manuals.online logo
Brands
  1. Home
  2. •
  3. Brands
  4. •
  5. Panasonic
  6. •
  7. TV Mount
  8. •
  9. Panasonic WV-Q123A User manual

Panasonic WV-Q123A User manual

Ambient operating temperature: –50 °C to +60 °C {–58 °F to +140 °F}
Dimensions: ø58 mm × 85 mm (H)
{ø2-9/32 inches × 3-11/32 inches (H)}
Mass: Approx. 200 g{0.44 lbs}
Finish: Aluminum die cast
Fine silver (WV-Q123A)
Light gray (WV-Q179)
i-PRO white (WV-QAT500-W)
avs0520-0
Printed in China
Attachment Pipe Bracket
Model No. WV-Q123A
WV-Q179
WV-QAT500-W
Operating Instructions
Included Installation Instructions
• Before attempting to connect or install this product, please read these instructions carefully and
save this manual for future use.
• The external appearance and other parts shown in this manual may differ from the actual product
within the scope that will not interfere with normal use due to improvement of the product.
Preface
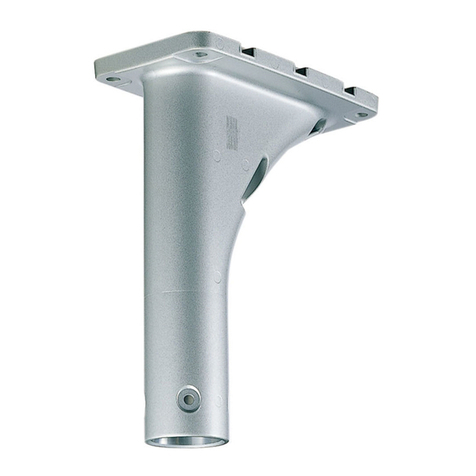
This product is used to mount the camera on a locally procured mounting bracket.
For the latest information about the supported cameras, refer to our support website
(https://security.panasonic.com/training_support/support/info/ <Control No.:C0501, C0112>).
Specifications
Refer installation work to the dealer.
Installation work requires technique and experience. Failure to observe this may cause fire, electric
shock, injury, or damage to the product.
Be sure to consult the dealer.
Do not use this bracket except with specified cameras or mount brackets.
Failure to observe this may cause a drop resulting in injury or accidents.
When using this product, also read the “Precautions” described in the operating
instructions for the camera to be attached.
Precautions
■In order to prevent injury, the product must be securely mounted to the mount bracket
(locally procured) according to the Installation Guide of the camera.
■Mounting method for this product
This product is designed to be used as a pendant mount camera. If the product is mounted on a
desktop or at a slant, it may not work correctly and its lifetime may be shortened.
■Make sure to remove this product if it will no longer be used.
Precautions for installation
Operating Instructions (this document) ................................................................................ 1 pc.
Camera mounting screw (hexagon screw (M6)) ................................. 5 pcs.(of them, 1 for spare)
Standard Accessories
For U.S. and Canada:
Panasonic i-PRO Sensing Solutions
Corporation of America
800 Gessner Rd, Suite 700 Houston, TX 77024
https://www.security.us.panasonic.com/
Panasonic Canada Inc.
5770 Ambler Drive, Mississauga, Ontario, L4W 2T3 Canada
1-877-495-0580
https://www.panasonic.com/ca/
© Panasonic i-PRO Sensing Solutions Co., Ltd. 2020
For Europe and other countries:
Panasonic Corporation
http://www.panasonic.com
Panasonic i-PRO Sensing Solutions Co., Ltd.
Fukuoka, Japan
Authorised Representative in EU:
Panasonic Testing Centre
Panasonic Marketing Europe GmbH
Winsbergring 15, 22525 Hamburg, Germany
【3】Fix the mount bracket (locally procured) on the installation surface.
➡
①
Pass the cables through the mount bracket and
this product.
②
Fix a mount bracket to the installation surface by
using appropriate bolts, nuts or the like (locally
procured).
port for pulling
out the cable
Hole for fixing
mount bracket
【4】Attach the camera to this product.
IMPORTANT:
• For details on procedure for attaching mount
bracket, read the operating instructions of
mount bracket.
• After waterproofing the hole for fixing mount
bracket and the port for pulling out the cable
on the installation surface, fix the mount
bracket on the installation surface.
• Ensure the minimum pull-out strength that
has sufficient allowance for total mass of
mount bracket, this product, and camera etc.
Mount bracket
(locally procured)
(Attachment image)
Connect each cable to the camera, and attach the camera to this product with the camera
mounting screw (accessory) or the hexagon screw supplied with the camera. Refer to the
Installation Guide of the camera for details such as the recommended tightening torque for the
camera mounting screws.
Installation
The following explains an example of mounting the camera on a ceiling.
Prepare the mount bracket (locally procured) for
mounting the camera.
ø58 mm {2-9/32 inches}
85 mm
{3-11/32 inches}
【1】Preparations before installation
【2】Fix this product to the mount bracket (locally procured).
➡
①Fix this product to the mount bracket.
②
Fill the gap between the mount bracket and this
product with waterproof material (locally procured)
such as silicon clay.
This product
Mount bracket
(locally procured)
IMPORTANT:
• The mount bracket (locally procured) should
have the configuration that enables fixation of
safety wire from camera.
R 1-1/2, 11crest,
length MAX. 30 mm {1-3/16 inches}
(taper pipe thread)
RP 1-1/2, 11 crest,
deep MAX. 30 mm {1-3/16 inches}
(parallel pipe thread)
Mount bracket
(locally procured)
This product
Waterproof material
(locally procured)
Safety wire
installation
surface
Panasonic i-PRO Sensing Solutions Co., Ltd. assumes no responsibility for injuries or
property damage resulting from failures arising out of improper installation or operation
inconsistent with this documentation.
Caution:
• Before attempting to connect or operate this
product, please read these instructions care-
fully.
Notice:
• This product is not suitable for use in loca-
tions where children are likely to be present.
• Do not install this product in locations where
ordinary persons can easily reach.
• For information about screws and brackets
required for installation, refer to the corre-
sponding section of this document.
パイプ取付金具
取扱説明書
品番 
WV-Q123A
WV-QAT500-W
このたびは、弊社製品をお買い上げいただき、まことにありがとうございます。
󱾀取扱説明書をよくお読みのうえ、正しく安全にお使いください。
󱾀ご使用前に「安全上のご注意」を必ずお読みください。
󱾀この取扱説明書は大切に保存してください。
󱾀製品の改良などにより、ご使用上影響のない範囲で、記載されている外観などが実際の
製品と異なる場合があります。
工事説明付き
本金具は、現地調達の取付金具にカメラを取り付けるための金具です。
対応機種の最新情報については、弊社のサポートウェブサイト
(https://sol.panasonic.biz/security/support/info.html<管理番号:C0501、C0112 >)
を参照してください。
商品概要
取扱説明書に記載されていない方法や、指定の部品を使用しない方法で施工された
ことにより事故や損害が生じたときには、当社では責任を負えません。また、その
施工が原因で故障が生じた場合は、製品保証の対象外となります。
「日本エリア」でお使いの場合に限ります。日本以外でお使いの場合のサービスは
いたしかねます。
〒812-8531福岡県福岡市博多区美野島四丁目1番62号
パナソニック システムお客様ご相談センター
受付:9時〜17時30分
(土・日・祝祭日は受付のみ)
əɒɅɓɋȷㄊノヱンヰ
ɃɻȿɻȸɅɲɭʀȿɯɻɂጋ೙Ή᰷
■お守りいただく内容を次の図記号で説明しています。
■誤った使い方をしたときに生じる危害や損害の程度を区分して、説明しています。
「死亡や重傷を負うおそれがある内容」です。
警告
警告
■工事は販売店に依頼する

(工事には技術と経験が必要です。火災、感電、けが、器物損壊の原因となります。)
 ⇒必ず販売店に依頼してください。
■専用のカメラや金具以外は取り付けない
 (落下によるけがや事故の原因となります。)
本金具をご使用の際は、取り付けるカメラの取扱説明書に記載された「安全上のご注意」とあわ
せてお読みください。
付属品をご確認ください
取扱説明書(本書)......................................................................................................................... 1冊
カメラ取付ねじ(六角穴付きねじ(M6))................................................................ 5本(1本は予備)
(取り付けイメージ)
人への危害、財産の損害を防止するため、必ずお守りいただくことを説明しています。
安全上のご注意 必ずお守りください
使用温度範囲 − 50℃〜+ 60℃
寸法  φ58mm x 85mm(H)
質量  約200g
仕上げ  アルミダイカスト 
ファインシルバー(WV-Q123A)
i-PROホワイト(WV-QAT500-W)
仕様
【3】取付金具(現地調達)を設置面に取り付る。
➡
①取付金具と本金具にケーブルを通します。
②
取付金具を、取付場所に適したナットやアンカー
ボルトなど(現地調達)で、設置面に取り付け
ます。
取付金具
(現地調達)
重要
󱾀取り付け手順の詳細については、取付金具の
取扱説明書をお読みください。
󱾀設置面の取付金具固定用ねじ穴およびケー
ブル引出し口を防水処理してから、取付金具
を設置面に固定してください。
󱾀取付金具、本金具、カメラなどの総質量に対し
て十分な最低引抜強度を確保してください。
ケーブル
引出し口
取付金具固定用
ねじ穴
【4】パイプ取付金具にカメラを取り付る。
カメラに各ケーブルを接続し、本金具に、カメラ取 付ねじ(付属品)またはカメラに付属の六角穴付
きねじでカメラを取り付けます。カメラ取付ねじの推奨締め付けトルクについてなど、詳細はカメ
ラの取扱説明書を参照ください。
禁止
設置する
カメラを取り付けるための取付金具(現地調達)
を用意します。
φ58mm
R1-1/211山
長さ:30mm以上
(管用テーパねじ)
RP1-1/211山
深さ:30mm以下
(管用平行めねじ)
85mm
重要
󱾀落下防止ワイヤーを取り付け可能な取付金
具を用意してください。
【1】準備する。
【2】取付金具(現地調達)にパイプ取付金具を取り付る。
本金具
取付金具(現地調達)
➡
①取付金具にパイプ取付金具を取り付けます。
②
本金具と取付金具の接合部をシリコンなどの防
水材(現地調達)で防水処理します。
本金具
取付金具
(現地調達)
防水材
(現地調達)
カメラを天井に取り付ける場合を例に説明します。 落下防止ワイヤー
設置面
■設置工事は電気設備技術基準に従って実施してください。
■傷害防止のため、本金具は、設置の説明に従って取付金具(現地調達)にしっかりと取り付
ける必要があります。
■カメラの取付方法について
本金具は吊り下げ専用です。据え置きや傾けた状態で使用すると、正常に動作しなかったり、
寿命が短くなる場合があります。
■本金具を使用しなくなった場合は放置せず、必ず撤去してください。
本金具の設置・接続を始める前に必要な周辺機器やケーブルを確認し、準備してください。接続す
る前に、カメラ、PC など接続する機器の電源を切ってください。
設置上のお願い
注意:
󱾀 取扱説明書をよくお読みのうえ、正しく安全
にお使いください。
注記:
󱾀 本金具は子供がいる可能性のある場所での
使用には適していません。
󱾀 一般の人が容易に触れることができる場所へ
の設置はしないでください。
󱾀 設置に必要なねじや金具などの情報について
は本書の該当部分を参照してください。
してはいけない内容です。
実行しなければならない内容です。

This manual suits for next models

2

Other Panasonic TV Mount manuals

Panasonic ET-WBC100 User manual

Panasonic

Panasonic ET-WBC100 User manual

Panasonic WV-Q185 User manual

Panasonic

Panasonic WV-Q185 User manual

Panasonic TY-WK5P1SW User manual

Panasonic

Panasonic TY-WK5P1SW User manual

Panasonic TY-WK3L1RW User manual

Panasonic

Panasonic TY-WK3L1RW User manual

Panasonic ET-PKE2000 - Mounting Kit For Projector User manual

Panasonic

Panasonic ET-PKE2000 - Mounting Kit For Projector User manual

Panasonic TY-WK32LR2W User manual

Panasonic

Panasonic TY-WK32LR2W User manual

Panasonic TY-WK32GRW User manual

Panasonic

Panasonic TY-WK32GRW User manual

Panasonic ET-PKE301B User manual

Panasonic

Panasonic ET-PKE301B User manual

Panasonic TY-CE103PS10 User manual

Panasonic

Panasonic TY-CE103PS10 User manual

Panasonic TY-ST85P12 Owner's manual

Panasonic

Panasonic TY-ST85P12 Owner's manual

Panasonic TY-WK5P1RW User manual

Panasonic

Panasonic TY-WK5P1RW User manual

Panasonic WV-Q118E User manual

Panasonic

Panasonic WV-Q118E User manual

Panasonic ET-PKD120H User manual

Panasonic

Panasonic ET-PKD120H User manual

Panasonic TY-WK42PV4W User manual

Panasonic

Panasonic TY-WK42PV4W User manual

Panasonic TY-WK42PR1 User manual

Panasonic

Panasonic TY-WK42PR1 User manual

Panasonic TY-WK3L2RW User manual

Panasonic

Panasonic TY-WK3L2RW User manual

Panasonic ET-DFL6500P User manual

Panasonic

Panasonic ET-DFL6500P User manual

Panasonic TY-WK103PV9 User manual

Panasonic

Panasonic TY-WK103PV9 User manual

Panasonic TY-WK6P1RW User manual

Panasonic

Panasonic TY-WK6P1RW User manual

Panasonic WV-Q193 User manual

Panasonic

Panasonic WV-Q193 User manual

Panasonic TY-WK5P1RW User manual

Panasonic

Panasonic TY-WK5P1RW User manual

Panasonic ET-PKD120B User manual

Panasonic

Panasonic ET-PKD120B User manual

Panasonic WV-7010A User manual

Panasonic

Panasonic WV-7010A User manual

Panasonic TY-WK32LX20W User manual

Panasonic

Panasonic TY-WK32LX20W User manual

Popular TV Mount manuals by other brands

Nordic DELTACO ARM-0400 user manual

Nordic

Nordic DELTACO ARM-0400 user manual

HumanCentric 101-1054-V2 instructions

HumanCentric

HumanCentric 101-1054-V2 instructions

AVF JZL4701 Instruction leaflet

AVF

AVF JZL4701 Instruction leaflet

Commercial Electric MB-64102 Use and care guide

Commercial Electric

Commercial Electric MB-64102 Use and care guide

PEERLESS PARAMOUNT PRFLU installation guide

PEERLESS

PEERLESS PARAMOUNT PRFLU installation guide

Technibel K 60 U 026 Z installation instructions

Technibel

Technibel K 60 U 026 Z installation instructions

Kanto L102 user manual

Kanto

Kanto L102 user manual

VonHaus 3005117 manual

VonHaus

VonHaus 3005117 manual

traulux SMMI-ROST-VC installation manual

traulux

traulux SMMI-ROST-VC installation manual

TRAC T10050 user manual

TRAC

TRAC T10050 user manual

Crestron TSW-70-RMB Series quick start

Crestron

Crestron TSW-70-RMB Series quick start

peerless-AV tru-vue TRWS251/BK installation instructions

peerless-AV

peerless-AV tru-vue TRWS251/BK installation instructions

Kimex 031-3200K1 quick start guide

Kimex

Kimex 031-3200K1 quick start guide

Catalyst 63607151 Instruction booklet

Catalyst

Catalyst 63607151 Instruction booklet

Mounting Dream MD2465 installation instructions

Mounting Dream

Mounting Dream MD2465 installation instructions

Electro-Voice ZLX-BRKT installation guide

Electro-Voice

Electro-Voice ZLX-BRKT installation guide

Perlegear PGMFK6 instruction manual

Perlegear

Perlegear PGMFK6 instruction manual

KSL UKR2ET449 quick start guide

KSL

KSL UKR2ET449 quick start guide

manuals.online logo
manuals.online logoBrands
  • About & Mission
  • Contact us
  • Privacy Policy
  • Terms and Conditions

Copyright 2025 Manuals.Online. All Rights Reserved.