manuals.online logo
Brands
  1. Home
  2. •
  3. Brands
  4. •
  5. Panasonic
  6. •
  7. VCR System
  8. •
  9. Panasonic Omnivision PV-4425S User manual

Panasonic Omnivision PV-4425S User manual

(
Panasonic ",,,,,,,,
IyrlsI
t
, II ') I',']_]l
I' :,\to oj,
iiii i i
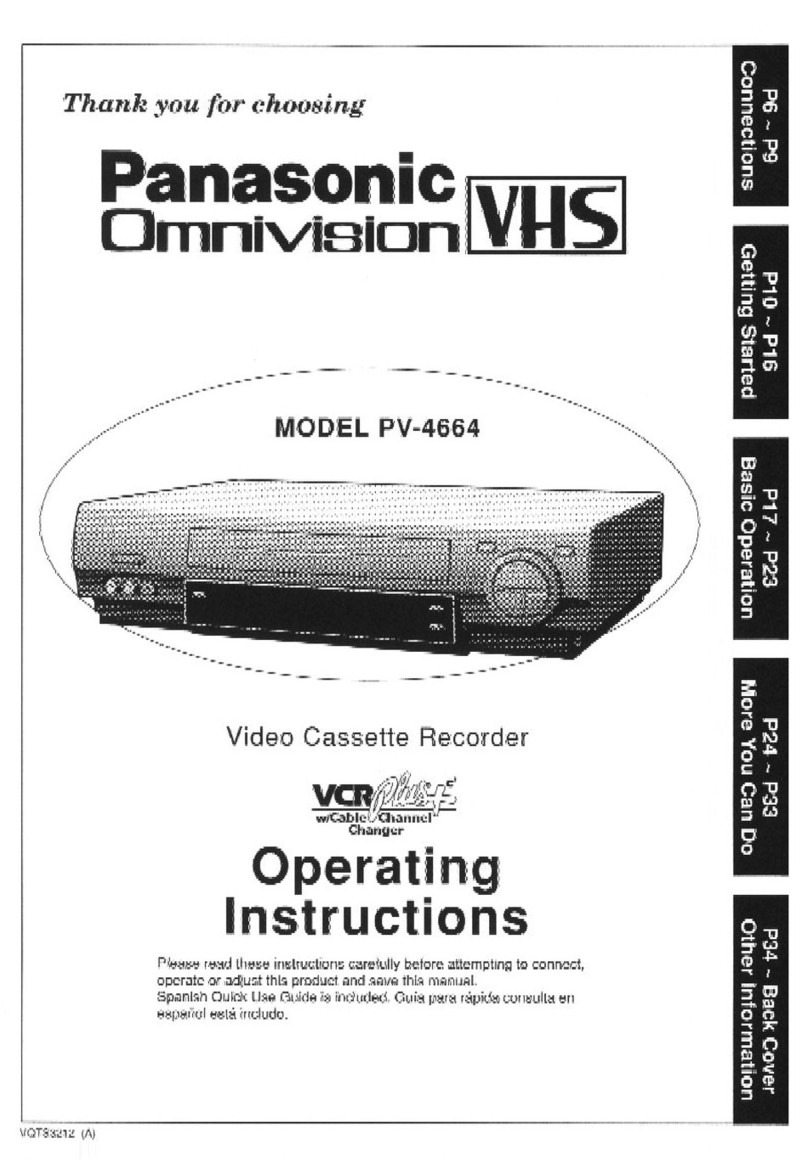
Video Cassette Recorder
MODEL PV-4425S
Changer
Operating
Instructions
Before attempting to connect, operate or adjust this product, please read these instructions completely.
Spanish Quick Operation Guide is included. Gula para r&pida consulta en espafiol est& includo.
VQTS3017 (A)
-ongra uLa tons on your purchase of
one of the most sophisticated and reliable products on
the market today. Used properly, we're sure it will bring
you and your family years of enjoyment. Please take
time to fill in the information at right. The serial number
is on the tag located on the back of your VCR. You'll
want to keep this manual handy as your convenient
VCR information source.
Date of Purchase
Dealer Purchased From
Dealer Address.
Dealer Phone No.
Model No. PV-4425S
Serial No.
Unpacking Your VCR
The accessories shown below are provided to help you
use or set up your VCR.
Optional accessories are also listed.
Accessories
OQ®
OQQ
Remote Control
VSQS1340
Optional Accessories
•1/2" Video Cassette Tape
I P
I p
2"AA"
Batteries
RF Coaxial
Cable
VJAS0155
Load the batteries in the Remote Control
1
2
Press in the direction of the _,,_._...
arrow and lift off the lid.
Install two batteries as ____
indicated inside the Battery
Compartment.
Replace the lid and snap
into place.
Battery replacement caution
•Do not mix old and new batteries. (Also, never mix
alkaline with manganese batteries.)
Safety Precautions
Warning: To prevent fire or shock hazard, do not expose this equipment to rain or moisture.
This video recorder, equipped with the HQ (High Quality) System, is compatible with existing VHS equipment,
Only use those tapes with the _ mark. It is recommended that only cassette tapes that have been tested and
inspected for use in 2, 4, 6, and 8 hour VCR machines be used.
E:_._._:_. =,_ .,_._,, _.,,.÷__:., ,, _. .- _j .......
r._.UTIOq TO REDUCETHE R_K OF ELECTRIC _'tOCK.
DO NOT _MOVE COVER (OR BAGK)
NO USER-SERV)CE_I.E pART8 mOE
REFER lIERVICING I0 QU_LIRE_ 8ERV_E PEftSONtl_L
i. _l_is'_in_01 W_'rh_tfle user that unlnsUlated v(_ltage within
the unit may have sufficient magnitude to cause electric
shock. Therefore, it is dangerous to make any kind of
contact with any inside part of this unit.
This symbol alerts the user that important literature
concerning the operation and maintenance of this unit have
been included. Therefore, it should be read carefully in order
to avoid any problems.
2
Control Reference Guide
CHANNEL PAUSE/
POWER UP/DOWN STILL
Casse_e
VIDEO Input Multi REWIND/
Connector Function SEARCH
Display
AUDIO Input REMOTE
Connector SENSOR
RECORD/
TIME
FAST
FORWARD/
SEARCH
U
VCR POWER
IR!
PLAYIL__
D EWIND/
SEARCH
RECORD/'rlMEE_,
DMENU
CLEAR
I_ CATVPOWER
CATV
CHANNEL
UP/DOWN
-rv VOLUMEUP/DOWN
RAPID TUNE
COUNTER
RESET
DISPLAY
_ RACKING/
V-LOCK
SLOW/FRAME _I_
CHANNEL
UP/DOWN
FORWARD/I_F1
SEARCH
STOP
SELECT/
SET
WHEEL
POWER_I_
VCR plus+
TV CHANNEL _
UP/DOWN
NUMBERED
' BOOK MARK
INDEX
SPEED
ZERO _1_
"ARCH/
1 MINUTE
SKIP
Using this Ma luc=l
To get the most from your product, we recommend that you read
the Operating Instructions thoroughly and in .the order presented.
To assist you in locating controls and indicators on the remote
control and VCR, we have provided a fold-out Control Reference
Guide. Each control and indicator is listed by name as well as a
reference number or letter. You will also find corresponding
numbers and letters throughout the Operating Instructions.
Keep this manual handy as a ready reference source.
•Fold out the Control Reference Guide.
• Read the Operating Instructions carefully.
• When an unfamiliar control or indicator is
encountered, see the reference number or
letter and then find the corresponding
character on the Control Reference Guide.
Example:
Control Reference Guide
POWER _
VCWTV
CHANNELE _
UP/DOWN
CHANNEL
UP/DOWN
REMOTE
SENSOR
Operating Instructions
@
Press (_
UP or DOWN fd
screen display.,
English or Spa=
See the separate, "Basic Connection Guide" which covers not only TV/VCR connections, but
optional Audio/Video and Cable connections as well.
One Time Set Ups (Channel Memory/Setting the Clock) ...................................................... 4, 5
On Screen Displays ................................................................................................................... 6
Basic Playback/Special Playback .............................................................................................. 7
Basic Recording ........................................................................................................................ 8
Copying Your Tapes ................................................................................................................... 9
Timer Recording ................................................................................................................. 10, 11
VCR Plus+ Set Up ........................................................................................................ 12, 13, 14
VCR Plus+ Programming ......................................................................................................... 15
Tape Operation ................................................................................................................. 16, 17
Setting at the VCR ................................................................................................................... 18
Multi-Brand Control Feature .................................................................................................... 18
Helpful Notes on Operations ................................................................................................... 19
VCR and Cassette Information .............................................................................. 20, 21, 22, 23
Before Requesting Service ................................................................................................ 24, 25
Spanish Quick Use Guide/Gu[a para r&pida consulta ....................................................... 26, 27
Quick Use Guide ....................................................................................................... Back cover
Product Features
Auto Daylight Saving Time ......................................................................................................... 19
Auto Operation Functions .......................................................................................................... 16
Auto Repeat Function ................... ............................................................................................. 16
Book Mark Search ...................................................................................................................... 16
Cable Box Channel Control .................................................................................................. 12, 13
Digital Auto Picture ...................................................................................................................... 7
Easy-to-Read English/Spanish On Screen Displays ................................................... 4, 5, 10, 11
Front-mounted AN In Terminals .......................... ......................................................................... 9
Head Cleaner .............................................................................................................................. 20
Multi Brand TV/Cable Box Remote Control ............................................................................... 18
One Minute Skip ......................................................................................................................... 16
One Month, 8 Program Timer Recording ............................................................................. 10, 11
One Touch Recording (OTR) ............................................................. ........... ............................. 8
Program Director Remote Control ....................................................................................... 10, 11
Quick Play Mechanism .............................................................................................................. 25
Rapid Tune .................................................................................................................................. 5
Special Effects Playback .............................................................................................................. 7
VCR Plus+ Recording ........................................................................................................... 14, 15
VHS Index Search System ......................................................................................................... 17
Zero Search ............................................................................................................................... 16
181-CH Cable-Compatible Tuner/All Channel Auto Set .............................................................. 4
3
Before you begin, make sure...
• your Antenna or Cable system is connected to the
VCR. (See separate Connection Guide.)
• you familiarize yourself with the easy operation of
the Select/Set Wheel before turning on the VCR. El
Se/ect/Set Wheel Operation
There are two types of Wheel operation.
Selecting from amenu type screen and entering
information, such as setting the clock,
programming the timer, etc.
ROTATE TO
PUSH TO
SET
Rotate
0(upordown)
To Use the Wheel
Press
(like a button)
to make selection to enter selection
Examples of Operation
A
When selecting from a
menu, rotate the Wheel to
move the shaded area up
or down the screen.
Then, press the Wheel like
a button to make your
selection.
/
....... MENU ....... /
• .v = • vv
SET UP VCR
SET CLOCK
CHANNEL AUTO SET
SELECT ' ROTATE WHEEL
SET ' PUSH WHEEL
END PUSH MENU KEY
B
When entering information
such as setting the clock,
rotate the Wheel to change
the numbers. Then, press
the Wheel to enter and
move on to the next item. r_ E/CLOC,..... 1
IJb I ON
BY ROTATING WHEEL
PUSH WHEEl m
TO END PUSH MENU KEY
•ByrepeatedlypressingtheWheel, youcanskip
overalreadyset itemsas desired.
1®
Press (_ _"j (orrJll)
UP or Down for on-
screen displays in
English or Spanish.
• You must choose one.
•This screen appears a
few seconds later.
SELECTLANGUAGE]
PUSH VCR CH UP ENGLISH
PUSH VCR CH DOWN ESPANOL /
J
CHANNELAUTOSET
CONNECT ANTENNA CABLE
THEN,
PUSH VCR CH UP KEY
Press (_) _ (or
to_tart Channel Auto Set,
Afterchannels have been placed in memory,
thefollowing on-screendisplays appearin
sequence:
"CH AUTO SET COMPLETED"
The lowest numbered channel.
"PLEASESET CLOCKBYPUSHINGMENUKEY"
If MENU is not pressed within 10 seconds,
the VCR willexit this mode. Inthiscase,
please seethe"Set or ResettheClock"
sectionon thenextpage.
3Press _I_1
within 10 seconds to
display the SET
CLOCK screen,
Then,
rotate .o,,.
press
f
-I _ 7- - SET CLOCK
/_]€ll=[lll_[O]_Ul;I
BY ROTATING WHEEL
/PUSH WHEELI_
I TO END PUSH MENU KEY
to select and enter the month, date, year,
time, and D.S.T. (Daylight Saving Time).
•The day of the week automatically appears.
•"DST:ON" automatically adjusts for Daylight
Saving Time. (See page 19 for details.)
.ow, lfl
press
twice to start the clock
and exit this mode.
..... SET CLOCK .....
DST.ON
TO CORRECT
PUSH WHEEL OR CLEAR KEY
TO START PUSH MENU KEY
Change the OSD Language
Press
to display the menu.
IqOTATE TO
Then, _o _
use
to first, select SET UP VCR
from the menu and then to
select IDIOMA or LANGUAGE.
• "ldioma" isSpanish for
"language."
....... MENU .......
l _Ev,Ew
SET CLOCK
CHANNEL AUTO SET
SELECT ROTATE WHEEL
SET PUSH WHEEL
END PUSH MENU KEY
1
REPEAT PLAY " OFF
i_ ELECT iTUNER
ENGLISH
CABLE BOX SET UP
VCR Plus+ CH SET UP
SELECT ROTATE WHEEL
SET PUSH WHEEL
END PUSH MENU KEY
pressN°W'_I_l twice ...........................................j
to leave this screen.
Replace Channels in Memory
Example, if you have '_.bJ_ installeci, etc.'.....
Press _I_1
to display the menu.
ROTATE TO
Then, _
use
to first, select CHANNEL
AUTO SET from the
menu and then press to set
your antenna system
(TV or CATV).
IIOTATIE TO
Now,
use Iff_
to select AUTO SET
I ....... MENU .......
PROGRAM REVIEW
SET UP VCR
SELECT ROTATE WHEEL
SET PUSH WHEEL
END PUSH MENU KEY
...........................................
---CHANNEL AUTO SET--- /
/
- , :CATV /
AUTO SET I
SELECT 'ROTATE WHEEL |
SET : PUSH WHEEL |
END : PUSH MENU KEY /
)
and then press to start Auto Set.
Press _I_1
to display the menu.
ROTATE TO
Then, _
use
to first, select SET CLOCK
Jromthe menu, and then
to set the time and date.
Now,
press _I_1 twice
to start the clock and exit
this mode.
MENU ....... 1
PROGRAM REVIEW
_UTO SET
SELECT ROTATE WHEEL
SET PUSH WHEEL
END PUSH MENU KEY
.... ,.... [
_-_'7 '- SET CLOCK ..... 1
/
BY ROTATING WHEEL /
II PUSH CLEAR' 'PUSH WHEEL I= l
TO START PUSH MENU KEY J
...........................................
Add or Delete a Channel
Select a channel
using the NUMBERED keys
on the remote control.
Then, A_LT
press _J
to add or delete the channel.
CHANNEL 08 DELETED
:]:or
ADDED
•To selecta deleted channel, usethe NUMBERED
keysonthe remote control. Each timea deleted
channelisselected,itwillflashin theMultiFunction
Display.
Rapid Tune
Press"_:_E _1_
to display the Previous Present
last channel you Channel Channel
were watching. CH08"----_CH10
•When selecting channels with the CH UP/DOWN
key, the channels must be displayed for at least 4
seconds in order for the VCR to recognize them as a
new selection.
Helpful Notes
•This VCR will accurately maintain its calendar
upto Dec.31,2012, 11:59PM.
•Makeentries within 5 minutes, or theVCR exits the
Set Clockscreen.
•Normal TV or Cable channels are automatically
selected and placed in memory depending on how
your VCR is hooked up.
•By pressing the Wheel or CLEAR button repeatedly,
you can skip forward or backward over correct entries
and go directly to aspecific item,
5
Whenever a function
button is pressed (PLAY,
FF, etc.) or the channel is
changed, a 4 second
OSD will appear first in
large and then small
characters.
FF 02
Press El
to display the menu.
ROTATETO
Then,
use SET TO
to make your selection.
(See page4 fordetails.)
MENU ....... 1
E |[01_1€fL5_II_ BvJI_vAvJ
SET UP VCR
SET CLOCK
CHANNEL AUTO SET
SELECT : ROTATE WHEEL
SET : PUSH WHEEL
END ' PUSH MENU KEY
•To getthemost fromeach feature,itis
recommendedthatyouread theOperation
Manualbeforeattemptinganyoperation.
Press ¥11 J
to display the overlay Function
shown at right. Status Channel
Press eCoJnter
again
to leave this mode.
If a blank section of tape is encountered in the
Play mode or the channel you select has no
broadcast, the TV screen will change to a solid
blue field. The screen will remain blue until a
recorded signal is again detected or an active
channel is selected.
6
These displays will alert you to a missed
operation or provide further instructions.
If no active channels
are found for CHANNEL
MEMORY...
If you attempt to set
or review a Timer Recording
and the Clock is not set...
If a Timer Program was not
completed before exiting
the Program mode...
After a Timer Program
has been set...
Ifyou press REC on the
remote control or REC and
PLAY on the VCR, and a
cassette isinserted with no
record tab...
If you press PLAY or REC
on the remote control or
REC and PLAY on the
VCR without a cassette
inserted...
If you press POWER or
STOP during a Timer
Recording...(visible in
VCR mode only)
lNO CH FOUND
PLEASE CHECK ANTENNA
CABLE CONNECTION THEN
PUSH VCR CH UP KEY AGAIN
1
PLEASE SET CLOCK
BEFORE PROGRAMMING
[PROGRAM IS INCOMPLETE
TURN VCR OFF
FOR TIMER RECORDING ]
................
CHECK CASSE'NE
RECORD TAB
i,,, .... i ,,r 1
NO CASSETTE
PLEASE INSERT A CASSENE
1
Before you begin, make sure ...
•connections are made (see separate Connection Guide).
•VCR is plugged in.
Turn TV on. Select VCR
Channel
(CH3 or CH4).
•The TV channelis thesamenumberyou
seton the back ofthe VCR (see separate
ConnectionGuide).
Insert a
cassette I_11 I VCR i
Thisindicatorlightsinthe
MultiFunctionDisplay,
•VCR powercomesonautomatically.
Playbackbeginsifcassettehas norecordtab.
Press _ILql(orH)
to start playback.
4Press _I_ (orO)
Or _ _1 (or I_ )
to quickly locate a scene
during playback.
•SP mode tapeshavea searchspeedof9
timesand SLPmode tapes27 timesthe
normalspeed.
•Somenoisebarswillappearduringsearch.
t,_Press _ I_(or1_1)
to stop playback.
Then,
press _ i_
on the VCR to eject the
cassette.
Special Effects During Playback
These featuresworkbest in SP or SLP mode. Sound
willbemuted.
Slow Motion Playback
Press F ADV
Then,
press [_ IL_(org)
to release,
Still Frame Picture
Press _'(_)_sT,LLI_1 (or M)
Press again to release.
Frame Advance
Hold _'
down F.ADV
in Still mode to advance the still picture
one frame at a time.
Features for a Quality Picture
Digital Auto Picture
This feature automatically controls the video
output signal for improved picture resolution or
less noise depending on the tape condition,
Digital Auto Tracking
This feature continuously analyzes the signal
and adjusts for optimum picture quality.
Manual Tracking Control
Use during Playback and Slow Motion to
reduce picture noise.
Press v-LOCK
until the picture clears up.
V-Lock Control
Use during Still mode to reduce jitter.
m
Press V-LOCr
until the picture is stabilized.
J
7
Before you begin, make sure ...
•connections are made (see separate ConnectionGuide).
• VCR is plugged in.
•IV is turned on and set tothe VCR channel (CH3 or CH4).
Insert a
cassette !_1
with record tab.
•VCR powercomesonautomatically.
@
Press (_ rl_ (orB)
to select a channel to
be recorded. STOP
"TO record from an
outsidesource, see
"SelectingtheInputMode"
sectionon this page.
O2
3Press _:_° F_
until the desired speed
appears on-screen.
Press (_,",_ Ir_ (or _ and O)
to start recording.
5Press _ _"J (orB)
to_.
One Touch Recording (OTR)
%u-c_i_S;iuP-t6eVba-6{urn_seW__'ai_a.....
preset time making ita one touch timer recording.
in step 4,
continue to press _)_ _ (orllTII)
to set the recording length.
Each press will change the time as shown
in the diagram below.
Helpful Notes
• Holding down theCH T/_i, will increase thechannel
search speed.
• Press PAUSE to pausethe recording in progress.
8
Selecting the Input Mode
Press _I_1
to display the menu.
_OT^11_ TO
Then, _,_,o I_ I
use
to first, sele_' SET UP VCR
and then, to choose TUNER
or LINE (LINE1 or LINE2).
• LINE1 : For rear audio/video
connection.
LINE2: For front audio/video
connection.
[ ....... MENU....... ]
/ _EVJEW
|SET CLOCK
CHANNEL AUTO SET
ISELECT : ROTATE WHEEL
ISET .PUSH WHEEL
END . PUSH MENU KEY
REPEAT PLAY ON
TUNER
IDIOMA ENGLISH
CABLE BOX SET UP
VCR Plus+ CH SET UP
SELECT ROTATE WHEEL
SET PUSH WHEEL
END PUSH MENU KEY
• You can also select "LINE1" or "LINE2" using the CH
•/A. The numbers will change in the order shown.
___ 1-- 2-- 3(CATV) ('IV) ")
LINE2_--LINE1,4,--125_69<-/
•When LINE isselected,"L1"or %2"is displayed in
the MultiFunctionDisplay([]).
Record One TV Program
While Watching Another
Press "(_ _ (or Ir_)
while the recording is in progress to turn off
the VCR indicator in the Multi Function Display.
Then, use the TV
channel controls
to select a program for viewing.
The VCR will continue to record your program
while you watch any channel you choose.
• You can switchbackandforthbetweenthe channel
beingrecordedand thechannelyouareviewingby
usingtheVCR!TVbutton.
Select Channels at the VCR
for Recording or Viewing
Turn TV on.
Select VCR vcR I I_1
ChaR nel. This indicator lights in the Multi
Channel 3or 4. FunctionDisplay.Ifnot,pressthe
VCR/TVbuttontoturniton.
Then, (_)
press (_ _1_(orb)
to select channels.
Now,
press '(_ Inl ('or_)
toturnthe VCR indicatoroff, or simplyturnthe
VCR offto selectchannels withthe TV controls.
Connections you'll
need to make.
(Choose front or rear
connection.)
Front View
for front audio/video
input connection
=
IF] I_IAII
(_/ideo In_ (_Audio In_
Playing (Source) VCR
Recording
(Editing) VCR
TV for Monitoring
II QCH3 or 4
[] ,_,;_
Insert a pre-recorded tape
intothe Playing (Source) VCR.
2
Then, insert a blank tape
with record tab into the Recording
(Editing) VCR.
Select "LINE"
as the input on the Recording VCR.
LINE1:Forrearaudio/videoconnection.
LINE2:Forfrontaudio/videoconnection.
• See page8 for LINEinputinformation.
Press PLAY
on the Playing VCR.
Then, press PAUSE/STILL
when the tape reaches the point you want to
start copying.
Press REC and PLAY
at the same time on the Recording VCR.
Then, press PAUSE/STILL
immediately.
Press PAUSE/STILL
on both VCRs to 10egincooying.
Then, press STOP
on both VCRs to stOPcooying.
To Monitor the Re-Recording
Turn the TV on and select its
VCR channel (either channel 3 or 4).
Then, set the VCR/TV selector
on the Recording VCR to the "VCR" position.
ICaution: 1
Unauthorized exchanging and/or copying of
copyrighted recordings may be copyright
infringement.
Helpful Note
•By using the PAUSE/STILL button (on the
Recording unit) while copying is in progress, you can
edit out unwanted parts of the original recording.
9
Before you begin, make sure ...
• if you are going to record from a cable box, please complete pages 12 and 13. *connecttons are made (see separate
Connection Guide). • TV and VCR are plugged in. • VORfTV selector is set to "VOR." • clock is set. • tape is long enough.
• record tab is in place. • all entries are made within 5 minutes.
/Press
for program mode.
•Ifa programhasalready
been set,selecta blank
programnumberwith
theWheel.
TV Screen
_'_,STARTSTOP!
,_Ol_A Y\ SLP I
,PUSH WHEEL [] |
TO END PUSH PROG KEY /
/
Rotate _"_'°
and m
press
to select and enter each program item (date,
start time, etc.) as it appears on-screen.
fExample: Setting the Date -_
Rotate _ TODAY'S _Rotate
Wheel DATE Wheel
Down I Up
.- WEEKLY(SAT}_- 7"--_8--9 .... 31 "_
•-" 1
WEEKLY j
(MON) WheelSelectionOrder
{ k'--WEEKLY(SUN_---0AILY_S.......-"
...... _........ _,,,,_- ':,_,,_,',,_,_,;_,,,:% _,_:%,,_:'_:'_
_*omakecorrections,pressthe _eel or
CLEAR button repeatedly to move back or
forward to the desired item.
3Press
to finish the program.
"1
P DTSTART STOP CHSPD /
2
3
4.... I--
SELECT 1-8 •ROTATE WHEEL
ENTER :PUSH WHEEL
CANCEL • PUSH CLEAR KEY
END : PUSH PROG KEY
Then, set the next program
by repeating steps 2 and 3,
or m
press
to exit the programming mode.
_'_rr&,_ orllL_ )
Press O (
OFF to set the Timer.
The TIMER indicator lights
in the MultiFunctionDisplay.
",, I/
d" I"_
Daily/Weekly
In step 2,
RO_AI_ 1"O
Use _
to enter DAILY or WEEKLY
in place of the Date.
Weekly recordings
require that you enter the
day of the week. See the
"Wheel Selection Order"
in step 2 on this page.
Then, continue
with programming.
Programming
I_-"--_'-- _--_-_-I
ATI_ tSTART STOP OH ]
_[__L.... I
__"_L__"_ __<_|
€111=(_1_'_11L'I-'1111"7-'111€1 |
ROTATING WHEEL /
PUSH WHEEL _- |
O END PUSH PROG KEY ]
1
Review Program Contents
Press _I_1
to display the menu.
_OTATE TO
to select PROGRAM
REVIEW.
PDT START STOP CH SPD |
1DAY 9 00A12 00A 08 SP l
2 8 1000P 1200P 125 SLP
3.... ".... ,....
4........ ,....
5.... :........
6.... ..... :....
7 .... :.... .....
8........ :....
TO END PUSH MENU KEY
Now,
press _ FJ twice
to return to normal TV.
Helpful Notes
•If you are recording channels from a cable box,
the cable box must be left on for timer recording.
Also, if the cable box cannot be controlled with the VCR
(see page 13),you must manually select the channel to
be recordedat the cable box.
10
Cancel a Timer Recording
in Prouress
Press O B (orb)
to release the Timer mode.
Then, within
press _ N_J(orl_)10 seconds
to cancel the Timer Recording.
Now,
press _" B(°r_)
to turn the VCR OFF.
•Any future daily or weekly recordings will be
performed as programmed.
Replace Program Contents
(Recording isnot in progress.)
Press O_
to display all currently
set programs.
ROTATI_10
Then, _
use
to select and enter the
desired program.
Now,
press _ 1_
to return to normal TV.
-,,1
310 800P 900P 10 SP
4 SU 900P 1000P L SLP
SELECT 1-8 . ROTATE WHEEL
ENTER " PUSH WHEEL
CANCEL PUSH CLEAR KEY
END PUSH PROG KEY
.... t
I ;I'STAR'STOPCHI
il°H°IOl"iP'EOIO]_ PJ°II
_--!--_.......... -_-_PI
[] PUSH CLEAR PUSH WHEEL [] I
TO END PUSH PROG KEY J
/
Clear Program Contents
'_ (Recording isnot in progress.)
Press O_ F_
to display all programs.
I_OTATeTO
Next,
rotate I_
to select the desired
program number.
Then,
press C_ARI_
to clear the program.
Now,
press O_ _
to return to normal TV.
P DTSTART STOP CHSPD/ /
2 81000P 1200P 125 SLP
3 10 8.00P 900P 10 SP
4 SU 9'00P 10:00P L SLP
SELECT 1-8 : ROTATE WHEEL
ENTER PUSH WHEEL
CANCEL ' PUSH CLEAR KEY
END ' PUSH PROG KEY
....................... t
2-8 IO00P ;2:0(;P 125 SLP
3 10 800P 9"OOP 10 SP
4SU 900P IO00P L SLP
SELECT 1-8. ROTATE WHEEL
ENTER ' PUSH WHEEL
END :PUSH PROG KEY
..........
Helpful Notes
•Another way to review program contents isto
first,place the VCR inVCR mode. Then, press the
PROGRAMbuttonwhilea TimerRecordingisin
progress.
•Check your times carefully toavoidoverlapping.
•If the record tab is missing whenthepower is
turnedoff,thetapeejectsandthe Timerindicator
flashes.
If there is a power interruption of more than
about one minute, the Recording cannot be performed
or continue.
•If "PROGRAM IS INCOMPLETE" appears,
checkallentriescarefullyand makeanycorrections.
Then,continuewithstep3.
•When recording from an external source,
rotatetheWheeluntil"L1(Rear connection)"or "L2
(Frontconnection)"appearsinsteadoftheChannel.
11
In order for your VCR to do a VCR Plus+ recording (see top of page 14 for explarlation of VCR Plus+), or a timer
Choose your Connection Type
(Then, follow the instructionsunder the diagram.)
recording of cable stations, some setup is required. At first, find the antenna or cable connection that matches yours.
Then, follow the accompanying instructions.
Cable Box Code Numbers
(Refer to this list in step 7 on page 13.)
•Turn to page 14 and complete the
VCR Plus+ Set Up steps .....
•You are then ready for VCR Plus+
Infrom cable
i ,,i
Cable Box Control steps.
..... If your cable box is remote
controllable, complete the VCR
Plus+ Set Up steps on page 14.
If not, you may skip page 14.
' You are then ready for VCR Plus+
Programming on page 15.
12
Positioning Your Cable Box
(Ifyour Cable Box is controlled by a wireless remote.)
Position your cabie _x as shown in t_edia_ram_
Be sure not to cover up the transmitter window.
The VCR transmits an infrared signal from two
locations to the cable box.
Archer ......................... _......... !..,................. 42, 44
Curtis .................................... :........ 08, 09, 56, 61
Diamond ...................................... ;....... 29, 44, 76
Drake ................................................... 37, 67, 71
Eagle ...................... 13, 20, 21, 22, 23, 25, 58, 62
Eastern ............................................................ 28
GC Brand ................................................... 42, 44
Gemini .............................................. ........... 4, 30
General Electric ............................................... 57
General Instruments .... 01,02, 03, 04, 55, 75, 83
Hamlin ........................................................ 14, 15
Jerrold .......................... 01, 02, 03, 04, 55, 75, 83
Macom, Hitachi .................................... 31,79, 80
Magnavox .................... 13, 20, 21, 22, 23, 25, 26
Movietime .................................................. 32, 60
Movietime ............................................ 38, 39, 40
NSC ..................................................... 38, 39, 40
Oak .................................... 10, 11, 12, 13, 46, 47
Panasonic ............................................ 06, 16, 17
Philips ...................................... 13, 20, 21,23, 24
Pioneer ...................................................... 05, 06
Pulser ......................................................... 42, 44
RCA ....................... ,., i.i._...... ,..:...i .....06, 16, 17
Realistic ..................................................... 51,53
Regal .................................... :.............. 14, 23, 41
Regency ........................................................... 28
Rembrandt ................................................. 32, 60
Salora ........................................................ 68, 72
Samsung ................................... ..... 04, 06, 42, 78
Scientific Atlantic ....................... ;.....08,09, 56, 61
Sheritech .......................................................... 27
3L Marx ......................................... 04, 06, 42, 78
_prucer ................................. ,.............. 06, 16, 17
Stargate ......................................... 04, 06, 42, 78
Stargate .................................................... 42, 44
Teknika ......................................... ............. 54, 74
Teleview ......................................... 04, 06, 42, 78
Texscan ..................................................... 18, 19
Tocom ...................................... 33, 34, 48, 49, 73
Toshiba ................................................ 36, 66, 70
Uniden Satellite .............................. ............ 65, 69
Unika .................................................... 29, 44, 76
Unika ......................................................... 42, 44
Universal ............................ ............ 43, 52, 63, 82
Viewstar ................. 13, 20, 21,22, 23, 25, 58, 62
_tidTech ........................................................... 64
Zenith ............................................. 07, 45, 50, 59
If you receive channels through a cable box, it is necessary to establish a link with the VCR. This is done by
entering the cable box output channel (the channel that you tune your TV to in order to watch cable stations) into
the VCR's memory. If your cable box is remote controllable, it may be possible for the VCR to automatically change
cable box channels for VCR Plus+ and Timer recordings.
If your cable box is remote controllable, place it
on top of the VCR as shown on page 12.
to display the menu.
to first, select SET UP
VCR, and then, to select
CABLE BOX SET UP.
....... MENL ....... /
J
EVlEW
SET CLOCK
CHANNEL AUTO SET
SELECT ROTATE WHEEL
SET PUSH WHEEL
END PUSH MENU KEY
..................................
REPEAT PLAY OFF
INPUT SELECT TUNER
IDIOMA ENGLISH
VCR Plus+ CH SET UP
SELECT ROTATE WHEEL
SET PUSH WHEEL
END PUSH MENU KEY
W
via the cable box (connection B on page 12).
Then, go to step 4.
Select NO if your cable connection
resembles diagram A on page 12.
CABLE BOX CONTROL IS NOT AVAILABLE
appears on-screen. Press MENU to exit
and turn to page 14.
Turn on the cable box and
manually set it to channel 02.
in preparation for step 8.
ROTATE TO
[oi
to change the displayed
number to your cable
box output channel
(the channel you tune
your TV to in order to
watch cable stations).
If necessary, refer to
your cable box manual.
•This screen appears
for yourconfirmation.
(Channel shown is
TUNE YOUR CABLE BOX
TO CH 02 AND ENTER
CABLE BOX OUTPUT CHANNEL
SELECT ROTATE WHEEL
SET PUSH WHEEL
END PUSH MENU KEY
YOUR VCR IS RECEIVING
THE OUTPUT OF CABLE BOX
CH 03 1
use
by a remote control and continue with step 7.
controllable. CABLE BOX CONTROL IS NOT
AVAILABLE appears on-screen. Now, press
MENU to exit and turn to page 15,
•SETenter
the Cable Box Code
number that matches
r
...... you brand from the
list on page 12.
CABLE BOX FROM THE LIST
IN OWNER'S MANUAL AND
ENTER NUMBER
SELECT : ROTATE WHEEL
NOW TRANSM rFrlNG
ISYOURCABLEBOX
RECEIVING CH09?
NO
SELECT ROTATE WHEEL
SET PUSH WHEEL
END PUSH MENU KEY
if
changes to channel 09. CABLE BOX SET UP
assigned to your brand and/or repositioning the......
cable box as shown on page 12. If the answer is
still NO, cable box control is not available. Finish
up with step 9 and turn to page 15. ....
Helpful Note
•Make each entry within 5 minutes in steps 5 and 7,
and within 60 seconds for other steps, or the VCR
will leave this mode. 13
VCR Plus+ programming allows you to set most items of a timer recording by simply entering a special code found
in TV GUIDE magazine as well as the TV listings in selected newspapers. In order for the VCR to read this special
code, some set up is required. A Guide (VCR Plus+) channel number is assigned to each local broadcast and cable
station. Because this number sometimes differs from the channel your TV receives the station on, it is necessary to
program the VCR with local channel information.
Channel Set Up Preparations
your cable box can be controlled with the
VCR, or your VCR hook-up resembles "A"
on page 12.
Prepare a list like the example below.
This list will help you smoothly enter the
_information needed in step 3 at right.
i
You will need the following to
complete the list: •
[] A line up of normal and/or cable stations you
receive along with the channel numbers your
il TV receives them on. A cable channel line-up
chart is supplied by your cable company.
_i[] A listofGuide (VCR Plus+) channel numbers
assigned tothe stationsyou receive. This listis
available in TV Guide and the TV listings
found in selected newspapers.
1Draw a chart with 3 columns like the example
below. In the left column, fillin the name or
call letters of the stations you receive.
2In the middle column, fillin each station's
assigned Guide (VCR Plus+) number found
•in TV Guide, newspapers, etc.
3In the right column, fill in the channel number
that your TV receives the station on from
your channel line-up.
Assigned Channel no.
Broadcast or Cable Guide your TV
Station Name (VCRPlus+)receivesthe
channel no. station on
• HBO 33 15
Nickelodeon 38 20
CBS 04 04
FOX 11
14
PUSH TO
REPEAT PLAY OFF
INPUT SELECT TUNER
IDIOMA ENGLISH
CABLE BOX SET UP
select VCR Plus+ SET
END
ROTATE WHEEL
PUSH WHEEL
For step 3, use the
may leave lines blank if, (a) you don't
that station, or (b) the GUIDE CH number
this operation untilthe list is compieie _
Helpful Notes:
•Make each entry within 60 seconds or the
VCR will leave this mode.
• Once local channels have been programmed,
they will stay in memory, even in the case of a
power failure.
Before you begin, make sure ...
• the clock isset. • VCR Plus+ Channel Set Up iscomplete (if applicable). • each entry is made within 60
seconds or VCR leaves this mode.
To Make Corrections
Use normal Timer Recording
steps if:
• the PlusCode for a program is not listed.
• you anticipate the program, such as a sporting
event, to run over the scheduled stop time.
g
ress the SPEED button for SP LP or SLP.
To cancel program contents:
Press the CLEAR button.
TURN VCR OFF
box hook-up.
off
AND
on. lights intheMulti
FunctionDisplay.
your cable box cannot be controlled with
the VCR, make sure it istuned to the desired
channel for timer recording. .....
See pages 10 and 11 to:
• Review program contents
• Cancel a timer recording in progress
• Clear program contents once set
•Replace program contents
Helpful Notes:
• If you use "B" connection on page 12, but
your cable box cannot be controlled with the
VCR, the channel shown in the on-screen display
in step 4 will always be the cable box output
channel number.
• Fora list of publications thatcarrythe PlusCode
numbersin yourarea, call 1 - 800 - 258 - 4827.
•You can obtain unlisted PlusCode numbers by
calling 1 - 900 - 454 -7587. Callcostsapproximately
$.95 perPlusCodenumber.
•Avoid overlapping program times.
• An on-screen display will Indicate ifan invalid
PlusCodenumberhasbeenentered.
•An on-screen display will indicate when all timer
programs are full.
VCR Plus+ and PlusCode are trademarks of Gemstar
Development Corporation. VCR Plus+ system is
manufactured under license from Gemstar
Development Corporation.
15
over and over.
I ....... MENU .......
Press EV,EW
to display the menu. CHANNELAUTOSET
ROTATE WHEEL
_1_ PUSH MENU KEY
Use
to first, select SET UP
VCR from the menu;
and then, to select
REPEAT PLAY •ON.
,,, I
ON
INPUT SELECT TUNER
IDIOMA ENGLISH
CABLE BOX SET UP
VCR Plus+ CH SET UP
SELECT ROTATE WHEEL
SET PUSH WHEEL
END PUSH MENU KEY
•When REPEAT PLAY :"ON" isselectS, theVCR
willplay totheend ofa tape, or untilit reachesa
blankportion30 secondsor more.(Erasedportions
oftape arenotconsideredblank.)Then, theVCR
willautomaticallyrewindthetapeand playitagain
and againuntilyoucancelrepeatplay.
•Allfunctionbuttons(REW, FF,etc.)areoperational
duringRepeat Play. ...... .......
To Cancel
and2, and select REPEAT PLAY : "OFF".
Then press MENU to exit.
Auto Playback
When a tape is inserted, the power comes on
(Auto). If the record tab* is removed, playback
begins (Auto).
Auto Rewind
After a tape reaches itsend during playback, fast
forward or manual record, the VCR will rewind it
and go into Stop mode.
Playback Auto Eject
After a tape without a record tab* is played to its
end, the VCR will rewind and then eject the tape.
When the POWER button is pressed during
rewind, the VCR will turn off after rewind
is complete.
A cassette may be ejected with
*For record tab information, see page 20.
to reset the Time
Counter to 0:00:00
at whatever point
you wish on the tape.
STOP 12:00 AM CH 08
0:00:30
J
STOP 12:00 AM CH 08
0:00:00
Now, zE.o
press 1.,._SK,Pk'-[i]in Stop mode.
The VCR will go into FF or REW mode.
The tape will stop at the last pointthe Time
Counter was set to 0:00:00.
BOOK MARK SEARCH
in play, FF or STOP mode:
The VCR will go into FF
mode and then STOP
automatically around the
end of your recording
If the BOOK MARK SEARCH butt6n is pressed
where no signal is recorded, the VCR will go
into Rewind mode and then stop automaticall,
::around the end of your recording.
Playback a few seconds of tape
exact location to start a new recordings.
With this feature, you can skip over commercials
recorded on a tape.
ZERO_,,_ CH/
Press ,,,,_-_K,p[_in Play
The VCR will go into FF search mode and skip
over 60 seconds of recorded time.
Then, normal playback will resume. .....
16
VHS Index Search System
Each time you start a recording, an invisible index mark is automatically
placed on the tape. You can then use these index points to locate a
particular recording in one of the two ways described below.
This method allows you to go directly to the
recording you want from anywhere on the tape
by entering a specific index number.
Press t_ F,rtJ ,NOEX
in the Playback or
Stop mode.
Press a NUMBERED keym_-I
to select the desired recording. :|
•To calculate the
number, see below.
IINDEX 04 1
3PreSs (_ B (orB)
or _L'r_ (or_])
to start the Index Search
forward or backward.
•When the designated
location is reached,
the VCR goes into
Playback mode.
INDEX SEARCH 02 1
To Select an Index Number
Count forward or backward each recording start
point including the recording you want to see
from wherever you are on the tape.
I1 I1' iol,°1c° °1,'
Examples:
(1) You are now viewing recording Dand you
want to see recording B. Count the starting point
•of D, C and B which adds up to 3. Enter 3 in step
2 and then press the REW button.
(2) You are watching recording Band ybb wanf
to see recording F. Count the starting point of C,
D, E and F which adds up to 4. Enter 4 in step 2
and then press the FF button.
Li
STOP
Helpful Notes
• Make entries within 10 seconds, or the Index Search
modewillbe canceled.
•Index marks will be placed for Timer recording as
well.
• If the Direct Access index search is initiated
extremely close to an index mark, there is a possibility
that the index mark will not be counted in the search.
17
A timer recording can be set up using the buttons on the
VCR. If necessary, the clock can also be set.
VCR Front Panel
1,4'11 _ I=_t'_,llel}
' I ' I '-'-r"
V'SELECTA, SET PROGRAM
Hold down I-_
and press
to enter the program
mode.
• If the clock is not set,
pressing these buttons
will display the SET
CLOCK screen.
In this case, proceed with
step 2 to set the clock
and then to set a timer
recording.
STOP
SIP
-I i
BY SELECT • /• KEY
NEXT, PUSH SET KEY OR
TO END PUSH PROG KEY
CLOCK .....
\ DSI : ON
BY SELECT • /•KEY
NEXT, PUSH SET KEY OR
TO END PUSH PROGKEY
or _(fordown)
to make your selection.
Then,
press
to set and move on to the next item.
When the program Is completed,
)press _ and _ (at the same time)
to display all program contents.
Then, set the next program
by repeating steps 2 and 3,
or,
press I_ and _again
tO return to the normal screen.
Helpful Notes
•It is not possible to clear a timer program using the
VCR buttons. Please use the Remote Control.
•Press SET (FF) repeatedly to move to a particular
item for setting or correction.
•Once the VCR is in the Program mode, the PLAY,
REC, FF, and REW buttons on the VCR are non-
functional.
18
Your Remote Control may be programmed to
_ntrol POWER ON/OFF, CHANNEL UP/DOWN,
and VOLUME UP/DOWN functions ofthe TV and
Cable Box brands listed below.
Makesureyour TV and/orCable B0xis _i_ge_ in _
_ _ ;;_;_;;__,; _ _;i_iiiiiill¸_¸
_Holdd_ _
or .............CATVm
..... 11511
;and ente_ybur _ or Cable
;;number (see below) using the NUMBERED
keys. The TV or Cable Box should come on
and your remote is now programmed.
TV Brand
Code Numbers*
Cable Box
Brand Code
Numbers*
Brand
Panasonic
Quasar
Panasonic
Quasar
RCA
GE
Zenith
Magnavox
Sylvania
Sharp
Sharp
Code Brand Code
Sony 08
01 Toshiba 09
Sanyo 10
02 Fisher
JVC 11
03 Hitachi 12
04 Mitsubishi 13
Samsung 14
05 Gold Star 15
06 Gold Star 16
07' Gold Star 17
Brand Code
Panasonic
RCA 1
Panasonic 2
Scientific- 3
Atlanta 4
5
Zenith 6
Oak 7
Oak Sigma
Oak Sigma 8
Jerrold 9
* Due to changes in infra-red commands used by
some manufacturers, some TV or Cable Box brands
are listed more than once. If, while activating
Universal Control, the first code does not power on
the TV or Cable Box, please try the next code.
Helpful Notes
•It is necessary to reprogram the remote to control your
TV or Cable Box when you replace the remote's
batteries.
•The remote control is designed to control the brands
listed. However, itwill not operate all TVs or Cable Boxes
made by these manufacturers.
•Depending on your TV or Cable Box model, not all
functions listed may be controlled by this remote control.

Other Panasonic VCR System manuals

Panasonic NV-MV20EG User manual

Panasonic

Panasonic NV-MV20EG User manual

Panasonic Omnivision VHS PV-4564 User manual

Panasonic

Panasonic Omnivision VHS PV-4564 User manual

Panasonic Omnivision PV-7200 User manual

Panasonic

Panasonic Omnivision PV-7200 User manual

Panasonic AJ-D960 Quick start guide

Panasonic

Panasonic AJ-D960 Quick start guide

Panasonic AG-W3P User manual

Panasonic

Panasonic AG-W3P User manual

Panasonic AGRT650P - TIME LAPSE VTR User manual

Panasonic

Panasonic AGRT650P - TIME LAPSE VTR User manual

Panasonic Omnivision VHS PV-V4022 User manual

Panasonic

Panasonic Omnivision VHS PV-V4022 User manual

Panasonic NV-HD675 Series User manual

Panasonic

Panasonic NV-HD675 Series User manual

Panasonic NV-FJ710 Series User manual

Panasonic

Panasonic NV-FJ710 Series User manual

Panasonic PV-V4524S User manual

Panasonic

Panasonic PV-V4524S User manual

Panasonic NV-SJ230A User manual

Panasonic

Panasonic NV-SJ230A User manual

Panasonic Omnivsion PV-4515S User manual

Panasonic

Panasonic Omnivsion PV-4515S User manual

Panasonic AJHD3700B-PE User manual

Panasonic

Panasonic AJHD3700B-PE User manual

Panasonic Omnivision PV-4608 User manual

Panasonic

Panasonic Omnivision PV-4608 User manual

Panasonic PV-C2541 User manual

Panasonic

Panasonic PV-C2541 User manual

Panasonic NV-HS950AM User manual

Panasonic

Panasonic NV-HS950AM User manual

Panasonic NV-FJ730 Series User manual

Panasonic

Panasonic NV-FJ730 Series User manual

Panasonic AG-DV2000P User manual

Panasonic

Panasonic AG-DV2000P User manual

Panasonic NV-L25 Series User manual

Panasonic

Panasonic NV-L25 Series User manual

Panasonic PV-8665S User manual

Panasonic

Panasonic PV-8665S User manual

Panasonic AG-6740 Operation manual

Panasonic

Panasonic AG-6740 Operation manual

Panasonic Omnivision VHS PV-4465S User manual

Panasonic

Panasonic Omnivision VHS PV-4465S User manual

Panasonic AJD230HP User manual

Panasonic

Panasonic AJD230HP User manual

Panasonic Omnivison VCRplus+ PV-V4611 User manual

Panasonic

Panasonic Omnivison VCRplus+ PV-V4611 User manual

Popular VCR System manuals by other brands

Daewoo DV-T8T2NZ-QB/M Service manual

Daewoo

Daewoo DV-T8T2NZ-QB/M Service manual

Samsung SVR-639 Service manual

Samsung

Samsung SVR-639 Service manual

JVC HR-S4500U instructions

JVC

JVC HR-S4500U instructions

Magnavox VRC602M owner's manual

Magnavox

Magnavox VRC602M owner's manual

Audiovox AVP7380 - AVP 7380 - VCP Owner's instruction manual

Audiovox

Audiovox AVP7380 - AVP 7380 - VCP Owner's instruction manual

Sony SLV-ED1PL Service manual

Sony

Sony SLV-ED1PL Service manual

JVC HR-VP680U quick start

JVC

JVC HR-VP680U quick start

JVC HR-J4008UM instructions

JVC

JVC HR-J4008UM instructions

THOMSON VPH6910C user manual

THOMSON

THOMSON VPH6910C user manual

Magnavox VR3440 owner's manual

Magnavox

Magnavox VR3440 owner's manual

Hitachi VT-M181A owner's manual

Hitachi

Hitachi VT-M181A owner's manual

Daewoo DQ-K2121N-P Service manual

Daewoo

Daewoo DQ-K2121N-P Service manual

RCA VR692HF user guide

RCA

RCA VR692HF user guide

Magnavox VR9720AT01 operating instructions

Magnavox

Magnavox VR9720AT01 operating instructions

Sony SLV-SE30EE operating instructions

Sony

Sony SLV-SE30EE operating instructions

Samsung SV-200X Service manual

Samsung

Samsung SV-200X Service manual

JVC HR-S6975EK instructions

JVC

JVC HR-S6975EK instructions

Philips VR210/55 user manual

Philips

Philips VR210/55 user manual

manuals.online logo
manuals.online logoBrands
  • About & Mission
  • Contact us
  • Privacy Policy
  • Terms and Conditions

Copyright 2025 Manuals.Online. All Rights Reserved.