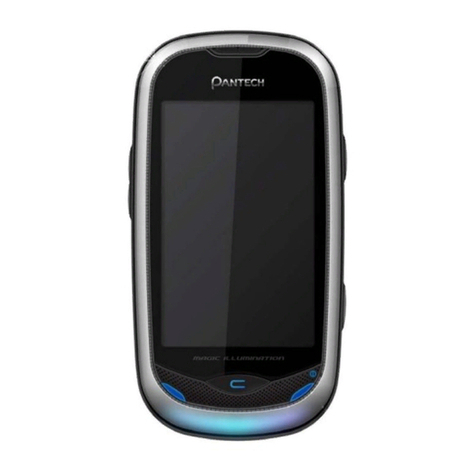
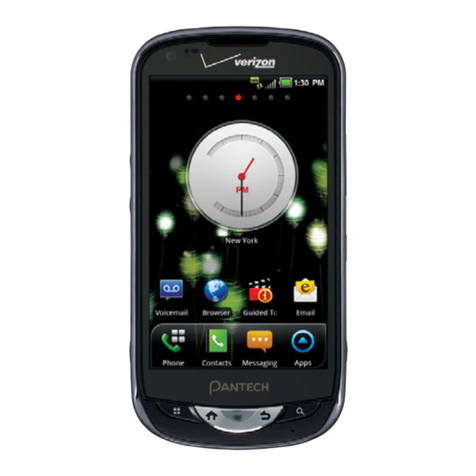
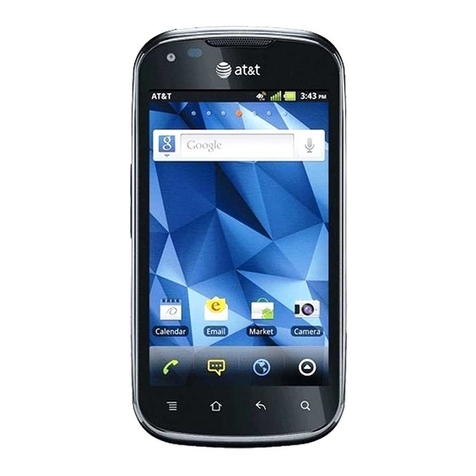
Pantech ADR910L User manual

User Guide for ADR910L
Thank you for choosing the Pantech
ADR910L, our latest smartphone.
The Pantech ADR910L has many
features designed to enhance your
mobile experience. With its unique,
stylish design, you will enjoy the
entire ADR910L experience.
This User Guide contains important
and useful information that will
maximize your familiarity with all that
the Pantech ADR910L has to offer.

2
IMPORTANT SAFETY INFORMATION
ABOUT BATTERY USAGE
Your phone is powered by a Lithium Ion (Li-Ion) battery. Therefore,
you can recharge the battery while some charge remains without
reducing your phone’s autonomy. For safe use of the battery:
xDo not use a damaged battery or charger.
xDo not disassemble, open, crush, bend, deform, puncture, or
shred the battery.
xDo not modify or remanufacture, insert foreign objects into the
battery, immerse or expose to water or other liquids, expose to
fire, explosion or other hazard.
xDo not put your battery in contact with conductive objects.
xDispose of and recycle used batteries in accordance with local
regulations. Do not dispose of batteries by burning; they may
explode.
xDo not use an unauthorized charger or battery.
xUse the battery only for the device for which it is specified.
xUse the battery with a charging device that has been qualified
for the device per this standard. Use of an unqualified battery
or charger may present a risk of fire, explosion, leakage, or other
hazard.
xDo not short circuit a battery or allow metallic conductive
objects to contact battery terminals.
xReplace the battery only with another battery that has been
qualified with the device per this standard, IEEEStd-1725-2006.
xChildren should be supervised when they use the battery.

3
BASIC INSTRUCTIONS
xAvoid dropping the phone or the battery. If the phone or the
battery is dropped, especially on a hard surface, and the user
suspects damage, take it to a service center for inspection.
xUse your battery for the specified purpose only.
xThe closer you move to your network’s base station, the longer
you can use your phone because less battery power is required
for connection.
xThe battery recharging time varies depending on the remaining
battery capacity and the battery and charger type.
xBattery life inevitably shortens over time.
xSince overcharging may shorten battery life, remove the phone
from its charger once it is fully charged. Unplug the charger
once charging is complete. Leaving the battery in hot or cold
places, especially inside a car in summer or winter, may reduce
its capacity and life.
xTo prevent injury or burns, ensure that no metal objects come
into contact with the + and – terminals of the battery.
BASIC INSTRUCTIONS
USEFUL TIPS TO UNDERSTAND USER GUIDE
To understand information contained in this user guide and activities
that you can do with the ADR910L, keep in mind the following tips:
xIt is assumed that you start operating applications of the
ADR910L from the Applications screen.
1 Touch Menu from the Home screen to access the Applications
screen.

4
BASIC INSTRUCTIONS
2 Swipe the screen left or right and run the application you want
to use. Applications are arranged by category. You can rearrange
them.
Accessing applications Navigating Applications
xWords in bold type refer to the relevant action on the screen.
For example, “Touch Gmail” means that you have to touch Gmail
below the Gmail icon . Words might be placed below or next
to an icon or included in the text.
xThe symbol “>” refers to the next action. For example, “Touch
Settings > Language & input” means that you should touch
Settings first and then Language & input next.
xApplications screen refers to the screen where all applications of
the ADR910L appear.
xHome Screen refers to the screen that appears first when you
unlock the screen.
xIdle mode refers to the status where you stay on the Home
screen ready to run an application.

5
BASIC INSTRUCTIONS
xLauncher bar refers to the bar on the bottom of the Home
Screen where you can place favorite applications.
xChannels through which you can share items, e.g. contacts and
pictures, increase as you subscribe to services. For example, if you
sign up for Facebook or Twitter, you can also share information
through Facebook or Twitter.
xCaptured images in this user guide might change according to
the relevant software upgrade.
COMMON ICONS
Icon Selected to
Adjust value
Rearrange the selected item
The battery is charging
SD card prepared
There is an error
Delete the selected item
Strength of battery: The greener,
the more battery is charged

6
BASIC INSTRUCTIONS
Icon Selected to
There is no SIM/USIM card
The memory disk is full
The phone will not ring when there is an
incoming call

7
Important Safety Information .................................................. 2
BASIC INSTRUCTIONS....................................................................................................... 3
TABLE OF CONTENTS ................................................................... 7
1. GETTING STARTED
GETTING STARTED......................................................................13
CHECKING PACKAGE .......................................................................................................13
REMOVING THE BATTERY COVER.............................................................................14
REPLACING THE BATTERY COVER............................................................................14
INSTALLING THE 4G SIM CARD..................................................................................15
REMOVING THE 4G SIM CARD...................................................................................15
INSTALLING THE microSD™ CARD...........................................................................16
REMOVING THE microSD™ CARD............................................................................16
INSTALLING THE BATTERY............................................................................................17
REMOVING THE BATTERY..............................................................................................17
CHARGING THE BATTERY..............................................................................................18
POWERING YOUR PHONE ON/OFF.........................................................................18
MANAGING SCREEN........................................................................................................19
OVERVIEWING PRODUCT.............................................................................................22
GRIPPING ADR910L..........................................................................................................26
ACTIVATING ADR910L.....................................................................................................27
TABLE OF CONTENTS

8
TABLE OF CONTENTS
BACKING-UP DATA............................................................................................................30
UNDERSTANDING HOME SCREEN ..........................................................................32
CUSTOMIZING HOME SCREEN..................................................................................37
MANAGING APPLICATIONS SCREEN......................................................................43
2. CONNECTIVITY
CONNECTIVITY.............................................................................46
USING Wi-Fi NETWORK..................................................................................................46
USING Wi-Fi Direct............................................................................................................50
CONNECTING TO A 3G/4G NETWORK .................................................................50
USING Bluetooth ...............................................................................................................53
CONNECTING TO A PC ..................................................................................................57
3. CALLS AND MESSAGES
CALLS AND MESSAGES .............................................................59
CALLING..................................................................................................................................59
MESSAGING..........................................................................................................................67
CONTACTS.............................................................................................................................74
Google TALK.........................................................................................................................79

9
TABLE OF CONTENTS
4. COMMUNICATION
COMMUNICATION ......................................................................82
EMAIL........................................................................................................................................82
GMAIL.......................................................................................................................................85
GOOGLE+...............................................................................................................................87
SOCIAL ON WIDGET.........................................................................................................88
SOCIAL GALLERY ...............................................................................................................89
5. ENTERTAINMENT
ENTERTAINMENT.........................................................................91
LISTENING TO MUSIC ......................................................................................................91
USING CAMERA..................................................................................................................97
USING CAMERA AS CAMCORDER ........................................................................104
USING GALLERY...............................................................................................................107
ENJOYING YOUTUBE.....................................................................................................109
USING VIDEO PLAYER...................................................................................................111
NET MEDIA.........................................................................................................................114
READING E-BOOKS (TBD)..........................................................................................118
WEB SURFING...................................................................................................................119
ANDROID MARKET ........................................................................................................124
USING Google MAPS....................................................................................................126
Google SEARCH ..............................................................................................................128
VOICE SEARCH .................................................................................................................130

10
TABLE OF CONTENTS
USING PLACES..................................................................................................................131
USING LATITUDE.............................................................................................................132
NAVIGATION ......................................................................................................................135
NEWS & WEATHER..........................................................................................................137
6. TOOLS
TOOLS........................................................................................... 142
CALENDAR..........................................................................................................................142
CALCULATOR ....................................................................................................................145
ALARM/CLOCK.................................................................................................................146
CLOCK TOOLS...................................................................................................................149
DOC VIEWER......................................................................................................................151
SMARTNOTE ......................................................................................................................153
VOICE RECORDER...........................................................................................................155
DOWNLOADS...................................................................................................................157
CONTENT TRANSFER....................................................................................................158
WEATHER.............................................................................................................................159
7. SETTINGS
SETTINGS .................................................................................... 163
MODE CHANGE...............................................................................................................163
USER THEME......................................................................................................................163
WIRELESS & NETWORKS.............................................................................................164

11
TABLE OF CONTENTS
DEVICE...................................................................................................................................165
LOCATION SERVICES.....................................................................................................168
APPLICATIONS..................................................................................................................173
ACCOUNTS & SYNC.......................................................................................................174
PRIVACY................................................................................................................................175
STORAGE..............................................................................................................................176
LANGUAGE & KEYBOARD..........................................................................................176
VOICE INPUT & OUTPUT.............................................................................................177
ACCESSIBILITY ..................................................................................................................178
DATE & TIME.......................................................................................................................178
ABOUT PHONE.................................................................................................................179
8. APPENDIX
APPENDIX ................................................................................... 182
SAFETY AND WARRANTY ..........................................................................................182
UPnP AND DLNA............................................................................................................207
SPECIFICATIONS..............................................................................................................208
LOCATION-BASED SERVICES....................................................................................210
END USER LICENSE AGREEMENT (EULA) .........................................................211
LEGAL NOTICE..................................................................................................................211
TROUBLESHOOTING CHECKLIST...........................................................................212
INDEX.....................................................................................................................................213

CHECKING PACKAGE
REMOVING THE BATTERY COVER
REPLACING THE BATTERY COVER
INSTALLING THE 4G SIM CARD
REMOVING THE 4G SIM CARD
INSTALLING THE microSD™ CARD
REMOVING THE microSD™ CARD
INSTALLING THE BATTERY
REMOVING THE BATTERY
CHARGING THE BATTERY
POWERING YOUR PHONE ON/OFF
MANAGING SCREEN
OVERVIEWING PRODUCT
GRIPPING ADR910L
ACTIVATING ADR910L
BACKING-UP DATA
UNDERSTANDING HOME SCREEN
CUSTOMIZING HOME SCREEN
MANAGING APPLICATIONS SCREEN
GETTING STARTED
This chapter provides important information to know
before using the ADR910L, including:
1

13
GETTING STARTED
CHECKING PACKAGE
Check if the package contains the following items:
xHandset
xStandard Lithium-Ion Battery
xWall/USB Charger
xQuick Start Guide
xUser Guide
xProduct Safety & Warranty Brochure
Note You can purchase the Wireless Charging Inductive
Battery Cover from the Verizon stores. It must be used
with the Wireless Charging Pad certified by Wireless Power
Consortium (WPC).
It is recommended that you purchase the following accessories to use
the ADR910L in a safe and convenient manner.
xLCD protective film
xExternal memory card adaptor

14
GETTING STARTED
REMOVING THE BATTERY COVER
1 Turn off your phone and hold it securely with both hands with
the front facing out.
2 Place your finger nail in the groove at the bottom of the unit, and
then lift it up.
REPLACING THE BATTERY COVER
Place the battery cover over the battery compartment and press it
downward until it clicks into place.

15
GETTING STARTED
INSTALLING THE 4G SIM CARD
1 Turn off your phone and remove the battery cover and battery.
2 Insert the 4G SIM card into the slot. Make sure that the gold
contacts of the card go against the metal contacts of your
phone.
REMOVING THE 4G SIM CARD
1 Turn off your phone and remove the battery cover and battery.
2 Hold the 4G SIM card carefully and slide it out from the slot.
ABOUT 4G SIM CARD
When you subscribe to your network operator, you receive the Subscriber
Identity Module (SIM) card or RUIM (Re-Usable Identification Module)
card that houses your registration information, PIN code, etc. Keep it
secure and handle carefully like a credit card. Do not bend, scratch or
expose it to moisture. Avoid static electricity.

16
GETTING STARTED
INSTALLING THE microSD™ CARD
1 Turn off your phone and remove the battery cover and battery.
2 Insert the microSD™ card into the slot. Ensure that the gold
contacts of the card go against the metal contacts of the phone.
3 Replace the battery cover by sliding it up until you hear “CLICK.”
REMOVING THE microSD™ CARD
1 Turn off your phone and remove the battery cover and battery.
2 Hold the microSD™ card carefully and slide it out from the slot.
ABOUT microSD™ CARD
A microSD™ card is a removable flash memory card where you can
save data. Save pictures and contacts, and download applications
to the card. You can expand the external memory up to 32GB. It is
recommended that you format the microSD™ card before using with
the ADR910L. For more information on erasing microSD™ card, refer
to page 197.

17
GETTING STARTED
INSTALLING THE BATTERY
1 Hold your phone tightly after removing the battery cover.
2 Align the battery contacts (1) with the terminals in the battery
compartment.
3 Press the battery down (2) until it clicks into place.
4 Replace the battery cover over the battery compartment, slide it
upward until it clicks into place.
REMOVING THE BATTERY
1 Hold your phone tightly after removing the battery cover.
2 Remove the battery from the battery compartment by lifting the
top of the battery using the fingertip cutout.
ABOUT BATTERY
The ADR910L uses a Lithium Ion (Li-Ion) battery. Make sure to use
the authorized battery and charger only. Maximum hours to use the
battery might vary depending on service types offered by the service
provider and temperatures. For more details, contact your nearest
dealer.

18
GETTING STARTED
CHARGING THE BATTERY
1 Connect the USB cable into the Wall/USB Charger.
Note Make sure to align the connector as indicated in the
image. Otherwise, the charging connector will be damaged
and the battery will not be charged.
2 Plug the USB cable into the phone’s charging port. Plug the Wall/
USB Charger into an electrical outlet. The battery starts charging.
3 Disconnect the charger when the battery is fully charged.
POWERING YOUR PHONE ON/OFF
It’s important to fully charge the battery before turning on your
phone.
1 Ensure that the 4G SIM card and the battery are safely installed
in your phone.

19
GETTING STARTED
2 Press and hold the Power/Lock key at the top left of the
phone for a few seconds until the screen lights up.
3 To turn off the phone, press and hold the Power/Lock Key
until the pop-up menu appears.
4 Touch Power off in the pop-up menu.
5 Touch OK to confirm that you want to turn off the phone.
MANAGING SCREEN
UNLOCKING THE SCREEN
The screen is locked by default when you turn on power for the first
time. To unlock the screen:
1 Press the Power/Lock Key .
2 Drag the lock to the right. Draw a pattern
if the screen is protected by a pattern
lock. Enter a PIN or a password if the
screen is locked by a PIN or a password.
You can also unlock the screen with your
face recognized.
Note You can check missed calls, messages or emails
quickly when the screen is locked: Drag the icon for call,
message or email to the clock located in the middle of the
screen.

20
GETTING STARTED
UNLOCKING THE SCREEN WITH FACE
1 Press the Power/Lock Key .
2 Move your face and adjust it to the
circle in the screen. If you fail to unlock
the screen with face, draw a pattern or
enter the PIN. Refer to page xx for more
information.
LOCKING THE SCREEN
To lock the screen, press the Power/Lock Key . If you want to get
the ADR910L locked automatically in a predetermined time, refer to
page 189 for screen timeout.
It is recommended to lock the screen to protect information
contained in the ADR910L and to conserve battery power.
USING THE TOUCHSCREEN
Your touchscreen provides an excellent way to interact with and use
your Android phone. With the touch of your finger, you can download
and use available applications, make menu selections, and access
data saved to your phone.
The following terms are used for describing the different available
actions using the touchscreen:
xTouch: A single finger touch selects items. For example, touch
an icon (e.g., Application screen item), touch words (e.g., menu
selection or to answer an on-screen question), or touch letters
and numbers to type on the virtual QWERTY keypad.
Table of contents
Other Pantech Cell Phone manuals

Pantech
Pantech Verse User manual

Pantech
Pantech C630 User manual

Pantech
Pantech AT&T C820 User manual

Pantech
Pantech C570 User manual

Pantech
Pantech G700 User manual

Pantech
Pantech OVAL User manual

Pantech
Pantech G800 User manual

Pantech
Pantech DM-P205 User manual

Pantech
Pantech PC-7300L User manual

Pantech
Pantech Caper User manual

Pantech
Pantech PN-218 User manual

Pantech
Pantech C320 User manual

Pantech
Pantech Verse User manual

Pantech
Pantech Z530i User manual

Pantech
Pantech W61PT User manual

Pantech
Pantech TX-215A User manual

Pantech
Pantech Laser Quick start guide

Pantech
Pantech C790 User manual

Pantech
Pantech Breeze III Quick start guide

Pantech
Pantech GF 200 User manual