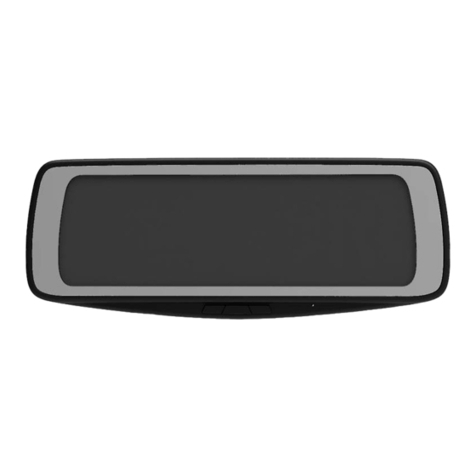
Papago GoSafe TPMS 500BT User manual

Tire Pressure Monitoring System
User’s Manual

Introduction
This wireless Tire Pressure Monitoring System (TPMS) was designed
specifically to increase driving safety and to provide a better
understanding of your vehicle’s tire conditions. Once you have correctly
installed the TPMS, these sensors will automatically monitor tire
pressure and temperature and transmit real-time statistics to the
receiver via wireless communications. The receiver then utilizes
Bluetooth technology to transmit information to the driver’s iPod,
iPhone, iPad, or Android mobile phone.
When abnormal pressure increases or decreases are detected in the
tires, the mobile phone app will immediately emit warning sounds and a
flashing light to remind the driver to stop the vehicle and check the tires.
This system will ensure your driving safety.

1
GoSafe TPMS Tire Pressure Monitoring System
Product Characteristics
1. Simple DIY Installation
No wire installations or tire removal/installation. Simply install sensors
onto the tire valves and complete installation within 3 minutes !
2. Graphical Interface
Intuitive operating interface, simple and clear indication of pressure
and temperature changes for all four tires.
3. High Precision
Electronic pressure detection differs from traditional valve detection,
with a degree of pressure precision that can reach ±1 PSI.
4. Wireless System Structure
Bluetooth transmission technology is utilized for the sensors to
transmit tire pressure and temperature automatically to a mobile
phone screen once the vehicle is started.

2
5. Sensor Battery Power Display
When sensors are low on power, the system automatically prompts
the user to replace the batteries. The user can also monitor remaining
battery power at any time.
6. Sensor Anti-theft Design
Anti-theft nuts ensure fortified installation of sensors, preventing easy
removal.

3
About this Manual
◆The information contained within this manual is subject to change
without notice.
◆This manual has been carefully written. If you have any comments or
questions regarding this manual, please contact our customer
service center or your local dealer.
◆ Please read this manual thoroughly before operating this system and
ensure a complete understanding of the regulations and use
restrictions pertaining to the parts and accessories. We are not liable
for any losses, damages, or harm which incurs from misuse or
misappropriation of this device for other functions.

Safety Warnings
4
◆The information contained within this manual is subject to change
without notice.
◆This manual has been carefully written. If you have any comments or
questions regarding this manual, please contact our customer
service center or your local dealer.
◆Please read this manual thoroughly before operating this system and
ensure a complete understanding of the regulations and use
restrictions pertaining to the parts and accessories. We are not liable
for any losses, damages, or harm which incurs from misuse or
misappropriation of this device for other functions.
◆This product is suitable for use in sedans, SUVs, and sports cars with
a tire pressure no greater than 60 PSI. The device does not support
trucks, tow trucks, large commercial vehicles, or trailers.

Product Contents
5
The packaging should contain the following parts and accessories.
Please contact our customer service center or your local dealer if there
are any damaged or missing parts.
1 3 A-type Sensor
2Receiver
4Anti-theft nut
7User’s manual
6Velcro
5Anti-theft wrench
Tire Pressure Monitoring System
User’s Manual
Power source
(12 to 5V)

6
Product Installation
※Airbag Warning
Do not install the device within the operating area of the airbag or
airbag cover.
Our company will not be held liable for any injuries or deaths as a
result of vehicle collisions or vehicle airbag issues.
Receiver Installation
1. Install the car charger.
2. Insert the USB cable into the car charger.
3. Use Velcro to secure the receiver.
4. When the blue light on the receiver
flashes, this indicates that it is properly
receiving signal from the sensor.

7
※ Caution: Do not bend the cord during placement
OK NG

Installation of the GoSafe TPMS App
8
This app is available as a free download. Through using the GoSafe
TPMS App, you can monitor tire pressure, temperature, battery power
status, and sensor ID.
Step1: For iPhones, download the PAPAGO GoSafe TPMS App from the
Apple Store For Android phones, download the PAPAGO GoSafe
TPMS App from Google Play.
1. Access Settings →General → Bluetooth
2. Turn on Bluetooth in order to automatically
search for your device.
3. Once the GoSafe TPMS device is located,
select and pair the device.
Step2: Pair the phone with the GoSafe TPMS device, according to the
following pairing steps.

Step3: Once the installation and pairing is complete, you can set sensor ID
on your iPod, iPhone, or iPad to monitor real-time tire conditions.
1. Open up the TPMS App and select the Learning Sensor ID interface.
2. Install sensor batteries in sequence, and set each ID on the iPod,
iPhone, or iPad. Once sensor ID is successfully setup, the user can visit
this page to monitor tire pressure.
Tip: After setting up each sensor, the user can install the sensor onto the
tire valve to easily setup sensor ID
9

10
Tires usually have recommended cold tire inflation pressure values and
maximum inflation pressure values. The recommended cold tire inflation
pressure and maximum inflation pressure values can be found printed on
the side of the tires or within the vehicle owner’s manual. Please adjust
the preset values only after consulting professional technical personnel
at the tire or car manufacturer.
The software is preset to emit a warning when tire pressure exceeds
44PSI or falls below 27 PSI during vehicle operation. When tire
temperature exceeds 60℃, a warning is also emitted.

11
1. (A – type) External sensors (replaceable battery model) have been
matched at the factory. For your convenience when testing for
normal sensor activity, we suggest that you install the sensors in the
sequence described below.
2. Before installing the sensor, please do not place the batteries inside
the sensors. Install sensors on one tire at a time, in the following
sequence: left front tire → right front tire → right rear tire → left
rear tire.
3. Please place the battery correctly into the sensor, according to
polarity, and tightly screw in the sensor top cap.
Sensor Installation

12
4. Remove the valve cap from the original tire.
5. Anti-theft nut (1) Install onto the tire valve. (2) Tighten all the way to
the bottom using an appropriate amount of force. (3) Screw in the
sensor on the tire valve in a clockwise fashion. (4) While stabilizing
the sensor with one hand, use the wrench provided to tighten the nut
in a counterclockwise direction, until the wrench can no longer turn
the sensor.
6. Screw in the sensor by and in a clockwise fashion; then use the
wrench on the hexagonal anti-theft nut, tightening it in a
counterclockwise direction to increase sensor stability and deter theft.

※Please Note
1. Please clean tire valves before installation to ensure effective conduction
between the sensors and tire valve contact surfaces.
2. While the anti-theft nuts increase sensor stability and provide theft
deterrent properties, they may pose an inconvenience when filling tires up
with air. As sensors already provide reliable stability, users may consider
the pros and cons of installing or removing anti-theft nuts when the device
is not in use.
3. When sensor battery voltage falls below 2.6V, please replace the
sensor’s CR1632 battery.
4. Upon completion of installation, soapy water can be used to ensure
proper sealing and detect any air leaks.
13

14
Product Specifications
Sensor (A-type) :
Operating voltage - 40°C to 125 ± 1°C
Operating current 100%
Frequency 433.92MHz
Pressure range 0 ~ 65 ± 1 PSI
Battery 3.0 V
Weight A-type 9.0 g ± 0.2 g
Lifespan A-type, approximately 1 year
Receiver (GoSafe TPME 500BT) :
Operating voltage USB 5V
Operating current 30 mA
Operating temperature -10 ~ 75°C
TPMS receiving frequency 433.92 MHz
Bluetooth transmission frequency 3.0 SPP

15
Please install sensors according to the sequences shown in the
following images to avoid any errors related to improper display of tire
statistics on the software.
1. Installation method for a four
wheeled vehicle:
2. Installation method for a three
wheeled vehicle (two front, one rear):
Sensor Installation Methods for Various Vehicle Types
L1
L1 R1
R2
L2
R1
R2

3. Installation method for a three wheeled vehicle
(one front, two rear):
4. Installation method for a two wheeled vehicle
(two front, one rear):
16
L1
L1
R2 R1
L2

17
1. The information displayed by this product is for reference only. The
device can only be operated when the vehicle comes to a stop.
2. This product may not function due to other harmful interference
systems.
3. The 4 sensor IDs allotted to this product were setup at the factory. If
you wish to replace or change out sensors, please setup these
sensors at a dealer.
4. Please do not immerse this device or sensors directly in water or any
chemicals.
5. This product is only water resistant. Please do not immerse in water.
6. Airbag warning: Do not install this device within the operating area of
the airbag or airbag cover. Our company will not be held liable for any
injuries or deaths as a result of vehicle collisions or vehicle airbag
issues.
7. This device is covered under a 1-year warranty, which does not
include any malfunctions aside from flaws to the product itself. Those
malfunctions that are not under warranty include but are not limited to:
Safety Warnings

PAPAGO Inc.
www.papagoinc.com
Made in Taiwan
Table of contents
Other Papago Automobile Accessories manuals
Popular Automobile Accessories manuals by other brands

Fisher
Fisher 43119 installation instructions

injen technology
injen technology FM1573i instruction manual

Scosche
Scosche MAGICMOUNT MAGDM manual

Snow Performance
Snow Performance BOOST COOLER 50005 installation instructions

Quadratec
Quadratec 07-Current Wrangler installation manual

Aries
Aries 2153002 installation manual

Sirius Satellite Radio
Sirius Satellite Radio SL2GSGV100107 Getting started guide

Thule
Thule 2060 parts list

Victory 4x4
Victory 4x4 3RD GEN 4RUNNER STRIKE ROCK SLIDERS Install instructions

Shad
Shad UC02 instruction manual

Yakima
Yakima EXO SnowBank quick start guide

Luverne
Luverne 571726 installation manual