Parkside 383526 2107 User manual

IRRIGATION KIT, TROPFBEWÄSSERUNGS-SET,
SET D’ARROSAGE GOUTTE-À-GOUTTE PTBS 30 A1
IAN 383526_2107
CSEPEGTETŐ ÖNTÖZŐ KÉSZLET
Használati utasítás KOMPLET ZA NAMAKANJE
Navodila za uporabo
SET IRRIGAZIONE AGOCCIA
Istruzioni per l'uso
SET D’ARROSAGE GOUTTE-À-GOUTTE
Mode d’emploi
IRRIGATION KIT
Operating instructions
DRUPPELSPROEISET
Gebruiksaanwijzing
KAPKOVÝ ZAVLAŽOVACÍ SYSTÉM
Návod k obsluze
DRYPVANDINGSSYSTEM
Betjeningsvejledning
KVAPKOVÝ ZAVLAŽOVACÍ SYSTÉM
Návod na obsluhu
TROPFBEWÄSSERUNGS-SET
Bedienungsanleitung
ZESTAW DO NAWADNIANIA
KROPELKOWEGO
Instrukcja obsługi
SET DE RIEGO POR GOTEO
Instrucciones de uso

GB/ IE Operating instructions Page 1
DE/AT/CH Bedienungsanleitung Seite 11
FR/BE Mode d’emploi Page 21
NL/BE Gebruiksaanwijzing Pagina 31
CZ Návod k obsluze Strana 41
PL Instrukcja obsługi Strona 51
SK Návod na obsluhu Strana 61
ES Instrucciones de uso Página 71
DK Betjeningsvejledning Side 81
IT Istruzioni per l'uso Pagina 91
HU Használati utasítás Oldal 101
SI Navodila za uporabo Stran 111
Before reading, unfold the page containing the illustrations and familiarise yourself with all functions of the
device.
Klappen Sie vor dem Lesen die Seite mit den Abbildungen aus und machen Sie sich anschließend mit
allen Funktionen des Gerätes vertraut.
Avant de lire le mode d‘emploi, ouvrez la page contenant les illustrations et familiarisez-vous ensuite avec
toutes les fonctions de l‘appareil.
Vouw vóór het lezen de pagina met de afbeeldingen open en maak u vertrouwd met alle functies van het
apparaat.
Před čtením si otevřete stranu s obrázky a potom se seznamte se všemi funkcemi přístroje.
Przed przeczytaniem proszę rozłożyć stronę z ilustracjami, a następnie proszę zapoznać się z wszystkimi
funkcjami urządzenia.
Pred čítaním si odklopte stranu s obrázkami a potom sa oboznámte so všetkými funkciami prístroja.
Antes de empezar a leer abra la página que contiene las imágenes y, en seguida, familiarícese con todas
las funciones del dispositivo.
Før du læser, vend siden med billeder frem og bliv bekendt med alle apparatets funktioner.
Prima di leggere aprire la pagina con le immagini e prendere confidenza con le diverse funzioni
dell'apparecchio.
Olvasás előtt kattintson az ábrát tartalmazó oldalra és végezetül ismerje meg a készülék mindegyik funkcióját.
Pred branjem odprite stran s slikami in se nato seznanite z vsemi funkcijami naprave.


GB│IE │ 1 ■PTBS 30 A1
Contents
Introduction ......................................2
Intended use .....................................2
Package contents .................................2
Technical specifications.............................3
Safety information ................................3
Connection and assembly ..........................4
Operation .......................................8
Dismantling ......................................8
Cleaning.........................................8
Storage .........................................9
Disposal .........................................9
Service .........................................10
Importer........................................10
IB_383526_PTBS30A1_LB8.indb 1
10.11.2021 14:40:59
10.11.2021 14:40:59

■ 2 │ GB│IE PTBS 30 A1
IRRIGATION KIT
PTBS 30 A1
Introduction
Congratulations!
You have purchased a high-
quality product. Familiarise yourself
with the product before using it for
the first time. To do this, read the
following operating instructions
thoroughly. Use the product only as
described and for the range of ap-
plications specified. Keep these op-
erating instructions in a safe place.
Please, also pass all documents on
to any future owner.
Intended use
This product is intended exclusively
for watering outdoor garden beds,
pots and balcony flower boxes.
The product is not intended for
commercial use.
The manufacturer accepts no re-
sponsibility for damage attributable
to misuse.
Package contents
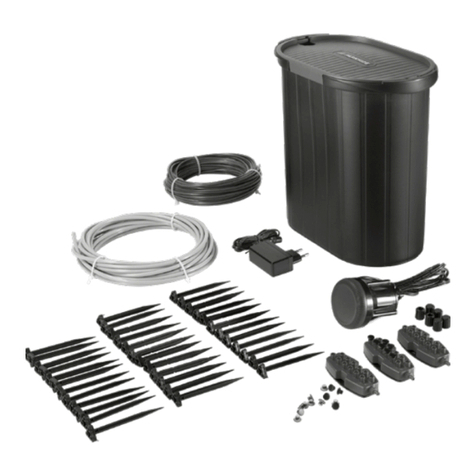
1
1 × Base appliance with
pressure regulation
2
2 × L-connector (13 mm/ )
3
1 × T-connector (13 mm/ )
4
5 × T-reducer (13 mm/
and 4.6 mm/ )
5
2 × End plugs (13 mm/ )
6
5 × End plugs (4.6 mm/ )
IB_383526_PTBS30A1_LB8.indb 2
10.11.2021 14:41:00
10.11.2021 14:41:00

GB│IE │ 3 ■PTBS 30 A1
7
2 × Shut-off valve (4.6 mm/ )
8
35 × Inline dripper (4.6 mm/ )
9
20 × Hose holder (4.6 mm/ )
0
5 × Hose holder (13 mm/ )
q
1 × 15m distributor tube
(4.6 mm/ )
w
1 × 15m distributor tube
(13 mm/ )
1 × Operating instructions
NOTE
► Check the package for
completeness and signs of
visible damage.
Technical specifications
Max. operating pressure: 2 bar
Safety information
Read all safety warnings and
all instructions!
■ Do not direct the water jet at
electrical equipment!
■ Do not direct the water jet at
people or animals!
■ Do not drink from the
hose!
■ Do not allow children to play
with the product.
■ This product may be used by
children aged 8 years and
above and by persons with
limited physical, sensory or
mental capabilities or lack of
experience and knowledge,
provided that they are under
supervision or have been told
how to use the product safely
and are aware of the potential
risks.
IB_383526_PTBS30A1_LB8.indb 3
10.11.2021 14:41:02
10.11.2021 14:41:02

■ 4 │ GB│IE PTBS 30 A1
■ Use this product only in con-
junction with the base appli-
ance 1.
■ Make sure that no dirt particles
can clog the connections or get
inside the hose.
■ Make sure all the connections
are firmly attached.
■ After using the product, always
close the water outlet (tap)!
■ Dismantle the product during
cold weather to avoid frost
damage.
Connection and assembly
NOTE
► You can connect the base
appliance 1to a water tap
or to the coupler of a garden
hose. The arrow symbol on
the base appliance 1indi-
cates the flow direction of the
water.
► The wide distributor tube w
is laid from the base appli-
ance 1to the vicinity of the
desired irrigation point. The
narrow distributor tube qis
laid from the wide distributor
tube w, directly past your
plants, which are watered by
the inline drippers 8.
► Before assembly, take a look
at the example connection
diagram on the fold-out page.
The following description is
based on this example.
IB_383526_PTBS30A1_LB8.indb 4
10.11.2021 14:41:02
10.11.2021 14:41:02

GB│IE │ 5 ■PTBS 30 A1
Garden hose connection
♦ Connect the base appliance 1
to the connector of your
garden hose.
Tap connection
♦ Unscrew the garden hose
section anticlockwise from
the base appliance 1.
♦ Screw the base appliance 1
clockwise onto a water tap.
Connection principle of the
distributor tubes q/w
All parts of the product that you
can connect to the distributor tubes
q/wfollow the same principle.
♦ Unscrew the union nut anti-
clockwise.
♦ Push the union nut with the
narrow side onto a distributor
tube q/w.
♦ Push the distributor tube q/w
onto the bracket.
♦ Screw the union nut clockwise
onto the thread of the bracket.
IB_383526_PTBS30A1_LB8.indb 5
10.11.2021 14:41:02
10.11.2021 14:41:02

■ 6 │ GB│IE PTBS 30 A1
Assembly
NOTE
► Spread out the distributor
tubes q/wand leave them
in the sun for one to two
hours to make them easier to
straighten.
► Use sharp all-purpose scissors
to cut the distributor tubes
q/w. Straighten and deburr
the cut with a cutter if neces-
sary.
► Use the long hose holders 0
for the wide distributor tubes
wand the short hose holders
9for the narrow distributor
tubes q.
♦ Lay out the wide distributor
tube wand cut it into the re-
quired lengths. Cut the ends of
all distributor tubes wstraight.
♦ Connect the required L- and
T-connectors 2/3with the
cut-to-size distribution pipes w.
♦ Connect the T-reducers 4to
the distributor tubes win the
locations where you line them
up with the rows of your plants.
♦ Connect the end plugs 5to
the distributor tubes wat the
points where you do not wish
to connect anything else.
♦ Place the inline drippers 8
near the roots of the plants
to be watered.
IB_383526_PTBS30A1_LB8.indb 6
10.11.2021 14:41:03
10.11.2021 14:41:03

GB│IE │ 7 ■PTBS 30 A1
♦ Place the shut-off valves 7
where your plants require sep-
arately adjustable water deliv-
ery. You can regulate the water
supply for a single plant or a
whole row of plants separately.
♦ Lay out the narrow distributor
tube qand cut it into the re-
quired lengths. Cut the ends of
all distributor tubes qstraight.
♦ Connect the T-reducers 4to
the distributor tubes q.
♦ Connect the inline drippers 8
and the shut-off valves 7to
the distributor tubes q.
♦ Connect the end plugs 6to
the distributor tubes qat the
points where you do not wish
to connect anything else.
♦ Clamp the wide distributor
tubes winto the long hose
holders 0and push the hose
holders 0into the ground.
♦ Clamp the narrow distributor
tubes qinto the short hose
holders 9and push the hose
holders 9into the ground.
IB_383526_PTBS30A1_LB8.indb 7
10.11.2021 14:41:04
10.11.2021 14:41:04

■ 8 │ GB│IE PTBS 30 A1
Operation
♦ Turn on the water tap. The base
appliance
1regulates the
water pressure.
NOTE
► The base appliance 1has an
opening on one side through
which air is released if the wa-
ter pressure is too high. Make
sure that this opening is never
obstructed.
♦ Adjust the shut-off valve 7
(turn anticlockwise to open/
clockwise to close).
♦ Turn off the tap when you are
finished watering.
Dismantling
♦ Unscrew the base appliance 1
anticlockwise from the tap. If
you are using a garden hose,
push the front part of the coupler
back and pull off the base ap-
pliance 1.
♦ Push all of the distributor
tubes q/wout of the hose
holders 9/0.
♦ Pull the hose holders 9/0
out of the ground.
♦ Dismantle the distributor
tubes q/wfrom all parts.
Cleaning
ATTENTION
► Do not use caustic, abrasive
or solvent-based cleaning
materials. They can damage
the surfaces of the product.
♦ Clean the product using a
damp, lint-free cloth.
♦ Clean the connections from
time to time to ensure a tight fit.
IB_383526_PTBS30A1_LB8.indb 8
10.11.2021 14:41:05
10.11.2021 14:41:05

GB│IE │ 9 ■PTBS 30 A1
Cleaning the base appliance
♦ Unscrew the garden hose sec-
tion anticlockwise from
the base appliance 1.
♦ Remove the sieve and clean
it under running water.
♦ Replace the sieve in the base
unit 1.
♦ Screw the garden hose section
clockwise into the base appli-
ance 1.
Storage
♦ Completely empty all water-
carrying parts of the product.
♦ Let the product dry completely
before storage.
♦ Store the product in a frost-
proof location to prevent frost
damage.
Disposal
Your municipal or city ad-
ministration can provide
you with information on
options for disposing of used
products.
The product is recyclable,
subject to extended pro-
ducer responsibility and is
collected separately.
The packaging materials
have been selected for
their environmental com-
patibility and ease of disposal
and are thus recyclable.
Dispose of packaging materials
that are no longer needed in ac-
cordance with applicable local
regulations.
Dispose of the packaging
in an environmentally
friendly manner. Observe
the labels on the different packaging
materials and separate them as
needed. The packaging materials
are labelled with abbreviations (a)
and numbers (b) with the following
meanings: 1–7: plastics,
20–22: paper and cardboard,
80–98: composites.
IB_383526_PTBS30A1_LB8.indb 9
10.11.2021 14:41:09
10.11.2021 14:41:09

■ 10 │ GB│IE PTBS 30 A1
Service
Service Great Britain
Tel.: 0800 404 7657
E-Mail: k[email protected]
Service Ireland
Tel.: 1890 930 034
(0,08EUR/ Min.,(peak))
(0,06EUR/ Min.,(off peak))
E-Mail: k[email protected]
IAN 383526_2107
Importer
Please note that the following
address is not the service address.
Please use the service address pro-
vided in the operating instructions.
KOMPERNASS HANDELS GMBH
BURGSTRASSE 21
44867 BOCHUM
GERMANY
www.kompernass.com
IB_383526_PTBS30A1_LB8.indb 10
10.11.2021 14:41:09
10.11.2021 14:41:09

DE│AT│CH │ 11 ■PTBS 30 A1
Inhaltsverzeichnis
Einleitung .......................................12
Bestimmungsgemäßer Gebrauch ...................12
Lieferumfang....................................12
Technische Daten.................................13
Sicherheitshinweise ..............................13
Anschluss und Montage ...........................14
Betrieb.........................................18
Demontage .....................................18
Reinigung.......................................18
Aufbewahrung ..................................19
Entsorgung......................................19
Service .........................................20
Importeur ......................................20
IB_383526_PTBS30A1_LB8.indb 11
10.11.2021 14:41:09
10.11.2021 14:41:09

■ 12 │ DE│AT│CH PTBS 30 A1
TROPFBEWÄSSERUNGS-
SET PTBS 30 A1
Einleitung
Herzlichen Glückwunsch!
Mit Ihrem Kauf haben Sie
sich für ein hochwertiges Produkt
entschieden. Machen Sie sich vor
der ersten Inbetriebnahme mit dem
Produkt vertraut. Lesen Sie hierzu
aufmerksam die nachfolgende
Bedienungsanleitung. Benutzen
Sie das Produkt nur wie beschrie-
ben und für die angegebenen
Einsatzbereiche. Bewahren Sie
diese Bedienungsanleitung gut auf.
Händigen Sie alle Unterlagen bei
Weitergabe des Produkts an Dritte
ebenfalls mit aus.
Bestimmungsgemäßer
Gebrauch
Das Produkt ist ausschließlich zur
Bewässerung von Beeten, Pflanz-
töpfen und Balkonkästen im Außen-
bereich bestimmt. Das Produkt ist
nicht für den gewerblichen Einsatz
bestimmt.
Für aus bestimmungswidriger
Verwendung entstandene Schäden
übernimmt der Hersteller keine
Haftung.
Lieferumfang
1
1× Basisgerät mit Druck-
regulierung
2
2× L-Verbindungsstück
(13 mm/ )
3
1× T-Verbindungsstück
(13 mm/ )
4
5× T-Reduzierstück (13 mm/
und 4,6 mm/ )
5
2× Verschlussstopfen
(13 mm/ )
6
5× Verschlussstopfen
(4,6 mm/ )
IB_383526_PTBS30A1_LB8.indb 12
10.11.2021 14:41:10
10.11.2021 14:41:10

DE│AT│CH │ 13 ■PTBS 30 A1
7
2× Absperrventil (4,6 mm/ )
8
35× Reihentropfer (4,6 mm/ )
9
20× Schlauchhalter
(4,6 mm/ )
0
5× Schlauchhalter (13 mm/ )
q
1× 15m Verteilerrohr
(4,6 mm/ )
w
1× 15m Verteilerrohr
(13 mm/ )
1× Bedienungsanleitung
HINWEIS
► Prüfen Sie die Lieferung auf
Vollständigkeit und auf sicht-
bare Schäden.
Technische Daten
Max. Betriebsdruck: 2 bar
Sicherheitshinweise
Lesen Sie alle Sicherheits-
hinweise und Anweisungen!
■ Wasserstrahl nicht auf elektrische
Einrichtungen richten!
■ Wasserstrahl nicht auf Personen
oder Tiere richten!
■ Keine Trinkwasser-
entnahme!
■ Kinder dürfen nicht mit dem
Produkt spielen.
■ Das Produkt kann von Kindern
ab 8 Jahren und darüber sowie
von Personen mit verringerten
physischen, sensorischen oder
mentalen Fähigkeiten oder
Mangel an Erfahrung und Wis-
sen benutzt werden, wenn sie
beaufsichtigt oder bezüglich
des sicheren Gebrauchs des
Produktes unterwiesen wurden
und die daraus resultierenden
Gefahren verstehen.
IB_383526_PTBS30A1_LB8.indb 13
10.11.2021 14:41:12
10.11.2021 14:41:12

■ 14 │ DE│AT│CH PTBS 30 A1
■ Verwenden Sie das Produkt
nur zusammen mit dem Basis-
gerät 1.
■ Achten Sie darauf, dass keine
Schmutzpartikel die Anschlüsse
verstopfen oder in das Rohrin-
nere gelangen können.
■ Achten Sie auf einen festen Sitz
aller Anschlüsse.
■ Nach Verwendung des Produkts
stets die Wasserentnahmestelle
(Wasserhahn) schließen!
■ Bauen Sie das Produkt wäh-
rend der Frostperiode ab, um
Frostschäden zu vermeiden.
Anschluss und Montage
HINWEIS
► Sie können das Basisgerät 1
an einen Wasserhahn oder an
einem Kupplungsstück eines
Gartenschlauchs anschließen.
Das Pfeilsymbol auf dem
Basisgerät 1 zeigt die Fließ-
richtung des Wassers an.
► Das breite Verteilerrohr wwird
von dem Basisgerät 1bis in
die Nähe der gewünschten
Bewässerungsstelle verlegt.
Das schmale Verteilerrohr q
wird von dem breiten Verteiler-
rohr waus, direkt an Ihren
Pflanzen vorbei verlegt, die
durch die Reihentropfer 8
bewässert werden.
► Schauen Sie sich vor der
Montage das beispielhafte
Anschlussschema auf der Aus-
klappseite an. Die folgende
Beschreibung bezieht sich auf
dieses Beispiel.
IB_383526_PTBS30A1_LB8.indb 14
10.11.2021 14:41:12
10.11.2021 14:41:12

DE│AT│CH │ 15 ■PTBS 30 A1
Anschluss Gartenschlauch
♦ Stecken Sie das Basisgerät 1
in das Kupplungsstück Ihres
Gartenschlauchs.
Anschluss Wasserhahn
♦ Schrauben Sie das Garten-
schlauchstück gegen den
Uhrzeigersinn aus dem Basis-
gerät 1heraus.
♦ Schrauben Sie das Basisgerät 1
im Uhrzeigersinn auf einen
Wasserhahn.
Anschlussprinzip der Verteiler-
rohre q/w
Alle Teile des Produkts, die Sie mit
den Verteilerrohren q/wverbin-
den können, funktionieren nach
dem gleichen Prinzip.
♦ Schrauben Sie die Überwurf-
mutter gegen den Uhrzeiger-
sinn ab.
♦ Stecken Sie die Überwurfmutter
mit der schmalen Seite auf ein
Verteilerrohr q/w.
♦ Stecken Sie das Verteilerrohr
q/wauf die Aufnahme.
♦ Schrauben Sie die Überwurf-
mutter im Uhrzeigersinn auf das
Gewinde der Aufnahme fest.
IB_383526_PTBS30A1_LB8.indb 15
10.11.2021 14:41:13
10.11.2021 14:41:13

■ 16 │ DE│AT│CH PTBS 30 A1
Montage
HINWEIS
► Breiten Sie die Verteilerrohre
q/waus und lassen Sie sie
ein bis zwei Stunden in der
Sonne liegen, damit sie sich
leichter begradigen lassen.
► Verwenden Sie zum Schneiden
der Verteilerrohre q/weine
scharfe Allzweckschere. Begra-
digen und entgraten Sie ggf.
den Schnitt mit einem Cutter.
► Verwenden Sie die langen
Schlauchhalter 0für die brei-
ten Verteilerrohre wund die
kurzen Schlauchhalter 9für
die schmalen Verteilerrohre q.
♦ Legen Sie das breite Verteiler-
rohr waus und schneiden Sie
es in die erforderlichen Längen
zu. Schneiden Sie alle Verteiler-
rohre wgerade ab.
♦ Verbinden Sie die benötigten
L- und T-Verbindungsstücke
2/3mit den zugeschnittenen
Verteilerrohren w.
♦ Verbinden Sie die T-Reduzier-
stücke 4mit den Verteiler-
rohren wan den Stellen, wo
Sie Reihen zu Ihren Pflanzen
bilden.
♦ Verbinden Sie die Verschluss-
stopfen 5mit den Verteilerroh-
ren wan den Stellen, wo Sie
nichts weiter anschließen.
♦ Platzieren Sie die Reihentropfer
8in Wurzelnähe der zu be-
wässernden Pflanzen.
IB_383526_PTBS30A1_LB8.indb 16
10.11.2021 14:41:14
10.11.2021 14:41:14

DE│AT│CH │ 17 ■PTBS 30 A1
♦ Platzieren Sie die Absperrven-
tile 7dort, wo Ihre Pflanzen
einen separat regulierbaren
Wasserbedarf benötigen. Eine
einzelne Pflanze oder eine gan-
ze Pflanzenreihe kann separat
reguliert werden.
♦ Legen Sie das schmale Ver-
teilerrohr qaus und schneiden
Sie es in die erforderlichen
Längen zu. Schneiden Sie alle
Verteilerrohre qgerade ab.
♦ Verbinden Sie die T-Reduzier-
stücke 4mit den Verteilerroh-
ren q.
♦ Verbinden Sie die Reihentrop-
fer 8und die Absperrventile
7mit den Verteilerrohren q.
♦ Verbinden Sie die Verschluss-
stopfen 6mit den Verteilerroh-
ren qan den Stellen, wo Sie
nichts weiter anschließen.
Klemmen Sie die breiten Verteiler-
rohre win die langen Schlauch-
halter 0und stecken Sie die
Schlauchhalter 0in die Erde.
♦ Klemmen Sie die schmalen
Verteilerrohre qin die kurzen
Schlauchhalter 9und stecken
Sie die Schlauchhalter 9in
die Erde.
IB_383526_PTBS30A1_LB8.indb 17
10.11.2021 14:41:15
10.11.2021 14:41:15
This manual suits for next models
1
Table of contents
Languages:
Other Parkside Irrigation System manuals