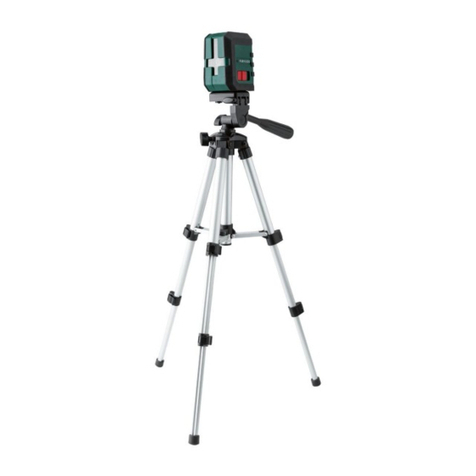
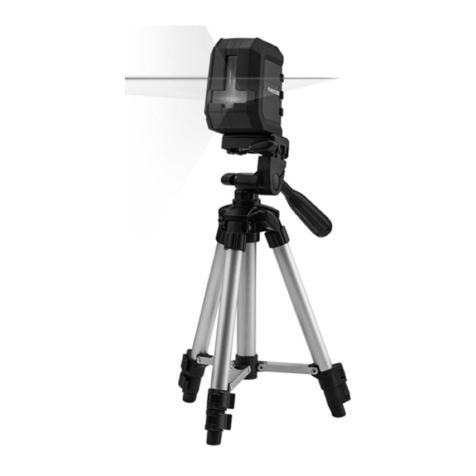
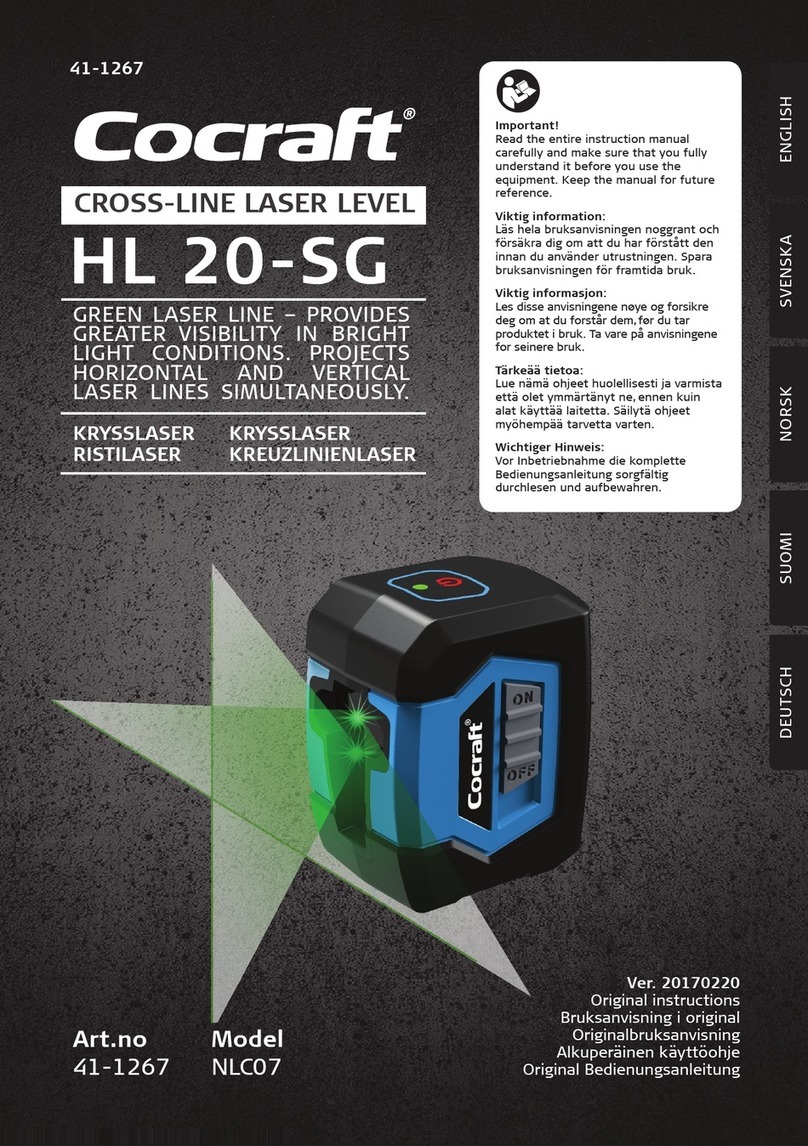
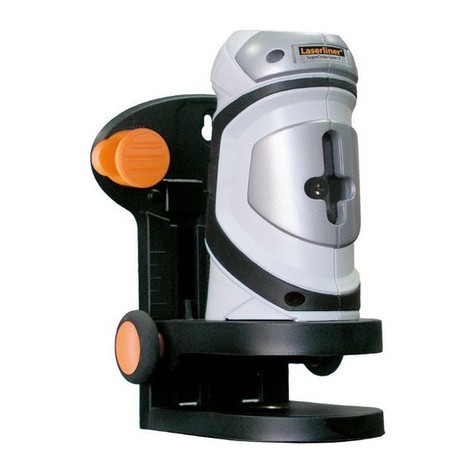
Parkside PKLL 8 A3 User manual

SELF-LEVELLING CROSS LINE
LASER LEVEL PKLL 8 A3
RISTILINJALASER
Alkuperäisen käyttöohjeen käännös
SELF-LEVELLING CROSS
LINE LASER LEVEL
Translation of the original instructions
KRYSSLASER
Översättning av bruksanvisning i original
L
ASER KRZYŻOWY
Tłumaczenie oryginalnej instrukcji obsługi
KRYŽMINIŲ LINIJŲ LAZERIS
Originalios naudojimo instrukcijos vertimas
IAN 322432_1901
KREUZLINIENLASER
Originalbetriebsanleitung

SELF-LEVELLING CROSS LINE
LASER LEVEL PKLL 8 A3
GB Translation of the original instructions Page 5
FI Alkuperäisen käyttöohjeen käännös Sivu 17
SE Översättning av
bruksanvisning i original Sidan 28
PL Tłumaczenie oryginalnej
instrukcji obsługi Strona 39
LT Originalios naudojimo
instrukcijos vertimas Puslapis 51
DE/AT/CH Originalbetriebsanleitung Seite 63

H
V
1 2
7
8
10
11a
11
13
14
15
12
16
17
18
19
9 3
4
5a
6
A

C5a
1
2
B
6
5

5GB
List of pictograms used............................................ Page 6
Introduction....................................................................... Page 6
Intended use............................................................................ Page 6
Description of parts................................................................. Page 7
Scope of delivery.................................................................... Page 7
Technical data......................................................................... Page 7
Safety notes...................................................................... Page 8
Safety instructions for batteries/rechargeable batteries ..... Page 9
Initial use............................................................................. Page 10
Inserting /Changing batteries ................................................ Page 10
Switching on /off .................................................................... Page 11
Use automatic levelling system............................................... Page 11
Using individual lines and crossed lines................................ Page 11
Working without the automatic levelling system................... Page 12
Practical guidance .................................................................. Page 12
Working with the tripod.......................................................... Page 12
Maintenance and cleaning................................... Page 13
Storage ................................................................................. Page 14
Disposal................................................................................ Page 14
Warranty............................................................................. Page 15
Warranty claim procedure..................................................... Page 15
Service ..................................................................................... Page 16

6 GB
List of pictograms used
Please read the instructions for use.
Danger of explosion!
Wear safety gloves!
Attention!
Protect yourself from laser radiation!
Do not stare into the laser beam!
Self-levelling cross line laser level PKLL 8 A3
Introduction
We congratulate you on the purchase of your new product.
You have chosen a high quality product. The instructions for
use are part of the product. They contain important information
concerning safety, use and disposal. Before using the product, please
familiarise yourself with all of the safety information and instructions for
use. Only use the product as described and for the specified
applications.
If you pass the product on to anyone else, please ensure that you also
pass on all the documentation with it.
Intended use
The product is suitable for the the determination and verification of
horizontal and vertical lines. The product is exclusively suitable for use
in enclosed operating sites. Any other use or modification of the product
shall be considered improper use and may result in serious accidents.
The manufacturer assumes no liability for damages due to improper use.
Not intended for commercial purposes.

7GB
Description of parts
1H-button to switch on/off horizontal line
2LED indicator (red: levelling off, green levelling on)
3V-button to switch on/off vertical line
4LOCK switch
5Battery compartment
5a Battery compartment cover
6- Tripod thread (underneath)
7Laser beam opening
8- screw (to align with tripod thread of cross line laser)
9Metal key (to adjust screw on the quick shoe)
10 Locking screw (to adjust the angle of tripod flat head to up
to 90 degree)
11 Bubble level
11a Lever (to fix the quick shoe)
12 Long Handle
13 Locking screw (to rotate the tripod flat head up to 360 degree
horizontally)
14 Locking screw (to adjust the height of the centre column)
15 Plastic ring
16 Blocking lever (to adjust the height of the legs)
17 Legs of the tripod
18 Tripod flat head
19 Quick shoe
Scope of delivery
1 Self-levelling cross line laser level
1 Tripod
2 1.5V-Batteries, Type AA
1 Set of instructions for use
Technical data
Operating voltage: 3V (direct current)
Working area at least 1): 8 m
Levelling accuracy: +/- 0.5 mm/m
Typical self-levelling range: ± 4°
Typical levelling time: approx. 4 seconds
Operating temperature: +5°C–35°C
Max. relative humidity: ≤ 90 %
Laser class: 2

8 GB
Wave length (λ): 635nm
Maximum performance
P max: 1mW
Tripod mount:
Batteries: 2 x 1.5V-Batteries, Type AA
Product weight: 310g (without batteries)
Tripod weight: 330g
Product dimensions: approx. 70 x 61 x 90mm
Tripod dimensions: 65cm
1) The operating range can be reduced by unfavourable environmental
conditions (e.g. direct sunlight).
Safety notes
DANGER OF SUFFOCATION! Packaging materials (e.g. films or
polystyrene) can not be used as toys. Always keep children away
from the packaging material. The packaging material is not a toy.
Do not work with the measuring tool in an environment where there
is a danger of explosion, where there are flammable liquids, gasses
or dusts. Sparks can be created in the product, which could ignite
dust or fumes.
This product may be used by children from the age of 8, by per-
sons of reduced physical, sensory or mental abilities or a lack of
experience and/ or knowledge if they are supervised or instructed
with regard to the safe use of the product and have understood
the risks resulting from use. Do not allow children to play with the
product. Cleaning and user maintenance may not be carried out
by children unless they are supervised.
Do not leave the switched-on product unattended and switch the
product off after use. Others could be blinded by the laser beam.
Risk of eye injury.
Do not expose the product to moisture or direct sunlight.
Do not expose the product to extremely high temperatures or tem-
perature fluctuations. For example, do not leave it in your car for a
long time. In the case of large temperature fluctuations, let the product
acclimatise before using it. In extreme temperatures or temperature
fluctuations, the precision of the product can be impaired.
Avoid strong impacts against the measuring tool. Damage to the
measuring tool can impair its accuracy. After a strong impact com-
pare the laser line with a known vertical or horizontal reference
line to check it.

9GB
Turn the measuring tool off when you transport it. When it is switched
off the pendulum unit is locked, which otherwise can be damaged
in strong movements.
Do not bring the measuring tool near to heart pacemakers. The
magnet inside the measuring tool creates a field that can impair
the function of pacemakers.
Keep the measuring tool away from magnetic data carriers and
devices that are sensitive to magnetic influences. The effects of the
magnet can lead to irreversible data losses.
Protect yourself from laser radiation!
LASER
2
Pmax < 1 mW
λ = 635 nm
EN 60825-1:2014
Do not look directly into the laser beam or the laser beam
opening 7.
Viewing the laser beam with optical instruments
(e.g. loupe, magnifying glass etc.) is associated with risk injury to
the eyes.
CAUTION! If operating or adjusting devices than other than those
described here are used or other procedures are carried out, this
can lead to dangerous radiation effects.
Never direct the laser beam at people, animals or reflective sur-
faces. Even looking briefly into the laser beam can cause damage
to the eyes.
Safety instructions for batteries/
rechargeable batteries
DANGER TO LIFE! Keep batteries/rechargeable batteries out
of reach of children. If accidentally swallowed seek immediate
medical attention.
DANGER OF EXPLOSION! Never recharge non-re-
chargeable batteries. Do not short-circuit batteries/re-
chargeable batteries and/or open them. Overheating,
fire or bursting can be the result.
Never throw batteries/rechargeable batteries into fire or water.
Do not exert mechanical loads to batteries/rechargeable batteries.

10 GB
Risk of leakage of batteries/rechargeable batteries
Avoid extreme environmental conditions and temperatures, which
could affect batteries/rechargeable batteries, e.g. radiators/
direct sunlight.
If batteries/rechargeable batteries have leaked, avoid contact
with skin, eyes and mucous membranes with the chemicals! Flush
immediately the affected areas with fresh water and seek medical
attention!
WEAR PROTECTIVE GLOVES! Leaked or damaged
batteries/rechargeable batteries can cause burns on
contact with the skin. Wear suitable protective gloves at
all times if such an event occurs.
In the event of a leakage of batteries/rechargeable batteries,
immediately remove them from the product to prevent damage.
Only use the same type of batteries/rechargeable batteries. Do not
mix used and new batteries/rechargeable batteries.
Remove batteries/rechargeable batteries if the product will not be
used for a longer period.
Risk of damage of the product
Only use the specified type of battery/rechargeable battery!
Insert batteries/ rechargeable batteries according to polarity marks
(+) and (-) on the battery/ rechargeable battery and the product.
Clean the contacts on the battery/ rechargeable battery and in the
battery compartment before inserting!
Remove exhausted batteries/ rechargeable batteries from the
product immediately.
Initial use
Check that the delivery is complete and that there is no visible
damage.
Remove the packaging material from the product.
Inserting/Changing batteries
Open the battery compartment cover 5a (see fig. B).
Insert batteries into the battery compartment 5(see fig. C). Make
sure that the batteries are inserted in a correct polarity (see fig. C)
before closing back the battery compartment cover 5a .
Note: When the battery is low, the LED indicator 2blinks red.
Always replace all batteries at the same time. Only use batteries
from the same manufacturer and with the same capacity.

11GB
Remove the batteries from the product if it will not be in use for a
prolonged period of time. In long periods of storage the batteries
can corrode and can run themselves down.
Switching on/off
To switch the product on, push the LOCK switch 4to the
position . Immediately after being switched on, the product
releases two laser lines from the laser beam opening 7.
To switch the product off, push the LOCK switch 4to the
position . When switched off, the pendulum unit is locked.
Use automatic levelling system
To work with automatic levelling, place the product on a level, firm
surface, or fasten it with the - tripod thread 6to the tripod.
When it is switched on, the automatic levelling system automatically
corrects irregularities of ±4° within the self levelling area. The level-
ling is concluded when the laser lines stop moving and the LED in-
dicator 2goes green.
If automatic levelling is not possible, e.g. because the base of the
measuring tool deviates by more than 4° from the horizontal or
because the product is being freely hand-held, the LED indicator
2will go red and the horizontal and vertical laser lines will be
switched off.
Note: operation without automatic levelling will always be indi-
cated via the red LED indicator 2.
Note: if the product is agitated or its position is changed during
operation, the product will automatically re-level. After re-levelling
check the positions of the horizontal and vertical laser lines against
reference points to avoid errors.
Using individual lines and crossed lines
When the product is performing automatic levelling and the base
of the measurement device deviates from the horizontal by less
than 4° (green LED on), carefully press the H-button 1to turn the
horizontal line on or off.
Or correspondingly press the V-button 3to turn the vertical line
on or off.

12 GB
Crossed lines can be locked with this product:
When the product is performing automatic levelling and the base
of the measurement device deviates from the horizontal by less than
4° (green LED on) hold down the H-button 1until the LED indica-
tor 2goes red. Now automatic levelling is switched off and the
crossed lines are permanently switched on - even if the base of the
measurement device deviates from the horizontal by more than 4°.
You can turn this mode off again by pressing and holding down the
H-button 1until the LED indicator 2goes green again. The auto-
matic levelling system has been switched on again.
The crossed lines are turned off as soon as the base of the measuring to
ol
deviates from the horizontal by more than 4°, and the LED indicator 2
will turn red again.
Working without the automatic
levelling system
Put the LOCK switch 4into the position .
Hold down the H-button 1until the red LED indicator 2comes
on. Now the product will release two laser lines from the laser
beam opening 7that are not levelled. Operation without automatic
levelling will always be indicated via the red LED indicator 2.
Practical guidance
Always use only the middle of the laser line for markings. The width
of the line depends on the distance.
Working with the tripod
Setup and alignment
1. Pull all the three legs 17 of the tripod apart. The plastic ring 15 ,
which is connecting all the three cross hinges will be moved to the
end of the middle column.
2. Release the blocking levers 16 and extend the legs until you get
your desired height.
3. Then, fold-back all those blocking levers 16 .
4. Check the straight positioning by using the bubble level 11 . If the
tripod is straight, the air bubble will be positioned in the centre of
the circle. If necessary, readjust the length of the legs 17 .

13GB
5. If additional height is necessary, loosen the locking screw 14 and
extend the centre column to desired height. Once reached the
desired height, tighten the locking screw 14 .
6. For a horizontal alignment of the tripod flat head 18 , loosen the
long handle 12 by turning anti-clockwise and move the handle up
or down as desired. If the air bubble of the spirit level 11 is located
exactly in the middle of the circle, the tripod flat head is aligned
horizontally. Then, tighten the long handle 12 by turning it clockwise.
7. If necessary, loosen the locking screw 13 to rotate the tripod flat
head 18 up to 360 degree horizontally to get desired side. Once
reached the desired side, tighten the locking screw 13 .
8. If necessary, loosen the locking screw 10 to adjust the angle of the
tripod flat head 18 up to 90 degree vertically to get desired angle.
Once reached the desired angle, tighten the locking screw 10 .
Securing the Cross Line Laser
Align -thread 6of cross line laser with the -screw 8of
the quick shoe and make sure to tighten the screw well by screwing
the metal key 9clockwise. The metal key 9is on the bottom side of
the quick shoe 19 .
Removing quick shoe from tripod:
User can just remove the cross line laser together with quick shoe 19
from tripod by following below steps:
1. Pull the lever 11a on the tripod flat head 18 along the side.
2. Remove the quick shoe 19 .
3. If want to put back the cross line laser on the tripod again, pull the
lever 11a on the tripod flat head 18 and place the quick shoe 19
back firmly on the tripod flat head 18 . Then, release the lever 11a
to bring back to original position and to firmly hold the quick shoe
19 (see fig. A).
4. Check the tight fitting of the quick shoe 19 within the tripod flat
head 18 .
Maintenance and cleaning
The product requires no maintenance.
ATTENTION! Never submerge the product in water or other liquid
s.
Do not allow water to enter into the product during cleaning.
Keep the product clean to ensure good, secure work.
Use a dry cloth to clean the outside.

14 GB
Clean the laser beam opening 7with a soft air jet. In cases of
heavy contamination, remove the dirt with a slightly damp Q-tip.
Do not exert any strong pressure!
For repair purposes the product may only be
opened by a professional.
Have the measuring tool repaired by qualified professionals and
only with original replacement parts. This ensures that the safety of
the measuring tool is maintained.
Storage
If you will not be using the product for a prolonged period of time,
remove the batteries and store it in a clean, dry place that is not
exposed to direct sunlight.
Disposal
The packaging is made entirely of recyclable materials, which you
may dispose of at local recycling facilities.
b
a
Observe the marking of the packaging materials for waste
separation, which are marked with abbreviations (a) and
numbers (b) with following meaning: 1–7: plastics/20–22:
paper and fibreboard/ 80–98: composite materials.
The product and packaging materials are recyclable, dispose
of it separately for better waste treatment. The Triman logo
is valid in France only.
Contact your local refuse disposal authority for more details
of how to dispose of your worn-out product.
To help protect the environment, please dispose of the product
properly when it has reached the end of its useful life and not
in the household waste. Information on collection points and
their opening hours can be obtained from your local authority.
Faulty or used batteries / rechargeable batteries must be recycled in
accordance with Directive 2006/66/EC and its amendments. Please
return the batteries/rechargeable batteries and/ or the product to the
available collection points.

15GB
Environmental damage through incorrect dis-
posal of the batteries / rechargeable batteries!
Batteries/rechargeable batteries may not be disposed of with the
usual domestic waste. They may contain toxic heavy metals and are
subject to hazardous waste treatment rules and regulations. The chemi-
cal symbols for heavy metals are as follows: Cd = cadmium, Hg =
mercury, Pb = lead. That is why you should dispose of used batteries/
rechargeable batteries at a local collection point.
Warranty
The product has been manufactured to strict quality guidelines and
meticulously examined before delivery. In the event of product defects
you have legal rights against the retailer of this product. Your legal rights
are not limited in any way by our warranty detailed below.
The warranty for this product is 3 years from the date of purchase.
Should this product show any fault in materials or manufacture within
3 years from the date of purchase, we will repair or replace it – at our
choice – free of charge to you.
The warranty period begins on the date of purchase. Please keep the
original sales receipt in a safe location. This document is required as
your proof of purchase. This warranty becomes void if the product has
been damaged, or used or maintained improperly.
The warranty applies to defects in material or manufacture. This warranty
does not cover product parts subject to normal wear, thus possibly con-
sidered consumables (e.g. batteries) or for damage to fragile parts, e.g.
switches, rechargeable batteries or glass parts.
Warranty claim procedure
To ensure quick processing of your case, please observe the following
instructions:
Please have the till receipt and the item number (e.g. IAN 123456_7890)
available as proof of purchase.
You will find the item number on the type plate, an engraving on the
front page of the instructions (bottom left), or as a sticker on the rear
or bottom of the appliance.

16 GB
If functional or other defects occur, please contact the service department
listed either by telephone or by e-mail.
You can return a defective product to us free of charge to the service
address that will be provided to you. Ensure that you enclose the proof
of purchase (till receipt) and information about what the defect is and
when it occurred.
Service
Service Great Britain
Tel.: 0800 404 7657

17FI
Merkkien selitykset......................................................Sivu 18
Yleistä.......................................................................................Sivu 18
Tarkoituksenmukainen käyttö ...................................................Sivu 18
Osien kuvaus.............................................................................Sivu 19
Toimituksen sisältö.....................................................................Sivu 19
Tekniset tiedot............................................................................Sivu 19
Turvallisuusohjeet..........................................................Sivu 20
Paristoja/akkuja koskevat turvallisuuohjeet ...........................Sivu 21
Käyttöönotto......................................................................Sivu 22
Paristojen sisäänasettaminen ja vaihtaminen ..........................Sivu 22
Päälle- ja poiskytkeminen.........................................................Sivu 22
Vaaitusautomaatin käyttäminen...............................................Sivu 23
Yksittäisten ja ristiviivalaserien käyttäminen ............................Sivu 23
Työskentely ilman vaaitusautomaattia.....................................Sivu 24
Käyttöohjeet ..............................................................................Sivu 24
Työskentely kolmijalan kanssa .................................................Sivu 24
Huolto ja puhdistus.......................................................Sivu 25
Säilytys ...................................................................................Sivu 25
Hävittäminen.....................................................................Sivu 25
Takuu........................................................................................Sivu 26
Toimiminen takuutapauksessa..................................................Sivu 27
Huoltopalvelu............................................................................Sivu 27

18 FI
Merkkien selitykset
Lue käyttöohje.
Räjähdysvaara!
Käytä suojakäsineitä!
Huomio!
Suojaa itsesi lasersäteilyltä!
Älä katso suoraan lasersäteeseen!
Ristilinjalaser PKLL 8 A3
Yleistä
Onnittelemme sinua uuden tuotteen hankinnasta. Valitsit erit-
täin korkealaatuisen tuotteen. Käyttöohje on osa tätä tuotetta.
Se sisältää tärkeitä turvallisuusohjeita sekä käyttöä ja hävitystä
koskevia ohjeita. Tutustu ennen tuotteen käyttöä huolellisesti kaikkiin käyt-
töja turvallisuusohjeisiin. Käytä tuotetta ainoastaan ohjeen mukaan ja
siinä mainittuihin tarkoituksiin. Anna kaikki ohjeet mukaan, jos luovutat
tuotteen edelleen.
Tarkoituksenmukainen käyttö
Tämä tuote on tarkoitettu vaaka- ja pystysuorien linjojen määrittämiseen
ja tarkastamiseen. Tuote soveltuu käytettäväksi ainoastaan suljetuilla toi-
mipaikoilla. Kaikenlainen muu käyttö tai tuotteeseen tehtävät muutokset
ovat tarkoituksenvastaisia toimia, joihin liittyy huomattavia vaaratilanteita.
Valmistaja ei vastaa vahingoista, jotka johtuvat tarkoituksenvastaisesta
käytöstä. Tuotetta ei ole tarkoitettu ammattimaiseen käyttöön.

19FI
Osien kuvaus
1H-painike (horisontaalin linjamäärityksen kytkeminen päälle/pois)
2
LED-merkkivalo (punainen: vaaitus pois päältä, vihreä: vaaitus p
äällä)
3V-painike (vertikaalin linjamäärityksen kytkeminen päälle ja pois)
4LUKKO-kytkin
5Paristolokero
5a Paristolokeron kansi
6-kolmijalan kiinnitusruuvi (Alapuoli)
7Lasersäteen aukko
8-Ruuvi (Ristiviivalaserin kiinnittämiseen -statiivin kierteisiin)
9Metalliavain ( -ruuvin kiinnittämiseksi pikavaihtolevyyn)
10 Varmistusruuvi (Statiivin kupukannan kulman säätämiseen jopa
90 asteen kulmassa)
11 Vesivaaka
11a Vipu (Pikavaihtolevyn kiinnittämiseen)
12 Pitkä kahva
13 Varmistusruuvi (Statiivin kupukannan kääntämiseen jopa 360 astetta
horisontaalisesti)
14 Varmistusruuvi (Keskiputken korkeuden säätämiseksi)
15 Muovirengas
16 Lukitusvipu (Jalkojen korkeuden säätämiseen)
17 Statiivin jalat
18 Statiivin kupukanta
19 Pikavaihtolevy
Toimituksen sisältö
1 ristiviivalaser
1 teline
2 1,5V-paristoa, tyyppi AA
1 käyttöohje
Tekniset tiedot
Käyttöjännite: 3V (tasavirta)
Työskentelyalue vähintään1): 8m
Vaaituksen tarkkuus: +/- 0,5mm/m
Itseisvaaitusalue tyypillisesti: ± 4°
Vaaitusaika tyypillisesti: n. 4 sekuntia
Käyttölämpötila: +5°C–35°C
Suhteellinen ilmankosteus maks.: ≤ 90%
Laserluokka: 2

20 FI
Aallonpituus (λ): 635nm
Maksimiteho P max: 1 mW
Kolmijalka:
Paristot: 2 x 1,5V-paristot, tyyppi AA
Tuotteen paino: 310g (ilman paristoja)
Kolmijalan paino: 330g
Tuotteen mitat: n. 70 x 61 x 90mm
Kolmijalan mitat: 65cm
1) Epäsuotuisat olosuhteet (esim. suora auringonvalo) voivat
pienentää työskentelyaluetta.
Turvallisuusohjeet
TUKEHTUMISVAARA! Pakkausmateriaaleilla (esim. kelmuilla
ja styroksilla) ei saa leikkiä. Pidä pakkausmateriaali aina lasten
ulottumattomissa. Pakkausmateriaalilla ei saa leikkiä.
Älä käytä mittatyökalua räjähdysalttiissa ympäristössä, jossa on
syttyviä nesteitä, kaasuja tai pölyä. Tuote saattaa tuottaa kipinöitä,
jotka sytyttävät pölyn tai höyryn.
Tuotetta voivat käyttää 8 vuotta täyttäneet lapset sekä henkilöt, jotka
ovat fyysisiltä tai psyykkisiltä kyvyiltään tai aisteiltaan rajoittuneita tai
joilla ei ole kokemusta tai tietoa laitteen käytöstä, jos he käyttävät
laitetta valvonnan alaisina tai heitä on opastettu laitteen turvallisessa
käytössä ja he ovat tietoisia laitteeseen liittyvistä vaaroista. Lapset
eivät saa leikkiä tuotteella. Lapset eivät saa puhdistaa eikä huoltaa
laitetta, paitsi jos toiminta tapahtuu valvonnan alaisena.
Älä jätä tuotetta valvomatta, kun se on käytössä, ja kytke laite pois
päältä käytön jälkeen. Läheisyydessä olevat henkilöt voivat sokeutua
lasersäteestä. Silmävaurioiden riski.
Suojaa tuotetta kosteudelta ja suoralta auringonpaisteelta.
Älä koskaan altista tuotetta äärimmäisille lämpötiloille tai lämpötilan
muutoksille. Älä jätä sitä esim. pitkäksi aikaa autoon. Anna tuotteen
lämpötilan tasaantua voimakkaiden lämpötilanvaihteluiden yhtey-
dessä ennen sen käyttöönottoa. Äärimmäiset lämpötilat tai lämpö-
tilanvaihtelut voivat heikentää tuotteen tarkkuutta.
Vältä mittalaitteen iskuja ja pudottamista. Mittalaitteen vahingoittu-
minen saattaa aiheuttaa sen toimintatarkkuuteen. Voimakkaan
iskun tai pudottamisen jälkeen vertaa lasersädettä tunnetun vaaka-
suoran tai pystysuoran vertaislinjan kanssa.
Kytke mittalaite pois päältä kuljetuksen ajaksi. Pois kytkiessä heiluri-
laite lukittuu, muutoin se saattaa vahingoittua voimakkaissa liikkeissä.
Älä tuo mittalaitetta sydämentahdistimen lähelle. Mittalaitteen sisällä
oleva magneetti luo kentän, joka saattaa häiritä tahdistimen toimintaa.
Table of contents
Languages:
Other Parkside Laser Level manuals

Parkside
Parkside PKLL 7 B2 User manual

Parkside
Parkside 304474 User manual

Parkside
Parkside PKLL 10 B3 User manual

Parkside
Parkside 338152-2001 User manual

Parkside
Parkside PKLL 10 B3 User manual

Parkside
Parkside 322432-1901 User manual

Parkside
Parkside PKLL 7 A1 User manual

Parkside
Parkside PKLL 8 A2 User manual

Parkside
Parkside PKLL 7 E4 User manual