6 GB
Introduction
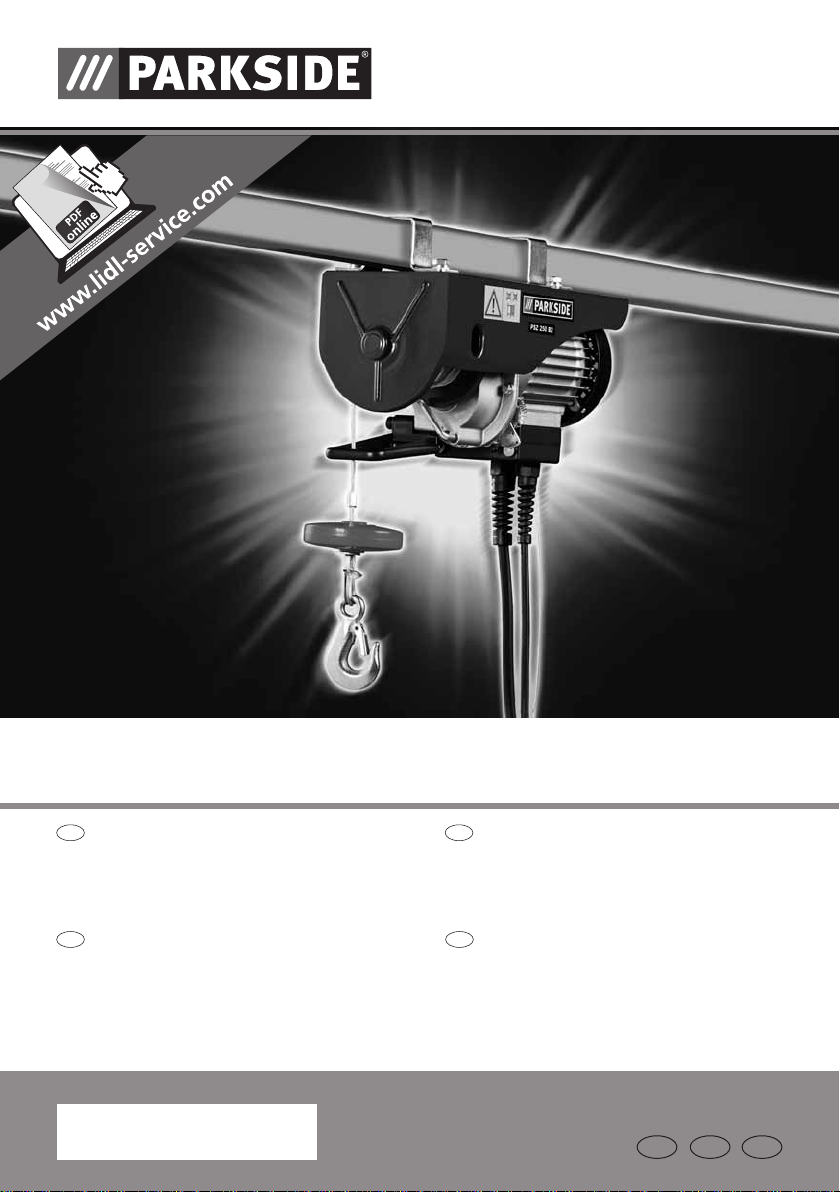
Cable winch PSZ 250 B2
Introduction
Please familiarise yourself with the appli-
ance before preparing it for use and using
it for the first time. To do so, please care-
fully read the following operating instructions and
the important safety information. Use the product
only as described and for the indicated purpose.
Keep these instructions in a safe place. If you pass
the device on to anyone else, please ensure that
you also pass on all the documentation.
The cable hoist is used to hoist and lower loads in
indoor spaces in accordance with the equipment
power. Only use the device as described. Any other
use is not intended. The user / operator, not the ma-
nufacturer, is liable for damages or any type of injury
resulting from any other use. Please note that our de-
vices were not constructed for commercial, manual,
or industrial use. We do not accept any warranty li-
ability if the device is used for commercial, manual,
or industrial operations, or activities similar to these.
Intended use
Scope of delivery
Technical Data
Parts description
1
2
4
6
8
10
11
12
13
15
14
16
3
5
7
9
Mounting bracket
Hoisting drum
Shut-off weight
Emergency stop switch
Remote control unit
Control lead
Deflection pulley
Maximum cable length lever
Auto-stop mechanism lever
Steel cable
Hook
Push button
Mains lead
Motor
Additional hook
1 Cable hoist
2 Mounting bracket with mounting materials (Fig. C)
1 Deflection pulley with additional hook and
mounting materials (see Fig. D)
1 Set of instructions for use
Duty type 3–20 % - 10 min: S3 = Intermittent duty
without the effect of starting. During a 10 min period
the max. operating time is 20 % (2 min).
Mechanical group M1.
The rated power of the device does not vary with
the position of the load.
The value of the A-rated noise emission in the
operator position is less than 70 dB.
The cable hoist must be operated at ambient tempe-
ratures from 0 °C to 40 °C and a relative humidity
below 85 %. Height above sea level: max. 1000 m.
Voltage: 230 V~50 Hz
Rated current: 2.2 A
Power input: 500 W
Duty type: S3 20 % 10 min
Rated load: 125 / 250 kg (without /
with deflection pulley)
Hoisting height: 11.5 / 5.7 m (without / with
deflection pulley)
Rated speed: 8 / 4 m / min (without / with
deflection pulley)
Steel cable
diameter: 3.0 mm
Steel cable
tensile strength: 1870 N / mm2
Insulating level: B
Degree of
protection: IP54
Power unit class: M1
Net weight: 9.3 kg
Gross weight: 10.5 kg
Mounting opening for hook in deflection
operation