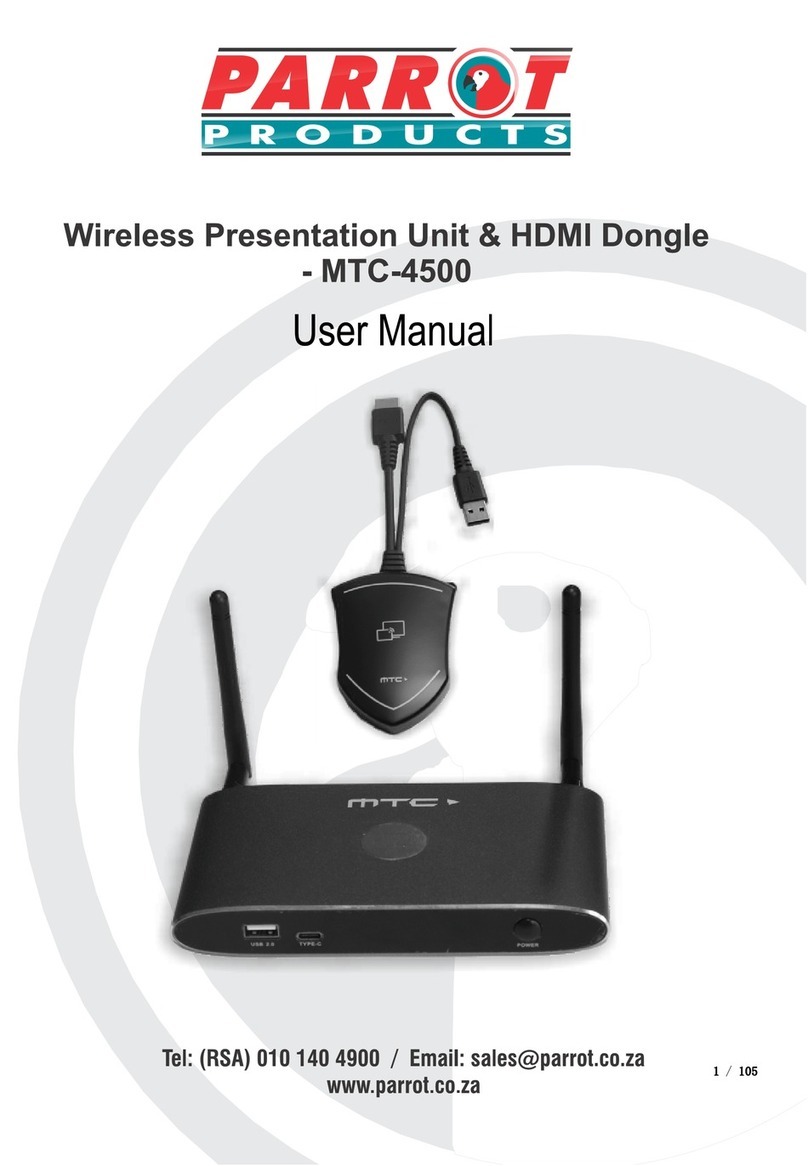
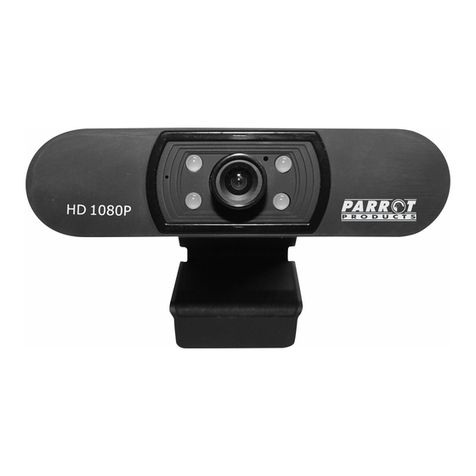
Parrot Products VC0003 User manual

User Manual
Tel: (RSA) 010 140 4900 / Email: [email protected]
www.parrot.co.za
Video Conference Wide Angle Camera 4K
- VC0003

Content
1. Camera Installation
.....................................................................................................................................................
3
1.1 Camera Interfaces
................................................................................................................................................
3
1.2 Camera Operation
................................................................................................................................................
3
2. Product Overview
.......................................................................................................................................................
3
2.1 Product Introduction
...........................................................................................................................................
3
2.1.1
2.1.2
Dimension
.....................................................................................................................................................
3
Accessory
......................................................................................................................................................
4
2.2 Main Features
......................................................................................................................................................
4
2.3 Technical Parameter
............................................................................................................................................
5
2.4 Interfaces Instruction
...........................................................................................................................................
6
2.4.1 External Interface
.........................................................................................................................................
6
3. Application Instruction
...............................................................................................................................................
7
3.1 Remote Control
....................................................................................................................................................
7
3.1.1 Keys Introduction
..........................................................................................................................................
7
3.1.2 Applications
..................................................................................................................................................
8
3.2 Menu Introduction
...............................................................................................................................................
9
3.2.1 Main Menu
...................................................................................................................................................
9-13
4. Maintenance and Troubleshooting
.........................................................................................................................
14
4.1 Camera Maintenance
........................................................................................................................................
14
4.2 Troubleshooting
.................................................................................................................................................
14
Attention
.....................................................................................................................................................
2

2
Attention
This manual introduces funcons, installaons and operaons for this camera in detail. Please read this
manual carefully before installaon and use.
1. Cautions
1.1 Avoid damage to product caused by heavy pressure, strong vibraon or immersion during transportaon,
storage and installaon.
1.2 Housing of this product is made of organic materials. Do not expose it to any liquid, gas or solids which may
corrode the shell.
1.3 Do not expose the product to rain or moisture.
1.4 To prevent the risk of electric shock, do not open the case. Installaon and maintenance should only be
carried out by qualified technicians.
1.5 Do not use the product beyond the specified temperature, humidity or power supply specificaons.
1.6 Wipe it with a so dry cloth when cleaning the camera lens. Wipe it gently with a mild detergent if needed.
Do not use strong or corrosive detergents to avoid scratching the lens and affecng the image.
1.7 This product contains no parts which can be maintained by users themselves. Any damage caused by
dismantling the product by user without permission is not covered by warranty.
2. Electrical Safety
Installaon and use of this product must strictly comply with local electrical safety standards.
3. Install
3.1 Do not rotate the camera head constantly, otherwise it may cause technical failure;
3.2 This product should be placed on a stable desktop or other horizontal surface. Do not install the product
obliquely, otherwise it may display a disposioned image.
3.3 Ensure there are no obstacles within rotaon range of the clamp / bracket.
3.4 Do not power on unless its completely installed.
4. Magnec Interference
Electromagnec fields at specific frequencies may affect the video image. This product is Class A. It may cause
radio interference in household applicaon. Appropriate measure is required.

3
1. Camera Installation
1.1 Camera Interfaces
Figure 1.1 Product Interfaces
1.Camera Lens 4.Tripod fixing hole 7.USB3.0 interface
2.Indicator light 5.Posioning hole
3.Built-in MIC 6.Bracket
1.2 Camera Operation
1) Product Installaon: Secure the device on a LCD screen, top of computer; place directly on a desk ordesk
2) Connect camera via USB cable to computer, video conference terminal or other USB input device, log into the
video conference soware (such as Skype/Teams/Zoom) and select a video device to have image output.
tripod mounng.
on

4
Figure 2.2 Product Dimension
2.1.2 Accessory
Please check below standard and oponal accessories when unpacking the box.
2.2 Main Features
VC0003 is a 4K ultra-high-definion ePTZ camera with a new design. With AI intelligence, images are framed
according to the number of people in the scene, and faces are centered in the frame . This model is equipped with
superior funcons, which employs advanced ISP processing algorithms to provide vivid images with evenly
clear brightness, strong colour layering, high resoluon, and fantasc colour rendion. Its easy and convenient to
install and maintain, stable and reliable.
Ultra HD 4K Resoluon: 1/2.8 inch high quality CMOS sensor. Resoluon is up to 4K with frame rate up to
30fps (MJPG) or 30fps (H.264); compable with 1080P and 720P.
ePTZ: ePTZ and 3X digital Zoom;
Built-in MIC: Built-inTwo omni-direconal MIC pickups; with unique noise suppression algorithm, effecve
pickup distance up to 6 meters.
Standard Accessory
IR Remote Control
USB3.0 Cable
User Manual
2.Product Overview
2.1.1 Dimension

5
Auto Framing: Employing superior face detecon algorithms to intelligently and automacally frame
the number of people in the scene and centering their faces.
Wide FOV: 100° wide angle and small distoron lens opons.
Video output interface: Video output interface USB 3.0.
Mulple Audio/Video Compression Standard: Supports H.264, MJPG, YUY2, NV12 video compression, to
Low Noise and High SNR: Super high SNR image is achieved with low noise CMOS. Even in the case of
ultra-low illuminaon, the picture remains clean and clear.
Mulple Installaons: Standard equipped with mold clamp. Easy to install on any devices, such as LCD
screen, laptop, table and tripod.
Easy to Use: No need to download driver; USB 3.0 Plug and play;
Wide Applicaons: Personal video conferencing, enterprise video conferencing, collaboraon meeng, etc.
2.3 Technical Parameter
Model
Camera Parameter
Sensor 1/2.8 inch high quality 4K CMOS sensor
Effecve Pixels 8.28MP,16:9
Video Interface 1 Channel USB 3.0 output, Type B; Support audio signal output
Audio input 2*Built-in MIC pickup
Video Format MJPG:3840*2160@30 /2560*1440@30 /1920*1080@30 /1600*896@30 /1280*720@30
/1024*576@30 /960*540@30 /800*600@30 /800*448@30 /720*576@30/
720*480@30 /640*480@30 /640*360@30 /480*270@30 /352*288@30 /320*240@30
H264:3840*2160@30 /2560*1440@30 /1920*1080@30 /1600*896@30 /1280*720@30
/1024*576@30 /960*540@30 /800*600@30 /800*448@30 /720*576@30/
720*480@30 /640*480@30 /640*360@30 /480*270@30 /352*288@30 /320*240@30
YUY2
:
1920*1080@30 /1280*720@30 /1024*576@30 /800*600@30 /800*448@30 /640*480@30
/640*360@30 /480*270@30 /320*180@30
NV12
:
1920*1080@15 /1280*720@30 /1024*576@30 /800*600@30 /800*448@30 /640*480@30
/640*360@30 /480*270@30 /320*180@30
View Angle 110° /100°(H)/53°(V)
Focal Length f=2.26mm
Aperture F1.8
Digital Zoom 3X
Minimum
Illuminaon 0.1Lux (F1.8, AGC ON)
White Balance Auto / Manual
Focus Manual
Exposure Auto / Manual/
BLC On/Off
SNR ≥50dB
USB Feature
Operaon Systems Windows 7(1080p or lower), Windows 8.1, Windows 10 ; macOS™ 10.10 or higher; Android;Linux
(UVC support)
Video
Compression
Format
YUY2, NV12, MJPG, H264
USB Audio Support
USB
Communicaon
Protocol
UVC & UAC
PTZ Control Support EPTZ
(D)

6
Hardware
Requirement 2.4 GHz Intel@ Core 2 Duo or higher, 2GB or higher, USB 3.0 port (USB3.0 for 4K)
Other Parameter
Input Voltage 5V
Input Current 1A(max)
Power
Consumpon
5W(max)
Stored Temperature -10℃~+60℃
Stored Humidity 20%~90%
Working
Temperature
-10℃~+50℃
Working Humidity 20%~80%
Dimension 180mm×42.5mm×46.3mm
Weight 0.3kg
Working
Environment Indoor
Accessory User Manual, USB 3.0 cable
2.4 Interfaces Instruction
2.4.1 External Interface
Figure 2.4 Wiring Diagram
Computer, TV
or Media Player
with video input
interface

7
3. Application Instruction
3.1 Remote Control
3.1.1 Keys Introduction
1.Standby Key
Device enters standby mode aer pressing it once and the device re-displays the picture aer pressing it
again.
2.Camera Selecon
Select the camera address to control.
3. Number key
Set or call 0-9 presets
4. 【*】,
【
#
】
key
5.Focus Control
【Auto】: None 【Manual】: None
Note: The camera is a fixed focus lens
6.Zoom Control
ZOOM +: press【ZOOM +】key to zoom in
ZOOM - : press 【ZOOM -】key to zoom out
7.Set and Clear Presets
Set Preset: press 【SET PRESET】buon, and then press the number key 0-9
to set preset posions.
Clear Preset: press 【CLEAR PRESET】buon, and then press the number key 0-9
to clear preset posions.
8.Pan/Tilt Control
Up: press Down: press
Le: press Right: press
Press and hold the up/down/le/right key, the pan/lt movements will keep running.
【HOME】:Camera lens back to the middle posion; Enter next menu
9.
【
BLC ON/OFF
】:
Turn on or off the back light compensaon
10.Menu Seng:Enter/exit the OSD menu or return to the previous menu.
11.Camera Remote Control Address Seng
【*】+【#】+【F1】:Camera Address No.1
【*】+【#】+【F2】:Camera Address No.2
【*】+【#】+【F3】:Camera Address No.3
【*】+【#】+【F4】:Camera Address No.4
12.Key Combinaon
1)【#】+【#】+【#】:Clear all presets 2)【*】+【#】+【6】: Restore factory defaults
3)【*】+【#】+【9】:Flip switch 4)【*】+【#】+【4】:Menu set to English
5)【*】+【#】+【3】:Menu set to Chinese
6
6
7
10
8
7
9

8
2) When a key-combinaon is required, do it in sequence. For example,“ 【*】
+
【#】
+
【F1】
”means press“
【*】
”first
and then press“【#】” and last press“【F1】”.
1
)
Camera Selecon
Select the camera address to control.
2
)
Pan/Tilt Control
Up: press Down: press
Le: press Right: press
Back to middle posion: press“【HOME】”
Press and hold the up/down/le/right key, the pan/lt
movements will keep running, from slow to fast, unl it
runs to the endpoint; stop as soon as the key is released.
3
)
Set and Clear Presets
Save Preset: press 【SET PRESET】buon, and then press
the number key 0-9 to set preset posions.
Note: 10 presets via remote control.
Call Preset: Press a number key 0-9 directly to call a
preset posion.
Note: If the number key is not preset, it is invalid.
Clear Preset: press 【CLEAR PRESET】buon, and then
press the number key 0-9 to clear preset posions.
Note : press the
【
#
】
key three mes connually to clear
all presets.
4
)
Zoom Control
ZOOM +: press【ZOOM +】key to zoom in
ZOOM -: press 【ZOOM -】key to zoom out
Press and hold the keys, the acon of focus will keep
connue and stop as soon as the key is released.
3.1.2 Applications
1) In this manual, “press the key” means a click rather than a long-press, and a special note will be given if a
long-press more than one second is required.

9
Focus + (near):Press【FOCUS +】None
Focus - (far): Press【FOCUS -】None
Auto focus: not supported
Manual focus: not supported
6) Camera Remote Control Address Seng
【*】+【#】+【F1】:Camera Address No.1
【*】+【#】+【F2】:Camera Address No.2
【*】+【#】+【F3】:Camera Address No.3
【*】+【#】+【F4】:Camera Address No.4
3.2 Menu Introduction
3.2.1 Main Menu
Press 【MENU】key under MJPG, YUY2, NV12 or H264 compression encoding format output to display the
menu, using scroll arrow to point at or highlight the selected items.
MENU
=================
Language English
(
Setup
)
(
Exposure
)
(
Color
)
(
Image
)
(
Noise Reduction
)
(
Version
)
(
Restore Default
)
[
↑↓
]Select [
← →
]Change Value
1) Language
1. Language Seng:press 【← →】key to select Language
5)Focus Control

10
Move the pointer to (Setup) in the Main Menu, click the【HOME】key and enter into the (System Seng) as
shown below,
Setup
=================
Image Style Default
(Auto Framing)
[
↑↓
]Select [
← →
]Change Value
Image Style: default / standard / clear / bright / so can be set
Intelligent zoom: on / off
3) Exposure Setting
Move the pointer to EXPOSURE in the Main Menu, click the【HOME】and enter the (EXPOSURE SET) as follows:
EXPOSURE
===============
Mode Auto
EV OFF
BLC OFF
Flicker 50Hz
G.Limit 6
DRC 4
[
↑↓
]Select [
← →
]Change Value
Mode: Auto, Manual, Shuer priority and Brightness priority.
EV: On/Off (only available in auto mode)
Compensaon Level: -7~7 (only available in auto mode when EV is ON)
BLC: ON/OFF for opons (only available in auto mode)
An-Flicker: OFF/50Hz/60Hz for opons (only available in Auto/Iris priority/Brightness priority modes)
Gain limit: 0~15(only available in Auto/ Iris priority /Brightness priority mode)
2) System Setting

11
WDR: Off, 1~8
ShuerPriority:1/30,1/50,1/60,1/90,1/100,1/120,1/180,1/250,1/350,1/500,1/1000,1/2000,1/3000,1/4000,1/6
000, 1/10000 (only available in Manual and Shuer priority mode)
Brightness: 0~23 (only available in Brightness priority mode)
4) Colour
Move the pointer to the (COLOR) in the Main Menu, click the【HOME】and enter the (COLOR sub menu) as
follow,
COLOR
================
WB Mode Auto
Saturation 100%
Hue 4
AWB Sensitivity High
[↑↓]Select [← →]Change Value
WB Mode: Auto, Manual, One Push, Specified color temperature
Saturaon: 60%,70%,80%,90%,100%,110%,120%,130%,140%,150%,160%,170%,180%,190%,200%
AWB Sensivity: high/middle/low(only available in automac mode)
Chroma: 0~8

12
IMAGE
================
Brightness 7
Contrast 7
Sharpness 5
Flip-H OFF
Flip-V OFF
B&W-Mode Color
Gamma Default
Low-Light Mode Close
[
↑↓
]Select [
← →
]Change Value
Brightness: 0~14
Contrast: 0~14
Sharpness: 0~15
Flip-H: On/Off
Flip-V: On/Off
B&W Mode: color, black/white
Gamma: Default/0.34/0.39/0.47/0.5
Minimum Illuminaon: On/Off
6) Noise Reduction
Move the pointer to the (NOISE REDUCTION) in the Menu, click the【HOME】and enter the (NOISE REDUCTION)
as follow,
NOISE REDUCTION
=================
NR-2D OFF
NR-3D 4
[
↑↓
]Select [
← →
]Change Value
2D Noise Reducon: Auto, close, 1~7
3D Noise Reducon: Close, 1~8
5) Image
Move the pointer to the (IMAGE) in the Menu, click the【HOME 】and enter into the (IMAGE sub menu) as
follow,

13
VERSION
=================
Camcra Version 1.0.0 2020-12-16
[
↑↓
]Select [
← →
]Change Value
8) Restore Default
Move the pointer to the (RESTORE DEFAULT) in the Main Menu, click the【HOME】and enter the (RESTORE
DEFAULT) as follow,
RESTORE DEFAULT
=================
Restore Default? NO
[↑↓]Select [← →]Change Value
Restore default: YES/NO. Color style and video format cannot be restored to factory default
Note: If the address of former remoter is not 1 but another one from 2, 3, 4, the corresponding camera address
will restore to 1 when all parameters or system parameters are restored. User should change the remoter
address to be 1 (press No.1 according to the camera so to get normal operaon)
7) Version
Move the pointer to the (VERSION) in the Main Menu, click the【HOME】and enter the (VERSION) as follow,

14
4.2 Troubleshooting
1) No video output
a. Check if the USB cable is connected well and power indicator light is ON.
b.
c.
Restart the computer to check if its working properly
d.
Check the video output cable or video display if its working properly
Check whether the camera is recognized by the computer
2) No image sometimes
a. Check the USB cable if there’s any wear and tear and if its connected properly
4. Maintenance and Troubleshoong
4.1 Camera Maintenance
1) Please power off the camera and disconnect the power adapter and socket, if it’s not used for a long run.
2) Use so cloth or ssue to clean the camera cover.
3) Wipe it with a so, dry cloth when cleaning the camera lens. Wipe it gently with a mild detergent if needed. Do
not use strong or corrosive detergents to avoid scratching the lens and affecng the video quality.
Table of contents
Other Parrot Products Conference System manuals