manuals.online logo
Brands
  1. Home
  2. •
  3. Brands
  4. •
  5. Comat Releco
  6. •
  7. Conference System
  8. •
  9. Comat Releco CMS-10R Series User manual

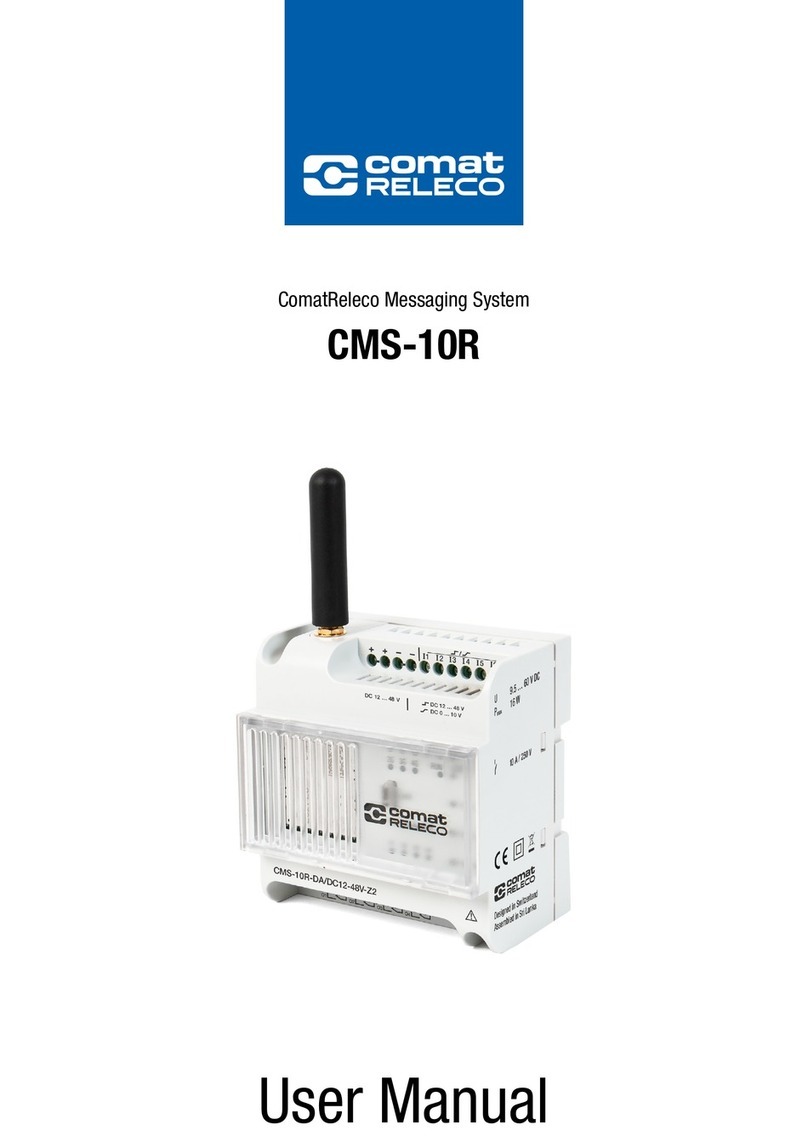
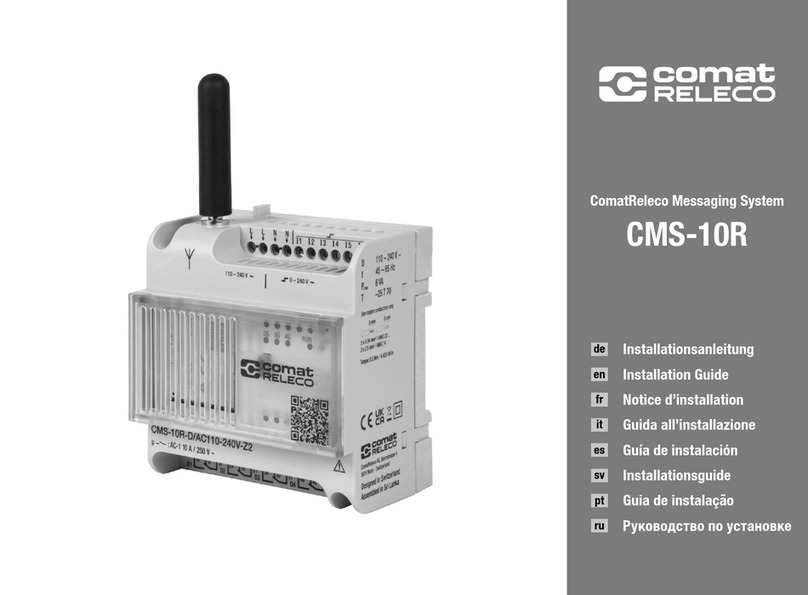
Comat Releco CMS-10R Series User manual

45013-031-54-002
WARNUNG: Vor der Benutzung die beiliegenden Hinweise aufmerksam lesen!
WARNUNG: Die Installation dieses Gerätes darf nur von qualifiziertem Personal
erfolgen.
WARNUNG: Das Gerät muss gemäß den nationalen Vorschriften und
Spezifikationen installiert und betrieben werden.
WARNUNG: Die Bedienungsanleitung muss gelesen werden!
Bei Nichtbeachtung der Hinweise sind schwere Körperverletzungen und / oder Sach-
schäden nicht auszuschliessen.
WARNUNG: Dieses Gerät ist nicht geeignet, um sensible Anlagen oder zeitkritische
Vorgänge zu überwachen. Mobil-Netzausfälle oder Unterbrüche in der Spannungsver-
sorgung können die Überwachung stören.
WARNUNG: Dieses Gerät ist nicht für den Einsatz in Nassbereichen, explosionsgefähr-
deten Bereichen (z.B. in Bereichen,in denen die Luft hohe Konzentrationen von brenn-
baren Chemikalien, Dämpfen oder Partikeln wie Getreide, Staub oder Metallpulver
aufweist) oder in der Nähe von Medizinprodukten geeignet.
WARNUNG: Beim Anschliessen an das 110 .. 240 V AC Netz unbedingt beachten, dass
die Geräte-Speisung sowie die Speisung der Eingänge von der gleichen Phase stammt.
WARNUNG: Es darf keine Spannung von über 240 V AC (für CMS-10R-D), bzw. 48 V DC
(für CMS-10R-DA und -DAC) am Gerät angelegt werden.
WARNUNG: Montieren und demontieren Sie das CMS-10R nur im spannungsfreien
Zustand. Gilt für das Gerät und alle Ein- und Ausgänge.
WARNUNG: Bei der elektrischen Installation sind die Vorschriften und gängigen Normen
einzuhalten.
WARNUNG: Das Gerät ist für den Einbau in einen Schaltschrank, Verteiler- oder Klem-
menkasten vorgesehen. Das Gerät darf nur im eingebauten Zustand betrieben
werden. Dieser Schaltschrank muss den Anforderungen eines Brandschutz-
gehäuses der Sicherheitsnorm IEC/EN 62368-1 entsprechen und für den Betrieb
mit Geräten der Schutzklasse von mindestens IP20 (nach IEC/EN 60529) ausgelegt
sein. Zudem muss er adäquaten Schutz gegen elektrischen Schlag bieten
(Berührungsschutz).
WARNUNG: Das Gerät muss durch eine installationsseitig vorgesehene, adäquate
Trennvorrichtung (Sicherung, Sicherungsautomat, etc.) von der Spannungsversorgung
getrennt werden können.
Inbetriebnahme über das ComatReleco-IoT-Portal
Das CMS-10R kann direkt über IoT.Comatreleco.com in Betrieb genommen und konfiguriert
werden. Die Konfiguration wird nach dem Koppeln des Geräts über das ComatReleco-IoT-Portal
geladen.
Folgen Sie dazu untenstehende Schritte:
1. Trennen Sie alle Stromversorgungen des Gerätes.
2. Verdrahten Sie alle nötigen Verbindungen zum Gerät.
3. Einschalten der Gerätespeisung.
4. Das CMS-10R beginnt nun sich zu initialisieren. Nach maximal einer Minute sollte das
Gerät betriebsbereit sein: Led «Run» und entweder «4G», «3G» oder «2G» müssen grün
leuchten. Hinweis: Das Gerät wählt automatisch das Netzwerk mit der besten Feldstärke
am Einsatzort aus.
5. Falls nicht vorhanden, muss auf dem Comatreleco-IoT-Portal ein neues Konto eröffnet
werden. Beachten Sie, dass die Eröffnung eines neuen Kontos mit einem PC durchge-
führt werden muss, dies ist per Android- oder iOS-App nicht möglich.
6. Nach dem Login «Neues Gerät hinzufügen» selektieren und den verwendeten Gerätetyp
auswählen.
7. Das Gerät wird unter der Nennung der Serienummer mit dem Benutzerkonto gekoppelt.
8. Nach erfolgreicher Kopplung des Gerätes muss das Dienstleistungsprofil ausgewählt
werden.
9. Die Gerätekonfiguration kann danach durchgeführt werden (falls nicht schon im Voraus
geschehen).
Kurzanleitung
Bref instructions
Short instruction manual
CMS-10R... (ComatReleco Messaging System)
Vollständige Bedienungsanleitung finden Sie auf comatreleco.com
Les instructions d’utilisation complètes sont disponibles sur comatreleco.com.
Complete operating instructions can be found on comatreleco.com
CMS-10R...
11
O2
14 12 2124 22 3134 32 4144 42
O3 O4O1
1114 12
O1
1114 12
O1
CMS-10…
L
N
LAST
CHARGE
LOAD
CMS-10…
L
N
LAST
CHARGE
LOAD
CMS-10...
L1
L2
L3
12 3 4 5 6
CMS-10R-DA/DC…V CMS-10R-DA/DC…V
CMS-10R-D/AC…V
N
L
N
L3
L2
L1
L L N N 1 2 3 4 5 6 L L N N 12 3 4 5 6
CMS-10R-DAC/DC…V
1- 4: oder / ou /or 0 -10 V
0…10 V
4... 20 mA
5 -6: 4 -20 mA
1- 6: oder / ou /or 0 -10 V
Sig.
0…10 V
Sig. Sig.
12 3 4 5 6
12 3 4 5 6
1- 4: oder / ou /or 0 -10 V
0…10 V
4... 20 mA
5 -6: 4 -20 mA
1- 6: oder / ou /or 0 -10 V
Sig.
0…10 V
Sig. Sig.
12 3 4 5 6
12 3 4 5 6
Français / English
Deutsch
Technische Daten
Betriebstemperatur –25 … +55°C
Relative Luftfeuchtigkeit, nicht kondensierend 10 … 95 %
Schutzart IP20
Ausgangsstrom max. 10 A
Summenstrom max. 20 A
Online Kurzanleitung
Manuel court en ligne
Online short manual
ComatReleco AG | Bernstrasse 4 | CH-3076 Worb | Phone +41 31 838 55 77 | Fa× +41 31 838 55 99 | comatreleco.com | info@comatreleco.com
EC-Konformitätserklärung | EC Declaration of conformity |
Déclaration de conformité CE
Dieses Gerät entspricht den Bestimmungen der folgenden EU-Richtlinien:
This device complies with the provisions of the following EU directives:
Cet appareil est conforme aux dispositions des directives européennes
suivantes :
• EMC Directive 2014/30/EU
• Low Voltage Directive 2014/35/EU
• RoHS Directive 2011/65/EU
und erfüllt die Anforderungen der folgenden harmonisierten Normen:
and comply with the requirements of the following harmonised standards:
et répond aux exigences des normes harmonisées suivantes:
• EN 55032 (CISPR-32)
• EN 60730-1
• EN 61000-6-2
• EN 61000-6-3
Dieses Gerät wurde gemäss den Anforderungen der IEC 60730-1 geprüft.
This device has been tested in accordance with the requirements specified in IEC 60730-1.
Cet appareil a été testé conformément aux exigences spécifiées dans la norme CEI 60730-1.
Mise en service via le portail IoT de ComatReleco
Le CMS-10R peut être mis en service et configuré directement via IoT.Comatreleco.com. La
configuration peut être téléchargée après couplage de l’appareil via le portail IoT.
Veuillez suivre les instructions ci-dessous.
1. Débranchez toutes les alimentations électriques de l’appareil.
2. Câblez toutes les connexions nécessaires à l’appareil.
3. Mettez l’appareil sous tension.
4. Le CMS-10R démarre l’initialisation. Après 1 minute maximum, l’appareil doit être prêt
à fonctionner: Les LED «run» et «4G», «3G» ou «2G» doivent être allumées en
vert. Remarque: l’appareil sélectionne automatiquement le réseau ayant la meilleure
intensité de champ sur le site d’utilisation.
5. Si un compte n’est pas déjà disponible, un nouveau compte doit être ouvert dans
le portail IoT de Comatreleco. Notez que l’ouverture d’un nouveau compte doit être
effectuée avec un PC et ne peut pas se faire via l’App Android ou iOS.
6. Après vous être connecté, pressez le bouton «ajouter un appareil» et sélectionnez le
type d’appareil approprié.
7. L’appareil sera couplé avec le compte propriétaire en donnant le numéro de série.
8. Une fois l’appareil couplé, le profil de service doit être sélectionné.
9. La configuration de l’appareil peut maintenant être achevée (si ce n’est pas déjà fait).
English
Technical Data
Operating temperature –25 … +55°C
Relative humidity, no condensation 10 … 95 %
Degree of protection IP20
Output current max. 10 A
Added currents max. 20 A
WARNING: Carefully read the enclosed instructions before using the device!
WARNING: Only skilled qualified personnel shall perform the installation of the
device.
WARNING: The device must be installed and operated according to the national
regulations and specifications.
WARNING: Read the user manual first!
Disregarding this warning may result in damage to equipment and/or serious personal
injury.
WARNING: This device is not suitable for monitoring sensitive systems or time-critical
processes. Mobile network failures or interruptions to the power supply may adversely
affect monitoring.
WARNING: This device is not foreseen to be used in wet areas, potentially explosive
atmospheres (e.g. areas where the air cointains high levels of flammable chemicals,
vapours or particles suich as grain, dust or metal powders) or in proximity to medical
devices.
WARNING: When connecting to the 110..240V AC mains (CMS-10R-D), ensure that the
device power supply and the supply of the inputs come from the same phase.
WARNING: No voltages above 240V AC (for CMS-10R-D), resp. 48 V DC
(for CMS-10R-DA and -DAC) shall be applied to the devices.
WARNING: Only mount and remove the CMS-10R when the power to the device and all
its inputs/outputs is disconnected.
WARNING: During electrical installation, comply with the usual standards and
regulations.
WARNING: The device is foreseen for mounting in an electrical cabinet, distribution
board or junction box. The device shall operate only in mounted state. The electrical
cabinet shall fulfill the fire protection requirements for a cabinet according to the safety
standard IEC/EN 62368-1. Furthermore it shall be suitable for operating devices having
a protection class of at least IP20 (according to IEC/EN 60529). In addition is shall
provide adequate protection against electric shock (protection against contact).
WARNING: The device must be separated from the power supply by an adequate
separator (fuse, circuit breaker, etc.), which is to be integrated in the installation.
Commissioning via the ComatReleco IoT portal
The CMS-10R can be commissioned and configured directly through IoT.Comatreleco.com. The
configuration can be uploaded after pairing of the device via the IoT portal.
Please follow below instructions.
1. Disconnect all power supplies to the device.
2. Wire all necessary connections to the device.
3. Switch on the power supply of the device.
4. The CMS-10R starts the initialisation. After max. 1 minute the device should be ready for
operation: Led «run» and either «4G», «3G» or «2G» must be turned on green. Remark:
the device selects automatically the network with the best field strength at the site of
operation.
5. If not already available, a new account must be opened in the Comatreleco IoT portal.
Be aware that the opening of a new account must be performed with a PC and cannot
be done via Androids or iOS App.
6. After login press the button «add a device» and select the right device type.
7. The device will be paired with the owner account by giving the serial number.
8. After successful pairing of the device, the service profile must be selected.
9. The configuration of the device can now be completed (in case not already done).
Français
Données techniques
Température de service –25 … +55°C
Humidité relative de l’air, sans condensation 10 … 95 %
Indice de protection IP20
Courant de sortie max. 10 A
Courant de somme max. 20 A
AVERTISSEMENT: Lire attentivement les instructions jointes avant d’utiliser
l’appareil!
AVERTISSEMENT: Seul un personnel qualifié et compétent peut effectuer
l’installation de l’appareil.
AVERTISSEMENT: L’appareil doit être installé et utilisé conformément aux
réglementations et spécifications nationales.
AVERTISSEMENT: D’abord lire le manuel d’utilisation!
Le non-respect de cet avertissement peut entraîner des dommages matériels et/ou des
blessures graves.
AVERTISSEMENT: Cet appareil ne convient pas à la surveillance de systèmes sensibles
ou de processus temporels critiques. Des pannes du réseau mobile ou des coupures
d’alimentation électrique peuvent perturber la surveillance.
AVERTISSEMENT: Cet appareil n’est pas prévu pour être utilisé dans des zones
humides, dans des atmosphères potentiellement explosives (par ex. zones où l’air
contient des niveaux élevés de produits chimiques inflammables, de vapeurs ou de
particules comme grains, poussières ou poudres métalliques) ou à proximité
de dispositifs médicaux.
AVERTISSEMENT: Lors du raccordement au secteur 110...240Vca (CMS-10R-D),
s’assurer que l’alimentation électrique de l’appareil et celle des entrées proviennent de
la même phase.
AVERTISSEMENT: Aucune tension supérieure à 240Vca (pour CMS-10R-D) ou à 48Vcc
(pour CMS-10R-DA et -DAC) ne doit être appliquée aux appareils.
AVERTISSEMENT: Ne monter et déposer le CMS-10R que lorsque l’alimentation à
l’appareil et à toutes ses entrées/sorties est coupée.
AVERTISSEMENT: Lors de l’installation électrique, respecter les normes et réglementa-
tions en vigueur.
AVERTISSEMENT: L’appareil est prévu pour être monté dans une armoire électrique,
un tableau de distribution ou une boîte de jonction. L’appareil ne doit fonctionner qu’à
l’état monté. L’armoire électrique doit satisfaire aux exigences de protection incendie
pour armoires électriques selon la norme de sécurité CEI/EN62368-1. Elle doit en
outre convenir à des dispositifs ayant une classe de protection IP20 minimum (selon
la norme CEI/EN60529). Elle doit aussi fournir une protection adéquate contre
les chocs électriques (protection contre les contacts).
AVERTISSEMENT: L’appareil doit être séparé de l’alimentation électrique par un
séparateur adéquat (fusible, disjoncteur, etc.) qui doit être intégré dans l’installation.
45013-031-54-002
Français / English
ComatReleco AG | Bernstrasse 4 | CH-3076 Worb | Phone +41 31 838 55 77 | Fa× +41 31 838 55 99 | comatreleco.com | info@comatreleco.com

Other manuals for CMS-10R Series

4

This manual suits for next models

3

Other Comat Releco Conference System manuals

Comat Releco CMS-10R Series User manual

Comat Releco

Comat Releco CMS-10R Series User manual

Comat Releco BoxX 2 Series User manual

Comat Releco

Comat Releco BoxX 2 Series User manual

Comat Releco CMS-10R Series User manual

Comat Releco

Comat Releco CMS-10R Series User manual

Popular Conference System manuals by other brands

Omron GRT1-CRT - 05-2008 Operation manual

Omron

Omron GRT1-CRT - 05-2008 Operation manual

Prentke Romich Company Accent 1400 user guide

Prentke Romich Company

Prentke Romich Company Accent 1400 user guide

Vocera B1000 user guide

Vocera

Vocera B1000 user guide

Avaya 1030 user guide

Avaya

Avaya 1030 user guide

Lucent Technologies MERLIN LEGEND System manager's guide

Lucent Technologies

Lucent Technologies MERLIN LEGEND System manager's guide

Omron CS1W-SCU21 Operation manual

Omron

Omron CS1W-SCU21 Operation manual

Crestron Flex UC-MM30-Z quick start

Crestron

Crestron Flex UC-MM30-Z quick start

Maytel Multicom Stationary 2.4G user manual

Maytel

Maytel Multicom Stationary 2.4G user manual

Avaya 1050 installation guide

Avaya

Avaya 1050 installation guide

VU Telepresence user manual

VU

VU Telepresence user manual

Polycom HDX Desktop Systems user guide

Polycom

Polycom HDX Desktop Systems user guide

Crestron CCS-UC-300 Do guide

Crestron

Crestron CCS-UC-300 Do guide

Alcatel-Lucent OmniPCX Office installation manual

Alcatel-Lucent

Alcatel-Lucent OmniPCX Office installation manual

Polycom CX5100 Administrator's guide

Polycom

Polycom CX5100 Administrator's guide

Yealink WPP20 quick start guide

Yealink

Yealink WPP20 quick start guide

ICP DAS USA UA-5200 Series user manual

ICP DAS USA

ICP DAS USA UA-5200 Series user manual

BJcast BJ60S user manual

BJcast

BJcast BJ60S user manual

Toa TS-700 Information

Toa

Toa TS-700 Information

manuals.online logo
manuals.online logoBrands
  • About & Mission
  • Contact us
  • Privacy Policy
  • Terms and Conditions

Copyright 2025 Manuals.Online. All Rights Reserved.