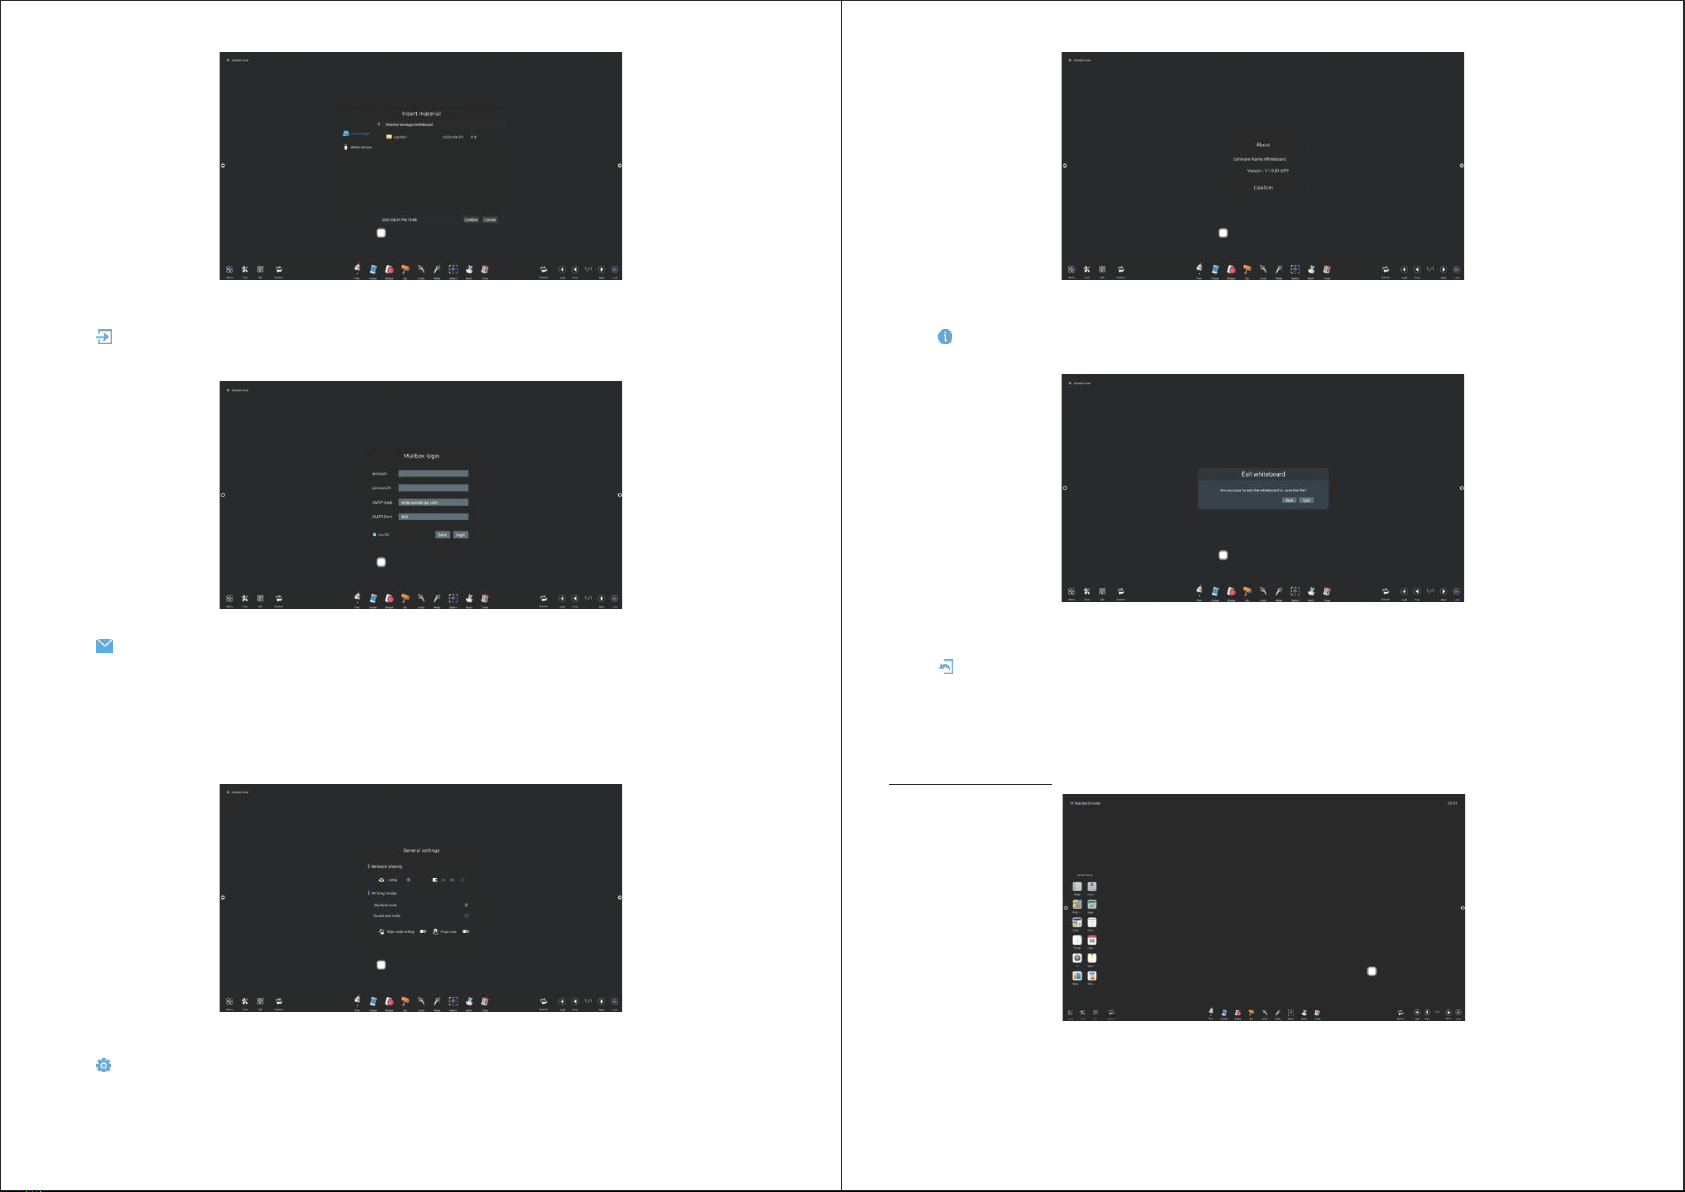
Parrot Products IP0065 User manual

User Manual
LED Touch Panel
IP0065, IP0075, IP0086
Tel: (RSA) 010 140 4900 / Email: [email protected] / www.parrot.co.za
For further information, please visit / contact us on:

1.1 System Home Page
1.2 Sidebar
1.3 Notication Panel
1.4 Status bar
1.5 System setting
2 Software Description
Writing Whiteboard
2.1.1 Interface Display
2.1.2 Menu
2.1.3 Aid tools
2.1.4 Code scanning and sharing
2.1.5 Common Function
2.2 Document Management
2.2.1 Interface Introduction
2.2.2 Classication Display
2.2.3 Extended Menu
2.2.4 Display Method
2.2.5 Toolbar
2.3 VIP Reception
2.3.1 Interface Description
2.3.2 Functional Application
2.4 More Applications
2.4.1 APK Application APK
2.4.2 Floating Menu
1
1
2
3
3
10
10
10
10
13
18
19
23
23
23
25
26
26
27
27
27
29
29
29
1.1 System Home Page
System Description
• After the boot is completed, the system will enter the main interface by default.
• The sidebar is divided into left and right sidebars, click on the icon that is hovering on the left/right
side of the screen, such as to bring up the sidebar. The function keys in turn that are
expanded are: return, home page, task, annotation, signal source, and notication center. The sidebar
will be hidden automatically after 5S without any operation.
To return or exit the current
page
Enter system home page
Task management interface List of signal source channels
Open the comment
Exit Annotation
Contents
1
QR code sharing
Import Whiteboard
Brush mode
Enable eraser
Annotation mode
Comment drop-down menu
Click The icon to open the comment menu window
1.2 Sidebar

32
Click icon to pop up the side menu, as shown in the gure below. The panel contains widget
display, common application shortcut function, custom add application, brightness, sound, and notication
center information
Open the calender
Lock Screen Mode
Unlocking ways are as follows:
(1) Password unlock: Click and enter
2580 in turn, and click OK to unlock.
(the initial password is 2580, the user
can enter the settings to change the
password.
(2) Remote unlocking: Press F9 to
unlock quickly.
(3) Combination key unlock: Press
the signal source key twice, and then
press the sound plus and sound decrease.
Note: It is necessary to press the sound
addition and subtraction in the signal
source interface.
Take Photos
Achive full screen capture
Eye protection
Spotlight Function - Highlight
Content
Custom
Energy Saving Mode
Curtain - Block screen
content with background
template
Click to customize shortcut apps according to your preferences
1.3 Notication Panel 1.4 Status bar
Shutdown
Adjust Screen Brightness
Wallpaper Interface
Settings Interface
Sound Adjustment
Machine Temperature
Connection Status
Unconnected State
Switch To Built-In Computer
1.5 System Settings
1. Basic
Device name: Displays the current name of the machine, and the user can customize the name of the device.
Network MAC: Displays the MAC address of the currently connected network.

54
2. Theme
Humanized design, you can change the theme style. Topics include regular themes and style themes. Regular
themes include: classic theme, conference theme, education theme, science and technology theme.
Classic Theme Science & Technology Theme
Meeting Theme Educational Theme
Style theme is: National style theme, nancial theme, party building theme, medical theme, industrial theme,
transportation theme, cartoon theme, enterprise theme; each style theme includes three different pages of
the application theme.
3. Wallpaper
Wallpaper is divided into static wallpaper and dynamic wallpaper. Click the corresponding wallpaper image to
change the wallpaper. Static wallpaper can be added by yourself. Pictures of built-in storage and external storage
can be added. The added wallpaper is displayed after the static wallpaper. Click the icon to execute the deletion
function.
4. Wireless network
Turn on the wireless network switch button, and the available wireless network will be obtained and displayed
automatically.
5. 2.4 / 5G hotspots
Under the 2.4 hotspot / 5G hotspot setting interface,user can change the hotspot name, security, password and
other parameters. Note: 2.4G hotspot and 5g hotspot cannot be opened at the same time. After modication, you
must click save.

6
6. Bluetooth
- When the integrated machine supports Bluetooth function, Bluetooth pairing can be implemented here to
achieve Bluetooth transmission function.
- When the integrated machine does not support the Bluetooth function, the Bluetooth function switch will be
grayed out and unavailable.
6. Power management
Under the power management interface, there is power button mode, system start mode, computer start mode,
energy saving mode and timing switch functions.
Energy saving mode
Set the hibernation time of the machine, set the resting screen state or screensaver state, screensaver can be
customized.
After clicking to change the screensaver, you can customize the screensaver (picture is static screensaver,
video is dynamic screensaver), which can be deleted by clicking the delete icon.
Timed switch machine
After setting the boot time and shutdown time, the system will automatically turn on or shut down when the set
time arrives.
7. Channel Settings
Intelligent recognition: When the intelligent recognition is turned on, the channel automatically jumps to the
channel when it detects a signal.
8. Security Settings
USB lock, screen lock, application lock and touch lock.You can also set the corresponding unlock password, the
initial password is 2580. Click to change the password, to change the corresponding password.
7

8
9. More multi-functional
There is suspension menu, sidebar, pull up menu, environmental sensitivity, centralized control, ve ngers
screen out, three ngers screen out and other functions.
9
10. Language and input method:
Click the arrow to set the language (Chinese, traditional Chinese, English, Arabic, Spanish, French, Italian,
Japanese, Portuguese, Russian, etc.) and input method.
11. Time and date:
Turn on the automatic setting time. If the networking is successful, the current network time will be automatically
synchronized. When the automatic setting time is off, the date and time can be set manually.
12. Sound
Adjust sound and set sound mode & output device. Sound mode: Standard, news, music, cinema, sports, user.
13. System information
You can view the system version information and the usage of built-in storage.
14. System update:
- Restore factory settings: Click Reset to restore the factory settings.
- Local upgrade: Copy the rmware to the root directory of the U disk, insert the USB ash disk into the multimedia
USB interface of the all-in-one machine, and select local upgrade and update

10 11
Software Description
2.1 Writing Whiteboard
2.1.1 Interface Display
- Click whiteboard icon in the main interface to start the whiteboard software
- The whiteboard is selected by default and can be written directly.
- Support single point mode and multi-point mode, multi-point supports up to 20 points.
- Single point mode, two ngers or more to perform zoom roaming function. It supports single stroke mode and
double stroke mode, and the double pen mode is for stroke writing.
- Support small tools, insert pictures and shapes, draw lines and arcs. You can also use some of the system's
small tools, such as camera, calendar, calculator, etc
2.1.2 Menu
- Click (menu icon) in the lower left corner of the interface, pop up display and display the lower content menu.
Open A File
- Click icon to open and save the le under the whiteboard le directory (the default path directory is built-in
storage / writeboard), click the le to open directly, and you can edit and save again.
Save A File
- Click icon to save the current writing content. The default time is named and saved. The user can
customize the name to save. The user can select the built-in storage or U-disk to save the whiteboard le.
Export
- Click the icon to export the content written on the whiteboard in the image format *. Jpg. The storage location
of the exported image can be selected as built-in storage or USB ash disk

12 13
Info
- Click icon to view version information.
Exit
- Click icon to exit the whiteboard, when there is content on the whiteboard. A prompt will pop up: the
whiteboard has not been saved. Do you want to save the whiteboard and exit the whiteboard. According to
whether to operate the function or not; if the whiteboard has no content, click exit whiteboard to exit directly.
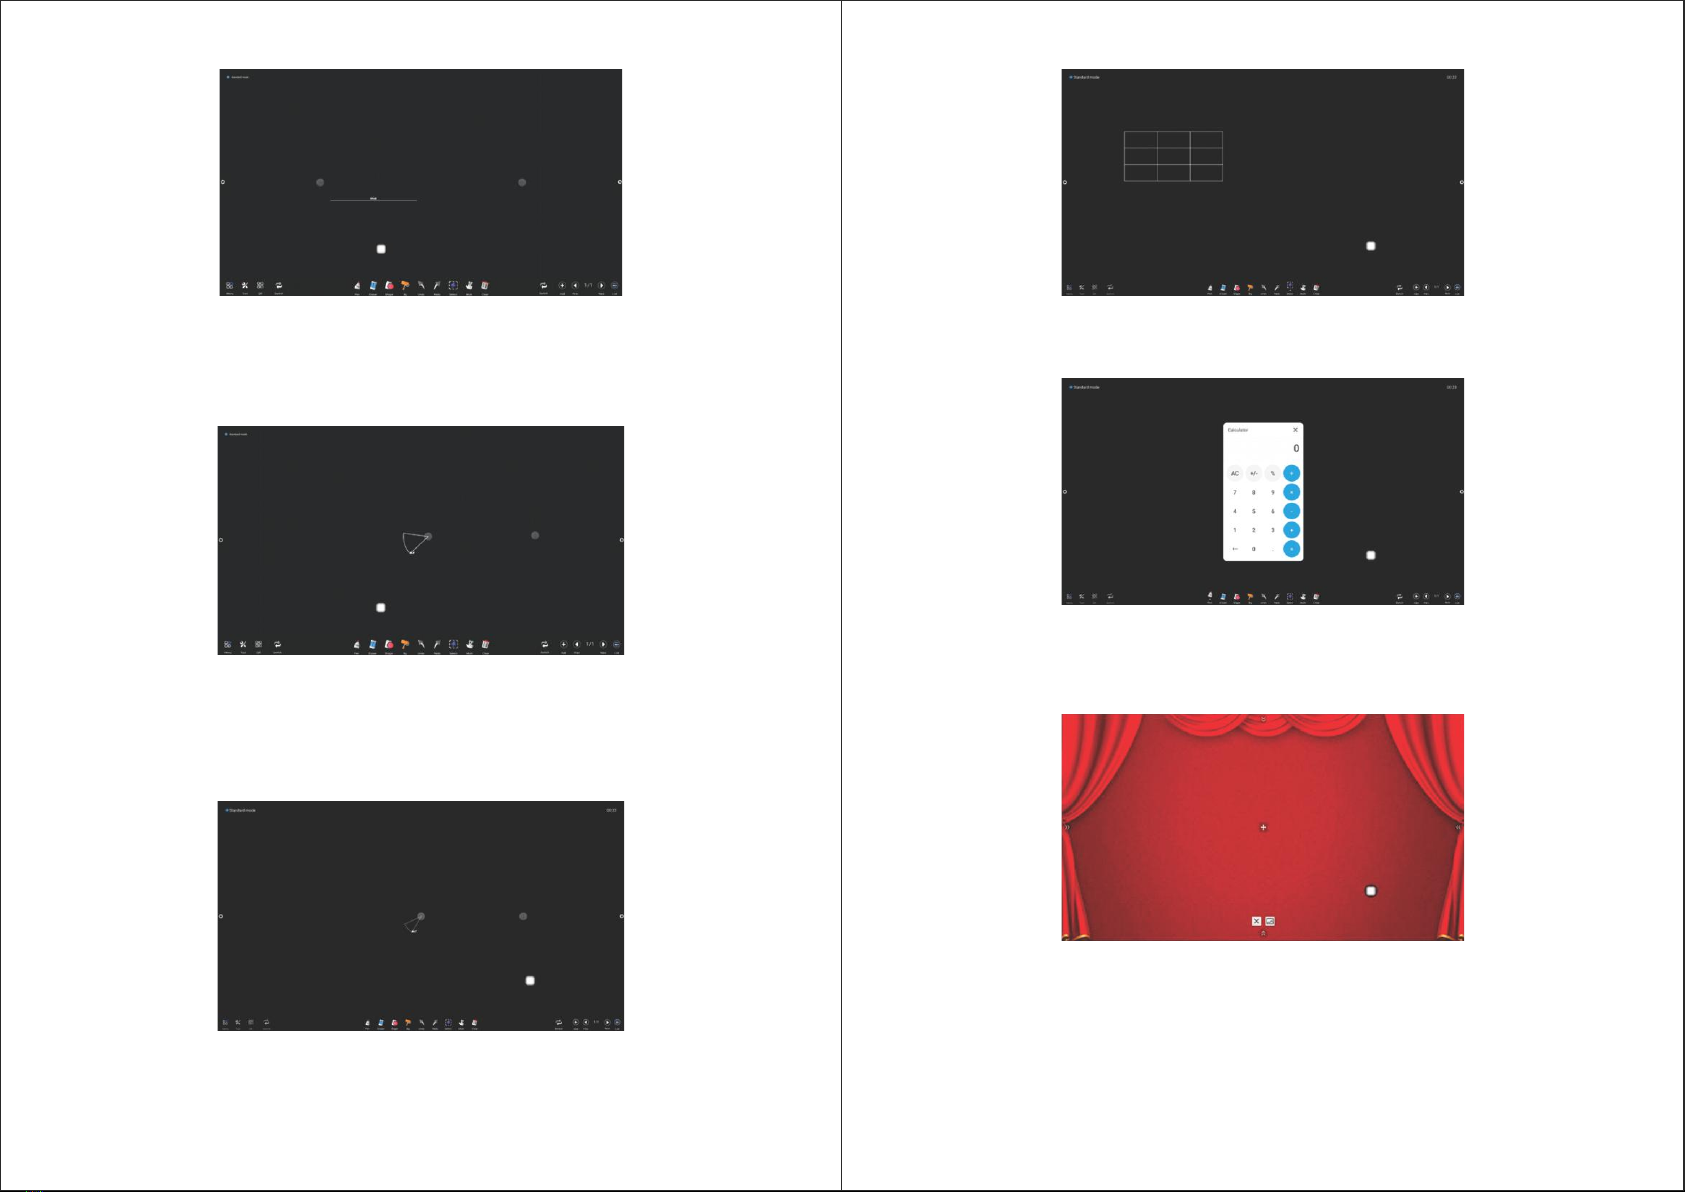
- The whiteboard comes with a ruler, compass, protractor, and insert table widget, and can quickly call to start
applications, such as: calculator, curtain, timer, calendar, camera, spotlight, multi-screen, grouping, etc.
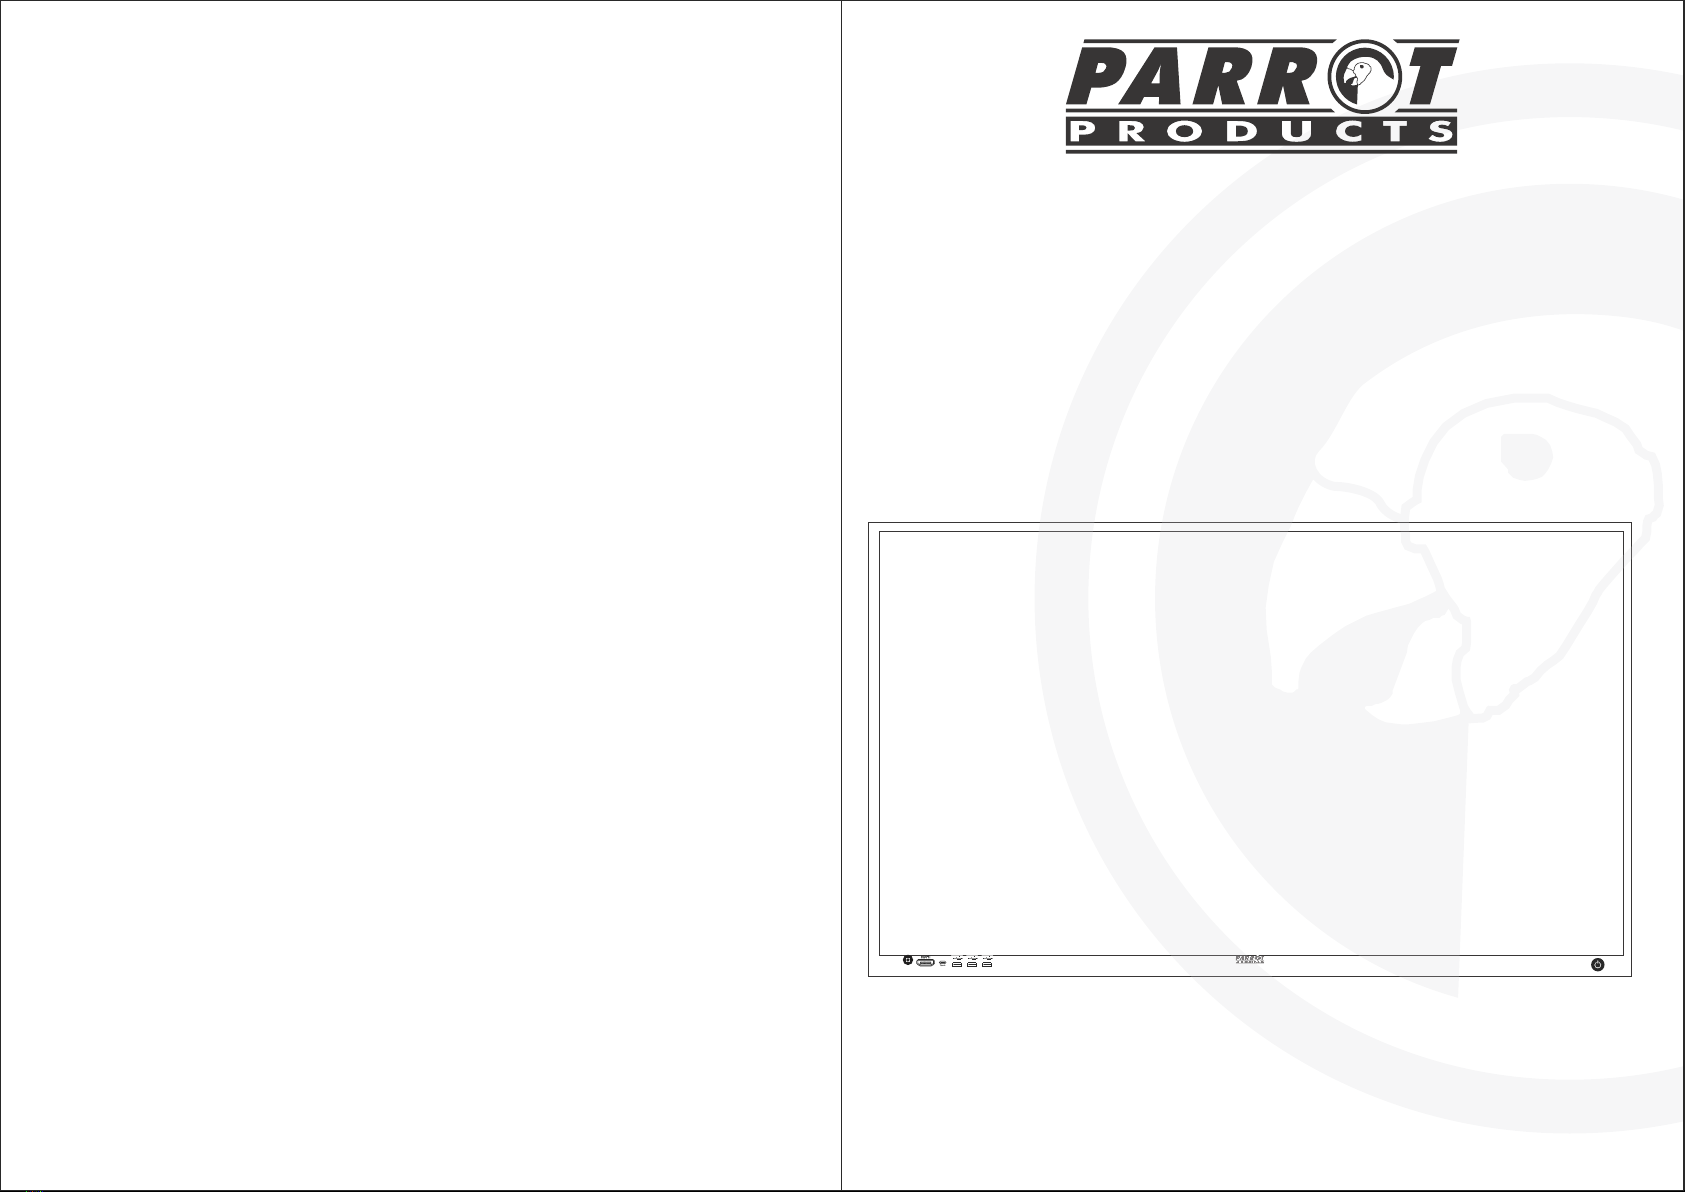
Insert
- Click icon to open the local storage or U disk image le, the user can select the image to insert on the
whiteboard, and the picture can be marked and written.
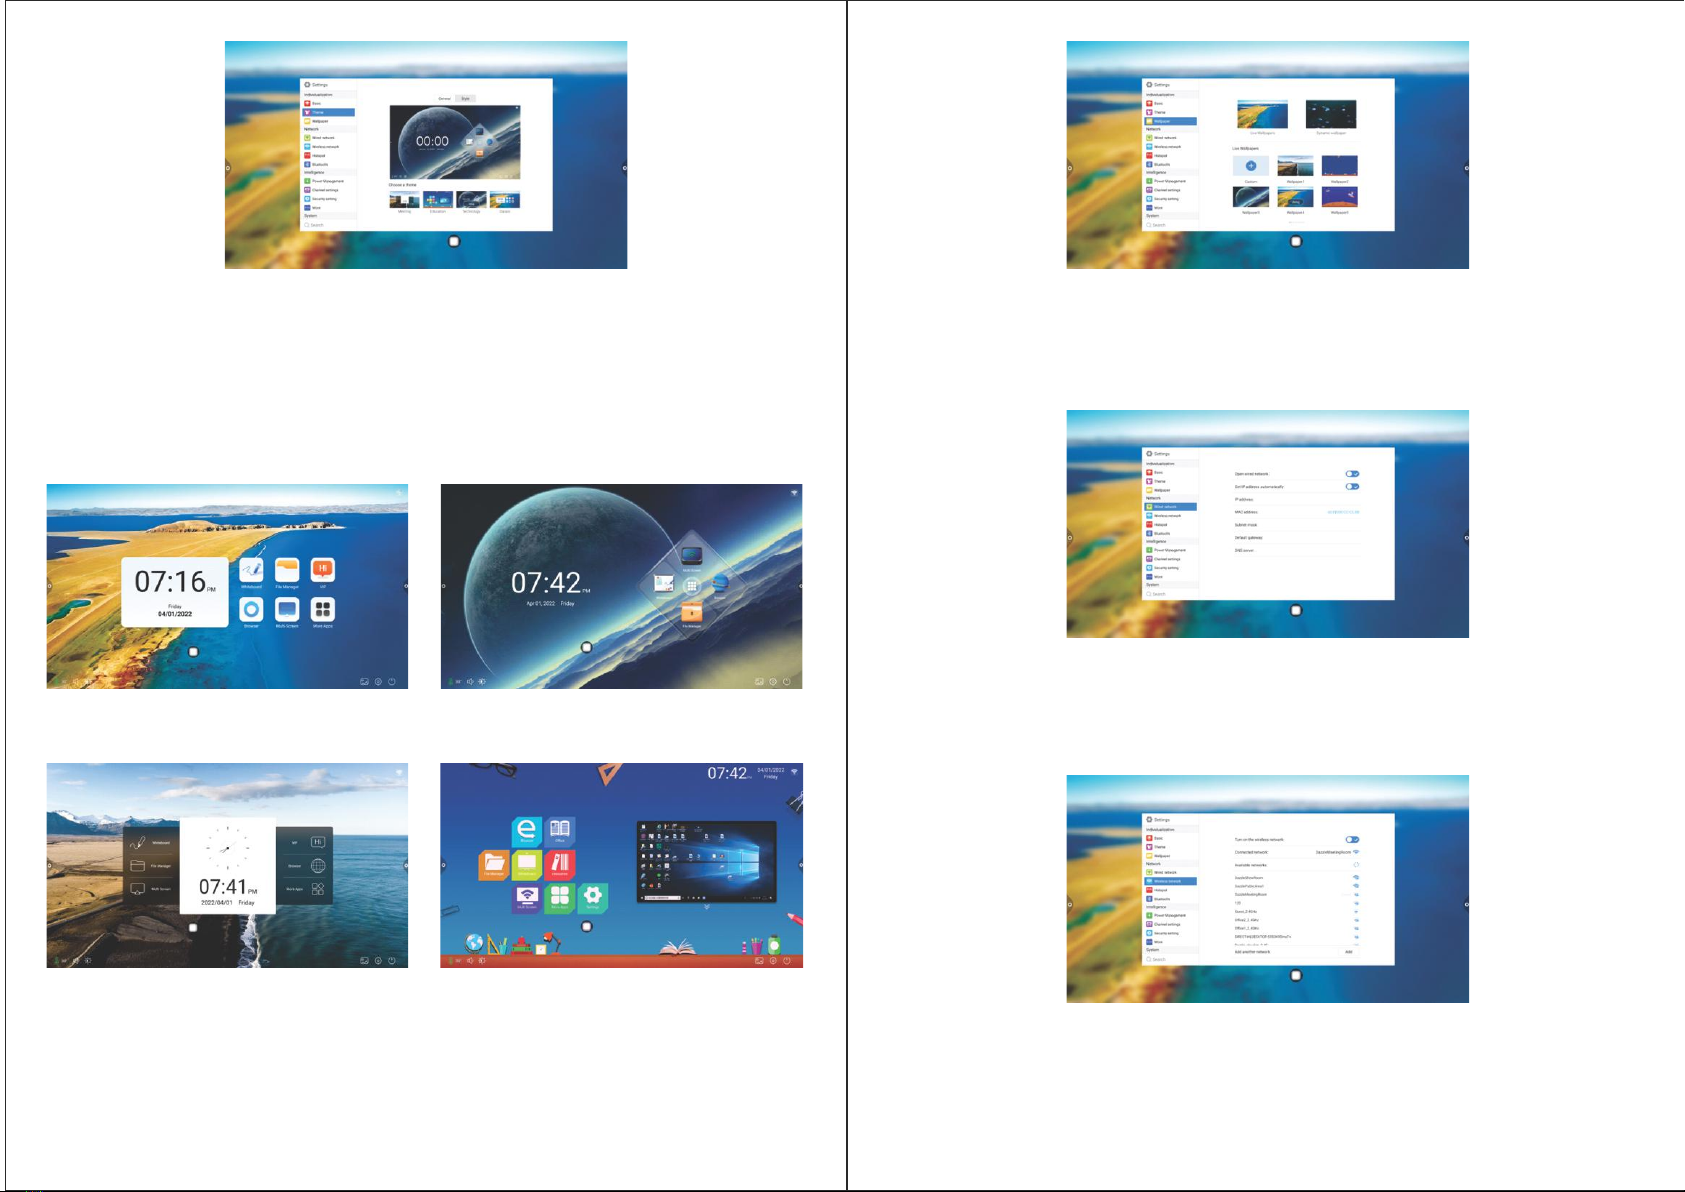
Email
- Click icon. When using the email sending function for the rst time, you need to set the email sender's
email information in the email login interface, as shown in the gure:
a. Use Tencent enterprise email, enter the account number and password, and click login.
b. After successful login, the user enters the email address of the recipient, and then click send to record the
contents on the whiteboard.Pdf format le is sent to the recipient's mailbox, and click settings to modify and
replace the current account number.
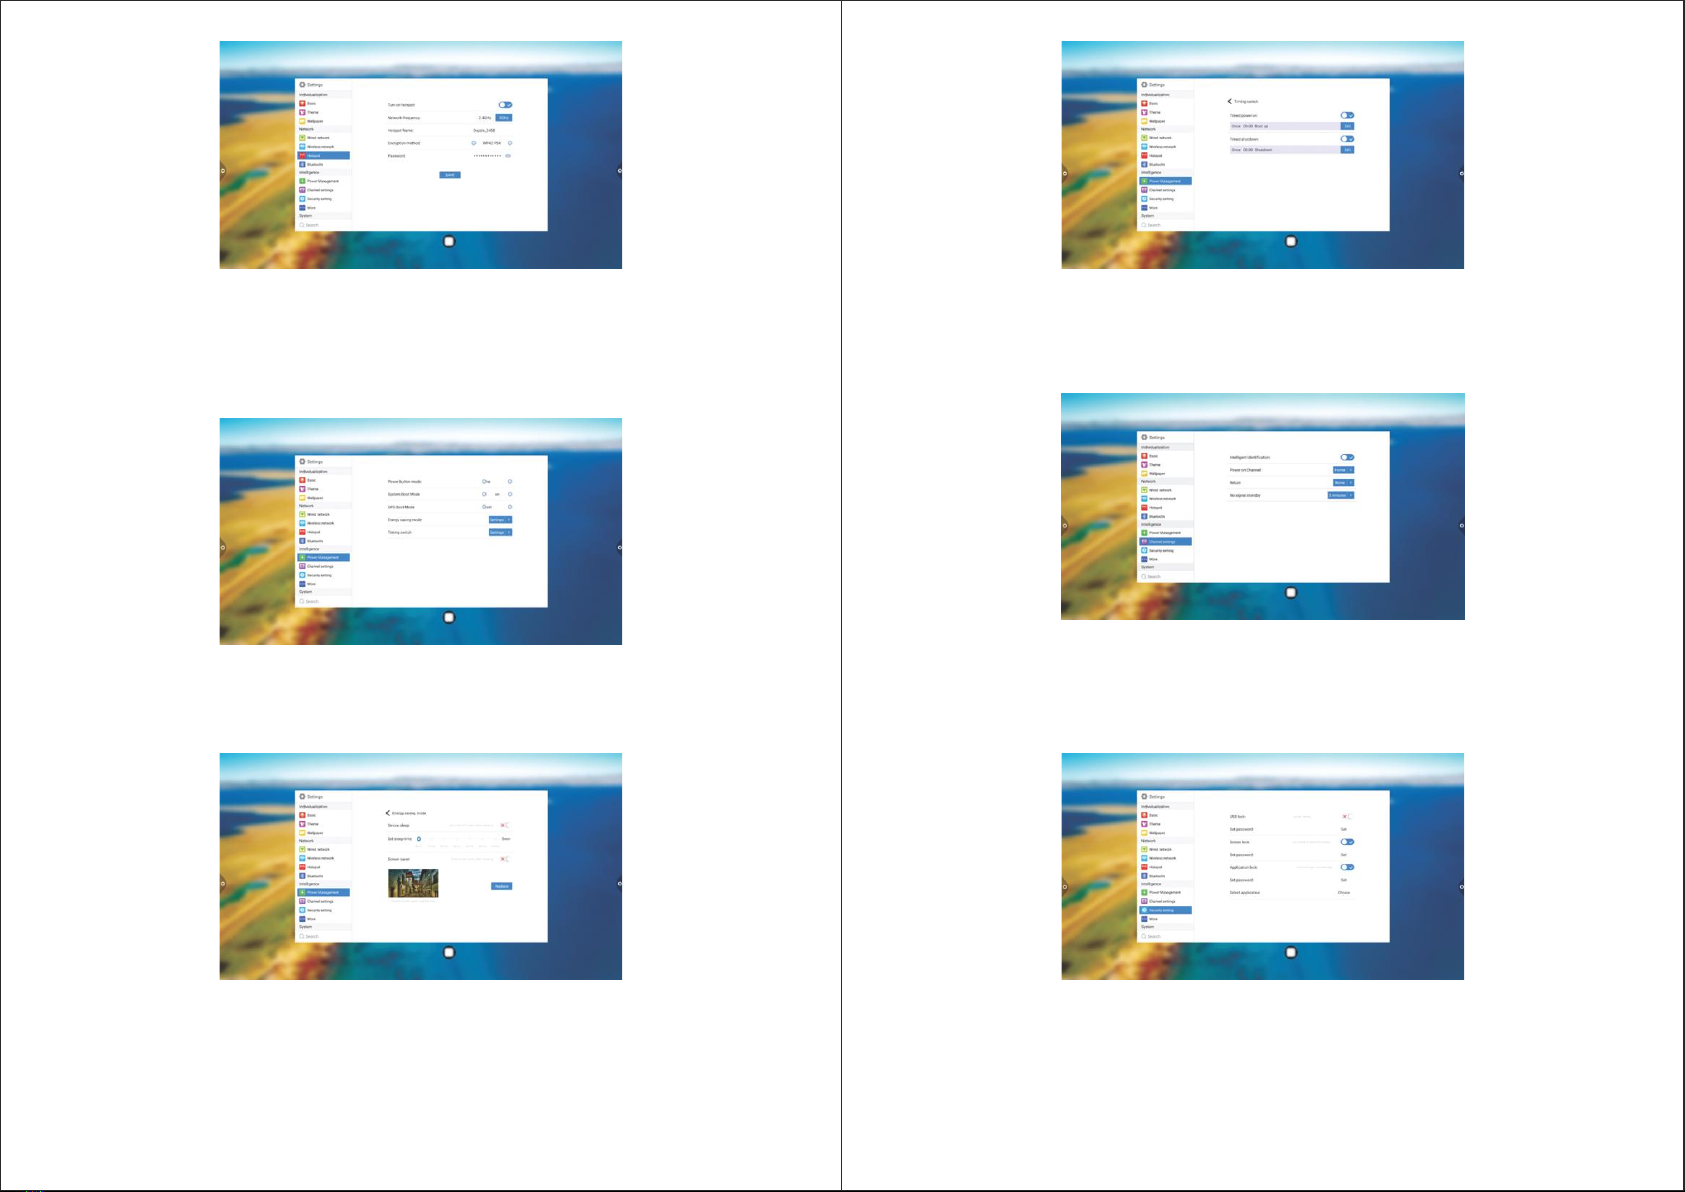
Settings
- Click settings Icon to enter the network sharing settings and writing mode settings.
a. Network sharing settings are divided into network sharing and local sharing functions.
b. The writing mode is divided into standard mode (single pen mode) and two-pen mode.
c. Other options are side write side wipe and nger wipe.
2.1.3 Aid Tools

14 15
Table
- Select Insert Table to insert a table on the screen.
Calculator
- The Select the Calculator to open it on the screen.
Ruler
- Select the ruler, the ruler widget appears on the screen. You can draw the line and mark the scale of the line.
Compass
- Choose a compass to draw a circle or arc on the screen.
Protractor
- Select the protractor to measure the corresponding degrees on the screen.
Curtain
- Select the screen that can open on the screen.

16 17
Spotlight
- Select the spotlight to turn it on on the screen.
Multiple Screens
- Select multiple screens, select the set split screen on the screen.
Timer
- Select a timer to open it on the screen.
Calender
- Select Calendar to open it on the screen.
Camera
- Select the camera to open the camera on the screen.
Group
- Select Group, to select set Group on the screen.

18 19
- Code scanning and sharing: Click the icon and select the sharing type. When the network is connected,
a two-dimensional code window can be generated, and the current conference record can be swept away through
the wechat scan function; if prompted, return to the home page, click to enter the system settings to connect to
the network, and scan the code again after the connection is successful. QR code sharing is divided into current
page sharing and all sharing.
2.1.4 Code Scanning and Sharing
- After the QR code is generated, the display is shown in the following gure. Click the lock icon to start the QR
code lock mode, and the password is displayed next to it. After scanning the QR code, you must input the
password before you can view the le.
2.1.5 Common Functions
Brush
- Click the icon to call up the brush tools menu.
- Change brush thickness and color.
Click the dot icon above to modify the stroke thickness, click the color box to select the
brush color, and click the custom icon to expand the color palette to customize the brush
color.
Eraser
- Click wipe: Click the icon to erase the written content,
- Circle erase: Click the icon to erase the handwriting in the area within the circle.
Shape
- Click , to pop up the graphic and image selection box. When the selected graph is drawn on the screen, it will
be displayed as the corresponding gure.

20 21
Select Function
- Click to select the selection function, and the interface switches from writing mode to selection mode. The
handwriting and shape in the interface can be drawn, and then the functions of moving, deleting, copying and
pasting can be realized for the inserted pictures. Move, delete, copy and paste, rotate and zoom.
Slide screen cleaning function
- Click the icon to call up the slider , and manually slide the icon to the right to clear the
writing content on the current screen.
Switch
- Click the icon to switch the left and right positions of more function icons, code scanning and switching
function icons with the function icons on the upper and lower pages, page preview function icons
and page adding function icons.
Background
- Click to change the background color of the whiteboard.
Revocation and restoration
- Undo icon to undo the previous operation. At most 50 steps can be undone at a time.
- Restore Click the icon to redo the operation that has been revoked. The maximum recovery steps are
50 steps at a time

22 23
2.2.1 Interface Introduction
- Click the le manager icon , open the le management application, and the external SD card and USB
external storage device are displayed on the left side of the le browser.
2.2.2 Classication Display
Documents
- When user clicks "Documents", the main contents are: Word, EXCEL, PDF, TXT les.
Image
- When user clicks "Picture", the image format le is displayed.
Page Preview
- Open the page preview pop-up window: Click to show that the current page is selected.
- Add page: Click the icon to add a page.
- Delete page: In the open page preview window, click the delete button in the upper right corner of the page
thumbnail to delete the page, or click at the bottom of the page preview window to delete all pages. To Click
enter all page display mode.
- Delete page or delete at the bottom of page preview window, press to delete all pages. Click icon to
enter all page display mode.
- Page turning function: Click the left and right page turning button and icon to realize page turning
effect. In the page preview window, if the preview page exceeds the Limited Preview range, slide up and down
quickly. Click to select, to achieve page up and down function.
2.2 Document Management

24 25
Sort
- Sort: Click icon, the sorting list will pop up. The sorting method has four sorting options: size, name,
type, and time. Users can sort and sort les according to their needs.
2.2.3 Extended Menu
- Click icon,there are functions such as display settings, favorites, and version information.
Audio
- When user clicks "Audio”, the audio format le is displayed.
Video
- When user clicks "Video", the video format le is displayed
Search
- Searching feature: In the search bar, enter the name of the le that the user needs to nd. After clicking Search,
the le to be found will be displayed in the main content window, as shown in the gure.
Display Settings
- User can set the le manager's front display and background color display.

26 27
2.3.1 Interface Description
- Click on the welcome template app enter to the app main page. The main interface is divided into a theme
bar and a preview display bar. The topic column is divided into three modules: Welcome module, industry theme,
and signature picture. Users can customize the theme, edit the theme, etc. under the Welcome Module, Industry
Theme module. Signed images can only be deleted. Open the theme image in the preview display bar.
2.3.2 Functional Application
Text Editor
- Click icon to enter text editing status, when in text editing state, user can enter text by touching the
keyboard. Click the function icon to select the font, size and color of the text.
- Press and hold the edit box at the top of the theme screen to pop up the Edit menu. Use the Edit menu to select,
cut, copy, delete, etc. the contents of the edit box.
- Save: Click icon to save,save as the theme image and it will appear under the theme.
Signature Mode: If you select Show, you will enter the signature state. You can manually touch the written content
in the signature state, as shown in the gure.
Favorites
- File collection: Select the les you want to collect and click on the collection.
- Viewing les: When viewing a le or folder in a favorite, user needs to double-click to receive the le or folder.
- Remove the favorite le: Click to select the le or folder to be removed, and then click to remove the favorite
- Exit the favorites: Click outside the Favorites interface to exit.
2.2.4 Display Method
Icon Display
- The icon display can be divided into a large icon display and a small icon display.
2.2.5 Toolbar
Multiple Selection
- Multiple folders can be selected at the same time.
- Extension tool: When you enter the selected state, the extension toolbar will pop up, which copies, cuts,
deletes, renames, compresses, encrypts, and collects functions.
- File Encryption: Open password protection: Long press to select the le or folder to be protected, click
encryption, enter the password to conrm. After the le is encrypted, you cannot delete, copy, cut, rename,
etc. the le. Unprotect the password: Long press to select the protected le or folder, click decrypt, enter
the password to unlock the password of the le or folder.
2.3 VIP Reception

28 29
2.4.1 APK Application APK
- Click the More Apps icon to enter the More Application interface of the conference system. Users can view
or open the APK application installed by themselves in this interface, as shown in the gure.
Write
- Click icon to choose the thickness of the line and the color of the line.
Erase
- Click icon to clear the edited content in the signature state.
- Click icon to bring up the eraser function.
2.4 More Applications
QR code sharing - Click icon to save theme interface signature image, If the network is be connected,
user can use the mobile phone to scan the QR code to view and download the saved theme image:
2.4.2 Floating Menu
- The icon oating on the desktop can be moved freely and displayed in any interface. Click Open to quickly
launch the application inside the menu, or you can customize to add other apps to the oating menu bar.
- Click Add user custom shortcut apps and gadgets to the hover menu.
- Delete: Long press the app icon you want to delete to enter the editable state, click to delete the app's
shortcut icon.

IP0065, IP0075, IP0086 Technical Features:
Life Span
50 000 Hours (min)
Category
Resolution
Multi Touch
Screen Sizes
40 Point Touch (Windows)
20 Point Touch (Android)
LED Touch Panel
4k
65", 75", 86"
Network Compatible
Bluetooth
Hotspot Enabled 2.4 and 5Ghz
Yes
Wired and Wireless
OS Support Windows, Max, Android, Linux and
Chrome
Durability
Built-in Android OS
Ops Slot
Multiple Display Sources
Power Mangements
Whiteboard and Annotation Software
4mm Tempered Glass
Android Ver 11, 4GB RAM, 32GB Storage,
1.9Ghz Quad Core
Yes
Yes
Built In
Built In
30 31
This manual suits for next models
2
Table of contents
Popular Touch Panel manuals by other brands

panel
panel PSR1-FP Series user manual

AMX
AMX Modero ViewPoint MVP-7500 Operation/reference guide

Topaz
Topaz TPZ-TS-32 Hardware user manual

Extron electronics
Extron electronics TouchLink Series Best practices guide

Renu Electronics
Renu Electronics WP Web HMI Series user manual

AMX
AMX AXD-MLC Dimensional drawing

MSI
MSI MS-9A91 manual

Crestron
Crestron Isys TPS Series Specification sheet

Elo TouchSystems
Elo TouchSystems SW602681 Quick installation guide

PZRacing
PZRacing GearTronic2 GT400 user manual

Dini Argeo
Dini Argeo 3590 Series Setup

Flavor Burst
Flavor Burst JBT 80FCB-2B Equipment, Maintenance and Operations Manual