888 291-4615 (toll free)
PARTY TENTS DIRECT.COM
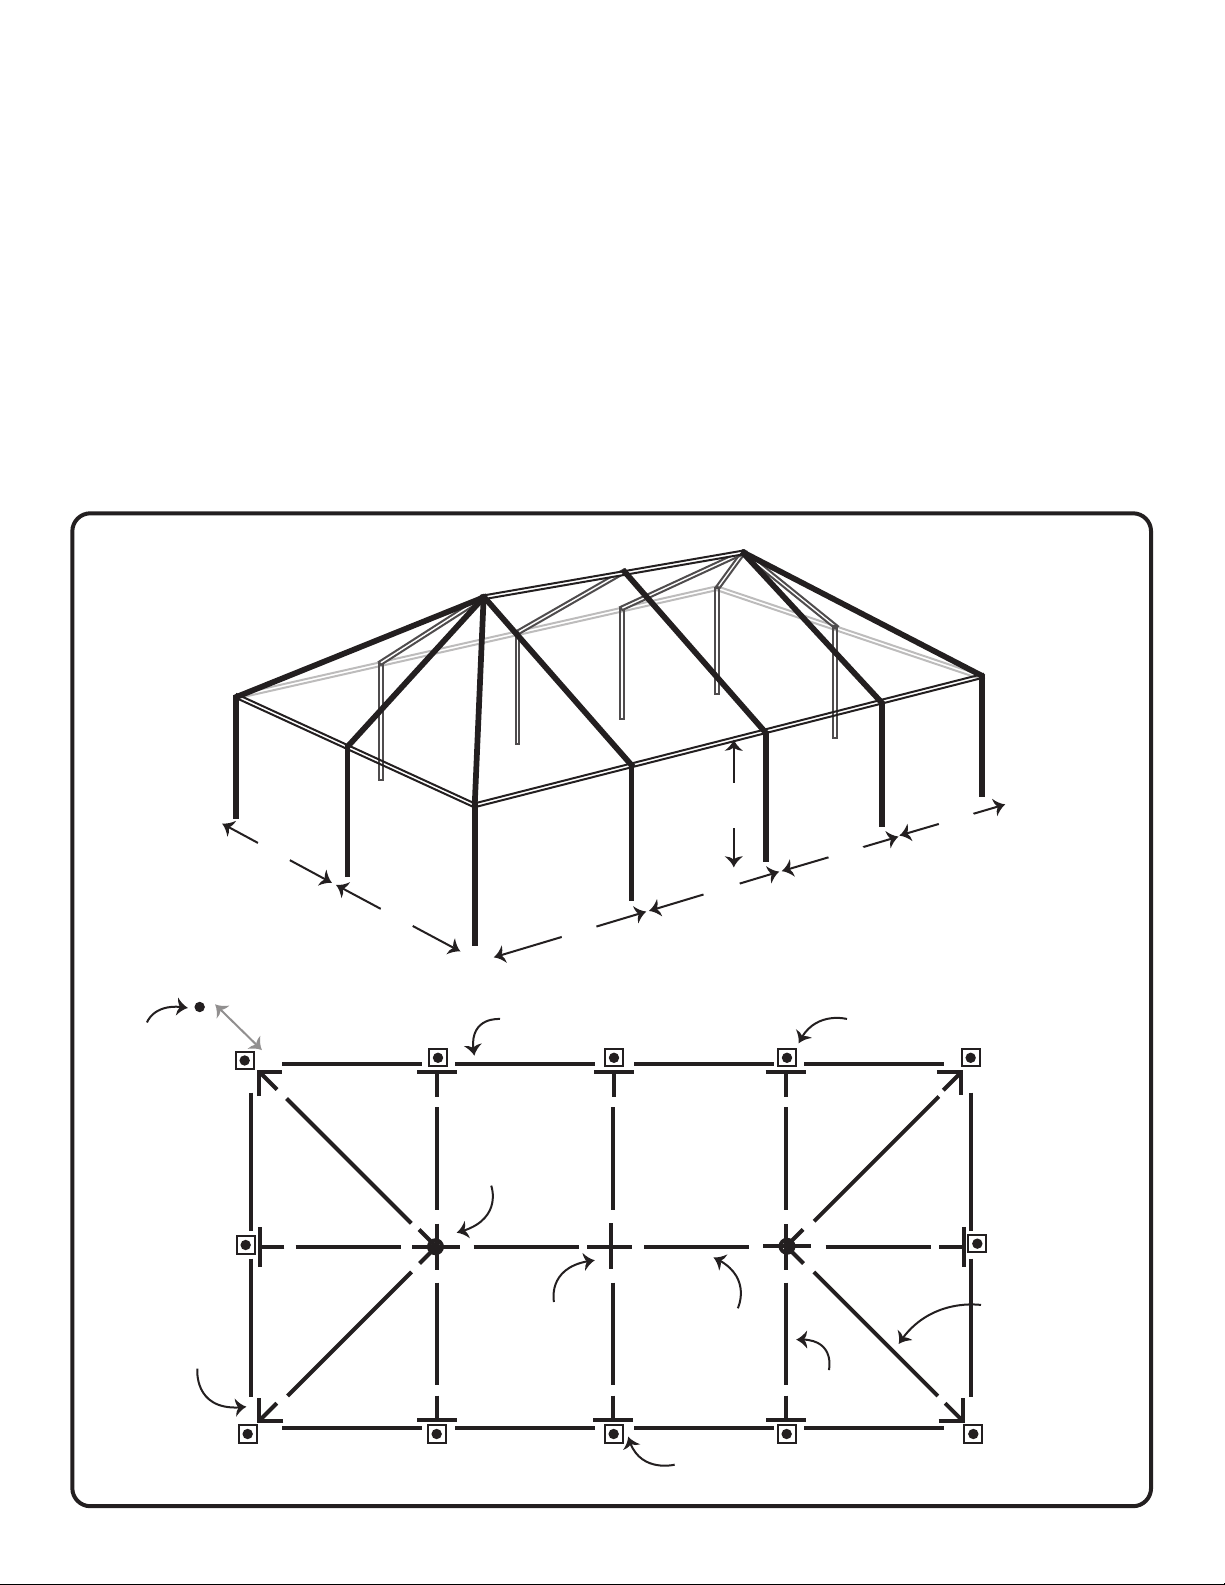
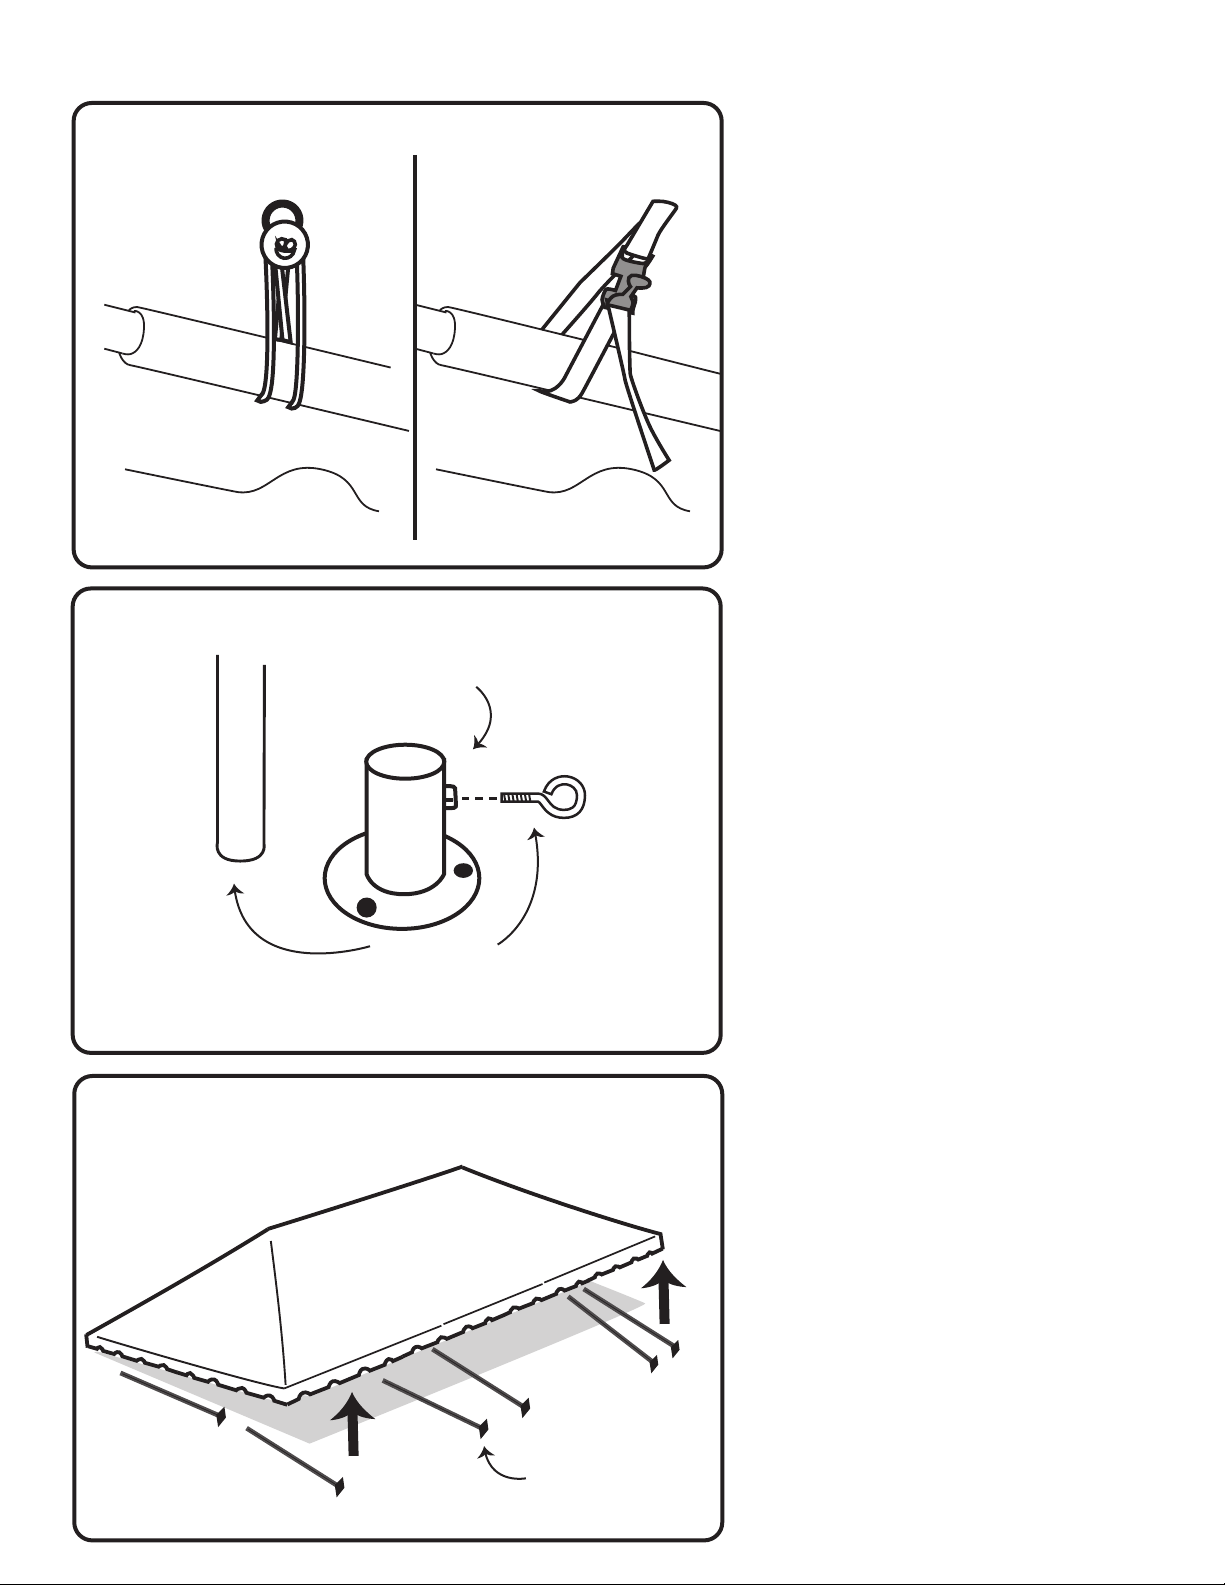
Base
plate
Connect all the base
plates to the leg poles
— using eye-screws
Insert leg
poles into
base plates
— screw
tightens to
outside
of leg
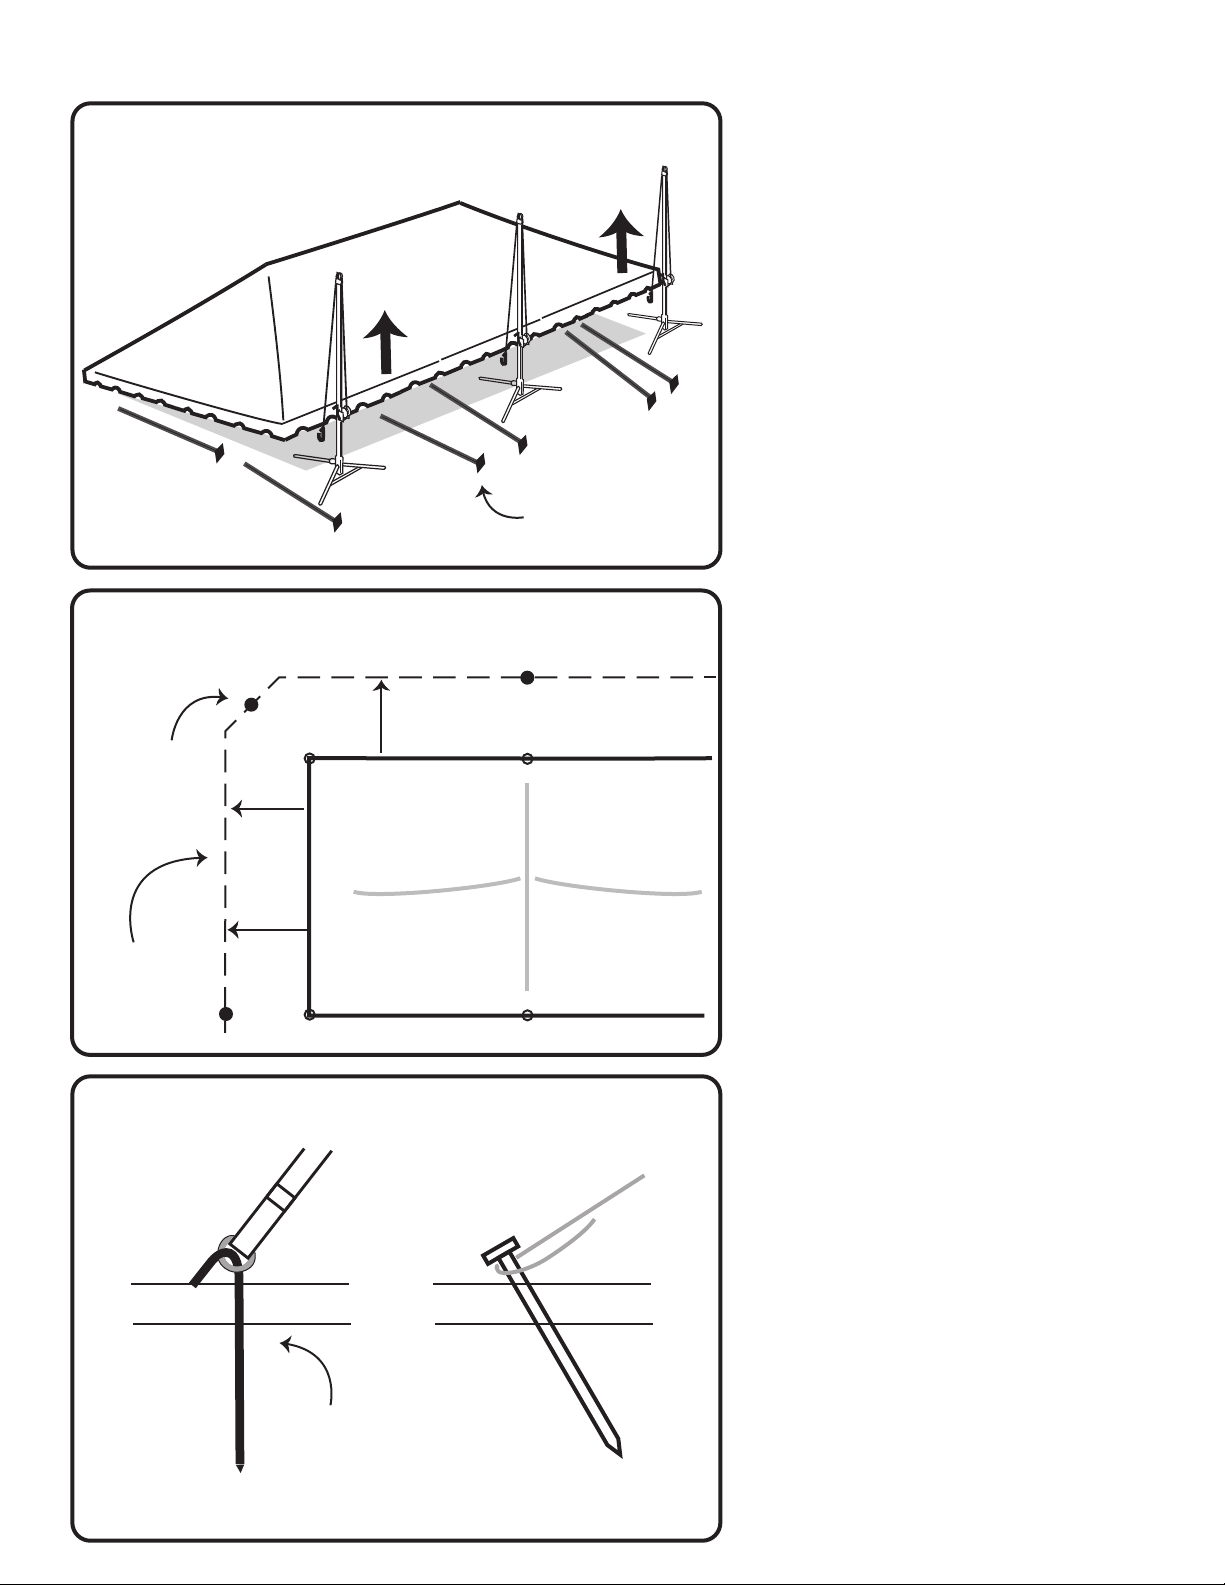
• For smaller tents, (10x10, 10x20,
20x20) three or four people should be
able to raise the frame and install the
leg poles
• Locate one of the long sides of the
frame—this will be raised first, while the
opposite side remains on the ground
• Important: Lift the entire side of the
frame at once (not one corner)
• Install all the legs on this side—secure
with ‘R’ pins—
• Repeat for opposite side, then install
legs for the remaining two sides
• Double check the canopy corners—pull
them down tight and straight—
secure velcro at corners
• Important: tighten spring buckle straps
or bungee balls— for security and to
help pull canopy corners into place
STEP 10. INSTALLING LEGS (smaller tents)
8
Remember, base
plates should be
attached first
• After canopy is pulled over frame and
and corners are pulled into position,
velcro corner seams together, loosely—
tighten after legs are installed
• The canopy should be attached to the
frame, before legs are connected—
secure some of the buckle straps/bungee
ball, to keep canopy in place—
start near corners and center fittings
• Buckle straps/bungee balls should be
located on the underside of canopy
• Secure the remaining straps after legs
are installed on one side and secure—
it’s easier at this height—
Final tightening happens after legs are
installed (step 10)
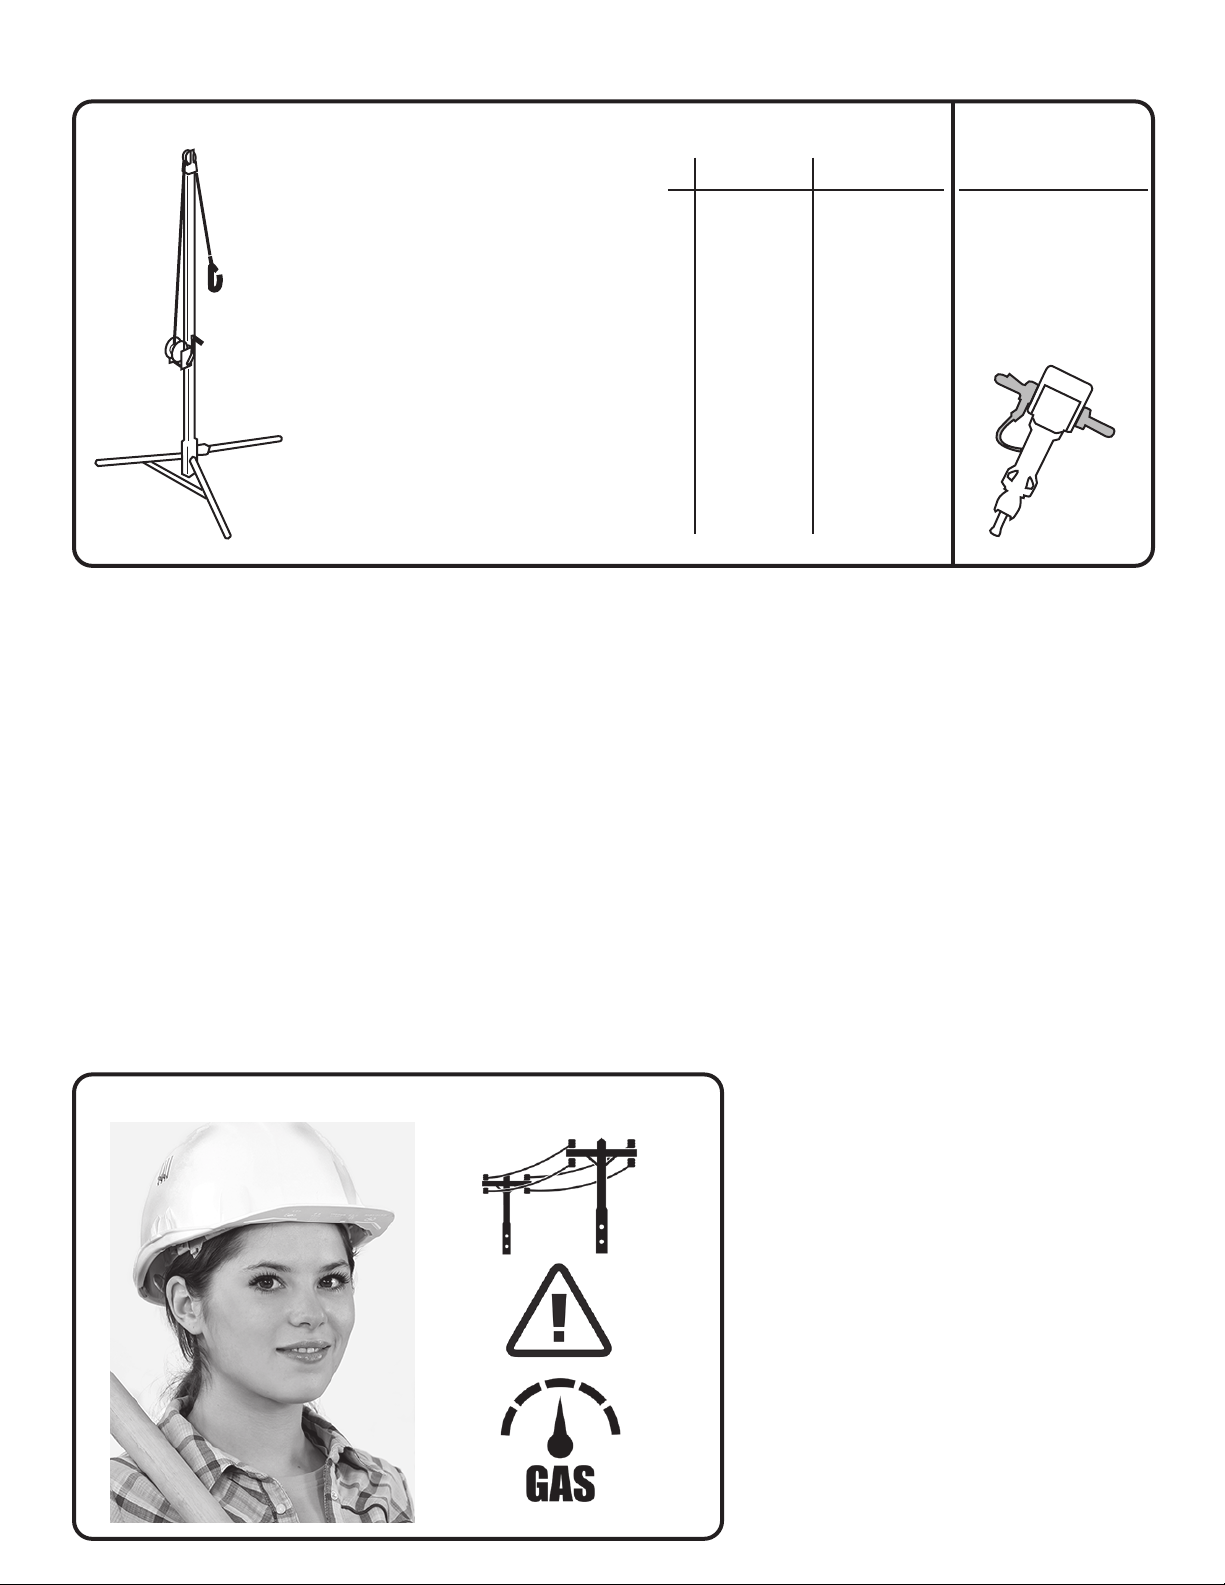
STEP 8. CANOPY CONNECTIONS
(PE canopy) (PVC canopy)
Under canopy
there will be
several Spring
Buckle Straps
PE canopys
use Bungee Ball
connectors
Start with one at each
corner and center fittings
Start with one at each
corner and center fittings
• Before the tent is raised, prepare the
leg poles
• Place poles on top of base plate and
secure with eye-screws
• Do this for all the leg poles
• Once tent is erect, use the smallest
hook stake to secure legs to ground
STEP 9. BASE PLATES