Pasta di Casa PCA-6 User manual

PASTA MAKER
INSTRUCTION MANUAL

Safety Precautions
Introduction
Components
Control Panel
Accessories
Installation
Operations
Dismounting and Cleaning
Care and Maintenance
Specifications
Circuit Diagram
Troubleshooting
The appearance of the product in kind prevail.
Designs are subject to change without prior notice.
All contents on this manual have been carefully checked,
in case of any printing errors or misunderstandings our
company reserves the right of final interpretation.
Dear customer, thank you for purchasing
our product. Please read these instructions
carefully before using our product. And save
this manual for future use.
7
9
Contents
4
4
5
10
10
11
10
Note:

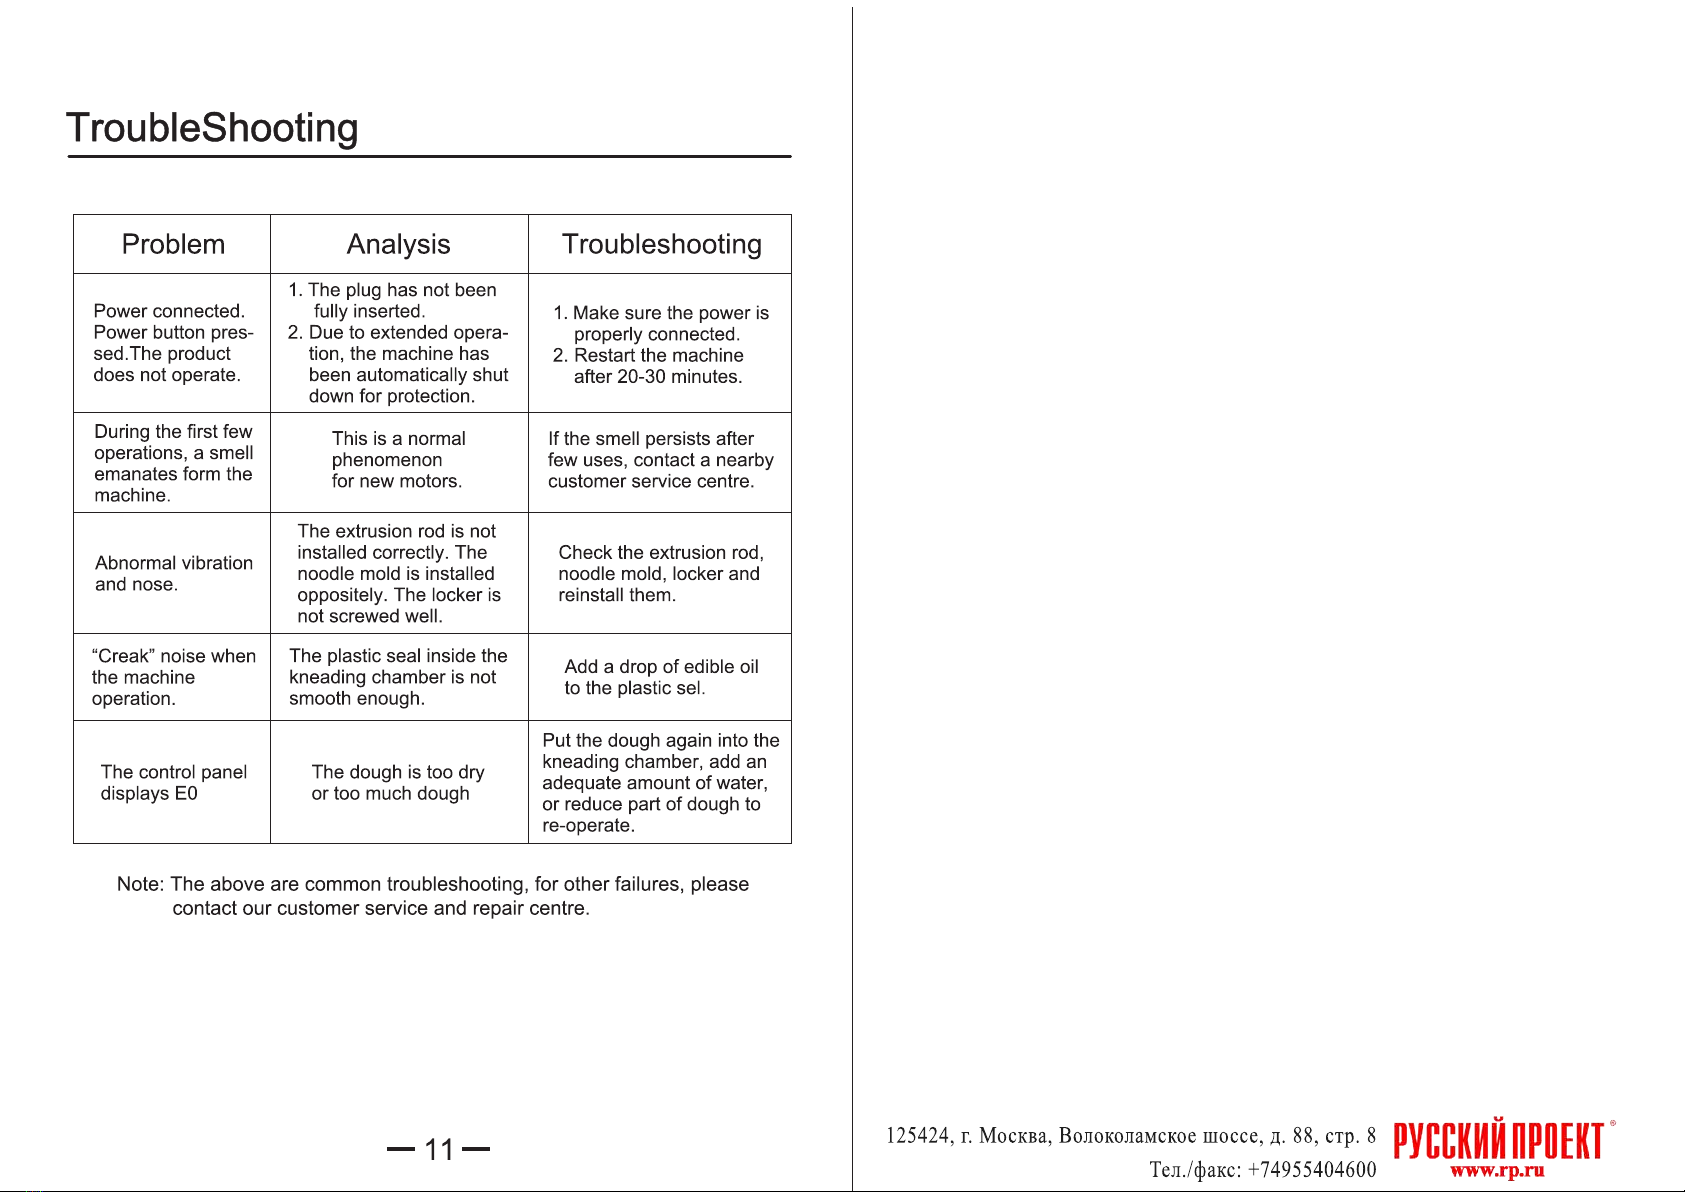
Safety Precautions Safety Precautions
The belowed precautions are divided into “WARNING” and “CAUTION”, each
precaution involves to related safety important content, please be sure to follow.
WARNING Said that if operation mistakes,
it may cause serious injury.
Said that if operation mistakes,
it may get hurt or goods damage.
!
Said prohibitions.
Said mandatory or instruction.
WARNING
Do not change. Except for the
repair technician, do not
disassemble or repair by yourself.
Do not allow children and without
self-care person to use alone. Do
not use in the place where
children can reach.
Do not insert or pull the plug with
wet hands. Plug & wire damage or
socket loose, do not use.
Power cord can not be damaged.
If the power cord is damaged,
it must be replaced by the
manufacturer, its services agent
or similarly qualified persons.
Do not use the power outside
AC220V-240V, otherwise there
is the risk of fire, electric shock
or machine damage.
The plug is fully inserted to avoid
the risk of electric shock, short
circuit, smoke and fire.
!
When the front of plug and the
mounting surface of pins have
dust, it should be carefully cleaned.
The main part must not be
immersed in water to avoid short
circuit and electric shock.
When the machine connect to the
power, do not touch any moving
parts, specially it should prevent
from children touching.
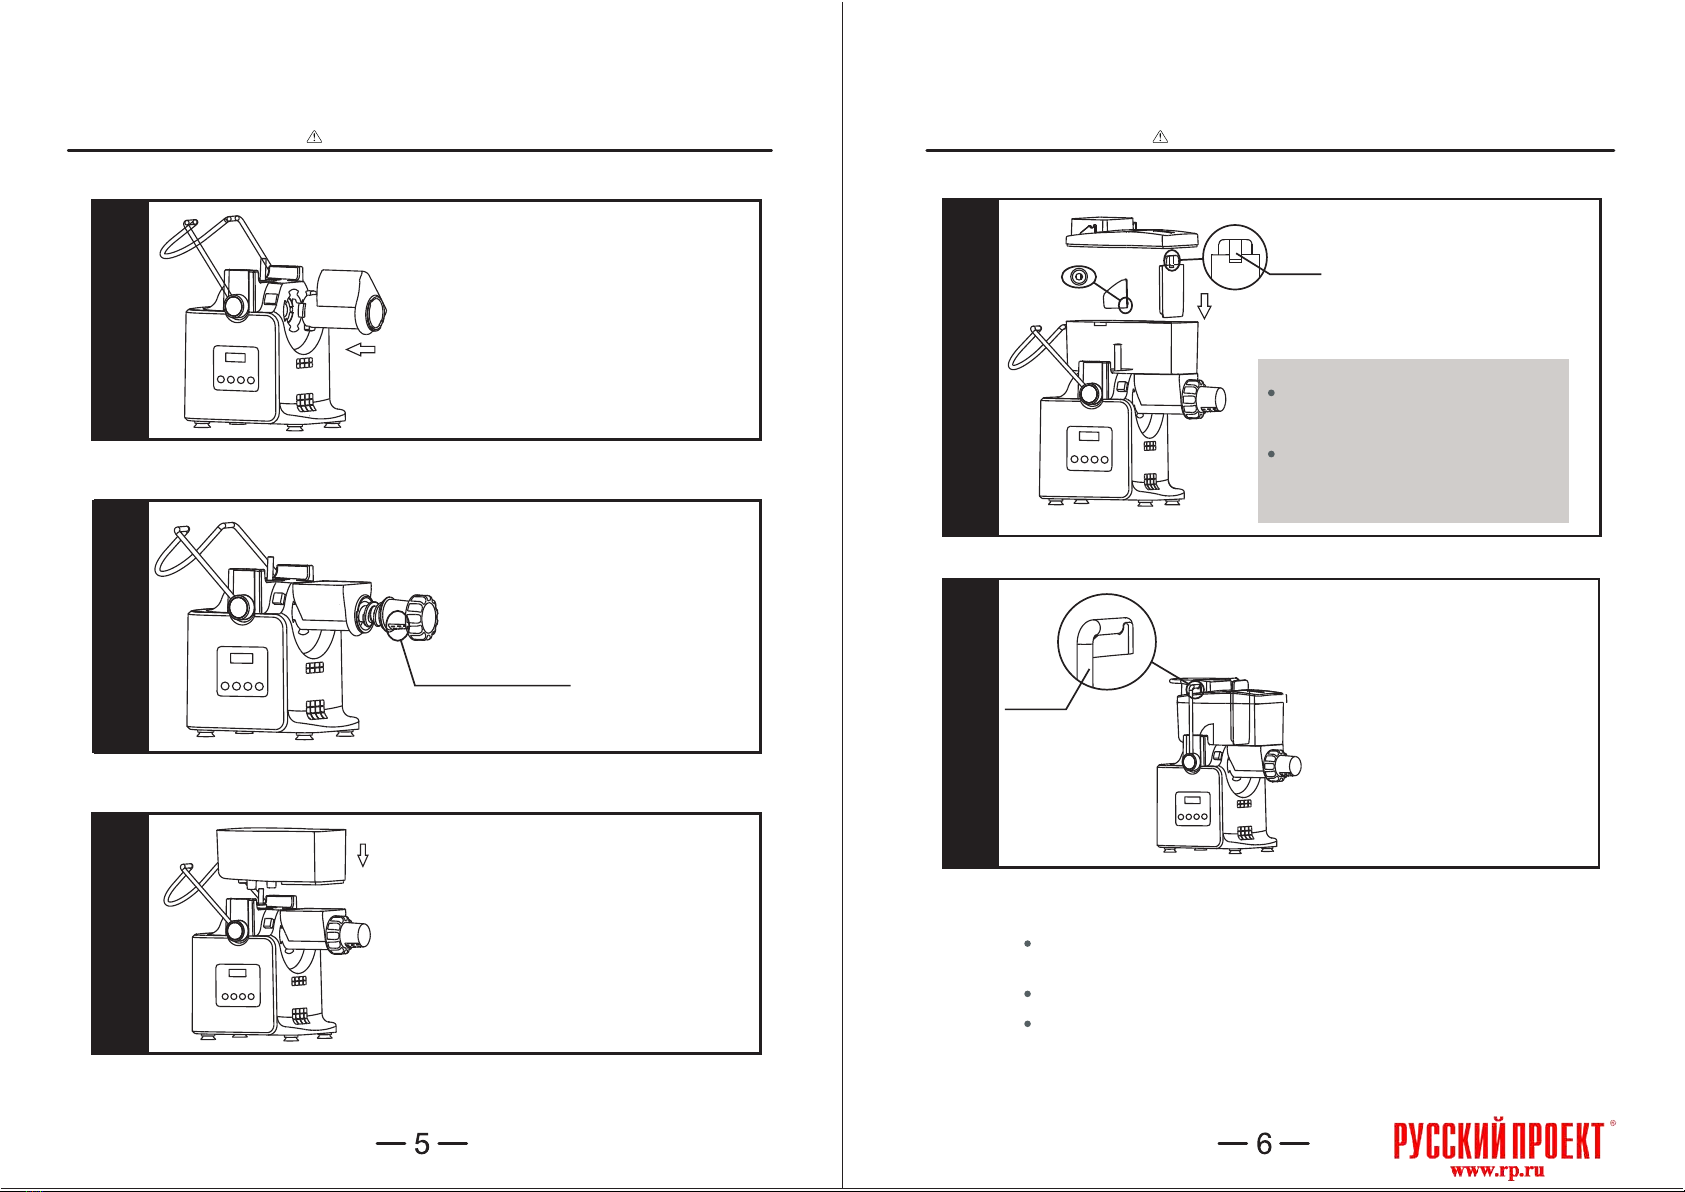
Do not open the top cover or move
the machine when kneading dough
an extruding, otherwise there is the
risk of injury.
Do not put the pins, wire etc metal
objects, and other strange objects
into the machine. To avoid electric
shock and unusual situations.
!
CAUTION
Please do not put strange objects
into the kneading chamber when
kneading dough, to avoid the
damage of machine.
Keep the machine away from
heat, stove or opening
microwave oven etc.
When unplug the plug, make
sure to hold the plug in hand. Do
not pull the supply cord to avoid
the sparks of electrical shock or
short circuit.
Disconnect the power when
moving the machine.
Do not use non-factory provided
parts and accessories to avoid
the damage of machine.
Place the machine on a stable
and level surface to use.
Do not use the machine in high or
too low temperature environment.
Store the machine in a well-
ventilated and dry place.
NOTE
Stop the machine for 20 minutes
after every 20-minute operation.
Continue to use after the motor
is cool.
Do not use the machine outside
kneading dough or making
noodles.
Serious injury means blindness, injury, burns
(hot, cold), electric shock, fracture, etc, and
have sequelae. Or need to be in hospital, or
need long-term hospital treatment’s wounds.
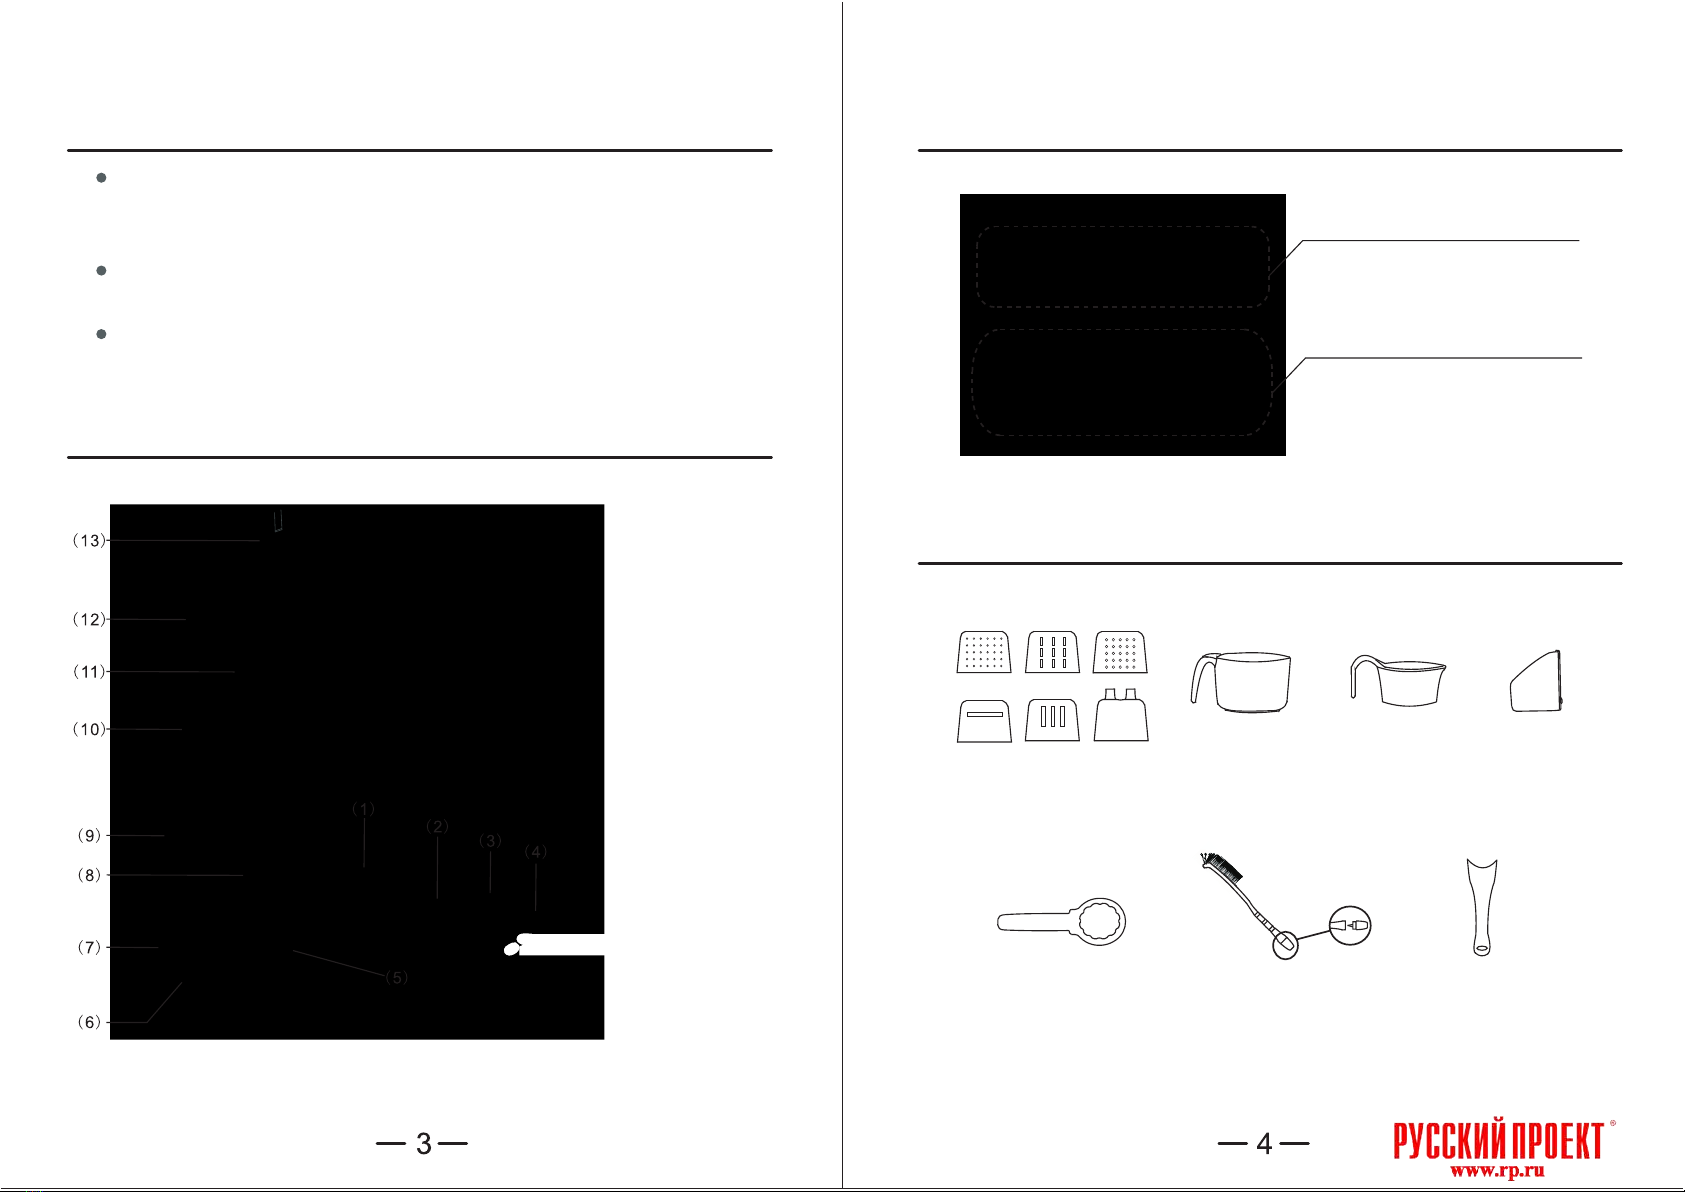
Remark:
When installing, disassembling
or changing the noodle molds,
be sure to disconnect the power.
!
Do not let the supply cord hang
on the table or touch any moving
parts.
Make sure the machine is fully
assembled correctly before
operation.
!
Make sure the machine is shut
down before opening or covering
the top cover.
Do not open the top cover or take
out the noodle mold, extrusion rob
when the machine is working.
!
!
!
!
CAUTION Injury means no need to be in hospital, no need
long-term hospital treatment’s injury and burns,
electric shock, etc.
Goods damage refers to the damage of housing,
family wealth, livestock, pets, etc.

Control Panel
Introduction
This product uses the microcomputer control technology,
it has features of quick making noodles, few flour residues,
low noise and easy cleaning.
This product has function of kneading dough and making
noodles, it can make your life more perfect and wonderful.
The performances of this product meet national standard
requirements, please be assured to use.
Components
(This picture is for reference only, the appearance
of the product in kind prevail.)
(1)Extrusion Box
(2)Extrusion Rod
(3)Locker
(4)Noodle Mold
(5)Fan
(6)Contral Panel
(7)Main Part
(8)Unlock Button
(9)Safety Bracket
(10)Kneading Chamber
(11)Kneading Blade
(12)Top Cover
(13)Slat
Accessories
Six types of
Noodle Mold
Flour
Measuring
Cup
Water
Measuring
Cup
Spanner Brush Cutter
Kneading
Blade
Timer Control and Display
Fuctional Control and Display

Make sure the power is disconnected before installation.
Installation Installation Make sure the power is disconnected before installation.
Safety
Bracket
1
2
3
5
4
Place the Main Part on a stable and
level surface. Plug in the Extrusion
Box and rotate left 45 degree until
it is securely locked.
Screw the Extrusion Rod into
the Extrusion Box. Connect
the Noodle Mold with Extrusion
Rod, and screw the Locker.
The Kneading Chamber has three
protrusions on the bottom. Map
them to the corresponding positions
on the Main Part.
Insert the Kneading Blade and Slat
into the Kneading Chamber,
close the top cover.
Pull the Safety Bracket in the
middle position to ensure the
top cover is securely fastened.
Note:
Ensure the Kneading Blade is fully
inserted, it can gently shake the
Kneading Blade for easy insertion.
Note:
Press
Button
Noodle Mold Down
Please noted the press button is in
the direction of noddle mold when
inserting the slat. Ensure the slat
is inserted in the end.
Connect the noodle mold with extrusion rod according
to the direction of arrow.
Ensure to screw the locker tightly.
The safety bracket must be fastened with top cover,
otherwise the machine can not work.
11111
11111

The capacity of flour measuring cup is about 160g, each time use a flat cup of flour.
The capacity of water measuring cup is about 80ml, it is recommended to add around
70ml water or eggs, 5g salt and 5ml edible oil.
One flat cup of flour with one full cup of water.(Since each kind of flour has its unique
water content, flour and water ratio is subjected to adjustment.)
Water
160g 70ml
Ingredient
Reference Ratio
1. Place the machine on a stable and level
surface, make sure the machine has
been properly installed, especially the
kneading blade and slat.
2. Open the top cover, add a flat cup of flour
into the kneading chamber, close the top
cover and secure with the Safety Bracket.
Disconnect the power when adding flour.
Use the attached Flour Measuring Cup to measure
and add the flour. One flat cup of flour is around 160g.
Do not add exceed 320g.
3.Press the power “ON/OFF” button .The
corresponding indicator lights up. Press the
“Knead” button. The corresponding indicator
lights up. Kneading begins. The default
kneading time is five minutes. Press “+”
and“-”to adjust Kneading time.
4. Use the Water Measuring Cup to pour a
cupful of mixture of water, oil and salt into the
kneading chamber.
Press the “Knead” button before adding water into the
Kneading Chamber.
The capacity of Water Measuring Cup is about 80ml.
Adjust the water according to different flours. It is
recommended to add around 70ml water,5g salt and
5ml edible oil.
You can add all kinds of vegetable juices(Spinach juice
etc..)or eggs into the Water Measuring Cup to pour
inside the Kneading Chamber.。
5.After Kneading dough, if the flour becomes a
dough, press “Extrusion” button and take out the
salt. The dough will be pushed into the Extrusion
Box automatically. If the flour does not become a
dough, press“+”button to increase the
Kneading time(It can add the right amount of the
water according to actual situation),until the flour
become a dough.
6.Slot the spanner through the dedicated hold on
the Extrusion Box. Push the dough gently; make
sure that the Extrusion Rod is contact with the
dough quickly.
7.During the extrusion process, the “Fan” indicator
lights up. The Fan can make the noodles dry fast.
8.Cut the noodles using the Cutter.
9.After extrusion, press the “ON/OFF” button to
shut down the machine.
Make sure the flour has become a dough before taking out
the slat.
160g
Press down
the dough
Please noted the press button is in the direction of
noodle mold when inserting the slat. Ensure the slat
is inserted in the end.。
Stop the machine for 20 minutes after every 20-minute
operation. After extrusion, resume the above steps to make
another batch of noodles.
If you do not intend to make another batch, disconnect the
power and dismount the parts for cleaning and storage.
Operations Operations
Ingredients: Bread flour , water, edible oil, salt(high-gluten flour)
Salt
5g
Edible Oil
5ml
If the flour does not become a dough, indicating that the water is not enough, then add
the right amount of water according to the actual situation. If the dough is too sticky,
indicating too much water, then shut down the machine and pour the right amount of flour.
Adding Flour
Kneading Dough
Add
water
Extrusion
Recommended ingredients and proportions
Note:
Note:
Note:
Do not open the Top cover during the Kneading process.
Note:
Do not open the top cover during the extrusion process.
Bread Flour
(high-gluten flour)
Ingredients: Bread flour(high-gluten flour), water, edible oil, salt

Make sure the power is disconnected before dismounting. Take out the
parts one by one. To take out the extrusion box, press the unlock button
while rotating the extrusion box. Clean the main part with a slightly damp
cloth, the other parts can be washed with water. Clean the flour residue
with the brush. After cleaning, dry the machine and store it in a well-
ventilated dry place.
Press the unlock button while rotating the extrusion box, otherwise
can not take out the extrusion box.
If there are flour residues on the top of extrusion rod and in the plastic
seal. Use the cleaning rod from the end of brush to clean the flour
residues. Otherwise the extrusion rod is hard to installed to correct
position. Disassemble the plastic seal and clean it.
After cleaning the plastic seal, make sure to fix it to the kneading
chamber again to avoid lost.
Dismounting and Cleaning
Plastic
Seal
Care and Maintenance
1. Disconnect the machine from the power supply before
cleaning.
2. Keep the machine dry.
3. Stone the machine in a well-ventilated and dry place.
4. Clean after each use.
5. Clean the machine with a slightly damp cloth only.
6. After cleaning, dry the machine before storage.
Specifications
Power
Board
Fan Motor
Motor
Control
Board
Input
Circuit Diagram
Net Weight
Model No.
Voltage
Frequency
Power
PCA-6
180W
4.2kg
Do not immerse the main part in the water or other liquids.
Fuse
AC220V-240V
AC100V-120V 50Hz-60Hz
50Hz-60Hz
AC220V-240V
AC100V-120V
Unlock Button

125424, г. Москва, Волоколамское шоссе, д. 88, стр. 8
Тел./факс: +74955404600
Table of contents