manuals.online logo
Brands
  1. Home
  2. •
  3. Brands
  4. •
  5. PCB Piezotronics
  6. •
  7. Measuring Instrument
  8. •
  9. PCB Piezotronics 3502A1220KG User manual

PCB Piezotronics 3502A1220KG User manual

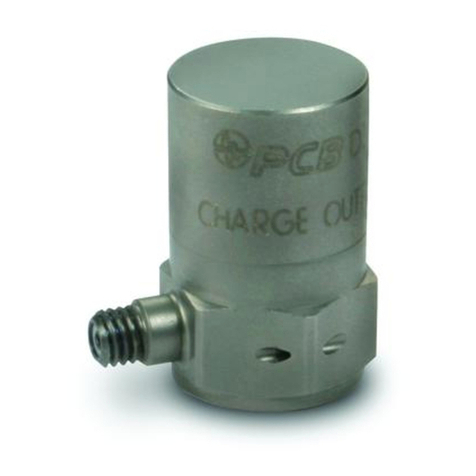
Model 3502A1220KG
Piezoresistive Shock Accelerometer
Installation and Operating Manual
For assistance with the operation of this product,
contact the PCB Piezotronics, Inc.
Toll-free: 716-684-0001
24-hour SensorLine: 716-684-0001
Fax: 716-684-0987
E-mail: [email protected]
Web: www.pcb.com
Manual 21354 Rev E
ECN 50523
Repair and Maintenance
PCB guarantees Total Customer Satisfaction through its
“Lifetime Warranty Plus” on all Platinum Stock Products
sold by PCB and through its limited warranties on all other
PCB Stock, Standard and Special products. Due to the
sophisticated nature of our sensors and associated
instrumentation, field servicing and repair is not
recommended and, if attempted, will void the factory
warranty.
Beyond routine calibration and battery replacements
where applicable, our products require no user
maintenance. Clean electrical connectors, housings, and
mounting surfaces with solutions and techniques that will
not harm the material of construction. Observe caution
when using liquids near devices that are not hermetically
sealed. Such devices should only be wiped with a
dampened cloth—never saturated or submerged.
In the event that equipment becomes damaged or ceases
to operate, our Application Engineers are here to support
your troubleshooting efforts 24 hours a day, 7 days a
week. Call or email with model and serial number as well
as a brief description of the problem.
Calibration
Routine calibration of sensors and associated
instrumentation is necessary to maintain measurement
accuracy. We recommend calibrating on an annual basis,
after exposure to any extreme environmental influence,
or prior to any critical test.
PCB Piezotronics is an ISO-9001 certified company whose
calibration services are accredited by A2LA to ISO/IEC
17025, with full traceability to SI through N.I.S.T. In
addition to our standard calibration services, we also offer
specialized tests, including: sensitivity at elevated or
cryogenic temperatures, phase response, extended high
or low frequency response, extended range, leak testing,
hydrostatic pressure testing, and others. For more
information, contact your local PCB Piezotronics
distributor, sales representative, or factory customer
service representative.
Returning Equipment
If factory repair is required, our representatives will
provide you with a Return Material Authorization (RMA)
number, which we use to reference any information you
have already provided and expedite the repair process.
This number should be clearly marked on the outside of
all returned package(s) and on any packing list(s)
accompanying the shipment.
Contact Information
PCB Piezotronics, Inc.
3425 Walden Ave.
Depew, NY14043 USA
Toll-free: (800) 828-8840
24-hour SensorLine: (716) 684-0001
General inquiries: in[email protected]
Repair inquiries: rma@pcb.com
For a complete list of distributors, global offices and sales
representatives, visit our website, www.pcb.com.
Safety Considerations
This product is intended for use by qualified personnel
who recognize shock hazards and are familiar with the
precautions required to avoid injury. While our equipment
is designed with user safety in mind, the protection
provided by the equipment may be impaired if equipment
is used in a manner not specified by this manual.
Discontinue use and contact our 24-Hour Sensorline if:
Assistance is needed to safely operate equipment
Damage is visible or suspected
Equipment fails or malfunctions
For complete equipment ratings, refer to the enclosed
specification sheet for your product.
Definition of Terms and Symbols
The following symbols may be used in this manual:
DANGER
Indicates an immediate hazardous
situation, which, if not avoided, may
result in death or serious injury.
Manual 21354 Rev E
ECN 50523
CAUTION
Refers to hazards that could damage
the instrument.
NOTE
Indicates tips, recommendations and
important information. The notes
simplify processes and contain
additional information on particular
operating steps.
The following symbols may be found on the equipment
described in this manual:
This symbol on the unit indicates that
high voltage may be present. Use
standard safety precautions to avoid
personal contact with this voltage.
This symbol on the unit indicates that
the user should refer to the operating
instructions located in the manual.
This symbol indicates safety, earth
ground.
Manual 21354 Rev E
ECN 50523
PCB工业监视和测量设备 - 中国RoHS2公布表
PCB Industrial Monitoring and Measuring Equipment - China RoHS 2 Disclosure Table
部件名称
有害物质
铅(Pb)
汞
(Hg)
镉
(Cd)
六价铬(Cr(VI))
多溴联苯 (PBB)
多溴二苯醚(PBDE)
住房
O
O
O
O
O
O
PCB板
X
O
O
O
O
O
电气连接器
O
O
O
O
O
O
压电晶体
X
O
O
O
O
O
环氧
O
O
O
O
O
O
铁氟龙
O
O
O
O
O
O
电子
O
O
O
O
O
O
厚膜基板
O
O
X
O
O
O
电线
O
O
O
O
O
O
电缆
X
O
O
O
O
O
塑料
O
O
O
O
O
O
焊接
X
O
O
O
O
O
铜合金/黄铜
X
O
O
O
O
O
本表格依据 SJ/T 11364 的规定编制。
O:表示该有害物质在该部件所有均质材料中的含量均在 GB/T 26572 规定的限量要求以下。
X:表示该有害物质至少在该部件的某一均质材料中的含量超出 GB/T 26572 规定的限量要求。
铅是欧洲RoHS指令2011/65/ EU附件三和附件四目前由于允许的豁免。
CHINA RoHS COMPLIANCE
Manual 21354 Rev E
ECN 50523
Component Name
Hazardous Substances
Lead (Pb)
Mercury (Hg)
Cadmium (Cd)
Chromium VI
Compounds
(Cr(VI))
Polybrominated
Biphenyls (PBB)
Polybrominated
Diphenyl Ethers
(PBDE)
Housing
O
O
O
O
O
O
PCB Board
X
O
O
O
O
O
Electrical Connectors
O
O
O
O
O
O
Piezoelectric Crystals
X
O
O
O
O
O
Epoxy
O
O
O
O
O
O
Teflon
O
O
O
O
O
O
Electronics
O
O
O
O
O
O
Thick Film Substrate
O
O
X
O
O
O
Wires
O
O
O
O
O
O
Cables
X
O
O
O
O
O
Plastic
O
O
O
O
O
O
Solder
X
O
O
O
O
O
Copper Alloy/Brass
X
O
O
O
O
O
This table is prepared in accordance with the provisions of SJ/T 11364.
O: Indicates that said hazardous substance contained in all of the homogeneous materials for this part is below the limit
requirement of GB/T 26572.
X: Indicates that said hazardous substance contained in at least one of the homogeneous materials for this part is above the limit
requirement of GB/T 26572.
Lead is present due to allowed exemption in Annex III or Annex IV of the European RoHS Directive 2011/65/EU.
Manual Number: 43331
Manual Revision: B
3500/3600 Series Piezoresistive Shock Accelerometer Operating Guide
1
1.0 Introduction
This Operating Guide contains information that will
familiarize the user with the basic operation and installation of
the 3500/3600 Series Piezoresistive (PR) Shock
Accelerometers. However, it is not intended to cover all of the
specific measurement challenges that one may encounter while
using the device. Therefore, if you have detailed questions or
are unsure of how to properly operate the sensor after reading
this Operating Guide, please contact a PCB Application
Engineer using our 24-Hour SensorLineTM at 716-684-0001.
2.0 Principle of Operation
PR accelerometers are passive devices which require stable
external power, typically a regulated dc voltage such as 10V
(or more recently 5V or 3.3V), to operate with new
electronics. These full-bridge sensors include four, active,
silicon strain-sensing elements which change resistance
proportionally to an applied acceleration. In response to an
acceleration input, the resistance will increase for two of the
sensing elements and the resistance will decrease for the other
two elements, as shown in the Wheatstone-bridge circuit of
Figure 1. The sensitivity of the bridge is proportional to the
Excitation Voltage.
Figure 1 –Wheatstone Bridge Circuit
Terminology related to PR devices includes:
ZMO –Zero Measurand Output, also called bias or offset, is
the output when no input acceleration is applied.
TSS –Thermal Sensitivity Shift, the change of sensitivity due
to temperature. The sensors are uncompensated, so they
display a slight linear decrease in sensitivity as temperature
increases.
TZS –Thermal Zero Shift, the change in ZMO due to
temperature. This is less predictable, and from unit to unit may
have positive or negative slope, although it will be stable for
any one unit.
3.0 Features
The 3500/3600 Series uses micro-electromechanical systems
(MEMS) technology, in which all structural and electronic
components are manufactured in silicon using electronic
microfabrication technologies. MEMS devices are preferred in
many high shock impact measurements over piezoelectric
elements, since these PR devices are inherently DC coupled,
exploit the strength of single crystal silicon (SCS) and display
minimal zero shift. However, an additional characteristic of
SCS is extremely low internal damping, which results in
susceptibility to overshoot and resonant excitation. Although
the stiffness of silicon can allow extremely high resonant
frequencies in some MEMS shock sensor designs, PCB
MEMS sensors take a different approach in which the resonant
frequency is intentionally lowered to reduce the response to
higher frequency energy present in shock events. The
relatively low resonance also creates displacements of the
seismic element sufficient to introduce squeeze film damping.
Air is used rather than a fluid so thermal effects on damping
are negligible.
Manufactured using recent advances in semiconductor
processing, the PCB MEMS design consists of a mildly under-
damped sensor with sufficient bandwidth to accurately track
rigid-body vehicle deceleration. Resonant amplification is
reduced by orders of magnitude, and survivability is increased.
Ruggedness is enhanced through the use of mechanical stops.
The sensors are manufactured as the sandwich of three wafers,
with the active core surrounded by the two outer wafers which
provide hermetic protection and restrict the travel of the proof
mass.
Because many such applications are coupled with battery
powered conditioning and data acquisition, PCB MEMS
sensors were designed with relatively high value resistors
(approximately 10 times that of other devices) to maximize
battery life.
4.0 Common Applications
The 3500/3600 Series PR Shock Accelerometers achieve true
DC response for measuring long duration shock. For this
reason, they are preferred for applications in which integration
from acceleration to velocity or displacement may be
or
Yellow
Manual Number: 43331
Manual Revision: B
3500/3600 Series Piezoresistive Shock Accelerometer Operating Guide
2
performed. These are violent events. Because of the critical
nature of these and similar test applications, PCB MEMS DC
Accelerometers have been designed and manufactured with the
following common characteristics:
Rugged, all-welded, titanium housing, or ceramic housing,
insures reliability and durability in demanding
applications and environments.
The MEMS sensor includes over-range stops set at
approximately twice the full range.
Gas damping attenuates unwanted high-frequency output.
5.0 Sensor Installation
The 3500/3600 Series DC Accelerometers are available in
various forms. Review Outline Drawings and/or Installation
Drawings provided with sensors for specific details and
requirements related to hardware, mounting, materials,
packaging, cabling, etc.
For certain applications not requiring a signal cable, surface
mount technology (SMT) style sensors are available upon
request. Contact PCB Application Engineers to discuss
specific application requirements.
When choosing a mounting method, it’s important to take
characteristics like location, temperature, environment, and
surface condition into consideration. The sensor must be
mounted on a clean, flat surface to avoid the potential for
misalignment and/or limited contact with the mounting surface
which may diminish the sensor’s performance. Mounting
surface flatness, finish & preparation requirements are
indicated on the provided Sensor Installation Drawing.
Mounting the sensor will require a clean contact surface to
avoid small particles or debris trapped between the mounting
surface and sensor that can preload the accelerometer case
with unwanted static strain, possibly resulting in zero-shift
during a shock measurement.
Prepare a smooth, flat mounting surface and, if applicable,
drill and tap mounting holes according to the Sensor
Installation Drawing.
Wipe clean the mounting surface and, as appropriate,
apply a thin film of couplant, such as machinist oil, to
enhance transmissibility by filling small voids in the
mounting surface and increasing mounting stiffness.
Hand-tighten the sensor (or mounting hardware, as
appropriate), then torque down per the Sensor Installation
Drawing. In extreme conditions it’s recommended to
check the mounting torque after each measurement. It’s
also recommended that a thread locking adhesive be
applied to any threads, if applicable.
Ceramic LCC (leadless chip carrier) packages available in this
series are designed to be installed on circuit boards with
conventional surface mounting techniques. An under-fill epoxy
is recommended to be used for additional mechanical strength.
6.0 Power
Normally PR devices are powered with regulated excitation,
since the sensitivity is proportional to input voltage. PCB
MEMS sensors generally exhibit good proportionality (due to
minimal self-heating of the comparatively high-resistance
elements). Still, it is generally recommended to obtain the
calibrated sensitivity using the intended excitation voltage. In
integrated applications, in which the data acquisition is
powered by the same voltage that supplies the bridge, it is
possible to reduce the effect of variations in excitation on
overall system sensitivity by using the excitation voltage as the
reference for the data acquisition.
7.0 Typical Measurement System
The output from the sensor is typically routed to a bridge
conditioner then an oscilloscope or various data acquisition
instruments. Consult PCB Application Engineering for
additional signal conditioning options. To take advantage of
the DC response of the accelerometer, the readout device must
be in a DC coupled state. Consult the appropriate manufacturer
or product manual for your readout device for details.
8.0 Sensor Verification
Generally the ZMO of a PR transducer is a good measure of
the health of the transducer. Input Resistance (from Red to
Black) or Output Resistance (from Green or Yellow to White),
is less commonly used to check the condition, since resistance
changes with temperature. A thorough check of the health
(suggested both before and after an expensive test) must
include calibration of the sensitivity.
In some laboratories which use piezoresistive transducers, it is
customary to check the continuity and gain of the conditioning
and data acquisition system using a technique called “Shunt
Calibration”. By temporarily unbalancing the bridge with a
shunt resistor placed in parallel with a leg of the bridge
(usually between the “+ Sig” wire and either the “+ Exc” or “–
Exc”), dc shifts of the offset are created. Whereas the process
does not calibrate the transducer, it is a check of system gain,
with accuracy of the resultant dc shift in output dependent on
the degree that the resistances of both the leg of the bridge and

Manual Number: 43331
Manual Revision: B
3500/3600 Series Piezoresistive Shock Accelerometer Operating Guide
3
the shunt resistor are accurately known. Among other sources
of variability, temperature can change the value of the
resistors, and therefore the Shunt Calibration output. The user
should be aware that because the sensors are full bridge
transducers, all legs are active and will have temperature
coefficients typical of piezoresistive sensors (approximately
+0.1%/degree C).
9.0 Sensor Calibration
For shock accelerometers, the most appropriate, accurate and
reliable calibration is with a comparison shock using a back-
to-back reference and pneumatic exciter, as described in ISO
16063-22, “Methods for the calibration of vibration and shock
transducers —Part 22: Shock calibration by comparison to a
reference transducer.” PCB offers this calibration as a service.
10.0 Maintenance and Repair
Because of the sophisticated nature of PCB instrumentation,
field repair of the equipment is not recommended. Most PCB
sensors are of modular construction and are factory repairable.
A repair or replacement quotation is available at no charge.
Before returning equipment for repair, it is recommended that
the user confer with a factory application engineer (or inter-
national representative) to first troubleshoot the problem.
11.0 Return Procedure
To expedite the repair process, contact a factory application
engineer to obtain a Return Material Authorization (RMA)
number prior to sending equipment to the factory. Please have
information, such as model number, serial number and
description of the problem, available.
Customers outside the U.S. should consult their local PCB
distributor for information on returning equipment. For
exceptions to this guideline, please contact the International
Sales department to request shipping instructions and an RMA.
For further assistance, please call (716) 684-0001 or fax us at
(716) 684-0987. You may also receive assistance via e-mail at
[email protected] or visit our web site at www.pcb.com
12.0 Customer Service / Warranty
The employees of PCB strive to provide superior, unmatched
customer service. Should you at any time find yourself
dissatisfied with any PCB product for any reason, consult a
factory Application Engineer or local representative/distributor
to discuss repair, refund, or exchange procedures.
When unexpected measurement problems arise, call our 24-
hour Sensor LineTM at (716) 684-0001 to discuss your
immediate dynamic instrumentation needs with a Factory
Representative.
Model Number
3502A1220KG PIEZORESISTIVE SHOCK ACCELEROMETER Revision: A
ECN #: 46359
Performanc
e
ENGLISH S
I
Sensitivity(± 50 %)(at 10 VDC excitation) 0.010 mV/g 0.001 mV/(m/s²) [1]
Sensitivity 0.001 mV/V/g 0.0001 mV/V/(m/s²)
Measurement Range ± 20 kg ± 196,100 m/s² pk
Frequency Range(± 1 dB) 0 to 10,000 Hz 0 to 10,000 Hz
Resonant Frequency >60 kHz >60 kHz
Damping Ratio 5 % Critical 5 % Critical [5]
Non-Linearity(per 10,000 g (98,100 m/s²)) ± 1 % ± 1 %
Transverse Sensitivity ≤3 % ≤3 %
Environmental
Overload Limit(Shock) ± 60,000 g pk ± 588,000 m/s² pk [4]
Overload Limit(Mechanical Stops) ≥30 kg ≥294,200 m/s² pk
Temperature Range(Operating) -65 to 250 °F -54 to 121 °C
Temperature Coefficient of Sensitivity -0.11 %/°F -0.20 %/°C [5]
Zero g Offset Temperature Shift ± 10 mV ± 10 mV [6]
Base Strain Sensitivity 0.10 g/µε0.98 (m/s²)/µε[5]
Magnetic Sensitivity 10 µg/gauss 0.98 (m/s²)/Tesla [5]
Electrica
l
Excitation Voltage(Maximum) 15.0 VDC 15.0 VDC
Current Consumption <3 mA <3 mA
Input Resistance(± 2000 Ohm) 6000 Ohm 6000 Ohm [1]
Output Resistance(± 2000 Ohm) 6000 Ohm 6000 Ohm [1]
Offset Voltage -40 to +40 mVDC -40 to +40 mVDC [1]
Settling Time 0.01 sec 0.01 sec [2]
Electrical Isolation(Case) ≥107Ohm ≥107Ohm [3]
Physica
l
Sensing Element Piezoresistive MEMS Piezoresistive MEMS
Sensing Geometry Full Active Full Active
Housing Material Titanium Titanium
Sealing Epoxy Epoxy
Size (Height x Length x Width) .11 in x .33 in x .22 in 2.8 mm x 8.4 mm x 5.6 mm
Weight(without cable) .011 oz .32 gm [5]
Electrical Connector Integral Cable Integral Cable
Electrical Connection Position Side Side
Cable Type 096 4-cond silicone jacket 096 4-cond silicone jacket
Cable Termination Pigtail Ends Pigtail Ends
Cable Length 10 ft 3.05 m
Mounting Adhesive Adhesive
All specifications are at room temperature unless otherwise specified.
In the interest of constant product improvement, we reserve the right to change specifications without notice.
OPTIONAL VERSIONS
Optional versions have identical specifications and accessories as listed for the standard model
except where noted below. More than one option may be used.
NOTES
:
[1] Verified with test data provided on supplied calibration certificate.
[2] Settling Time is the maximum time after power-up for the Offset Voltage to be within +/-2% of
Measurement Range output of the final offset value. Mounting surface must be at thermal
equilibrium.
[3] Individually tested to ensure compliance with specified value.
[4] Hal
f
-sine pulse duration, ≥20 µsec
.
[5] Typical
.
[6] -65 to +250 °F, ref. 75 °F (-54 to +121 °C, ref. 24 °C)
SUPPLIED ACCESSORIES:
Model ACS-62 Shock Calibration of Piezoresistive High Amplitude Accelerometers
Entered: LK Engineer: JS Sales: RW
M
Approved: NJF Spec Number:
Date: 1/10/2017 Date: 1/10/2017 Date: 1/10/2017 Date: 1/10/2017 64084
3425 Walden Avenue, Depew, NY 14043
Phone: 716-684-0001
Fax: 716-684-0987
E-Mail: [email protected]
1
1
2
2
3
3
4
4
A A
B B
CODE
IDENT. NO.
52681
DWG. NO.
SCALE: SHEET
DRAWN CHECKED ENGINEER
TITLE
UNLESS OTHERWISE SPECIFIED TOLERANCES ARE:
DIMENSIONS IN MILLIMETERS
[ IN BRACKETS ]
ANGLES 2 DEGREES
3425 WALDEN AVE. DEPEW, NY 14043
(716) 684-0001 E-MAIL: sales@pcb.com
DIMENSIONS IN INCHES
ANGLES 2 DEGREES
FILLETS AND RADII
.003 - .005
FILLETS AND RADII
0.07 - 0.13
OUTLINE DRAWING
64083
1 OF 1
2X
MODEL 3502A1220KG
EPOXY MOUNT SHOCK SENSOR
DECIMALS XX ±.03
XXX ±.010
DECIMALS X ± 0.8
XX ± 0.25
KRM 7/14/16 ECB 7/14/16 RMB 7/147/16
SHIELD
EXC + RED
OUT + GREEN
EXC - BLACK
OUT - WHITE
64083
PCB Piezotronics Inc. claims proprietary rights in
the information disclosed hereon. Neither it nor any
reproduction thereof will be disclosed to others
without the written consent of PCB Piezotronics Inc.
REVISIONS
REV DESCRIPTION DIN
NR RELEASED TO DRAFTING 45326
.22 [5.6]
.11 [2.8]
.11 [2.8]
.06 [1.5]
.33 [8.4]
.06 [1.4]
INTEGRAL CABLE
PER SPECIFICATION
DIRECTION OF
POSITIVE
ACCELERATION
.11 [2.8]

Other PCB Piezotronics Measuring Instrument manuals

PCB Piezotronics 602D61 User manual

PCB Piezotronics

PCB Piezotronics 602D61 User manual

PCB Piezotronics 3741F1230G User manual

PCB Piezotronics

PCB Piezotronics 3741F1230G User manual

PCB Piezotronics 605B91 User manual

PCB Piezotronics

PCB Piezotronics 605B91 User manual

PCB Piezotronics 356A45 User manual

PCB Piezotronics

PCB Piezotronics 356A45 User manual

PCB Piezotronics Triaxial ICP 339A32/NC User manual

PCB Piezotronics

PCB Piezotronics Triaxial ICP 339A32/NC User manual

PCB Piezotronics EX357E93 User manual

PCB Piezotronics

PCB Piezotronics EX357E93 User manual

PCB Piezotronics 480E09 User manual

PCB Piezotronics

PCB Piezotronics 480E09 User manual

PCB Piezotronics 3503A1160KG User manual

PCB Piezotronics

PCB Piezotronics 3503A1160KG User manual

PCB Piezotronics IMI SENSORS 627A11 User manual

PCB Piezotronics

PCB Piezotronics IMI SENSORS 627A11 User manual

PCB Piezotronics 350B23 User manual

PCB Piezotronics

PCB Piezotronics 350B23 User manual

PCB Piezotronics IMI SENSORS ICP M601A01 User manual

PCB Piezotronics

PCB Piezotronics IMI SENSORS ICP M601A01 User manual

PCB Piezotronics JM352C18 User manual

PCB Piezotronics

PCB Piezotronics JM352C18 User manual

PCB Piezotronics J352C68 User manual

PCB Piezotronics

PCB Piezotronics J352C68 User manual

PCB Piezotronics IMI SENSORS 646B01 User manual

PCB Piezotronics

PCB Piezotronics IMI SENSORS 646B01 User manual

PCB Piezotronics 3743F112G User manual

PCB Piezotronics

PCB Piezotronics 3743F112G User manual

PCB Piezotronics IMI SENSORS ICP 628F01/ICS-43 User manual

PCB Piezotronics

PCB Piezotronics IMI SENSORS ICP 628F01/ICS-43 User manual

PCB Piezotronics J357B14 User manual

PCB Piezotronics

PCB Piezotronics J357B14 User manual

PCB Piezotronics 356A44 User manual

PCB Piezotronics

PCB Piezotronics 356A44 User manual

PCB Piezotronics IMI Sensor M601A02 User manual

PCB Piezotronics

PCB Piezotronics IMI Sensor M601A02 User manual

PCB Piezotronics IMI Sensors TO625B01 User manual

PCB Piezotronics

PCB Piezotronics IMI Sensors TO625B01 User manual

PCB Piezotronics 018C10 User manual

PCB Piezotronics

PCB Piezotronics 018C10 User manual

PCB Piezotronics J357B11 User manual

PCB Piezotronics

PCB Piezotronics J357B11 User manual

PCB Piezotronics 354B20 User manual

PCB Piezotronics

PCB Piezotronics 354B20 User manual

PCB Piezotronics 080A181 User manual

PCB Piezotronics

PCB Piezotronics 080A181 User manual

Popular Measuring Instrument manuals by other brands

AimTTi SMU4000 Series instruction manual

AimTTi

AimTTi SMU4000 Series instruction manual

Linortek iTrixx-Ultra 300 user manual

Linortek

Linortek iTrixx-Ultra 300 user manual

ACU-RITE 01083 user manual

ACU-RITE

ACU-RITE 01083 user manual

Centech CEN-TECH 92340 Assembly and operating instructions

Centech

Centech CEN-TECH 92340 Assembly and operating instructions

Check-line CTM operating manual

Check-line

Check-line CTM operating manual

Ntron MINI ID Operation manual

Ntron

Ntron MINI ID Operation manual

FARM SCAN jackal V3.5 manual

FARM SCAN

FARM SCAN jackal V3.5 manual

Unit UT602 operating manual

Unit

Unit UT602 operating manual

Digi-Sense 20250-57 user manual

Digi-Sense

Digi-Sense 20250-57 user manual

ACU-RITE 06008RM instruction manual

ACU-RITE

ACU-RITE 06008RM instruction manual

V-tech VC7151-109 user manual

V-tech

V-tech VC7151-109 user manual

Unit UT267B operating manual

Unit

Unit UT267B operating manual

Micro Direct PulmoLife operating manual

Micro Direct

Micro Direct PulmoLife operating manual

red lion CUB 5TC-K manual

red lion

red lion CUB 5TC-K manual

Dilog CombiVolt DL6780 instruction manual

Dilog

Dilog CombiVolt DL6780 instruction manual

AU Tool X90 user manual

AU Tool

AU Tool X90 user manual

Biospherical Instruments Inc MER-2040 Software user manual

Biospherical Instruments Inc

Biospherical Instruments Inc MER-2040 Software user manual

Check-line BLL operating instructions

Check-line

Check-line BLL operating instructions

manuals.online logo
manuals.online logoBrands
  • About & Mission
  • Contact us
  • Privacy Policy
  • Terms and Conditions

Copyright 2025 Manuals.Online. All Rights Reserved.