manuals.online logo
Brands
  1. Home
  2. •
  3. Brands
  4. •
  5. PCE Instruments
  6. •
  7. Measuring Instrument
  8. •
  9. PCE Instruments PCE-CT 5000 User manual

PCE Instruments PCE-CT 5000 User manual

Other PCE Instruments Measuring Instrument manuals

PCE Instruments PCE-423N User manual

PCE Instruments

PCE Instruments PCE-423N User manual

PCE Instruments PCE-TG 75 User manual

PCE Instruments

PCE Instruments PCE-TG 75 User manual

PCE Instruments PCE-VE 1030N User manual

PCE Instruments

PCE Instruments PCE-VE 1030N User manual

PCE Instruments PCE-423 User manual

PCE Instruments

PCE Instruments PCE-423 User manual

PCE Instruments PCE-900 User manual

PCE Instruments

PCE Instruments PCE-900 User manual

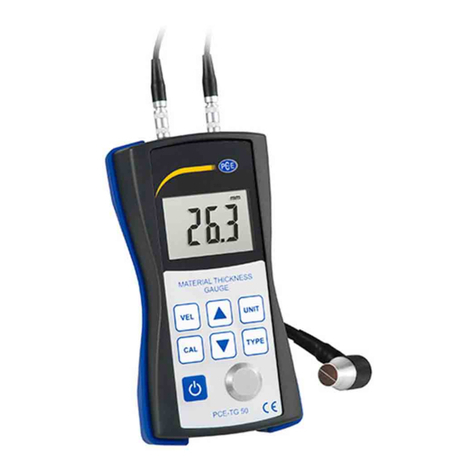
PCE Instruments PCE-TG 50 User manual

PCE Instruments

PCE Instruments PCE-TG 50 User manual

PCE Instruments PCE-CT 80 User manual

PCE Instruments

PCE Instruments PCE-CT 80 User manual

PCE Instruments PCE-T 260 User manual

PCE Instruments

PCE Instruments PCE-T 260 User manual

PCE Instruments PCE-GPA 62 User manual

PCE Instruments

PCE Instruments PCE-GPA 62 User manual

PCE Instruments PCE-320 User manual

PCE Instruments

PCE Instruments PCE-320 User manual

PCE Instruments PCE-LCT 3 User manual

PCE Instruments

PCE Instruments PCE-LCT 3 User manual

PCE Instruments PCE-PA 8000 User manual

PCE Instruments

PCE Instruments PCE-PA 8000 User manual

PCE Instruments PCE-COG 10 User manual

PCE Instruments

PCE Instruments PCE-COG 10 User manual

PCE Instruments PSE-SDL 1 User manual

PCE Instruments

PCE Instruments PSE-SDL 1 User manual

PCE Instruments PCE-432-ICA User manual

PCE Instruments

PCE Instruments PCE-432-ICA User manual

PCE Instruments PCE-FM 20 User manual

PCE Instruments

PCE Instruments PCE-FM 20 User manual

PCE Instruments PCE-TG 75-ICA User manual

PCE Instruments

PCE Instruments PCE-TG 75-ICA User manual

PCE Instruments PCE-CSM 10 User manual

PCE Instruments

PCE Instruments PCE-CSM 10 User manual

PCE Instruments PCE-SPM 1 User manual

PCE Instruments

PCE Instruments PCE-SPM 1 User manual

PCE Instruments PCE-VT 3700 User manual

PCE Instruments

PCE Instruments PCE-VT 3700 User manual

PCE Instruments PCE-DC 50 User manual

PCE Instruments

PCE Instruments PCE-DC 50 User manual

PCE Instruments PCE-ALK User manual

PCE Instruments

PCE Instruments PCE-ALK User manual

PCE Instruments UMI 880 Series User manual

PCE Instruments

PCE Instruments UMI 880 Series User manual

PCE Instruments PCE-DFG N 20K User manual

PCE Instruments

PCE Instruments PCE-DFG N 20K User manual

Popular Measuring Instrument manuals by other brands

Powerfix Profi 278296 Operation and safety notes

Powerfix Profi

Powerfix Profi 278296 Operation and safety notes

Test Equipment Depot GVT-427B user manual

Test Equipment Depot

Test Equipment Depot GVT-427B user manual

Fieldpiece ACH Operator's manual

Fieldpiece

Fieldpiece ACH Operator's manual

FLYSURFER VIRON3 user manual

FLYSURFER

FLYSURFER VIRON3 user manual

GMW TG uni 1 operating manual

GMW

GMW TG uni 1 operating manual

Downeaster Wind & Weather Medallion Series instruction manual

Downeaster

Downeaster Wind & Weather Medallion Series instruction manual

Hanna Instruments HI96725C instruction manual

Hanna Instruments

Hanna Instruments HI96725C instruction manual

Nokeval KMR260 quick guide

Nokeval

Nokeval KMR260 quick guide

HOKUYO AUTOMATIC UBG-05LN instruction manual

HOKUYO AUTOMATIC

HOKUYO AUTOMATIC UBG-05LN instruction manual

Fluke 96000 Series Operator's manual

Fluke

Fluke 96000 Series Operator's manual

Test Products International SP565 user manual

Test Products International

Test Products International SP565 user manual

General Sleep Zmachine Insight+ DT-200 Service manual

General Sleep

General Sleep Zmachine Insight+ DT-200 Service manual

Sensa Core Lacto Spark user manual

Sensa Core

Sensa Core Lacto Spark user manual

VOLTCRAFT UTS-1980 operating instructions

VOLTCRAFT

VOLTCRAFT UTS-1980 operating instructions

EBCHQ 94915 Operation manual

EBCHQ

EBCHQ 94915 Operation manual

Balluff BIP LD2-T017-01-EP-S4 Series user guide

Balluff

Balluff BIP LD2-T017-01-EP-S4 Series user guide

Pulsar IMP Lite Series instruction manual

Pulsar

Pulsar IMP Lite Series instruction manual

ETCR 6800 user manual

ETCR

ETCR 6800 user manual

manuals.online logo
manuals.online logoBrands
  • About & Mission
  • Contact us
  • Privacy Policy
  • Terms and Conditions

Copyright 2025 Manuals.Online. All Rights Reserved.

1
PCE Americas Inc.
711 Commerce Way
Suite 8
Jupiter
FL-33458
USA
From outside US: +1
Tel: (561) 320-9162
Fax: (561) 320-9176
[email protected]
www.pce-instruments.com/english
www.pce-instruments.com
PCE Instruments UK Ltd.
Unit 11
Southpoint Business Park
Ensign way
Hampshire / Southampton
United Kingdom, SO31 4RF
From outside UK: +44
Tel: (0) 2380 98703 0
Fax: (0) 2380 98703 9
[email protected]
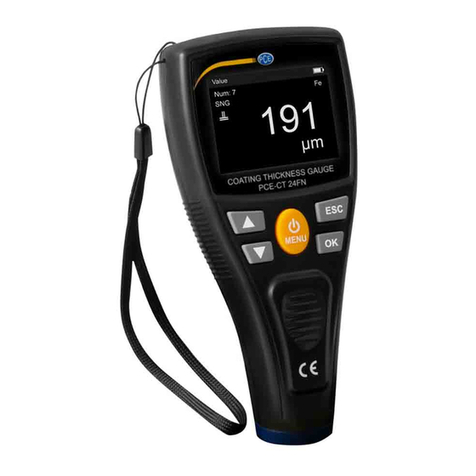
DIGITAL COATING
THICKNESS GAUGE
( F & NF TYPE)
PCE-CT 5000
INSTRUCTION MANUAL
This Coating Thickness Meter is small in size, light in
weight, easy to carry. Although complex and advanced, it
is convenient to use and operate. Its ruggedness will allow
many years of use if proper operating techniques are followed.
Please read the following instructions carefully and always
keep this manual within easy reach.
1
1. FEATURES
* It meets the standards of both ISO2178 and
ISO-2360 as well as DIN, ASTM and BS.
Suitable for the laboratory and for use in
harsh field conditions.
* The F probes measure the thickness of non-
magnetic materials (e.g. paint, plastic,
porcelain enamel, copper, zinc, aluminium,
chrome etc.) on magnetic materials (e.g.
iron, nickle etc.) . often used to measure the
thickness of galvanizing layer, lacquer
layer, porcelain enamel layer, phosphide
layer, copper tile, aluminium tile, some
alloy tile, paper etc.
* The N probes measure the thickness of
non-magnetic coatings on non-magnetic
metals. It is used on anodizing, varnish,
paint, enamel, plastic coatings, powder,
etc. applied to aluminum, brass, non-
magnetic stainless steel, etc.
* Automatic substrate recognition.
* Manual or automatic shut down.
* Two measurement mode: Single and Continuous
* Wide measuring range and high resolution.
* Metric/English conversion.
*Digital display gives exact reading with no
guessing or errors.
*Can communicate with PC computer for
statistics and printing by the optional cable and
the software for RS232C interface .
4
power and '0' shows up on the Display (3-2).
The gauge will restore the state of last
operation itself , with a symbol 'Fe' or 'NFe'
indicating on Display. The gauge enters the
auto mode which can automatically recognize
the substrate itself.
4.2 Place the probe (3-1) on a coating layer to be
measured. The reading on the Display is the
thickness of the coating layer.
4.3 To take the next measurement, just lift the
probe (3-1) to more than 1 centimeter and then
repeat the step 4.2.
4.4 If you suspect the accuracy of measurement,
you should calibrate before taking the
measurements. For the calibration procedures,
please refer to the calibration part 5.
4.5 The gauge can be switched off by pressing
the Power key (3-3). On the other side, the
gauge will power itself off about 50 seconds
after the last operation.
4.6 To change the measurement unit 'um' or 'mil'
by Depressing the Zero/Power key and not
releasing it till 'UNIT' on the Display. And
the unit changes after releasing the power key.
It takes about 6 seconds from starting
2.SPECIFICATIONS
Display 4 digits, 10 mm LCD
Range 0~5000 um/0~200mil
Other range should be specified
Resolution 0.1 um (0~99.9um)
1 um (over 100um)
Accuracy ±1~3%n or 2.5 um or 0.1mil
(Whichever is the greater)
PC interface: with RS-232C interface
Power supply 4x1.5 AAA(UM-4) battery
Operating condition: Temp. 0~50 ,
Humidity <80%
Size 126x65x27 mm (5.0x2.6x1.1 inch)
Weight: about 81g not including battery
Accessories
Carrying case ...................1 pc.
Operation manual ............ 1 pc.
F probe in built .................1 pc.
NF probe in built...............1 pc.
Calibration foils ..............1set
Substrate (Iron) ............1 pc.
Substrate (Aluminium)......1 pc.
Optional accessories:
Cable & software for RS232C
2
4. MEASURING PROCEDURE
4.1 Press the power key (3-3) to switch on the
3-1
3-1 Probes inbuilt
3-2 Display
3-3 Zero/Power Key
3-4 Battery Compartment/Cover
3-5 Jack for RS232C interface
3. FRONT PANEL DESCRIPTIONS
3-2
3-3
3-4
3-5
depressing the Zero/Power key.
4.7 To change measurement mode from the single
to continuous or vice visa, just depressing the
Zero/ Power key and not releasing it till 'SC'
on the Display. The measurement mode
changes after releasing the Power key. it takes
about 8 seconds from starting depressing the
Power key.
It is a continuous mode if the symbol on
the Display.
3
3-1
- +
5. ZERO CALIBRATION
Zero adjustment for 'Fe' and 'NFe' should be carried
out separately. Take the iron substrate if 'Fe' on
Display, while take the aluminium substrate if 'NFe'
on the Display. Place the probe (3-1) on the substrate
steadily. Press the Zero key (3-3) and '0' will be
on the Display before lifting the probe. If pressing
the ZERO key but the probe is not placed on
the substrate or an uncoated standard. The zero
calibration is invalid.
battery voltage less than approx. 2.5v , the
battery symbol ' ' will appear on the
Display
5
6.2 Slide the Battery Cover ( Fig. 1 , 3-4) away
from the instrument and remove the batteries.
6.3 Install the batteries (2x1.5v AAA/UM-4)
correctly into the case.
6.4 If the instrument is not to be used for any
extended period , remove batteries.
6. BATTERY REPLACEMENT
6.1 When it is necessary to replace the battery, i.e.
6
7.CALIBRATION FOILS
As accessori es, the in strume nt includes a
different foil set for different ranges. Please see
the following table.
STANDARD FOIL INCLUDED RANGE
(um) CM25 CM50 CM100 CM200 CM500 CM1000
0~200 X X X X
0~500 X X X X
0~1000 X X X X X
0~2000 X X X X X
Customized
7
8. CONSIDERATIONS
8.1 In order to weaken the influence of the measured
material on the accuracy of measurement, it is
recommended that the calibrations should be
done on the uncoated material to be measured.
8.2 Probes will eventually wear. Probe life will
depend on the number of measurements taken and
how abrasive the coating is. Replacement
separate can be fitted by qualified persons only.
8