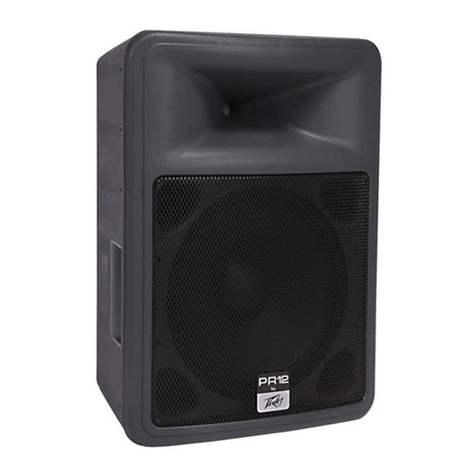
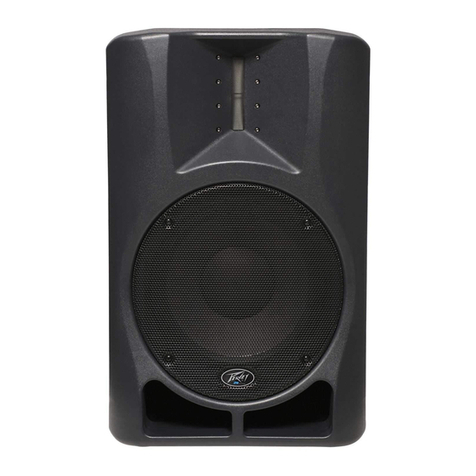
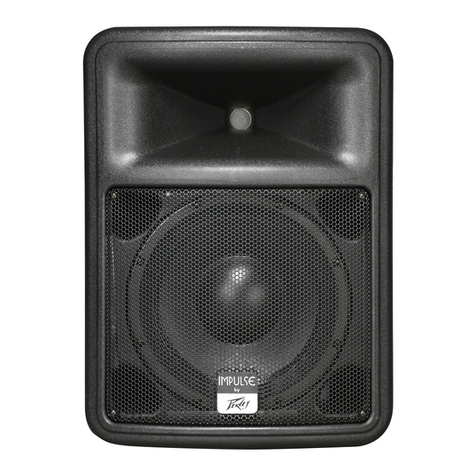
Peavey PR 12P User manual

PR™12P Powered bi-amplified two-way speaker system · Operations Manual
For more information on other great Peavey products, go to your local Peavey dealer or online at www.peavey.com.
All manuals and user guides at all-guides.com
all-guides.com

2
Intended to alert the user to the presence of uninsulated “dangerous voltage” within the product’s
enclosure that may be of sufficient magnitude to constitute a ris of electric shoc to persons.
Intended to alert the user of the presence of important operating and maintenance (servicing)
instructions in the literature accompanying the product.
CCAAUUIIOONN::Ris of electrical shoc — DO NOT OPEN!
CCAAUUIIOONN::To reduce the ris of electric shoc , do not remove cover. No user serviceable parts inside.
Refer servicing to qualified service personnel.
WWAARRNNIINNGG::To prevent electrical shoc or fire hazard, do not expose this appliance to rain or moisture.
Before using this appliance, read the operating guide for further warnings.
Este símbolo tiene el propósito, de alertar al usuario de la presencia de “(voltaje) peligroso” sin
aislamiento dentro de la caja del producto y que puede tener una magnitud suficiente como para
constituir riesgo de descarga eléctrica.
Este símbolo tiene el propósito de alertar al usario de la presencia de instruccones importantes sobre la
operación y mantenimiento en la información que viene con el producto.
PPRREECCAAUUCCIIOONN::Riesgo de descarga eléctrica ¡NO ABRIR!
PPRREECCAAUUCCIIOONN::Para disminuír el riesgo de descarga eléctrica, no abra la cubierta. No hay piezas útiles
dentro. Deje todo mantenimiento en manos del personal técnico cualificado.
AADDVVEERREENNCCIIAA::Para evitar descargas eléctricas o peligro de incendio, no deje expuesto a la lluvia o
humedad este aparato Antes de usar este aparato, Iea más advertencias en la guía de operación.
Ce symbole est utilisé dans ce manuel pour indiquer à l’utilisateur la présence d’une tension dangereuse
pouvant être d’amplitude suffisante pour constituer un risque de choc électrique.
Ce symbole est utilisé dans ce manuel pour indiquer à l’utilisateur qu’il ou qu’elle trouvera d’importantes
instructions concernant l’utilisation et l’entretien de l’appareil dans le paragraphe signalé.
AAEENNIIOONN::Risques de choc électrique — NE PAS OUVRIR!
AAEENNIIOONN::Afin de réduire le risque de choc électrique, ne pas enlever le couvercle. Il ne se trouve à
l’intérieur aucune pièce pouvant être reparée par l’utilisateur. Confiez I’entretien et la réparation de
l’appareil à un réparateur Peavey agréé.
AAVVEERRIISSSSEEMMEENN: Afin de prévenir les risques de décharge électrique ou de feu, n’exposez pas cet
appareil à la pluie ou à l’humidité. Avant d’utiliser cet appareil, lisez attentivement les avertissements
supplémentaires de ce manuel.
Dieses Symbol soll den Anwender vor unisolierten gefährlichen Spannungen innerhalb des Gehäuses
warnen, die von Ausreichender Stär e sind, um einen ele trischen Schlag verursachen zu önnen.
Dieses Symbol soll den Benutzer auf wichtige Instru tionen in der Bedienungsanleitung aufmer sam
machen, die Handhabung und Wartung des Produ ts betreffen.
VVOORRSSIICCHH:: Risi o — Ele trischer Schlag! Nicht öffnen!
VVOORRSSIICCHH:: Um das Risi o eines ele trischen Schlages zu vermeiden, nicht die Abdec ung enfernen. Es
befinden sich eine Teile darin, die vom Anwender repariert werden önnten. Reparaturen nur von
qualifiziertem Fachpersonal durchführen lassen.
AACCHHUUNNGG::Um einen ele trischen Schlag oder Feuergefahr zu vermeiden, sollte dieses Gerät nicht dem
Regen oder Feuchtig eit ausgesetzt werden. Vor Inbetriebnahme unbedingt die Bedienungsanleitung lesen.
All manuals and user guides at all-guides.com

3
IIMMPPOORRTTAANNTT SSAAFFEETTYY IINNSSTTRRUUCCTTIIOONNSS
WWAARRNNIINNGG::When using electrical products, basic cautions should always be followed, including the following:
1. Read these instructions.
2. Keep these instructions.
3. Heed all warnings.
4. Follow all instructions.
5. Do not use this apparatus near water.
6. Clean only with a dry cloth.
7. Do not bloc any of the ventilation openings. Install in accordance with manufacturer’s instructions.
8. Do not install near any heat sources such as radiators, heat registers, stoves or other apparatus (including amplifiers)
that produce heat.
9. Do not defeat the safety purpose of the polarized or grounding-type plug. A polarized plug has two blades with one
wider than the other. A grounding type plug has two blades and a third grounding plug. The wide blade or third prong is
provided for your safety. If the provided plug does not fit into your outlet, consult an electrician for replacement of the
obsolete outlet.
10. Protect the power cord from being wal ed on or pinched, particularly at plugs, convenience receptacles, and the point
they exit from the apparatus.
11. Note for UK only: If the colors of the wires in the mains lead of this unit do not correspond with the terminals in your
plug‚ proceed as follows:
a) The wire that is colored green and yellow must be connected to the terminal that is mar ed by the letter E‚ the earth
symbol‚ colored green or colored green and yellow.
b) The wire that is colored blue must be connected to the terminal that is mar ed with the letter N or the color blac .
c) The wire that is colored brown must be connected to the terminal that is mar ed with the letter L or the color red.
12. Only use attachments/accessories provided by the manufacturer.
13. Use only with a cart, stand, tripod, brac et, or table specified by the manufacturer, or sold with the apparatus. When a
cart is used, use caution when moving the cart/apparatus combination to avoid injury from tip-over.
14. Unplug this apparatus during lightning storms or when unused for long periods of time.
15. Refer all servicing to qualified service personnel. Servicing is required when the apparatus has been damaged in any
way, such as power-supply cord or plug is damaged, liquid has been spilled or objects have fallen into the apparatus,
the apparatus has been exposed to rain or moisture, does not operate normally, or has been dropped.
16. Never brea off the ground pin. Write for our free boo let “Shoc Hazard and Grounding.” Connect only to a power
supply of the type mar ed on the unit adjacent to the power supply cord.
17. If this product is to be mounted in an equipment rac , rear support should be provided.
18. Exposure to extremely high noise levels may cause a permanent hearing loss. Individuals vary considerably in suscep-
tibility to noise-induced hearing loss, but nearly everyone will lose some hearing if exposed to sufficiently intense noise
for a sufficient time. The U.S. Government’s Occupational Safety and Health Administration (OSHA) has specified the
following permissible noise level exposures:
Duration Per Day In Hours Sound Level dBA, Slow Response
890
692
495
397
2100
1 1⁄2 102
1105
1⁄2 110
1⁄4 or less 115
According to OSHA, any exposure in excess of the above permissible limits could result in some hearing loss. Ear plugs or protectors to the
ear canals or over the ears must be worn when operating this amplification system in order to prevent a permanent hearing loss, if exposure
is in excess of the limits as set forth above. To ensure against potentially dangerous exposure to high sound pressure levels, it is
recommended that all persons exposed to equipment capable of producing high sound pressure levels such as this amplification system be
protected by hearing protectors while this unit is in operation.
SSAAVVEE HHEESSEE IINNSSRRUUCCIIOONNSS!!
All manuals and user guides at all-guides.com

4
PPRR™™1122PP
Than you for purchasing the powered version of the Pro-Lite Series PR™12. The PR 12P features a bi-amped power
section that provides 200 Watts pea dynamic power for the woofer and 70 Watts pea dynamic power for the
compression driver tweeter, both with Peavey-exclusive DDT™compression. Offering a 12" heavy duty woofer and the
RX™14 compression driver, the PR 12P provides an XLR and 1/4"phone combo jac , mic/line switchable level, balanced
input with volume control, and a pair of 1/4" phone jac inputs with concentric volume controls. Up to three line-level
input signals can be mixed together, or one mic-level and two line-level signals mixed.
It is very important that you ensure the PR 12P has the proper AC line voltage supplied. You can find the proper voltage
for your PR 12P printed next to the IEC line (power) cord on the rear panel of the unit. Please read this guide carefully to
ensure your personal safety as well as the safety of your equipment.
FFeeaattuurreess
··BBii--aammpplliiffiieedd ppoowweerreedd ssyysstteemm wwiitthh 227700 WW ttoottaall ppeeaakk ddyynnaammiicc ppoowweerr!!
··BBootthh ppoowweerr aammppss hhaavvee DDDD ccoommpprreessssiioonn
··1122"" hheeaavvyy dduuttyy wwooooffeerr wwiitthh 22--33//88"" vvooiiccee ccooiill aanndd 5500 oozz.. mmaaggnneett
··RRXX 1144 11..44"" ttiittaanniiuumm ccoommpprreessssiioonn ddrriivveerr
··PPeeaakk SSPPLL uupp ttoo 112200 ddBB wwiitthh mmuussiicc!!
··CCoommbboo jjaacckk wwiitthh 11//44"" RRSS && FFeemmaallee XXLLRR mmiicc-- oorr lliinnee--lleevveell bbaallaanncceedd iinnppuutt
··wwoo 11//44"" pphhoonnee jjaacckk iinnppuuttss wwiitthh ccoonncceennttrriicc lleevveell ccoonnttrroollss
··IInnppuutt mmiixxiinngg bbuuiilltt--iinn
··MMoollddeedd--iinn hhoorrnn wwiitthh eexxcceeppttiioonnaallllyy ssmmooootthh rreessppoonnssee aanndd ppaatttteerrnn ccoonnttrrooll
··oopp aanndd ssiiddeess hhaannddggrriippss
··PPoollee mmoouunntt mmoollddeedd--iinn
··oopp aanndd bboottttoomm ffllyyiinngg ppooiinntt iinnsseerrttss
DDeessccrriippttiioonn
The Peavey PR 12P is a powered, bi-amplified, two-way spea er system engineered to provide very high levels of
performance in a compact, powered loudspea er. Capable of up to 120 dB pea SPL, this tiny system can pump out a lot
of sound. The enclosure utilizes tough polypropylene in an injection-molded plastic trapezoidal form with a coated steel
grille to offer an attractive-yet-durable powered spea er system.
This two-way powered system is comprised of a 200 W dynamic pea power amplifier driving a 12" heavy duty woofer.
The RX™14 compression driver is driven by a 70 W pea dynamic power amplifier and features a 1.4" titanium diaphragm
coupled to an extremely smooth and well-controlled constant directivity horn (with a coverage pattern of 90˚ by 40˚) that
is molded integrally into the enclosure.
A balanced input to the preamp/EQ electronics consists of one combo female XLR and 1/4" TRS phone jac . It is
switchable between mic-level and line-level sensitivity. Two 1/4" phone jac inputs are controlled in level by a concentric
pair of level controls. All three inputs can be mixed in any ratio.
The power amplifiers providing the bi-amplification are low-distortion units providing 150 W continuous RMS into the
nominal 8 Ohm load of the woofer, and a 50 W continuous RMS into the nominal 8 Ohm load of the tweeter. They were
selected for their reliability and superb musical performance capability. Both amplifiers feature our patented DDT™
compression, which virtually eliminates audible power amplifier clipping.
A molded-in handle provides ease of transport, while multiple mounting points (top and bottom) for the Peavey
Versamount™allow maximum utility.
EENNGGLLIISSHH
All manuals and user guides at all-guides.com

5
((11)) FFUUSSEE
The unit is AC power line fuse protected from overloads and fault conditions with an ABC-type fast-blow 5
Amp fuse. This fuse is located within the cap of the fuse holder. If the fuse fails, THE FUSE MUST BE
REPLACED WITH THE SAME TYPE AND VALUE IN ORDER TO AVOID DAMAGE TO THE EQUIPMENT AND TO
PREVENT VOIDING THE WARRANTY. If the unit repeatedly blows fuses, it should be ta en to a qualified
service center for repair.
((22)) IIEECC PPOOWWEERR CCOORRDD CCOONNNNEECCTTIIOONN
This receptacle is for the IEC line cord (supplied) that provides AC power to the unit.
Never break off the ground pin on any equipment. It is provided for your safety. If the outlet
used does not have a ground pin, a suitable grounding adapter should be used and the third
wire should be grounded properly. To prevent the risk of shock or fire hazard, always be sure
that the mixer and all other associated equipment are properly grounded.
((33)) OONN--OOFFFF SSWWIITTCCHH
This roc er switch supplies AC power to the PR12P when switched to the ON position.
AApppplliiccaattiioonnss
The Peavey PR™12P has a variety of applications such as sound reinforcement, public address, side fill
system, arao e or musical playbac . With the optional monitor stand it, the Peavey PR 12P ma es an
excellent stage monitor.
A typical signal source for the line-level inputs of the Peavey PR 12P would be a sound reinforcement
mixing console (mixer) or the output from a CD player, Minidisc player or tape dec . A dynamic
microphone can be connected and used as well.
RREEAARR PPAANNEELL
1 32
All manuals and user guides at all-guides.com

6
((44)) PPOOWWEERR//CCLLIIPP LLEEDD
Illuminates GREEN when the electronics receive power (when the Power switch (3) is On). Illuminates RED
when amplifier clipping is occurring or the unit has tripped the thermal protection system.
((55)) PPRRIIMMAARRYY IINNPPUUTT ((CCHHAANNNNEELL 11))
The primary input is switchable between line-level and mic-level input. The line-level input is of the
medium impedance balanced type, and when switched to mic-level it is of a typical low-Z mic input
impedance. Jac (5) is a combo female XLR and 1/4" TRS connector.
((66)) PPAADD
Switches the sensitivity of Channel 1 from line-level to mic-level sensitivity. Pushed all the way in, the
sensitivity is set for line-level input signals, and when the white tab is closer to the front panel, the
sensitivity is increased by 30 dB so it is suitable for mic-level signals.
((77)) VVOOLLUUMMEE
Controls the gain (level) of the Primary Input (5), Channel 1, of the powered spea er system. It is used to
directly set the system output level for the Channel 1 input signal.
((88)) SSEECCOONNDDAARRYY IINNPPUUTTSS,, CCHHAANNNNEELL 22 && 33
These consist of 1/4" unbalanced phone jac s for line-level signals, with medium input impedance.
((99)) CCOONNCCEENNTTRRIICC VVOOLLUUMMEE,, CCHHAANNNNEELL 22 && 33
Controls the gain (level) of Channel 2 & 3 inputs. Can be used in conjunction with the Channel 1 volume
control (7) to mix three line-level signals together, or two line-level signals and one mic-level signal.
4 986 7
5
FFRROONNTT PPAANNEELL
All manuals and user guides at all-guides.com
all-guides.com

7
OOPPEERRAATTIINNGG IINNSSTTRRUUCCTTIIOONNSS
CAUTIONS
The unit must be disconnected from the AC power source before any wor is done on it. Refer all servicing
to qualified service personnel.
The heat sin on the bac plate can become hot to the touch. Do not bloc or cover the heat sin from
ventilation.
Be sure to eep the microphone away from the front of the spea er after switching the mic sensitivity pad
to the OUT position and while setting the microphone level, or very loud feedbac will occur! Damage to
the system is li ely if this occurs!
DO NOT connect the inputs of the PR™ 12P to the output of a power amplifier. The inputs are meant to be
driven from a line-level strength signal.
DO NOT remove the protective metal grille.
Warning: The PR 12P is very efficient and powerful! This sound system can permanently damage hearing!
Use extreme care setting the overall maximum loudness!
The apparent sound level of the PR 12P can be deceiving due to its clear, clean sound output. The lac of
distortion or obvious distress can ma e the sound level seem much lower than it actually is. This system is
capable of SPL in excess of 120 dB at 1 M from the spea er!
FFllyyiinngg tthhee PPRR1122PP
CCaauuttiioonn::TThhee ssuussppeennddiinngg oorr ffllyyiinngg ooff tthhee PPeeaavveeyy PPRR1122PP mmuusstt bbee ddoonnee bbyy aa cceerrttiiffiieedd ssttrruuccttuurraall eennggiinneeeerr..
IImmppoorrttaanntt SSaaffeettyy IInnffoorrmmaattiioonn ffoorr MMoouunnttiinngg tthhee PPeeaavveeyy PPRR 1122PP ssppeeaaeerr ssyysstteemm
CCaauuttiioonn::Before attempting to suspend this model of spea er, consult a certified structural engineer.
Spea er can fall due to improper suspension, resulting in serious injury and property damage. Other
enclosures must not be suspended below one, nor should additional weight be suspended from one of
these units. Use only the correct mating hardware. All associated rigging is the responsibility of others.
Always use all four inserts of a given group as a set, NEVER use just one insert to fly a cabinet! The four
insert groupings are a top group of four and a bottom group of four. Some models also have a group of
four on the rear plane of the cabinet.
Maximum enclosure angle from vertical hang: 30˚
Always use a suitable safety chain or wire rope, looped through the top handle, and firmly attached to a
suitable structural member as indicated by a certified structural engineer.
The recommended range of torque for the mounting bolt is 3 to 3-1/2 lb./feet of torque. DO NOT
OVERTIGHTEN! If an insert spins, it has been damaged and the cabinet cannot be flown!
Never transport the cabinet while mounted on an array brac et or other mounting brac et, as this may
unduly stress the mounting inserts.
WWAARRNNIINNGG!! ((nnoottee ttoo ssttrruuccttuurraall eennggiinneeeerr))
For the PR 12P, the thread insertion depth of the end of the mounting bolt should not be more than 5/16"
past the surface of the cabinet.
If these thread insertion depths are exceeded, then the inserts may be damaged or unseated from the
cabinet, severely compromising the mounting integrity of the cabinet!
The correct mounting bolt diameter and threads per inch are: 1/4" X 20. Use of a grade five-bolt is
recommended.
All manuals and user guides at all-guides.com

8
GGeettttiinngg AACC PPoowweerr TToo TThhee PPRR™™1122PP
The PR 12P comes with an 8-foot IEC connection AC power cord. If you are using an extension cord or power
strip with this powered spea er, ma e sure it is of good quality and of a sufficient current capacity to maintain
safety and maximize the power output capability of the PR 12P. Do not connect any other device to the same
extension cord that the PR 12P is connected to.
SSppeecciiaall NNoottee ffoorr PPeerrmmaanneenntt IInnssttaallllaattiioonn
When installing the PR 12P, AC power runs will be used and a certified electrician should be consulted to
be sure that all AC wiring complies with local codes and regulations. It is also advisable to use a cable clip
properly affixed to the cabinet to strain relief the IEC power cord connected to the amplifier module at (2)
so the power cord cannot be pulled out or vibrate loose.
UUssee ooff PPRR 1122PP wwiitthh aa SSuubbwwooooffeerr
The built-in pole adapter allows use with the Peavey SP Subcompact 18X and the accessory pole that it is
designed to use, Peavey part #00326540.
The pole used is 36-3/16" long and has a nominal diameter of 1-3/8".
GGeettttiinngg aa SSiiggnnaall ttoo tthhee PPRR 1122PP
There are a variety of ways to input a signal to the PR 12P.
The primary input (5) provides either a balanced mic- or line-level input, allowing the use of a 1/4" phone
plug, either a standard single-ended (tip-sleeve) plug or a balanced TRS (ring-tip-sleeve) type plug OR a
male XLR plug. Then there are two line-level unbalanced 1/4" phone jac s that can be mixed in with the
primary input.
Do not connect cables to the jac s while the unit is ON and the Volume is turned up!
While a standard single-ended 1/4" phone plug-equipped cable will wor well and the balanced input
circuitry of the primary input (5) will provide some interference rejection, a balanced cable using either
the balanced TRS 1/4" phone plug or the XLR plug will provide superior interference rejection and
performance. Sometimes, with difficult interference problems, it will be helpful to lift the shield ground on
a balanced cable at the PR 12P end only. Chec any input changes carefully, always turning the volume
control down before plugging and unplugging cables.
Use of high quality, premium cables is recommended for the PR 12P, as these usually have better
shielding and materials and will provide greater long-term reliability. It is usually a good idea to leave
some slac at the input to the PR 12P and also to tape the cables down or run them under a cable guard to
avoid anyone tripping over them or pulling the PR 12P over when stand mounted.
VVoolluummee CCoonnttrrooll AAddjjuussttmmeenntt
The PR 12P is equipped with a volume control to facilitate use in many different applications. With the
volume control adjusted fully cloc wise, gain is at maximum and the input sensitivity is 0.375 V RMS for
full-rated output. When driving the PR 12P from a mixer, it may be advantageous to reduce the input
sensitivity by turning the volume control to the halfway point. The PR 12P will now more closely match a
typical power amp.
If the mixing board indicates clipping of its output signals, then all of the PR 12P power capability is not
being utilized cleanly. Clipping the signal before it gets to the PR 12P is not optimal. Reduce the mixer
output level and turn up the volume control on the PR 12P.
The amplifiers in the PR 12P are equipped with DDT™and an LED indicator to show that DDT™has
engaged. If the sound seems heavily compressed, chec this indicator; if it is blin ing RED more than
occasionally, then the drive level from the mixer (or the volume control on the PR 12P) needs to be
reduced.
All manuals and user guides at all-guides.com

9
When first turning on the sound system, switch on all upstream electronics first, then the PR™12P with its
volume control fully countercloc wise (all the way down). Begin chec ing levels with the mixer output
level controls all the way down, and bring them up slowly with the PR 12P volume control set to the
desired setting (halfway up recommended to start).
MMiicc//LLiinnee PPaadd AAddjjuussttmmeenntt
The mic/line pad (6) provides for the increased gain needed for microphone use into the primary input (5).
Use a straightened paperclip or small screwdriver to reach through the hole in the rear panel where the
recessed tab is to set its position. Set the Mic/Line Pad to “in,” or the white tab furthest from the panel,
for line-level signal use and set it “out,” or closest to the panel, for mic-level use. The unit is shipped with
the tab in the line-level position. It is recessed behind the panel so that the gain can not be inadvertently
increased during transport or set-up.
Due to the 30 dB of extra gain that this switch provides, DO NOT leave it in the “out” position for line-level
use! This will result in input-stage clipping of the PR 12P and cause unnecessary distortion.
MMiixxiinngg SSiiggnnaallss UUssiinngg tthhee VVoolluummee KKnnoobbss
The gain of all three channels can be adjusted independently from the other channels via the volume
nobs (7) and (9). Channel 1 can be used for either line-level signals or as a mic input and mixed with two
other line-level signals.
The PR 12P has plenty of gain, so do not overload the spea er system preamp inputs by driving them with
a signal that is too hot. Full output mixer levels well in excess of 0 dB will not be necessary to drive the
unit to full power capacity.
TTRROOUUBBLLEESSHHOOOOTTIINNGG
NNoo OOuuttppuutt aatt AAllll
First, ma e sure the unit has AC power and is turned ON. Ma e sure the Power/Clip LED (4) is illuminated
Green. If not, ma e certain the ON/OFF switch (3) is in the ON position and chec the IEC power cord
connection (2) by ensuring it is fully engaged and seated. Ma e certain the AC line cord is plugged into a
wor ing AC outlet. Finally, chec the fuse (1). (See the Rear Panel: Fuse section, for safety instructions.)
Once assured your unit is getting AC power, chec that the PR 12P is getting a signal. Temporarily disconnect
the cable running to its inputs and connect it to some other device capable of reproducing the signal (i.e., a
power amp and spea er). If this produces a signal, ma e sure that all Volume controls being used have been
turned up to a satisfactory level (one-third to halfway).
If the PR 12P has been subjected to direct sunlight or excessive heat, the built-in thermal protection may have
been triggered. The power/clip LED will be illuminated RED if this is the case. If so, turn off the PR 12P and let it
cool for a sufficient amount of time.
If there is still no output, contact your authorized Peavey dealer or the Peavey International Service Center.
All manuals and user guides at all-guides.com

10
HHuumm oorr BBuuzzzz
If the PR™12P is producing a hum or buzz, this can be AC outlet related. Try plugging the PR 12P into a
different AC outlet. Sometimes, if a different circuit (brea er) is used for the mixer and the PR 12P, it can
cause hum problems.
Ensure that shielded cables have been used to route the signal to the PR 12Ps inputs. If spea er cables
with 1/4" plugs are used as input cables instead of shielded cables, they will be prone to hum or buzz.
Hum may be ground loop related. Try lifting the ground connection at the spea er end of the signal cable if
it is a balanced signal cable. Chec any input changes carefully by first turning down the volume control,
plugging and unplugging cables, or lifting the shield ground at the spea er end.
Chec to ma e sure light dimmers are not on the same circuit as the PR 12P, the mixer or any source
devices. If light dimmers are used, then it may be necessary to turn them full ON or full OFF to eliminate or
reduce hum. This is a typical AC wiring/light dimmer interference problem, not a design flaw of the PR 12P.
The third wire (ground plug) on the AC plug should NEVER be removed or bro en off.
DDiissttoorrtteedd oorr FFuuzzzzyy SSoouunndd
First, ensure the mixer (signal source) is not clipping or being overdriven. Ma e sure the volume control/s
(7) and (9) on the PR 12P have not been set too low.
Chec that the input plugs are fully seated in the input jac s (5) and (8) on the rear panel of the PR 12P.
Ensure that the proper MIC/LINE PAD setting is being used (6) for line-level signals, or that a power amp
has not been plugged into one of the input jac s of the PR 12P.
If an extension cord is being used to provide the AC power to the unit, ensure that it is of sufficient
current capacity and that it is not also being used to supply power to any other device.
The PR 12P has built-in EQ to extend and smooth the natural response of the spea ers in the system.
Bass boost and HF EQ have been applied and the system has a nominally flat response, so it should
require little, if any, additional EQ. If excessive additional bass boost or HF boost have been added
externally to the PR 12P, it could cause premature overload at high SPL. Reduce the amount of any
external (mixer, rac ) EQ and see if that clears up the distortion.
Finally, realize that even though the PR 12P is a powerful and high output unit, it does ultimately have
limits, and it may need additional powered units (or a subwoofer) to provide enough sound output or
coverage. In this case, try turning the mixer levels down a little to see if that clears things up.
If, after chec ing all the things listed to chec and anything else you can thin of to chec safely, and the
system still exhibits problems, carefully note all conditions and chec with your Peavey dealer for advice.
CCaarree aanndd MMaaiinntteennaannccee
Your PR 12P is a sturdy and durable product and will provide years of reliable use if properly cared for. Use
common sense and read the safety warnings to avoid hazardous operating conditions.
The unit must be disconnected from the AC power source before any wor is done on it. Refer all servicing
to qualified service personnel.
SSuunnlliigghhtt//HHeeaatt
Avoid prolonged exposure to direct sunlight, as this may cause the unit to overheat and thermally shut
off. Excessively hot operating conditions can also cause a thermal shutdown.
Do not store in extremely hot or cold conditions or extremely high humidity. Always allow unit to come to
room temperature before use.
CClleeaanniinngg
Never clean the PR 12P while plugged in or turned ON! When the unit has been fully disconnected from AC
power sources, use a dry cloth to remove soil or other dirt. Never use strong solvents on the PR 12P, as
they could damage the cabinet. Do not allow ANY fluids to drip inside the PR 12P.
All manuals and user guides at all-guides.com

11
TToouucchhuupp
For an overall finish enhancement and protective coating, use gloves to apply a plastic finish protector,
such as Armor-All®protectant, to the surface of the plastic cabinet only. Note that the cabinet will be
slippery after these treatments; rub them down vigorously with a dry, lint-free cloth to minimize this.
CChheecc ffoorr SSeeccuurree HHaarrddwwaarree
After the first few months of use and periodically thereafter, chec the hardware of the PR™12P for
tightness, including the rear panel screws and the screws that hold the baffle and rear cabinet together.
The unit is subject to a great deal of vibration, and this could cause them to loosen with use.
AArrcchhiitteeccttuurraall aanndd EEnnggiinneeeerriinngg SSppeecciiffiiccaattiioonnss
The powered loudspea er system shall have a frequency response from 55 Hz to 20 Hz. The pea SPL
with inaudible distortion shall reach 120 dB with music as a source, when measured at a distance of 1M
and driven to full output capacity. The system shall utilize a 12" heavy duty woofer and an RX™14
compression driver tweeter. The nominal radiation pattern shall be 90˚ in the horizontal plane and 40˚ in
the vertical plane.
The powered, bi-amplified loudspea er system shall have a group of medium impedance input connectors
consisting of one combo female XLR and 1/4" TRS phone jac , and two 1/4" phone jac s, on the rear
panel. A volume control will be located near each input jac . The combo female XLR and 1/4" TRS phone
jac will have a gain adjust pad that provides for switching between line-level input signals and mic-level
input signals.
The system power amplifiers shall have an unfiltered frequency response of 10 Hz to 30 Hz which
deviates no more than +0, -1 dB up to rated power, a damping factor greater than 100 @ 1 Hz into
8 Ohms, hum and noise better than 90 dB below rated power, and THD and IMD of less than 0.1%. The
woofer amplifier shall be capable of 150 W into a 8 Ohm nominal load, and the tweeter amplifier shall be
capable of 50 W output into a 8 Ohm load, and both shall incorporate independent DDT™compression.
The input signal shall be electronically divided into high frequencies and low frequencies by a staggered-
pole third order slope line-level crossover at 2.2 Hz. The low frequencies shall be processed to provide
bass boost, subsonic filtering and overall response shaping, and the high frequencies shall be equalized
for constant directivity horn EQ- and response-shaping.
The enclosure shall be constructed of injection-molded polypropylene of 1/4" nominal thic ness with a UL
flame rating, and reinforcing ribs internally. A handgrip shall be molded-in on the top rear edge, and one
on each side of the woofer.
A powder-coated metal grille shall be provided for woofer protection. The cabinet shall incorporate a pole
mount for spea er stand use, four tall sturdy rubber feet for floor standing use, and four mounting point
inserts on the top and bottom each for flying use.
The outside dimensions shall be: 23.69" tall by x 17.81" wide (10.00" in rear) by x 13.75" deep, and the
weight shall be 43 lbs. Power requirements shall be: 100 Watts nominal, 120 VAC, 60 Hz Domestic and
240 VAC, 50 Hz (European). The loudspea er system shall be called a Peavey PR 12P.
All manuals and user guides at all-guides.com
all-guides.com

EEnncclloossuurree:: Peavey PR 12P (domestic)
FFrreeqquueennccyy RReessppoonnssee::
55 Hz to 20 Hz
LLooww FFrreeqquueennccyy LLiimmiitt ((--33 ddBB ppooiinntt))::
55 Hz
UUsseeaabbllee LLooww FFrreeqquueennccyy LLiimmiitt ((--1100 ddBB
ppooiinntt))::
42 Hz
IInntteerrnnaall PPoowweerr AAmmpplliiffiieerrss ((@@112200 VVAACC
lliinnee))::
Woofer - 200 Watts pea dynamic
power
150 Watts @ less than 0.1% distortion
Tweeter - 70 Watts pea dynamic power
50 Watts @ less than 0.1% distortion.
NNoommiinnaall SSeennssiittiivviittyy ((11WW @@11MM,, sswweepptt
ssiinnee iinnppuutt iinn aanneecchhooiicc eennvviirroonnmmeenntt))::
97 dB
MMaaxxiimmuumm SSoouunndd PPrreessssuurree LLeevveell::
120 dB music pea
NNoommiinnaall RRaaddiiaattiioonn AAnngglleess::
90˚ horizontal by 40˚ vertical
TTrraannssdduucceerr CCoommpplleemmeenntt::
12" heavy duty woofer and RX™14 1.4"
titanium diaphragm compression driver
tweeter
BBooxx TTuunniinngg FFrreeqquueennccyy ((FFbbooxx))::
70 Hz
EElleeccttrrooaaccoouussttiicc CCrroossssoovveerr FFrreeqquueennccyy::
2,200 Hz
CCrroossssoovveerr TTyyppee::
Internal Electronic two-way crossover
with CD horn EQ, level matching, bass
boost and subsonic filtering.
CCrroossssoovveerr SSllooppeess::
18 dB/octave (third order) low pass,
18 dB/octave (third order) high pass,
both with staggered poles and driver
EQ. Unit has horn spatially aligned
with woofer, so there is no need for
phase alignment or time delay of the
signals.
EElleeccttrroonniicc IInnppuutt IImmppeeddaannccee ((NNoommiinnaall))::
10 Ohms unbalanced, 20 Ohms
balanced line level, 2.4 Ohms
balanced mic level.
IInnppuutt CCoonnnneeccttiioonnss::
One combo female XLR/ 1/4" phone
jac providing balanced operation, with
switch selectable mic or line level
sensitivity. Also has two 1/4" phone
jac line level unbalanced inputs with a
concentric pair of level controls.
EEnncclloossuurree MMaatteerriiaallss aanndd FFiinniisshh::
Injection-molded polypropylene of a
nominal thic ness of 1/4" with internal
ribbing and bracing, and with textured
finish. Molded material is dar gray.
MMoouunnttiinngg::
Subwoofer pole-mounting via molded-
in mount, flying via Versamount™70
and four rubber feet for floor use.
DDiimmeennssiioonnss::
23.69" (60.2 cm) tall by 17.81"
(45.2 cm) wide {10.00"/25.4 cm in rear}
by 13.75" (34.9 cm) deep
OOppttiioonnaall AAcccceessssoorriieess::
Impulse®200 Floor Monitor Kit
(FG# 00370480)
NNeett WWeeiigghhtt::
43 lbs.
AAddddiittiioonnaall RReemmaarrss::
Also available as a passively crossed-
over unit, the Peavey PR 12.
EELLEECCTTRROONNIICCSS AANNDD AAMMPPLLIIFFIIEERR
SSPPEECCIIFFIICCAATTIIOONNSS::
EElleeccttrroonniicc IInnppuutt IImmppeeddaannccee ((NNoommiinnaall))::
Primary balanced input: 20 Ohms line
level sensitivity selected, 2.4 Ohms
mic level sensitivity selected, 10
Ohms unbalanced 1/4".
MMiicc SSwwiittcchh SSeennssiittiivviittyy IInnccrreeaassee::
30 dB
IInnffrraassoonniicc ffiilltteerr pprrootteeccttiioonn::
36 dB/octave roll-off
NNoommiinnaall AAmmpplliiffiieerr FFrreeqquueennccyy RReessppoonnssee::
+0, -1 dB from 10 Hz to 30 Hz
HHuumm aanndd NNooiissee::
Greater than 90 dB below rated power
DDDDTT DDyynnaammiicc RRaannggee::
Greater than 14 dB
TTHHDD aanndd IIMM::
Typically less than 0.1 %
DDaammppiinngg FFaaccttoorr::
Greater than 100 @ 1000 Hz, 8 Ohms
PPoowweerr rreeqquuiirreemmeennttss ooff PPeeaavveeyy PPRR™™1122PP
SSyysstteemm ((ddoommeessttiicc))::
Nominal 100 Watts, 120 VAC, 60 Hz
PPeeaavveeyy PPRR™™1122PP
SSPPEECCIIFFIICCAAIIOONNSS
12
All manuals and user guides at all-guides.com

13
20 50 100 200 500 1k 2k 5k 10k 20k
Frequency (Hz)
60
70
80
90
100
110
dB SPL (re 20 Pa)
Amplitude Response (1m On-Axis)
Figure 1
FFRREEQQUUEENNCCYY RREESSPPOONNSSEE CCUURRVVEESS
All manuals and user guides at all-guides.com

14
PPRR™™1122PP
Gracias por adquirir la versión amplificada del PR™12P de la serie Pro-Lite. El PR 12P Cuenta con una sección de bi-
amplificación que genera 200 Watts de poder dinámico máximo para el woofer y 70 Watts de poder dinámico máximo
para el driver de compresión del tweeter, ambos con la compresión exclusiva de Peavey DDT™. Ofreciendo un woofer de
12" de alto rendimiento y el driver de compresión RX™, el PR 12P cuenta con un conectador combo de XLR y de 1/4", nivel
intercambiable entre micrófono/línea, entrada balanceada con control de volumen, y un par de entradas de 1/4" con
controles de volumen concéntricos. Se pueden mezclar hasta tres señales de entrada de nivel de línea, o mezclar una
señal de nivel de micrófono y dos de nivel de línea.
Es muy importante asegurarse que el PR 12P cuenta con el voltaje de línea de CA adecuado. Puedes encontrar el voltaje
adecuado para tu PR 12P impreso junto al cable de corriente IEC en el panel trasero de la unidad. Por favor lee esta guía
con cuidado para asegurar tu seguridad personal y la de tu equipo.
CCaarraacctteerrííssttiiccaass
··SSiisstteemmaa bbii--aammpplliiffiiccaaddoo ccoonn 227700 WW ddee ppooddeerr ttoottaall
··CCoommpprreessiióónn DDDD ppaarraa pprreevveenniirr ssaattuurraacciióónn eenn aammbbooss aammpplliiffiiccaaddoorreess
··WWooooffeerr ddee aallttoo rreennddiimmiieennttoo ddee 1122"" ccoonn iimmáánn ddee 5500 oozz.. yy rroolllloo ddee 22--33//88""
··DDrriivveerr ddee ccoommpprreessiióónn ddee ttiittaanniioo RRXX 1144 ddee 11..44""
··NNiivveell ddee pprreessiióónn ssoonnoorraa aarrrriibbaa ddee 112200 ddBB ccoonn mmúússiiccaa
··EEnnttrraaddaa ddee ccoommbboo bbaallaanncceeaaddaa RRSS ddee 11//44"" yy XXLLRR FFeemmeenniinnaa ddee nniivveell ddee llíínneeaa oo mmiiccrróóffoonnoo
··DDooss eennttrraaddaass ddee 11//44"" ttiippoo pplluugg ccoonn ccoonnttrroolleess ddee nniivveell ccoonnccéénnttrriiccooss..
··EEnnttrraaddaa ddee mmeezzccllaa iinntteeggrraaddaa
··CCoorrnneettaa mmoollddeeaaddaa ccoonn rreessppuueessttaa ssúúppeerr ssuuaavvee yy ccoonnttrrooll ddee mmooddeelloo
··AAggaarrrraaddeerraass aa llooss llaaddooss yy ppaarrttee ssuuppeerriioorr
··EEnnttrraaddaa ppaarraa aattrriill iinntteeggrraaddaa
··PPuunnttooss ddee iinnsseerrcciióónn ppaarraa vvoollaarrllaa eenn llaa ppaarrttee ssuuppeerriioorr ee iinnffeerriioorr
DDeessccrriippcciióónn
El PR 12P de Peavey es un sistema de parlantes de dos vías biamplificado diseñado para brindar altos niveles de
ejecución en un parlante amplificado compacto. Capaz de generar niveles de presión sonora de hasta 120 SPL, este
pequeño sistema puede generar mucho sonido. La unidad está hecha de polipropileno moldeado en una forma
trapezoidal con una rejilla de metal para ofrecer un sistema de parlantes tanto atractivo como durable.
Este sistema amplificado de dos vías incluye un amplificador con capacidad máxima de 200 W alimentando un woofer de
alto rendimiento de 12". El driver de compresión RX™ 14 es alimentado por el amplificador de 70 Watts de poder máximo
y cuanta con un diafragma de titanio de 1.4" con una corneta de dirección (con una capacidad de cobertura de 90° por
40°) moldeada de manera integral en el parlante.
Una entrada balanceada al preamplificador/electrónicos del EQ consiste de una entrada combo de XLR femenina y 1/4"
TRS tipo plug. Es intercambiable entre sensibilidad de nivel de línea y nivel de micrófono. Dos entradas de 1/4" tipo plug
son controladas por un par de controles de nivel concéntricos. Las tres entradas pueden ser mezcladas a cualquier razón.
Los amplificadores de poder que generan la biamplificación son unidades de baja distorsión que proveen 150 W
continuos RMS a una carga nominal de 8 ohmios al woofer, y 50 W continuos RMS a una carga de 8 ohmios para el
tweeter. Fueron seleccionados por su durabilidad y su capacidad superior de ejecución musical. Ambos amplificadores
cuentan con nuestra compresión patentada DDT™, que elimina virtualmente la saturación audible del amplificador.
Una agarradera integrada provee facilidad de transporte, mientras que múltiples puntos de montura (arriba y abajo)
Versamount™de Peavey brindan máxima utilidad.
EESSPPAAÑÑOOLL
All manuals and user guides at all-guides.com

15
AApplliiccaacciioonneess
El PR™12P de Peavey cuenta con una Amplia gama de aplicaciones como sonido en vivo, sistemas de
voceo, side fills, arao e o reproducción musical. Con el paquete opcional de atril para monitor, el PR 12P
de Peavey es un excelente monitor de escenario.
Una típica señal de nivel de línea en las entradas del PR 12P de Peavey sería una mezcladora (consola) o
la salida de un reproductor de CD, MiniDisc o reproductor de cintas. Un micrófono dinámico también
puede ser conectado y usado a la vez.
PPAANNEELL TTRRAASSEERROO
1 32
((11)) FFUUSSIIBBLLEE
La unidad está protegida de sobrecargas de corriente CA con un fusible de resolución rápida tipo ABC de 5
Amperes. Este fusible está localizado en la tapa del receptáculo para fusible. Si el fusible falla, DEBE SER
REEMPLAZADO POR UNO DEL MISMO TIPO Y CAPACIDAD PARA PREVENIR DAÑOS AL EQUIPO Y PARA
PREVENIR LA CANCELACIÓN DE LA GARANTÍA. Si la unidad continua votando el FUSIBLE debe ser
verificada por un técnico de servicio calificado.
((22)) CCOONNEEXXIIÓÓNN PPAARRAA CCAABBLLEE DDEE CCOORRRRIIEENNTTEE IIEECC
El cable de corriente IEC (incluido) se conecta a este receptáculo para proveer corriente a la unidad.
Nunca se debe quitar la agu a de tierra de ningún equipo. Ha sido incluido para tu seguridad.
Si la fuente de corriente no cuenta con una entrada para esta agu a, se debe usar un
adaptador y la tercera agu a debe quedar propiamente aterrizada. Para prevenir el riesgo de
una descarga eléctrica, hay que asegurarse que la mezcladora y todo el demás equipo
asociado está propiamente aterrizado.
((33)) OONN--OOFFFF SSWWIITTCCHH
This roc er switch supplies AC power to the PR12P when switched to the ON position.
All manuals and user guides at all-guides.com

16
4 986 7
5
FFRROONNTT PPAANNEELL
((44)) LLEEDD DDEE EENNCCEENNDDIIDDOO//SSAATTUURRAACCIIÓÓNN
Este se ilumina VERDE cuando los electrónicos del amplificador reciben corriente, (cuando el interruptor
de encendido (3) está en la posición de encendido ON). Se lumina en ROJO cuando el amplificador está
experimentando saturación o la unidad entra en modo de protección térmica.
((55)) EENNTTRRDDAA PPRRIIMMAARRIIAA ((CCAANNAALL 11))
La entrada primaria en intercambiable entre nivel de línea y nivel de micrófono. La entrada de nivel de
línea es de impedancia media, y cuando se selecciona el nivel de micrófono es una entrada típica de
micro Low-Z de baja impedancia. El conectador es un combo XLR femenino y 1/4" TRS tipo plug.
((66)) PPAADD
Cambia la sensibilidad del Canal 1 de nivel de línea a nivel de micrófono. Si se aprieta al fondo, la
sensibilidad está en la posición de impedancia media balanceada, y cuando la parte blanca está más
cerca del panel frontal, la sensibilidad se incrementa a 30 dB para poder manejar señales de nivel de
micrófono.
((77)) VVOOLLUUMMEENN
Controla LA Ganancia (nivel) de la Entrada Primaria (5), Canal 1, del sistema de parlantes. Se usa para
ajustar directamente el nivel de salida del sistema de la señal de entrada del Canal 1.
((88)) EENNTTRRAADDAASS SSEECCUUNNDDAARRIIAASS,, CCAANNAALLEESS 22 YY 33
Estas consisten de entradas de 1/4" no balanceadas para señales de nivel de línea, con impedancia de
entrada media.
((99)) VVOOLLUUMMEENN CCOONNCCÉÉNNTTRRIICCOO,, CCAANNAALLEESS 22 YY 33
Controla la ganancia (nivel) de las entradas de los canales 2 y 3. Puede ser usada en conjunto con el
control de volumen del Canal 1 (7) para mezclar tres señales de nivel de línea, o dos de nivel de línea y
una de micrófono.
All manuals and user guides at all-guides.com
all-guides.com

17
IINNSSTTRRUUCCCCIIOONNEESS DDEE OOPPEERRAACCIIÓÓNN
PRECAUCIONES
Esta unidad debe ser desconectada de la toma de corriente CA antes de realizar cualquier trabajo en ella.
Todo servicio debe ser llevado a cabo por personal calificado.
La trampa de calor en la parte trasera puede estar caliente al tacto. Nunca se debe cubrir o bloquearle la
ventilación.
Asegúrate de mantener el micrófono lejos de la parte frontal del parlante después de encender la entrada
del micro, y durante el ajuste de nivel el mismo, o se puede crear retroalimentación severa. Es muy
posible que el equipo sufra daños si esto llegara a suceder.
NUNCA se deben conectar las entradas del PR™12P a la salida de un amplificador. Las entradas han sido
diseñadas para ser alimentadas por señales de nivel de línea.
NUNCA quites la rejilla metálica de protección.
CUIDADO: El PR 12P es extremadamente poderoso y eficiente. Este sistema de sonido puede dañar tus
oídos permanentemente. Se debe usar máxima precaución cuando se ajusten los volúmenes máximos.
El nivel de sonido aparente del PR 12P puede ser engañoso dada su calidad y limpieza en el sonido. La
falta de distorsión puede hacer que el nivel de sonido parezca más bajo de lo que está. Este sistema es
capaz de producir niveles de presión sónica (SPL) encima de los 120 dB a 1 M del parlante.
VVOOLLAANNDDOO EELL PPRR1122PP
CCuuiiddaaddoo::EEll ssuussppeennddeerr oo vvoollaarr llaass PPRR 1122PP ddee PPeeaavveeyy eess uunn pprroocceessoo qquuee ddeebbee sseerr lllleevvaaddoo aa ccaabboo ppoorr uunn
iinnggeenniieerroo cceerrttiiffiiccaaddoo..
IInnffoorrmmaacciióónn iimmppoorrttaannttee ddee mmoonnttaajjee ddeell ssiisstteemmaa ddee ppaarrllaanntteess PPRR 1122PP ddee PPeeaavveeyy
CCuuiiddaaddoo::Antes de intentar suspender este modelo de parlantes, consulta a un ingeniero de estructuras
calificado. Los parlantes se pueden caer de suspensiones incorrectas, resultando en daños al equipo y
personales. Otros sistemas no pueden ser suspendidos debajo de uno, o tampoco se debe añadir peso
adicional a las unidades. Usa solamente equipos de instalación adecuados. Todo lo asociado con la
instalación de las unidades es responsabilidad de otros.
Siempre hay que usar los cuatro insertos de un grupo como conjunto, NUNCA se use sólo un inserto para
volar una unidad. Los grupos de insertos son uno de cuatro en la parte superior, otro de cuatro en la parte
inferior y algunos modelos cuentan con otro grupo de cuarto en la parte trasera de la unidad.
El ángulo máximo para colgar verticalmente es de 30º
Siempre se debe usar una cadena o cuerda metálica, amarrada del asa superior, y esta debe estar
propiamente instalada a una estructura firme como lo indique un ingeniero capacitado.
La presión de tornillo para el tornillo de montura es de 3 pies a 3 pies 1/2 por libra. NO SE SOBRE
APRIETE. Si uno de los insertos da vueltas, ha sido dañado y la unidad no podrá ser volada.
Nunca se debe transportar la unidad mientras está montada. Esto puede causar seria presión en las
piezas y en los insertos.
CCUUIIDDAADDOO!! ((nnoottaa ppaarraa eell iinnggeenniieerroo eessttrruuccttuurraall))
Para el PR 12P, la profundidad de inserción del tornillo de instalación no debe ser mayor a 5/16" de la
superficie de la unidad.
Si se sobrepasan estas profundidades, los insertos pueden ser dañados o soltarse, comprometiendo
seriamente la instalación de montura de la unidad. Las medidas correctas de los tornillos para colgar son
5/16" X 20 de diámetro. El uso de un tornillo de grado cinco es recomendable.
All manuals and user guides at all-guides.com

18
LLlleevvaannddoo CCoorrrriieennttee aall PPRR™™1122PP
El PR 12P viene con un cable de corriente IEC de 8 pies. Si estás usando un cale de extensión asegúrate que
este sea de la más alta calidad y de suficiente capacidad para mantener la seguridad de tu equipo y maximizar
la capacidad de salida del PR 12P. No se debe conectar ningún otro aparato a la misma extensión que se use
para el PR 12P.
NNoottaa EEssppeecciiaall PPaarraa IInnssttaallaacciioonneess PPeerrmmaanneenntteess
Cuando se instala el PR 12P se debe consultar a un electricista certificado para asegurar que todo el
cableado de CA esté conforme a los códigos y regulaciones locales. También es recomendable que se
asegure el cable IEC conectado al módulo del amplificador (2) para que el cable no se pueda jalar o soltar
con la vibración.
UUssoo ddeell PPRR 1122PP ccoonn uunn SSuubbwwooooffeerr
El adaptador de atril incluido permite el uso del sistema de subwoofer SP Subcompact de Peavey, y el atril
diseñado para uso con este, parte Peavey #00326540.
El atril usado es de un largo de 36-3/16" y cuenta con un diámetro de 1-3/8".
LLlleevvaannddoo SSeeññaall aall PPRR 1122PP
Existen varias formas para hacer llegar señal al PR 12P.
La entrada primaria (5) provee capacidad de entrada de nivel de micro balanceada o nivel de línea usando
conectadores de 1/4" ya sean estándar (punta-manga) o TRS balanceado (anillo-punta-manga) o
conectador XLR masculino. Luego hay dos entradas de nivel de línea no balanceadas con conectadores de
plug de 1/4" que pueden ser mezcladas con la entrada primaria.
No se deben conectar cables a las entradas mientras la unidad está encendida y el volumen subido.
Mientras que el cable normal de 1/4" funcionará bien, y la los circuitos de la entrada balanceada de la
entrada primaria (5) provee algo de rechazo a la interferencia, un cable balanceado ya sea TRS de 1/4"
tipo plug o XLR proveerán mejor rechazo y rendimiento. Algunas veces, con problemas graves de
interferencia, es recomendable levantar la tierra en un cable balanceado sólo del lado del PR 12P. Hay que
verificar todos los cambios de entradas, siempre bajando el control de volumen antes de conectar y
desconectar cables.
El uso de cables de primera calidad es recomendado para las PR 12P, ya que estos por lo general tienen
mejor aislamiento y materiales, y darán mejores resultados y durabilidad. Es una buena idea dejar algo de
cable suelto al lado del PR 12P, así como usar cinta adhesiva para asegurar los cables y evitar que alguien
se tropiece con ellos o jale el PR 12P.
AAjjuussttee ddee CCoonnttrrooll ddee VVoolluummeenn
Las PR 12P han sido equipadas con un control de volumen para facilitar su uso en una variedad de
aplicaciones. Con el control de volumen ajustado completamente en dirección de las manecillas del reloj,
la ganancia estará a la máxima sensibilidad de 0.375 V RMS. Cuando la PR 12P se alimenta por medio de
una consola, puede ser recomendable reducir la sensibilidad de entrada ajustando el control de volumen a
la mitad. La PR 12P ahora se acercará más a un amplificador típico al que la consola está acostumbrada.
Si la consola indica saturación en sus señales de salida, entonces la capacidad del PR 12P no está siendo
explotada limpiamente. Saturar la señal antes que llegue a la PR 12P no es óptimo. En ese caso, se debe
reducir el nivel de salida y subir el volumen en el PR 12P.
Los amplificadores del PR 12P están equipados con un sistema de prevención de saturación DDT y un LED
que indica que este ha sido activado. Si el sonido parece estar seriamente comprimido, verifica el
indicador y si indica más de un parpadeo ROJO ocasional, entonces el nivel de la mezcladora (o el control
de volumen del PR 12P) debe ser reducido.
All manuals and user guides at all-guides.com

19
Cuando se enciende el sistema por primera vez, hay que encender todas las corrientes eléctricas primero,
luego las PR 12P con el control de volumen hasta abajo, o en contra de las manecillas del reloj. Hay que
verificar niveles con la salida de la consola hasta abajo y levantando los niveles poco a poco con el control
de volumen del PR 12P al nivel deseado (se recomienda a la mitad).
AAjjuussttee ddeell PPaadd ddee MMiiccrroo//LLíínneeaa
El Pad de micro/línea (6) provee ganancia adicional para el uso de micrófonos en la entrada primaria (5).
Usa un clip de papel o desarmador pequeño para entrar al agujero en el panel trasero y ajustar su
posición. Ajústalo en la posición ‘dentro’ o con la parte blanca alejada del panel, para señales de nivel de
línea; y ajústalo a la posición ‘fuera’ o más cerca del panel para uso a nivel de micrófono. La unidad sale
de fábrica con el botón en la posición de nivel de línea. Se esconde detrás del panel para que la ganancia
no pueda ser incrementada sin querer durante el transporte e instalación.
Dada la ganancia adicional de 30 dB que este interruptor produce, NUNCA se debe dejar en la posición
‘fuera’ para uso con nivel de línea. Esto resultará en saturación en la entrada del PR 12P y causará
distorsión innecesaria.
MMeezzccllaa ddee SSeeññaalleess UUssaannddoo llaass PPeerriillllaass ddee VVoolluummeenn
La ganancia de los tres canales puede ser ajustara independientemente de los otros canales por medio de
las perillas de volumen (7) y (9). El canal 1 puede ser usado tanto con señales de nivel de línea como de
micrófono y mezclado con las otras dos señales de nivel de línea.
La PR 12P cuenta con bastante ganancia, no se debe sobrecargar el preamplificador de entrada del
sistema de parlantes con señales muy elevadas. Los niveles altos de salida de consolas encima de 0 dB no
necesariamente alimentarán a la unidad a su capacidad completa.
PPRROOBBLLEEMMAASS
NNoo HHaayy SSaalliiddaa
Antes que nada hay que asegurarse que la unidad cuenta con corriente eléctrica y que está encendida. El LED
de encendido (4) debe estar iluminado en verde. Si no lo está, hay que verificar que el interruptor de
encendido/apagado (3) está en la posición de encendido (ON). Hay que verificar el cable IEC y la conexión de
corriente (2), asegurándose que está completamente conectado en ambos lados. Verificar que la fuente de
corriente de la pared está activa, y por último checar el brea er (1) (ver sección de BREAKER para
instrucciones).
Una vez confirmando que la unidad está recibiendo corriente, hay que verificar que está llegando señal al PR
12P. Desconecta temporalmente el cable de las entradas y conéctalo a las entradas de otro aparato capaz de
reproducir la señal (por ejemplo, un amplificador y unas bocinas). Si esto produce señal, verifica que todos los
controles de volumen que se usan están subidos a un nivel satisfactorio (entre un tercio y la mitad).
Si el PR 12P ha estado en luz directa del sol, o bajo condiciones muy calientes es posible que la protección
térmica haya sido activada. El LED de encendido/saturación se encenderá en ROJO si este es el caso. Hay que
apagar la PR 12P y dejarla enfriar suficiente tiempo. Si sigue sin haber salida, contacta a tu distribuidor
autorizado de Peavey o un Centro de Servicio Internacional de Peavey.
RRuuiiddooss
Si la PR 12P está produciendo ruidos o ‘hum’ puede tener que ver con la fuente de corriente. Se puede
intentar conectar el PR 12P a otra fuente de corriente. A veces si se usa un circuito diferente para la
mezcladora y la PR 12P puede resultar en ruidos (hum).
Se puede verificar que los cables que se usan para llevar la señal al PR 12P están propiamente aislados. Los
cables de bocinas de 1/4" pueden ser muy propensos al ruido (hum).
All manuals and user guides at all-guides.com

20
El ruido o ‘hum’ puede estar relacionado con circuitos de tierra. Trata de levantar la conexión de tierra del
lado del parlante si es un cable de señal balanceado. Verifica cambios en las entradas bajando el volumen,
conectando y desconectando cables, o levantando la tierra del lado del parlante.
Es importante comprobar que no hay "dimmers" de luces en el mismo circuito que las PR 12P o la
mezcladora (o cualquiera de las unidades en la cadena de audio). Si se usan dimmers de luces, puede ser
necesario que estos se ajusten al máximo o al mínimo para eliminad problemas de ruido o reducirlos a
niveles tolerables. Esto es una interferencia de cableado con el dimmer, y no es culpa del PR 12P. La tercera
aguja del cable de corriente (tierra) NUNCA debe ser quitada o arrancada.
SSoonniiddoo DDiissttoorrssiioonnaaddoo oo SSuucciioo
Antes que nada, hay que verificar que la consola, o fuente de señal no está saturando. Asegúrate que el
control de volumen (7) y (9) del PR 12P no ha sido ajustado demasiado bajo.
Asegúrate que las conexiones están bien metidas en las entradas (5) y (8) de la parte trasera del PR 12P.
Hay que verificar que se estén usando los ajustes del PAD de MICRO/LÍNEA correctos (6) para señales de
nivel de línea y que no se ha conectado un amplificador a las entradas del PR 12P.
Si se está utilizando una extensión de corriente para llevar electricidad a la unidad hay que asegurarse
que es de suficiente capacidad de corriente y no está alimentando a ninguna otra unidad.
Las PR 12P cuentan con un ecualizador integrado para extender la respuesta suave y natural de los
parlantes del sistema. Se aplica un incremento en los graves y en las frecuencias agudas, y la respuesta
del sistema es bastante plana y requerirá poco o nada de ecualización posterior. Si se han incrementado
considerablemente las frecuencias graves o agudas externamente al PR 12P, esto puede causar saturación
prematura a niveles de presión altos. Trata de reducir los ecualizadores externos a ver si esto soluciona el
problema de la distorsión.
Finalmente, hay que aceptar que a pesar de que las PR 12P son unidades de capacidades muy elevadas y
de alta calidad, también tiene limitantes y pueden requerir unidades amplificadas adicionales (o un
subwoofer) para brindar suficiente cobertura en ciertas aplicaciones. Es este caso, trata de bajar los
niveles de la consola un poco para aclarar el sonido.
Si después de verificar todas estas cosas, y cualquier otra que se te ocurra, el sistema sigue teniendo
problemas, cuidadosamente apunta todos los síntomas y verifícalos con un distribuidor Peavey que te
aconsejará.
CCuuiiddaaddoo yy MMaanntteenniimmiieennttoo
Tu PR 12P es un producto sólido y durable, que te dará años de uso si se cuida propiamente. Hay que usar
sentido común y leer las notas de cuidado para evitar una operación arriesgada.
La unidad tiene que estar desconectada de la corriente eléctrica antes de llevar a cabo cualquier cambio o
reparación. Todos los servicios deben ser llevados a cabo por personal calificado.
CCaalloorr//LLuuzz ddeell ssooll
Se debe evitar la exposición prolongada a los rayos del sol, ya que esto puede causar que la unidad se
caliente y cancele su operación temporalmente. Condiciones de uso con temperaturas elevadas también
pueden causar que el sistema térmico apague la unidad.
No se almacene en condiciones de temperatura extrema, baja o alta, o humedad. Siempre hay que darle
tiempo a la unidad de ponerse a la temperatura del cuarto antes de usarla.
LLiimmppiieezzaa
Nunca se debe limpiar el PR 12P mientras esté conectado o encendido. Una vez que la unidad ha sido
completamente desconectada de la corriente un paño seco puede usarse para quitar tierra y suciedad.
Nunca se deben usar solventes fuertes en el PR 12P, ya que pueden dañar el terminado. No se debe
permitir que NINGUN líquido caiga dentro del PR 12P.
All manuals and user guides at all-guides.com
Other manuals for PR 12P
2
Table of contents
Languages:
Other Peavey Speakers System manuals

Peavey
Peavey PR 12P User manual

Peavey
Peavey ER 1500 User manual

Peavey
Peavey PV 115 D User manual

Peavey
Peavey PR 1000T User manual

Peavey
Peavey AQ 12 User manual

Peavey
Peavey Lark10 User manual

Peavey
Peavey TLS-4X User manual

Peavey
Peavey Impulse 100 User manual

Peavey
Peavey SP 15M User manual

Peavey
Peavey ILS 1294 H User manual

Peavey
Peavey PV 1015 D User manual

Peavey
Peavey Impulse 1015 User manual

Peavey
Peavey Stadia T II User manual

Peavey
Peavey PV 15 PM User manual

Peavey
Peavey DPE 2P User manual

Peavey
Peavey SP 5 User manual

Peavey
Peavey SP 4X User manual

Peavey
Peavey TSL 1 User manual

Peavey
Peavey PR 1000 User manual

Peavey
Peavey SP 12M User manual