manuals.online logo
Brands
  1. Home
  2. •
  3. Brands
  4. •
  5. Pebble Grey
  6. •
  7. Indoor Furnishing
  8. •
  9. Pebble Grey Maya User manual

Pebble Grey Maya User manual

CMYK SINGLE HEX
c32 m25 y25 k85 90% black #363636
RGB
54 54 54
INSTALLATION GUIDE
Maya LED Mirror 201.30.05
Please read these instructions carefully before installation.
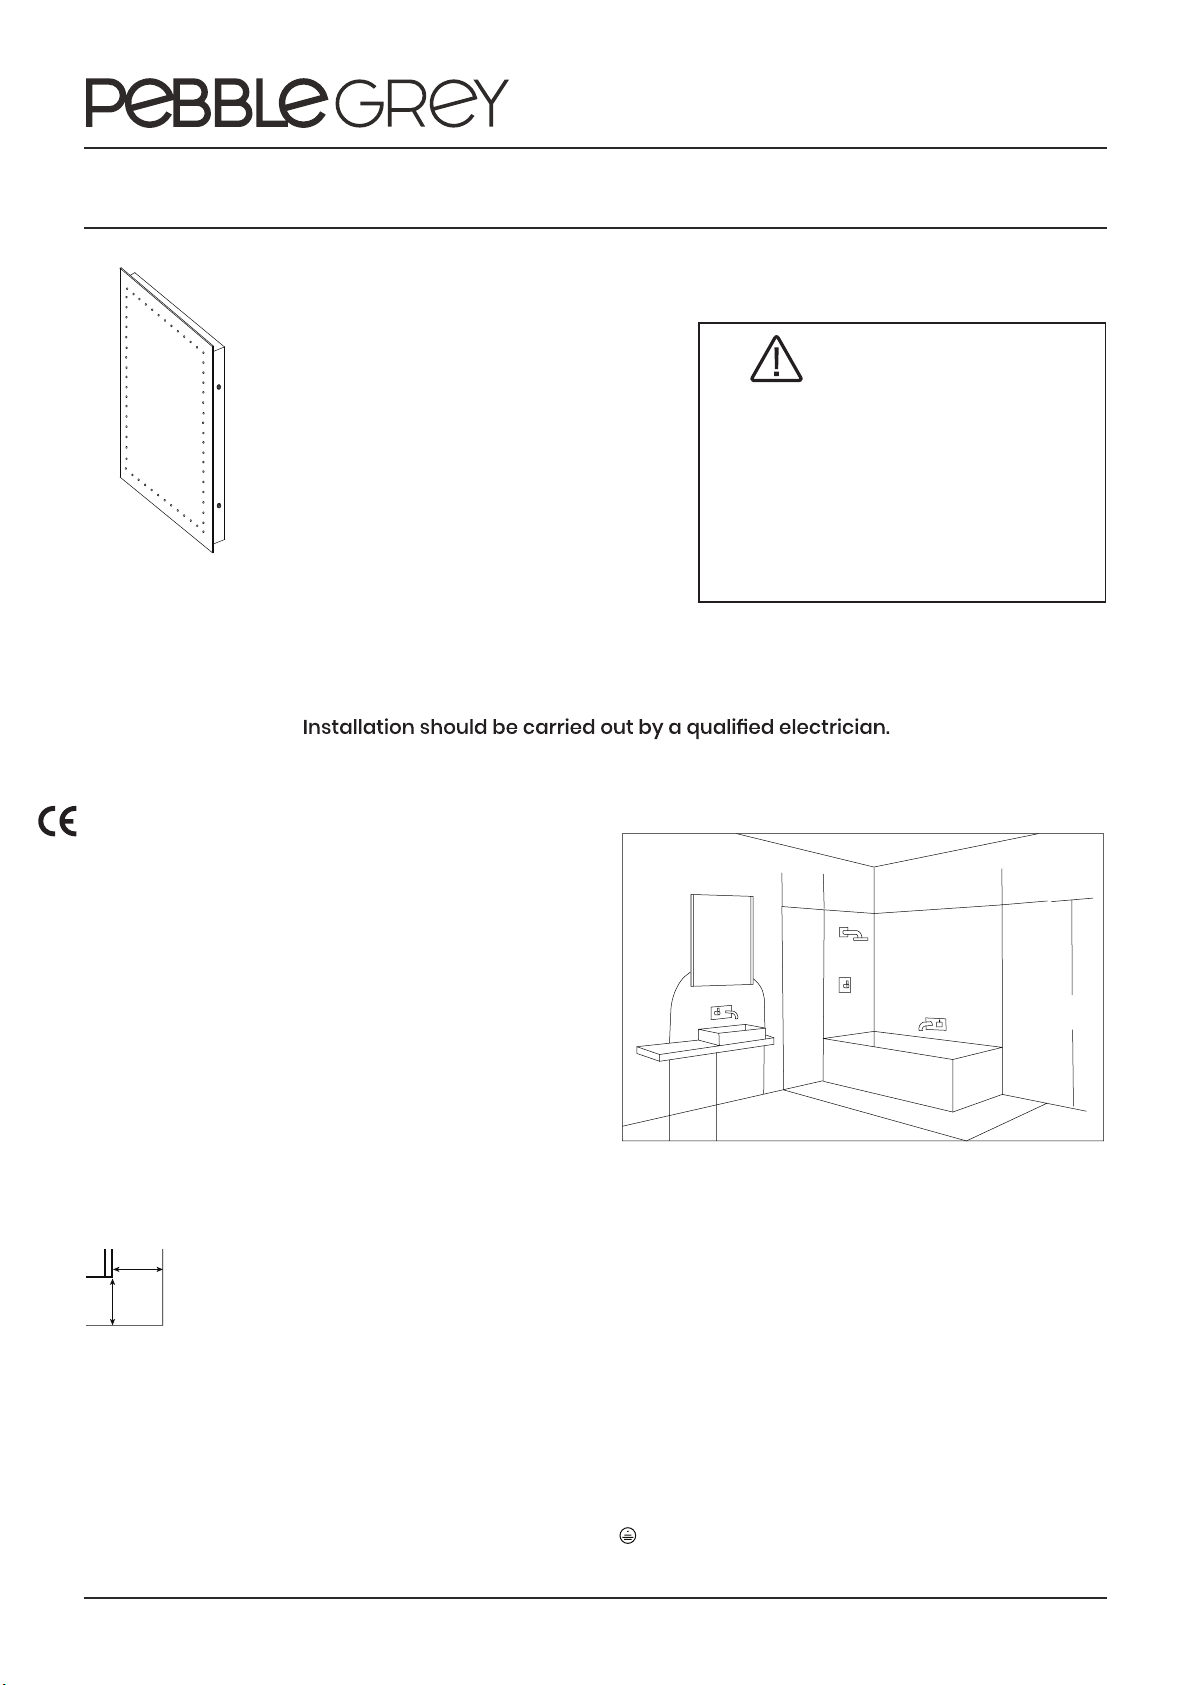
IEE Bathroom Zones
IMPORTANT
To ensure correct function of the sensor this product
MUST be installed with a minimum distance of 150mm
between the infrared sensor and any adjacent
worktop, surface, obstruction or tile trim.
• When working at heights, please use a suitable platform to
work from.
• Please note: For new installations, check for any electrical cables
or pipe work (gas/water) in the vicinity of the intended mounting
point before proceeding with the installation.
Ensure that the fixing location is able to take the weight of the
complete fitting.
•
• Wear suitable eye protection when drilling. Be careful when
using power tools near water.
GENERAL
•
THIS PRODUCT CONFORMS TO UK SAFETY STANDARDS AND MUST BE
INSTALLED IN ACCORDANCE WITH CURRENT IEE WIRING REGULATIONS
AND BUILDING REGULATIONS (PART P).
•
THIS PRODUCT MUST BE EARTHED, AND SHOULD NOT BE CONNECTED
TO AN UNEARTHED CIRCUIT.
•
ENSURE THAT CONNECTIONS ARE TURNED OFF AT THE CONSUMER
UNIT OR FUSE BOARD BEFORE INSTALLING OR CARRYING OUT ANY
MAINTENANCE.
•
THIS PRODUCT IS FOR INDOOR USE ONLY.
•
THIS PRODUCT IS IP44 RATED AND CAN BE INSTALLED IN BATHROOM
ZONE 2 (AS DEFINED BY THE IEE WIRING REGULATIONS) AND BEYOND.
SEE BATHROOM DIAGRAM.
•
THE PRODUCT IS SUITABLE FOR INSTALLATION IN ZONE 2 OR HIGHER.
•
IF THIS PRODUCT FEATURES REPLACEABLE BULBS THEN REPLACE FAILED
BULBS IMMEDIATELY. ALLOW THE GLASS, LAMP AND FITTING TO COOL
BEFORE REPLACING.
HANDLE WITH CARE!
When unpacking never stand the unit on a hard
surface.Always lay flat on a soft surface.
To avoid the risk of electrocution, please turn off
the electricity mains supply before commencing
installation.
Please do not hang or drape clothing or material
over the mirror. LEDs can get very hot and this may
cause a fire risk.
Please do not place objects too close to the LEDs as
this will cause the object to burn or melt.
Do NOT strike mirror glass with hard or pointed items. It is
recommended that the product is cleaned with a soft, dry, non
abrasive cloth. Do NOT use cleaning agents or abrasive materials
on any type of finished surface.Do NOT allow moisture to come into
ventilated where possible.
COMPLIANCE
WIRING
This product is designed and manufactured in the Class 1 category,
meaning a ground wire is required.
COLOUR CODING
LIVE
Brown
Blue
Green & Yellow
zone
2
radius
zone
2
zone
2
225cm
zone
1
60CM
60CM
60CM
MIN
150mm
Maya 201.30.05
600mmx800mm
contact with the electrical components. Keep your bathroom well
BS EN 60598-1: 2008+A11: 2009, EN60598-2-1: 1989
This product complies with the following safety standards:
NEUTRAL
EARTH
CMYK SINGLE HEX
c32 m25 y25 k85 90% black #363636
RGB
54 54 54
INSTALLATION GUIDE
Installation Procedure
1. Open the carton and make sure all the parts listed below
are present.
NOTE:
ADDITIONAL FIXINGS REQUIRED TO ALLOW INSTALLATION ON
PLASTERBOA
RD WALLS
2. Mark a desired height of the mirror. Drill the required
holes and insert the wall plugs.
NOTE: Wall plugs supplied are only suitable for solid stone/brick
walls. Please ensure the screws are fully tight.
3. electrical
Make the electrical connections ensuring first that the
supply has been turned off. This mirror is a class
1 product and requires an earth connection. It should be
installed in accordance with the latest IEE regulations.
4. Hang the mirror onto the wall. Activate the lights via the
sensor switch.
1X
4X
4X
DISPOSAL
Waste Electrical & Electronic Equipment Regulations (WEEE) requires
of our products showing this mark (left) must not be disposed
of with other household or commercial waste.
Pebble Grey Ltd does not levy any WEEE disposal charges to its
customers for affected WEEE related products.
To prevent possible harm to the environment or human health from
uncontrolled waste disposal, please separate any such product from
other waste types and recycle it responsibly at your local facilities.
Check with your Local Authority, Recycling Center or retailer for
recycling advice.
GUARANTEE
This product has a free replacement parts guaranteed in the UK for a
period of
1 year from the date of purchase. The guarantee is invalid in
improper use, incorrect installation or tampering.
Should this product fail during the guarantee period, please contact our
support team by email at [email protected] and we will replace the
relevant component part free of charge.
Pebble Grey does not accept responsibility for any installation costs associated
with the replacement of the component parts. Your statutory rig
affected.pebble Grey Ltd reserve the right to alter specifications without
hts are not
prior notice.
EXTENDED GUARANTEE
We offer an extended guarantee FREE OF CHARGE on selected products.
Activate online within 30 days of purchase to qualify.
For more information visit www.pebblegrey.co.uk/product-guarantee
100% RECYCLED CARTON
Our cardboard packaging is 100% recycled.
Please dispose of all waste responsibly.
BA
201.30.05 360 500
DISTANCE
A
BETWEEN
CENTERS OF BRACKETS
ECNATSID
B
NEEWTEB
STEKCARBFOSRETNEC
Power Cord
Live
Earth
Neutral
MAINS SUPPLY
the case of
that any
FLOOR
FROM
HEIGHT
DESIRED
CHOOSE
Wall plugs
Screws
Output Wires
Connect to the appropriated connector
IR Sensor
A
B

This manual suits for next models

1

Other Pebble Grey Indoor Furnishing manuals

Pebble Grey Linden 500.20.17 User manual

Pebble Grey

Pebble Grey Linden 500.20.17 User manual

Pebble Grey Renee 701.03.03 User manual

Pebble Grey

Pebble Grey Renee 701.03.03 User manual

Pebble Grey 201.40.05 User manual

Pebble Grey

Pebble Grey 201.40.05 User manual

Pebble Grey Grace 300.20.45 User manual

Pebble Grey

Pebble Grey Grace 300.20.45 User manual

Pebble Grey Leto 500.40.23 User manual

Pebble Grey

Pebble Grey Leto 500.40.23 User manual

Pebble Grey Grace 300.20.40 User manual

Pebble Grey

Pebble Grey Grace 300.20.40 User manual

Pebble Grey Grace 300.20.41 User manual

Pebble Grey

Pebble Grey Grace 300.20.41 User manual

Pebble Grey Nano 701.02.01 User manual

Pebble Grey

Pebble Grey Nano 701.02.01 User manual

Pebble Grey Hadley 500.20.12 User manual

Pebble Grey

Pebble Grey Hadley 500.20.12 User manual

Pebble Grey Copenhagen 701.07.01 User manual

Pebble Grey

Pebble Grey Copenhagen 701.07.01 User manual

Pebble Grey Halo 201.40.03 User manual

Pebble Grey

Pebble Grey Halo 201.40.03 User manual

Popular Indoor Furnishing manuals by other brands

Solos SD-GStand-BK Assembly manual

Solos

Solos SD-GStand-BK Assembly manual

U-Line H-10242 quick start guide

U-Line

U-Line H-10242 quick start guide

Sauder Aspen Post 427018 manual

Sauder

Sauder Aspen Post 427018 manual

Steelcase UPV Series Assembly instruction

Steelcase

Steelcase UPV Series Assembly instruction

Community G248 User and maintenance guide

Community

Community G248 User and maintenance guide

Next 21 47 62 Assembly instructions

Next

Next 21 47 62 Assembly instructions

Argos Malvern 395/5152 Assembly instructions

Argos

Argos Malvern 395/5152 Assembly instructions

John Lewis Duhrer 836 03703 manual

John Lewis

John Lewis Duhrer 836 03703 manual

Wampat W04E4151R Assembly instructions

Wampat

Wampat W04E4151R Assembly instructions

Jysk KALVEHUSE 3681421 manual

Jysk

Jysk KALVEHUSE 3681421 manual

PARAMOUNT BED PE-6001 instruction manual

PARAMOUNT BED

PARAMOUNT BED PE-6001 instruction manual

BSF BABY INC. Sleigh Assembly instructions

BSF BABY INC.

BSF BABY INC. Sleigh Assembly instructions

Habitat Akira 803422 manual

Habitat

Habitat Akira 803422 manual

FMD Furniture BORA 1 109-001 Assembly instructions

FMD Furniture

FMD Furniture BORA 1 109-001 Assembly instructions

Tufferman Stoealex MT130 instructions

Tufferman

Tufferman Stoealex MT130 instructions

HOMCOM 713-094V90 Assembly & instruction manual

HOMCOM

HOMCOM 713-094V90 Assembly & instruction manual

Argos Single Metal Futon Assembly instructions

Argos

Argos Single Metal Futon Assembly instructions

IKEA STUVA GRUNDLIG Assembly instructions

IKEA

IKEA STUVA GRUNDLIG Assembly instructions

manuals.online logo
manuals.online logoBrands
  • About & Mission
  • Contact us
  • Privacy Policy
  • Terms and Conditions

Copyright 2025 Manuals.Online. All Rights Reserved.