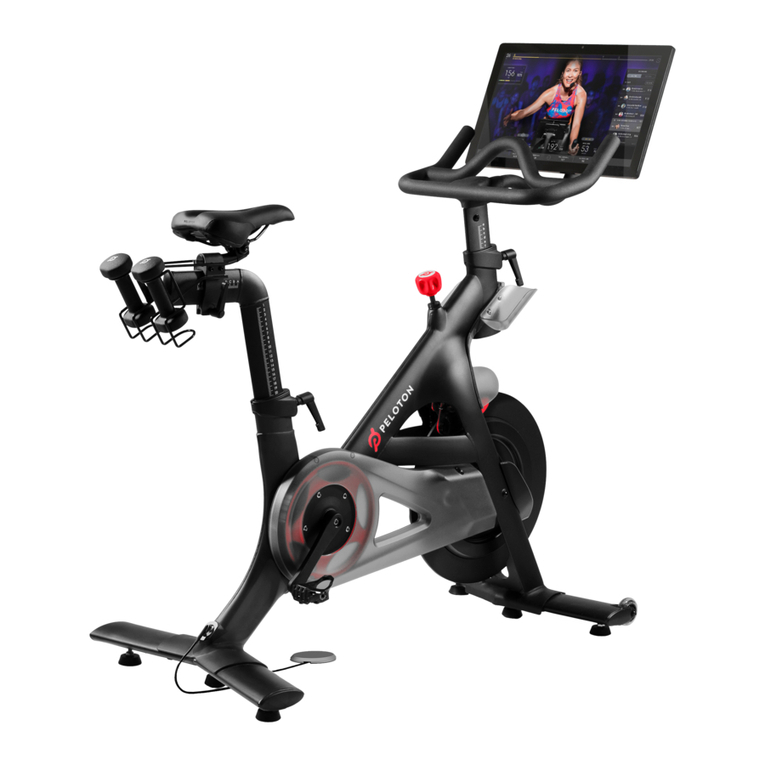
Peloton Bike+ User manual

USER MANUAL

23|
TABLE OF CONTENTS
TABLE OF CONTENTS
WARNING:To reduce your risk of injury, read all precautions and instructions in
this manual before using this equipment. Improper use or maintenance can void the
warranty. Keep this manual for future reference. Access the latest user manual, plus
additional languages, at onepeloton.co.uk/manuals.
SAFETY INFORMATION
NOTICES
LABELS
MEMBER SUPPORT
SPECIFICATIONS
SETTING UP YOUR BIKE
Location Requirements
Moving The Bike
Clipping In and Out
Adjusting Resistance
Locking The Bike
GETTING STARTED
Plugging In
Powering On and Off
Connecting to the Internet
04
06
08
09
10
16
16
17
24
26
27
28
27
29
30
30
31
31
31
32
34
38
42
Logging In
Peloton 101
Adding a Rider
Joining a Ride
CLASS SCREEN
ASSEMBLY
MAINTENANCE AND CARE
WARRANTY

45|
SAFETY INFORMATION
SAFETY INFORMATION
Read all safety information before operating
the bike. It is the owner’s responsibility to
ensure that users are aware of all warnings
and precautions.
Consult a physician before beginning a new
tness plan. Incorrect or excessive training
can result in serious injury.
If you experience faintness, chest pain,
or shortness of breath, stop exercising
immediately and consult a physician.
Metrics on the screen, including heart rate
monitoring, may be inaccurate. Values
should be used for reference only.
The resistance knob can be used as an
emergency brake. To stop immediately,
push down on the resistance knob.
This bike has a direct driven ywheel. If
the ywheel is moving, the pedals are
moving. Removing your feet from the
pedals while they are moving can cause
serious injury. Stop by reducing pedaling
frequency in a controlled manner or by using
the emergency brake. Do not remove your
feet from the pedals until the ywheel
stops moving.
Use caution when mounting
and dismounting.
To prevent injury, always adjust the
seat and handlebars to your
personal requirements.
Keep children under 14 and pets away from
the bike at all times. Children over the age
of 14 and persons with a lack of experience
and knowledge must be given supervision
or instruction before using the bike. Do not
allow children to perform maintenance or
to play with the bike. Always lock the bike
when not in use.
Keep hands, loose clothing, shoelaces,
and accessories away from moving parts.
Do not insert objects into openings on
the equipment.
The bike is equipped with Delta-compatible
pedals. Always cycle using footwear
equipped with appropriate cleats. Never
ride the bike barefoot.
Perform regular maintenance for optimal
performance and longevity. To ensure
safety, check the bike for wear and damage
on a regular basis. Replace any damaged
or worn parts immediately. Do not use the
bike until the repair is performed.
Use only original parts from the
manufacturer. Changes or modications
to this unit not expressly approved by
Peloton could void the warranty
Always unplug the bike immediately after
use and before cleaning or performing
maintenance. Service other than the
procedures described here must be
performed by an authorised technician.
The bike should not be used by persons
exceeding 297 lb/135 kg in weight.
This bike is for indoor use only. Do not store
the bike outdoors, near water, or at high
humidity levels.
This bike is for home use only. Do not use
in a commercial setting. Use the bike only
for its intended purpose.

67|
NOTICES
EU DECLARATION OF CONFORMITY
Hereby, Peloton Interactive, Inc.
declares that the radio equipment type
PLTN-TTR01 is in compliance with Directive
2014/53/EU. The full text of the EU
declaration of conformity is available at
onepeloton.co.uk/compliance.
The Peloton Bike+ is according to EN ISO
20957-1 and EN ISO 20957-10 a Class
H product and is built to the highest
standards for indoor home tness use. It
was designed especially for lower body
workout and cardiovascular training.
Waste electrical products should not
be disposed of with household
waste. Please recycle where facilities
exist. Check with your local authority
or retailer for recycling advice.
This product is ANT+™ certied and
is compatible with ANT+ sensors
that support heart rate monitoring.
Apple Watch is a trademark of Apple Inc.,
registered in the U.S. and other countries.
NOTICES
DISTRIBUTED BY:
US/CANADA
Peloton Interactive, Inc.
125 West 25th Street11th Fl
New York, NY 10001
USA
UK
Peloton Interactive UK Limited
Orion House, 8th Floor
5 Upper St Martin’s Lane
London WC2H 9EA
United Kingdom
GERMANY
Peloton Interactive Deutschland GmbH
c/o We Work, Friedrichstr. 76
10117 Berlin Germany

89|
MEMBER SUPPORT
LABELS MEMBER SUPPORT
Peloton’s #1 concern is member satisfaction. If you require assistance or are experiencing
issues with your Peloton Bike+, please contact member support for additional help.
UK +44.808.169.6469
DE +49 32211001778
US 1.866.679.9129
CAN 1.833.821.0099
support.onepeloton.co.uk
When you contact member support, have the following information ready:
1 Bike ID and serial number*
2 Purchase Date
3 Your order number or the email address associated with your Peloton Bike+ purchase
*To access the ID and serial numbers from the touchscreen, tap the menu icon at the lower
right, and select About.
Familiarise yourself with all warnings on the bike before use.
If any label is damaged or lost, contact member support for a replacement immediately.
A B
PELOTON BIKE+ Model: PL-02
Manufactured in Taiwan, Designed in NYC
Peloton Interactive, Inc.
125 West 25th Street, 11th Fl
New York, NY 10001 USA
1.866.679.9129
Peloton Interactive UK Limited
8th Floor, Orion House
5 Upper St.Martin’s Lane
London WC2H 9EA United Kingdom
Peloton Interactive Deutschland GmbH
C/o We Work, Friedrichstr. 76
10117 Berlin Deutschland
EN ISO 20957 Class H
Patents: onepeloton.com/legal/patents
Read user manual prior to use and follow all warnings and
instructions. Misuse of this bike may result in serious injury.
Set up and operate on a solid, level surface. Lock the equipment
when not in use. Keep children and pets away from the bike at all
times. Before mounting or dismounting, move the pedal on the
mounting or dismounting side to its lowest position and bring the
pedals to a complete stop. This bike does not free-wheel. Reduce
pedal speed in a controlled manner. Spinning pedals and other
moving parts can cause injury. Always unplug the bike after use
and before servicing. Maximum user weight: 297 lbs/135 kg
WARNING
A
B

10 11|
SPECIFICATIONS
SPECIFICATIONS
A TOUCHSCREEN
B SWIVEL
C HANDLEBAR HEIGHT ADJUSTMENT KNOB
D WATER BOTTLE HOLDER
E FLYWHEEL
F WHEELS
G FEET
H PEDALS
I BELT GUARD
J SEAT HEIGHT ADJUSTMENT KNOB
K SEAT SLIDER LATCH
L WEIGHT HOLDERS
M SADDLE
N RESISTANCE KNOB/EMERGENCY BRAKE
O AUDIO JACK
P HANDLEBARS
A
B
C
D
E
F
G
H
I
J
K
L
M
N
O
P

12 13|
SPECIFICATIONS
SPECIFICATIONS
Q VOLUME CONTROLS
R POWER BUTTON
S AUDIO JACK
T POWER/DATA PORT
U NETWORK PORT
CONTINUED
R
S
T
U
Q

14 15|
SPECIFICATIONS
SPECIFICATIONS
BIKE SPECIFICATIONS
Footprint 4’ x 2’/120 x 60 cm
Maximum Height 4’11”/150cm
Weight 141 lb/64 kg
User Height Range 4’11’’- 6’5’’/150 - 195 cm
Maximum User Weight 297 lb/135 kg
Weight Holder Capacity 5 lb/2.26 kg
Displayed Power Output Accuracy +/-10 % for Power > 50W, +/-5W for Power < 50W.
POWER CONSUMPTION
NETWORKED STANDBY MODE
Power Consumption: 1.91W
Power consumption with all interfaces connected: 1.91W
Time to enter Standby Mode: 20 mins of inactivity
OFF MODE
Power Consumption: 0.39W
Time to enter Off mode: N/A; Turn off equipment using power switch
TOUCHSCREEN SPECIFICATIONS
23.8” 1080P HD Touchscreen
WiFi 802.11 a/b/g/n/ac MIMO 2x2 antenna
1 Gbps Ethernet (via network port)
4 GB Memory
16 GB Internal Flash Storage
ANT+™ Wireless
Bluetooth® 5.0
8MP Still Photo/1080P Video Camera with Privacy Cover
4 Digital Microphone Array
3.5mm Headphone Port
2x10 Watt Woofers with 2x3W Front-Facing Tweeters
Stereo Speakers with 80Hz to 20KHz Frequency Response
CONTINUED

16 17
SETTING UP YOUR BIKE
LOCATION REQUIREMENTS MOVING THE BIKE
yPlace the bike on a solid, level surface
yUse a mat to avoid damage to the bike and oor.
yAllow a clearance of 24” / 60 cm on each side of the bike.
yDo not use extension cords or adaptors. The included power cord must
be able to reach an outlet.
yTilt the bike forward onto the wheels. Lift the rear stabiliser while a second person
holds the handlebars.
yCarefully roll the bike to the new location. Avoid uneven surfaces.
yIf the bike rocks or wobbles after being set down, adjust each foot until all four feet rest
rmly on the oor. Tighten a foot to shorten, or unscrew to lengthen.
24" / 60c m
24" / 60c m
24" / 60c m
24" / 60c m

18 19|
SETTING UP YOUR BIKE
SETTING UP YOUR BIKE CONTINUED
SEAT HEIGHT
SEAT DEPTH
ySet the seat height level with the top of your hip bone.
yLoosen the knob to adjust the seat height.
yTighten the knob to lock the seat in place.
ySet the seat elbow-to-ngertips length from the handlebars.
yOpen the latch to adjust the seat depth.
yClose the latch to lock the seat in place.
CAUTION: Always remove any weights from the weight holder before
adjusting the seat.
CAUTION: Fully tighten knob before using the Peloton Bike+.
CAUTION: To prevent injury, always adjust the seat and handlebars to your
personal requirements. Do not exceed maximum adjustment marks on seat and
handlebar posts or seat slider. CAUTION: Always remove any weights from the weight holder before
adjusting the seat.
CAUTION: Close latch before using the Peloton Bike+.
2
13
2
31

20 21|
SETTING UP YOUR BIKE
HANDLEBAR HEIGHT PROPER BODY POSITION
ySet to seat height, then adjust until you feel comfortable.
yLoosen the knob to adjust the handlebar height.
yTighten the knob to lock the handlebars in place.
1 Arms slightly bent
2 Hands rest on the handlebars without reaching
3 Leg slightly bent at the bottom of the stroke
1
2
3
These adjustments should get you started. If you’re uncomfortable, or want to ne-tune
your bike’s settings, access Peloton 101 from the menu on your touchscreen or
go to support.onepeloton.co.uk.
1
2
3
CONTINUED
CAUTION: Fully tighten knob before using the Peloton Bike+.

22 23|
SETTING UP YOUR BIKE
ADJUSTING THE TOUCHSCREEN ANGLE ROTATING THE TOUCHSCREEN
Hold the top and bottom of the touchscreen and tilt it forward or back. You should be able
to view the screen comfortably when seated on the bike.
CONTINUED
1 Make sure that the touchscreen is vertical.
2 Rotate it to the left or right.
1 2
Rotate the screen to view non-cycling content from off the bike.
90°

24 25|
SETTING UP YOUR BIKE
SETTING UP YOUR BIKE CONTINUED
CLIPPING IN CLIPPING OUT
Point your toes down to t the cleat into the pedal, then push down through your heel.
CAUTION:The bike is equipped with Delta-compatible pedals. Always cycle using
footwear equipped with appropriate cleats. Never ride the bike barefoot.
Hold the resistance knob down and kick your heel away from the bike.

26 27|
SETTING UP YOUR BIKE
SETTING UP YOUR BIKE CONTINUED
LOCKING THE BIKE
yRotate the resistance knob all the way clockwise.
yRun the lock cable through the left pedal and around the rear stabiliser.
yPull the lock open and insert the cable loop.
yClose the lock and rotate dials.
CAUTION: Always lock the bike when not in use.
ADJUSTING RESISTANCE
yTurn knob right to increase resistance.
yTurn knob left to decrease resistance.
yPress knob down for emergency brake.

28 29|
GETTING STARTED
POWERING ON AND OFF
yHold the power button for two seconds to power on the bike.
yThe bike will sleep after about 20 minutes of inactivity. To wake the bike, press
the power button.
yTo power down, hold the power button for two seconds. Select Shut Down
when prompted.
GETTING STARTED
PLUGGING IN
yPlug the power supply into the wall.
yPlug the power cord into the power jack at the back of the bike.
WARNING: Do not use extension cords or adaptors. The included power cord must
be able to reach an outlet.

30 31|
GETTING STARTED
GETTING STARTED CONTINUED
PELOTON 101
ADDING A RIDER
CLASSES
Check out our introduction to Peloton for more on adjusting your bike to t your body and
maintaining proper body position when you ride.
To let another rider use your bike, tap the icon next to your username at the lower left of
the home screen and tap Add/Remove Proles. Select another logged-in user or tap
Add Prole to create a new account, or to log in a rider who hasn’t used this bike before.
ySelect a live or on-demand ride from the home screen, or tap Classes to lter and search
thousands of on-demand rides by length, instructor, title, and featured music.
yToggle to Floor on the class selection screen to see strength, stretching, yoga, and more.
yUse the buttons along the bottom of the screen to view a Schedule of upcoming
classes, join Challenges, or view Programs of preselected classes.
yTap More for a Scenic Ride, or to Just Ride without instruction or video.
ySelect a class to view details. Tap Start to enter the class screen.
yTo connect a heart rate monitor, wireless headphones, or Apple Watch, select a class
and press Start. You will have the chance to connect to an available device before
the class begins.
yYour instructor will guide you through your workout. If the workout does not include a
warmup and cooldown, warmup and cooldown classes are available separately.
JOINING A RIDE
CONNECTING TO THE INTERNET
LOGGING IN
ySelect your WiFi network and enter the password. Tap Connect.
yIf a WiFi network is not available, you can connect to a wired network. Use an adaptor to
connect an Ethernet cable to the network port on the back of the touchscreen. The bike
will connect to the network automatically.
yTo turn off WiFi, tap the upper right corner of the touchscreen and select Wi-Fi. On the
WiFi screen, toggle the radio button at the upper right.
When logging in for the rst time, please have available your Subscription Activation Key or
the login information you set up when you purchased the Peloton Bike+.
Once a subscription is activated and associated with this bike, any user can log in and
access subscription content.

32 33
CLASS SCREEN
CLASS SCREEN
TAP ELEMENTS
TO HIDE OR REVEAL
LEADERBOARD
TOTAL OUTPUT
TARGET RANGES
AUTO-FOLLOW
Tap the lock symbol to
automatically adjust
resistance to match the
target resistance range
CADENCE
How fast you're pedaling,
in revolutions per minute
OUTPUT
The power you're exerting,
measured in watts
RESISTANCE
Pedaling diculty,
measured as a percentage
TIME REMAINING HEART RATE

34 35|
ASSEMBLY
ASSEMBLY
TOOLS REQUIRED
PARTS
6mm Allen key
5mm Allen key
4mm Allen key
3mm Allen key
Torque wrench with 4, 5 and
6mm hex bits
Bike frame
Front and back stabilisers
Stabiliser screws x 4
Handlebars
Handlebar post
Handlebar post screws with washers x 3
Handlebar post end cap
Endstop screw
Monitor mount
Monitor mount bolt
Weight holder
Weight holder screws x 4
Left and right pedals
Water bottle holder
Long screw with nut
Shoulder bolt
Touchscreen
Touchscreen screws x 2
1 Rest the bike frame on its back.
2 Attach front stabiliser using the 6mm Allen key. Torque
screws to 20 N.m.
3 Locate the handlebars and handlebar post.
4 Route the cable from the handlebars through the post.
5 Attach the post using the 5mm Allen key. Torque screws to 20 N.m.
6 Add end cap.
7 Route the cable through the head tube and then insert the handlebars.
8 Add the end stop screw to the handlebar post with the 3mm Allen key.
5
16
2
6
7 8

36 37|
ASSEMBLY
ASSEMBLY CONTINUED
16 Using a pedal spanner, install the right pedal. Thread clockwise and tighten fully.
17 The left pedal is reverse-threaded. Thread anti-clockwise and tighten fully.
18 Fit the water bottle holder onto the handlebar post.
19 Add the long screw and nut using the 3mm Allen key.
20 Add the shoulder bolt using the 3mm Allen key.
21 Fit the touchscreen onto the monitor mount. Add the screws using a 4mm Allen key
and torque to 10 N.m.
22 Plug the cables coming from the monitor mount into the audio and Peloton ports.
9 Thread both of the cables from the handlebar through the monitor mount.
Add the monitor mount cap.
10 Rotate the top of the monitor mount 180° to expose the bolt hole.
11 Secure the mount to the arm using the monitor mount bolt and 5mm Allen key. Torque
screws to 9.5 N.m.
12 Tip the bike to rest on the front wheels and monitor mount.
13 Attach rear stabiliser using the 6mm Allen wrench. Torque screws to 20 N.m.
14 Turn the bike upright.
15 Fit the weight holder onto the back of the saddle shaft and fasten with four screws and
the 3mm Allen key.
13 15
10-119
16
20 21
17
18-19
12

38 39|
MAINTENANCE AND CARE
AFTER EACH RIDE
EVERY 3 TO 5 RIDES
yCleaning: Wipe down the bike using a damp cloth.
yLeveling feet: If the bike rocks or wobbles, adjust each foot until all four feet rest rmly
on the oor. Tighten a foot to shorten, or unscrew to lengthen.
yCleaning: Clean the bike thoroughly using a damp cloth and a mild household cleaner
diluted in water. Do not use cleaning products containing ammonia. Clean the
touchscreen using an electronics wipe.
yPedals: Tighten any loose pedal with the included 15 mm spanner. Pedals should
be tightened to 34 N·m/25 lb-ft of torque. Turn clockwise to tighten the right pedal and
anti-clockwise to tighten the left pedal.
yCleats: Use a 4 mm Allen key to tighten any loose screws attaching your cleats to
your cycling shoes.
ySeat: Make sure the seat is parallel to the ground. Then use the included 13 mm
spanner to tighten the seat-xing nuts on both sides.
CAUTION:To ensure safe operation and optimal performance, check for wear
and damage and perform maintenance on a regular basis. Replace any damaged or
defective parts immediately. Do not use the bike until the repair is performed. Only use
original parts from the manufacturer. Changes or modications to this unit not expressly
approved by Peloton could void the warranty.
CAUTION:Always unplug the bike immediately after use and before cleaning or
performing maintenance. Service other than the procedures described here must be
performed by an authorised technician.
Other manuals for Bike+
1
Table of contents
Other Peloton Exercise Bike manuals

Peloton
Peloton BIKE User manual

Peloton
Peloton BIKE User manual

Peloton
Peloton BIKE User manual

Peloton
Peloton PL-21 User manual

Peloton
Peloton BIKE+ PL-02 User manual

Peloton
Peloton BIKE+ PL-02 User manual

Peloton
Peloton PL-01 User manual

Peloton
Peloton BIKE User manual

Peloton
Peloton PL-01 User manual

Peloton
Peloton BIKE User manual
Popular Exercise Bike manuals by other brands

cardiobull
cardiobull S14 manual

NordicTrack
NordicTrack Gx4.1 Bike Manual de utilizare

Orbit
Orbit OBR8301FC owner's manual

Life Gear
Life Gear Formula II 20280 owner's manual

Christopeit Sport
Christopeit Sport Ergometer EMS 3 Assembly and exercise instructions

CAPITAL SPORTS
CAPITAL SPORTS Evo Comfor manual