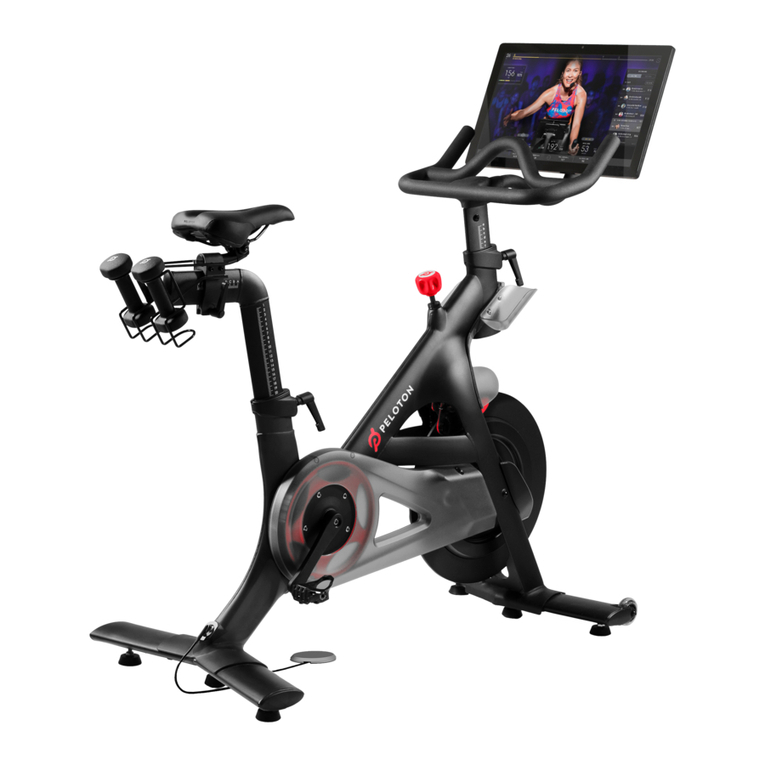
Peloton PL-01 User manual

USER MANUAL
MODEL:
PL-01
SKUs:
PL-01 | NEW
PL-01-R | REFURBISHED

23
|
TABLE OF CONTENTS
TABLE OF CONTENTS
CAUTION: Read all precautions and instructions in this manual before using this
equipment. Improper use or maintenance can void the warranty. Keep this manual for future
reference. The information in this manual may not reect recent updates as we continue
to improve our product. Please see onepeloton.com/manuals for the latest version of the
manual.
04
06
08
13
14
14
15
16
17
19
21
22
23
23
24
25
26
28
30
34
43
Connecting To the Internet
Logging In
CLASS SCREEN
MAINTENANCE AND CARE
BIKE ASSEMBLY
WARRANTY
WARNINGS AND SAFETY INFORMATION
NOTICES
SPECIFICATIONS
SUPPORT
SETTING UP THE BIKE
Location Requirements
Moving the Bike
Seat Height
Seat Depth
Body Position
Clipping In / Clipping Out
Adjusting Resistance
GETTING STARTED
Plugging In
Powering On and Off

45
|
WARNINGS AND SAFETY INSTRUCTIONS
Read all safety information before operating
the bike. It is the owner’s responsibility to
ensure that users are aware of all warnings
and precautions.
Consult a physician before beginning a new
tness plan. Incorrect or excessive training
can result in serious injury.
If you experience faintness, chest pain,
or shortness of breath, stop exercising
immediately and consult a physician.
Metrics on the screen, including heart rate
monitoring, may be inaccurate. Values should
be used for reference only.
The resistance knob can be used as an
emergency brake. To stop immediately, push
down on the resistance knob.
This bike has a direct driven ywheel. If the
ywheel is moving, the pedals are moving.
Stop by reducing pedaling frequency in a
controlled manner or by using the emergency
brake. Do not remove your feet from the
pedals until the ywheel stops moving.
Spinning pedals can cause injury.
Use caution when mounting and dismounting.
To prevent injury, always adjust the seat and
handlebars to your personal preference
and verify that all adjustment handles are fully
tightened. Loose seats or handlebars can
lead to serious injury.
Keep children under 14 and pets away from
the bike at all times. Children over the age of
14 and persons with a lack of experience
and knowledge must be given supervision
or instruction before using the bike. Do not
allow children to perform maintenance or to
play with the bike. Always fully engage the
brake when the bike is not in use.
Keep hands, loose clothing, shoelaces,
and accessories away from moving parts.
Do not insert objects into openings on
the equipment.
The bike is equipped with Delta-compatible
pedals. Always cycle using footwear
equipped with appropriate cleats. Cycling
barefoot or with inappropriate footwear can
cause serious injury.
Make sure that your cleats are properly
positioned and all bolts are fully
tightened before clipping in. Riding with
loose cleats could lead to serious injury.
Do not attempt to walk in cycling shoes
with cleats. Wear cycling shoes only while
using the Peloton Bike and remove them
immediately after clipping out. Walking
on cleats may cause you to fall or twist your
ankle, or otherwise result in serious injury.
Be careful when clipping in and out. While you
may need to use some force, excessive force
or aggressive movements could result in an
ankle, foot, or leg injury.
Perform regular maintenance for optimal
performance and longevity. To ensure safety,
check the bike for wear and damage on a
regular basis. Replace any damaged or worn
parts immediately. Do not use the bike until
the repair is performed.
Ensure that the power cable never passes
under the bike. Always keep the power
cable clean and dry. Sweat, spills, and other
damage to the power cable may result in
property damage or bodily harm.
Use only original parts from the manufacturer.
Changes or modications to this unit not
expressly approved by Peloton could void
the warranty.
Always unplug the bike immediately
after use and before cleaning or performing
maintenance. Service other than the
procedures described here must be
performed by an authorized technician.
The bike should not be used by persons
exceeding 297lb/135kg in weight.
This bike is for indoor use only. Do not store
the bike outdoors, near water, or at high
humidity levels.
This bike is for home use only. Do not use in
a commercial setting. Use the bike only for its
intended purpose.
WARNINGS AND SAFETY INFORMATION

67
|
NOTICES
This device complies with part 15 of the
FCC Rules. Operation is subject to the
following two conditions: (1) this device
must not cause harmful interference,
and (2) this device must not accept any
interference received, including interference
that may cause undesired operation.
NOTE: This equipment has been tested
and found to comply with the limits for
a Class B digital device, pursuant to
Part 15 of the FCC Rules. These limits
are designed to provide reasonable
protection against harmful interference in
a residential installation. This equipment
generates, uses and can radiate radio
frequency energy and, if not installed and
used in accordance with the instructions,
may cause harmful interference to radio
communications. However, there is no
guarantee that interference will not occur
in a particular installation. If this equipment
does cause harmful interference to radio
or television reception, which can be
determined by turning the equipment off
and on, the user is encouraged to try to
correct the interference by one or more of
the following measures:
1Reorient or relocate the receiving
antenna.
2Increase the separation between the
equipment and receiver.
3 Connect the equipment to an outlet on a
circuit different from that towhich the
receiver is connected.
4Consult the dealer or an experienced
radio/TV technician for help.
CAUTION:
1To comply with FCC RF exposure
compliance requirements, a separation
distance of at least 20 cm must be
maintained between the antenna of
this device and all persons.
2This transmitter must not be co-located
or operating in conjunction with
any other antenna or transmitter.
Waste electrical products must
be handed over to a designated
collection point for disposal to be
recycled in an environmentally sound
manner. Improper disposal of this
product could result in harm to the
environment or to human health.
Check with your local waste authority
or the retailer where you purchased
this product for available collection
facilities or further recycling advice
Please avoid the generation of waste
from electrical products as much as
possible, e.g. by giving preference to
products with a longer service life or
by reusing used electrical products
instead of disposing of them.
You are responsible for deleting any
personal data from this product
before disposing of it.
This product is ANT+™ certied and
is compatible with ANT+ sensors
that support heart rate monitoring.
.
NOTICES
DISTRIBUTED BY:
US/CANADA
Peloton Interactive, Inc.
441 9th Ave, 6th Floor
New York, NY 10001
USA
UK
Peloton Interactive UK Limited
110 Long Acre
Covent Garden
London WC2E 9LH
United Kingdom
EU
Peloton Interactive Deutschland GmbH
c/o WeWork
Neue Schönhauser Str. 3-5
Neue Schönhauser Straße 3-5
10178 Berlin
Germany
AUSTRALIA
Peloton Interactive Australia Pty Ltd
ACN 644 958 047
20 Martin Place
Sydney NSW 2000
Australia

89
|
SPECIFICATIONS
SPECIFICATIONS
TOUCHSCREEN
HANDLEBARS
HANDLEBAR POST SLEEVE
RESISTANCE KNOB / EMERGENCY BRAKE
HANDLEBAR HEIGHT L-HANDLE
WATER BOTTLE HOLDER
FLYWHEEL
WHEELS
POWER SUPPLY
PEDALS
BELT GUARD
LEVELING FEET
SEAT HEIGHT L-HANDLE
SEAT POST SLEEVE
SEAT DEPTH L-HANDLE
WEIGHT HOLDERS
SADDLE
A
B
C
D
E
F
G
H
I
J
K
L
M
N
O
P
Q
M
B
E
F
H
A
P
C
G
ON
D
Q
K
L
J
I

10 11
|
SPECIFICATIONS
SPECIFICATIONS CONTINUED
POWER INPUT
POWER BUTTON
HEADPHONE JACK
VOLUME CONTROLS
ETHERNET PORT
USB PORT
METRICS PORT
R
S
T
U
V
W
X
V
X
W
U
T
S
R

12 13
|
SPECIFICATIONS
BIKE
Footprint: 4ft x 2ft/120cm x 60cm
Weight: 135lb/61kg
Height: 4ft 10in/147cm
User Height Range: 4ft 11in - 6ft 5in/150cm - 195cm
Max User Weight: 297lb/135kg
Weight Holder Capacity: 3lb/1.36kg
TOUCHSCREEN
21.5in 1080P HD Touchscreen
WiFi 802.11 a/b/g/n/ac / 100 Mbps Ethernet
16 GB Internal Flash Storage
ANT+™ Wireless / Bluetooth® 4.0
2x10 Watt Stereo Speakers
SPECIFICATIONS CONTINUED
QUESTIONS OR CONCERNS
Peloton’s #1 concern is member
satisfaction. If you require assistance
or are experiencing issues with
your Peloton Bike, please contact
the member support team for additonal
help:
Peloton Interactive, Inc.
441 9th Ave, 6th Fl
New York, NY 10001
SUPPORT

14 15
|
SETTING UP YOUR BIKE
LOCATION REQUIREMENTS
yPlace the bike on a solid, level and horizontal surface.
yUse a mat to avoid damage to the bike and oor.
yAllow a clearance of 24in/60cm on each side of the bike.
2 4 i n / 6 0 c m
2 4 i n / 6 0 c m
CAUTION: Ensure that the power cable never passes under the bike. Always keep
the power cable clean and dry. Sweat, spills, and other damage to the power cable may
result in property damage or bodily harm.
MOVING THE BIKE
yTilt the bike forward onto the transport wheels. Lift the rear stabilizer while a second
person holds the handlebars.
yCarefully roll the bike to the new location. Avoid uneven surfaces.
yIf the bike rocks or wobbles after being set down, turn each leveling foot clockwise to
lower it, or counterclockwise to raise it until it rests rmly on the oor.
2 4 i n / 6 0 c m 2 4 i n / 6 0 c m

16 17
|
SETTING UP YOUR BIKE
SETTING UP YOUR BIKE CONTINUED
SEAT DEPTH
SEAT HEIGHT
CAUTION: Always remove any weights from the weight holder before adjusting the seat.
Set the seat height level with the top of your hip bone.
Set the seat elbow-to-ngertips length from the handlebars.
CAUTION: Verify that all adjustment handles are fully tightened. Loose seats or
handlebars can lead to serious injury.
CAUTION: To prevent injury, always adjust the seat and handlebars to your personal
requirements. Do not exceed maximum adjustment marks on seat and handlebar posts
or seat slider.
1 Turn L-handle counterclockwise to loosen.
2 Raise or lower seat.
3 Turn L-handle clockwise to tighten.
2
1 3
1 Turn L-handle counterclockwise to loosen.
2 Move seat forward or back.
3 Turn L-handle clockwise to tighten.
CAUTION: Always remove any weights from the weight holder before
adjusting the seat.
CAUTION: Verify that all adjustment handles are fully tightened. Loose seats or
handlebars can lead to serious injury.
CAUTION: Projecting adjustment handles could interfere with your movements. If any
adjustment handle sticks out sideways, pull the handle out, rotate it to point down, and
then release it.
2
31

18 19
|
SETTING UP YOUR BIKE
SETTING UP YOUR BIKE CONTINUED
HANDLEBAR HEIGHT
CAUTION: Verify that all adjustment handles are fully tightened. Loose seats or
handlebars can lead to serious injury.
Set the handlebars to seat height, then adjust until you feel comfortable.
yTurn L-handle counterclockwise to loosen.
yRaise or lower the handlebars
yTurn L-handle clockwise to tighten.
BODY POSITION
1 Arms slightly bent
2 Hands rest on the handlebars without reaching
3 Leg slightly bent at the bottom of the stroke
2
3
1
These adjustments should get you started. If you’re uncomfortable, or want to ne-tune
your bike’s settings, access Peloton 101 from the menu on your touchscreen or go to
support.onepeloton.com.

20 21
|
SETTING UP YOUR BIKE
SETTING UP YOUR BIKE CONTINUED
WARNING AND SAFETY INSTRUCTIONS
The Peloton Bike is equipped with Delta-compatible pedals. Always cycle using footwear
equipped with appropriate cleats. Cycling barefoot or with inappropriate footwear can
cause serious injury.
Make sure that your cleats are properly positioned and all bolts are fully tightened before
clipping in. Riding with loose cleats could lead to serious injury.
Do not attempt to walk in cycling shoes with cleats. Wear cycling shoes only while using
the Peloton Bike and remove them immediately after clipping out. Walking on cleats may
cause you to fall or twist your ankle, or otherwise result in serious injury.
Be careful when clipping in and out. While you may need to use some force, excessive
force or aggressive movements could result in an ankle, foot, or leg injury.
CLIPPING IN
CLIPPING OUT
Point your toes down to t the cleat into the pedal, then push down through your heel.
Hold down the resistance knob and kick your heel away from the bike.

22 23
|
GETTING STARTED
SETTING UP YOUR BIKE CONTINUED
yTurn knob right to increase resistance.
yTurn knob left to decrease resistance.
yPress knob down for emergency brake.
ADJUSTING RESISTANCE PLUGGING IN
yPlug the power supply into the wall.
yPlug the power cord into the power jack at the back of the bike.
GETTING STARTED
CAUTION: The Peloton Bike has a direct driven ywheel; the pedals will continue to
move until the ywheel stops. Reduce speed slowly. To stop the ywheel immediately,
push down the resistance knob. CAUTION: Ensure that the power cable never passes under the bike. Always keep
the power cable clean and dry. Sweat, spills, and other damage to the power cable may
result in property damage or bodily harm.

24 25
|
GETTING STARTED
POWERING ON AND OFF
yHold the power button for two seconds to power on the bike.
yThe bike will sleep after about 20 minutes of inactivity. To wake the bike, press
the power button.
yTo power down, hold the power button for two seconds. Select Shut Down
when prompted.
GETTING STARTED CONTINUED
yIf the network is not secured, the bike will connect to the network.
yIf the network is secured, you will be prompted to enter a password. Type in the
password and tap Connect.
CONNECTING TO THE INTERNET
To connect to a WiFi network, tap the network name.
To connect to a wired network, connect an Ethernet cable to the Ethernet port on the back
of the touchscreen and to a wall jack or router used by your local area network. The bike
will connect to the network automatically.

26 27
|
GETTING STARTED
LOGGING IN JOINING A RIDE
CLASSES
When logging in for the rst time, please have available your Subscription Activation Key or
the login information you set up when you purchased the Peloton Bike.
Once a subscription is activated and associated with this bike, any user can log in and
access subscription content.
To let another person use your bike, tap the icon next to your username at the lower left
of the screen and select Add/Remove Proles. The new user can log in with an existing
Peloton account or tap Create an Account to set up a new one.
GETTING STARTED CONTINUED
ADDING A PROFILE
PELOTON 101
Check out our introduction to Peloton for more on adjusting your bike to t your body and
maintaining proper body position when you ride. To access Peloton 101, tap on the icon on
the lower right of the home screen and select Peloton 101.
ySelect a live or on-demand ride from the home screen, or tap Classes to lter andsearch
thousands of on-demand rides by length, instructor, title, and featured music.
yTap the icons at the top of the Classes screen to view classes in strength, stretching,
yoga, and other disciplines.
yUse the buttons along the bottom of the screen to view a Schedule of upcomingclasses,
join Challenges, or view Programs of preselected classes.
yTap More for a Scenic Ride, or to Just Ride without instruction or video.
ySelect a class to view details. Tap Start to enter the class screen.
yTo connect a heart rate monitor or wireless headphones, select a class and press Start.
You will have the chance to connect to an available device before the class begins.
yYour instructor will guide you through a workout that includes a warmup and cooldown.

28 29
|
CLASS SCREEN
CADENCE
STRIVE SCORE* OUTPUTDISTANCE TRAVELLED
CLASS SCREEN
TIME REMAINING HEART RATE* TIMELINE
RESISTANCECALORIES BURNED
*Appears only when a heart
rate monitor is connected
TAP ELEMENTS TO
REVEAL OR HIDE THEM
LEADERBOARD
TOTAL OUTPUT
WARNING: Heart rate
monitoring systems may be
inaccurate. Over-exercising
may result in serious injury
or death. If you feel faint
stop exercising immediately.
Use metrics on the screen
for reference only.

30 31
|
MAINTENANCE AND CARE
CAUTION: To ensure safe operation and optimal performance, check for wear
and damage and perform maintenance on a regular basis. Replace any damaged or
defective parts immediately. Do not use the bike until the repair is performed. Only use
original parts from the manufacturer. Changes or modications to this unit not
expressly approved by Peloton could void the warranty.
CAUTION: Always unplug the bike immediately after use and before cleaning or
performing maintenance. Service other than the procedures described here must be
performed by an authorized technician.
AFTER EVERY RIDE
EVERY 3 TO 5 RIDES
Cleaning: Wipe down the bike using a damp cloth.
Cleaning: Clean the bike thoroughly using a damp cloth and a mild household cleaner
diluted in water. Clean the touchscreen using an electronics wipe.
Cleats: Use a 4mm Allen wrench to tighten any loose screws attaching your cleats to your
cycling shoes.
Saddle: Make sure the saddle is parallel to the ground. Then use the included 13mm
wrench to tighten the seat-xing nuts on both sides.
Leveling Feet: If the bike rocks back and forth, turn each leveling foot clockwise (when
viewed from above) until it rests rmly on the ground.
Pedals: Tighten any loose pedal with the included 15mm wrench. Pedals should be
tightened to 26lb-ft/35N•m of torque. Turn clockwise to tighten the right pedal and
counterclockwise to tighten the left pedal.

32 33
|
MAINTENANCE AND CARE
EVERY 15 TO 20 RIDES ANNUALLY
MAINTENANCE AND CARE CONTINUED
Emergency Brake: Press down on the resistance knob while pedaling slowly. The ywheel
should come to a complete stop immediately. If it does not, stop using the bike immediately
and contact Peloton Support.
Pedals: Replace pedals. Tighten new pedals to 26lb-ft/35N•m. of torque. For further
instructions, see support.onepeloton.com.
Frame: Check the entire frame for signs of wear and damage, and tighten any loose bolts.

34 35
|
BIKE ASSEMBLY
BIKE ASSEMBLY
1 Bike frame
2 Front stabilizer
3 Rear stabilizer
4 M8×20 socket cap screw × 8
5 Right and left pedals
6 Handlebar post
7 M8×12 round head screw × 2
8 M8×10 round head screw × 2
9 Flat washer × 4
10 M5×15 Phillips head screw
11 Handlebars
12 Water bottle holder cups × 2
13 M5×8 stainless steel screws × 4
14 Touchscreen arm
15 Touchscreen
16 M4×10mm ange head screws × 4
17 Right and left weight holders
18 M5 washer × 4
19 M5 spring washer × 4
20 M5×8 round head screw × 4
21 Power supply and cord
BIKE PARTSWARNING: These assembly
instructions are intended to assist
trained professional installers in
assembling the Peloton Bike. Damage
or equipment failure resulting from
the improper or negligent assembly of
the bike will not be covered under
Peloton’s warranties.
y3mm Allen wrench
y4mm Allen wrench
y5mm Allen wrench
y6mm Allen wrench
yPhillips head screwdriver
yTorque wrench with 15mm
crowfoot attachment
TOOLS
WARNING: Perform a complete
visual inspection of the Peloton Bike
and test all features and functions
prior to use.
15
11
7
9
6
16
14
8
9
7
10
13
24
4
3
1
19
5
21
20
18
12
12 17
13

36 37
|
BIKE ASSEMBLY
BIKE ASSEMBLY CONTINUED
A Saddle SP-03-1
B Small L-handle SP-06/RP-06
C Large L-handle SP-07/RP-07
D Outer Belt Guard SP-11-12
E Belt SP-15
F Right Crank Arm SP-11-17
G Left Crank Arm SP-11-19
H Front Belt Guard SP-11-26
I Sensor Assembly SP-27-2/RP-27
J Foot SP-31
K Wheels SP-32
L Stabilizer Screw Set SP-35
M Wire Bracket SP-41/RP-41
SPARE PARTS
yMonitor Cable SP-39
yInner Wiring SP-38/RP-38
yLabel package PL-11-KIT
yPedals PL-PS7-02-L/R
yWeight Holders SP-09/RP-09
yFront Stabilizer SP-33/RP-33
yRear Stabilizer SP-34/RP-34
yHandlebars SP-43/RP-43
A
C
B
D
E I M
G K
F J
H L

38 39
|
BIKE ASSEMBLY
BIKE ASSEMBLY CONTINUED
1 Fit the handlebar post onto the handlebars. Make sure the letters on the post will be
upright when the handlebar is right-side-up.
2 Add two at washers and two M8×12 round head screws to the front of the
handlebar base. Screw them in with a 5mm Allen wrench.
3 Add two at washers and two M8×10 round head screws to the sides of the handlebar
base. Screw them in with the 5mm Allen wrench.
4 Loosen the L-handle at the front of the bike frame and slide the handlebar
post into the head tube.
1
3
2
4
5 Add an M5×15 Phillips head screw to the hole at the end of the handlebar post.
Screw it in using a Phillips head screwdriver.
6 Raise the handlebars to seat height and tighten the L-handle.
7 Take four M5x12 round head screws and add one at washer and one spring
washer to each.
8 Secure each weight holder to the seat slider using two screw-and-washer sets and
a 4mm Allen wrench.
7
5
8
6
Other manuals for PL-01
2
This manual suits for next models
1
Table of contents
Other Peloton Exercise Bike manuals

Peloton
Peloton Bike+ User manual

Peloton
Peloton BIKE+ PL-02 User manual

Peloton
Peloton BIKE+ PL-02 User manual

Peloton
Peloton BIKE User manual

Peloton
Peloton BIKE User manual

Peloton
Peloton PL-21 User manual

Peloton
Peloton BIKE User manual

Peloton
Peloton BIKE User manual

Peloton
Peloton BIKE User manual

Peloton
Peloton Bike+ User manual