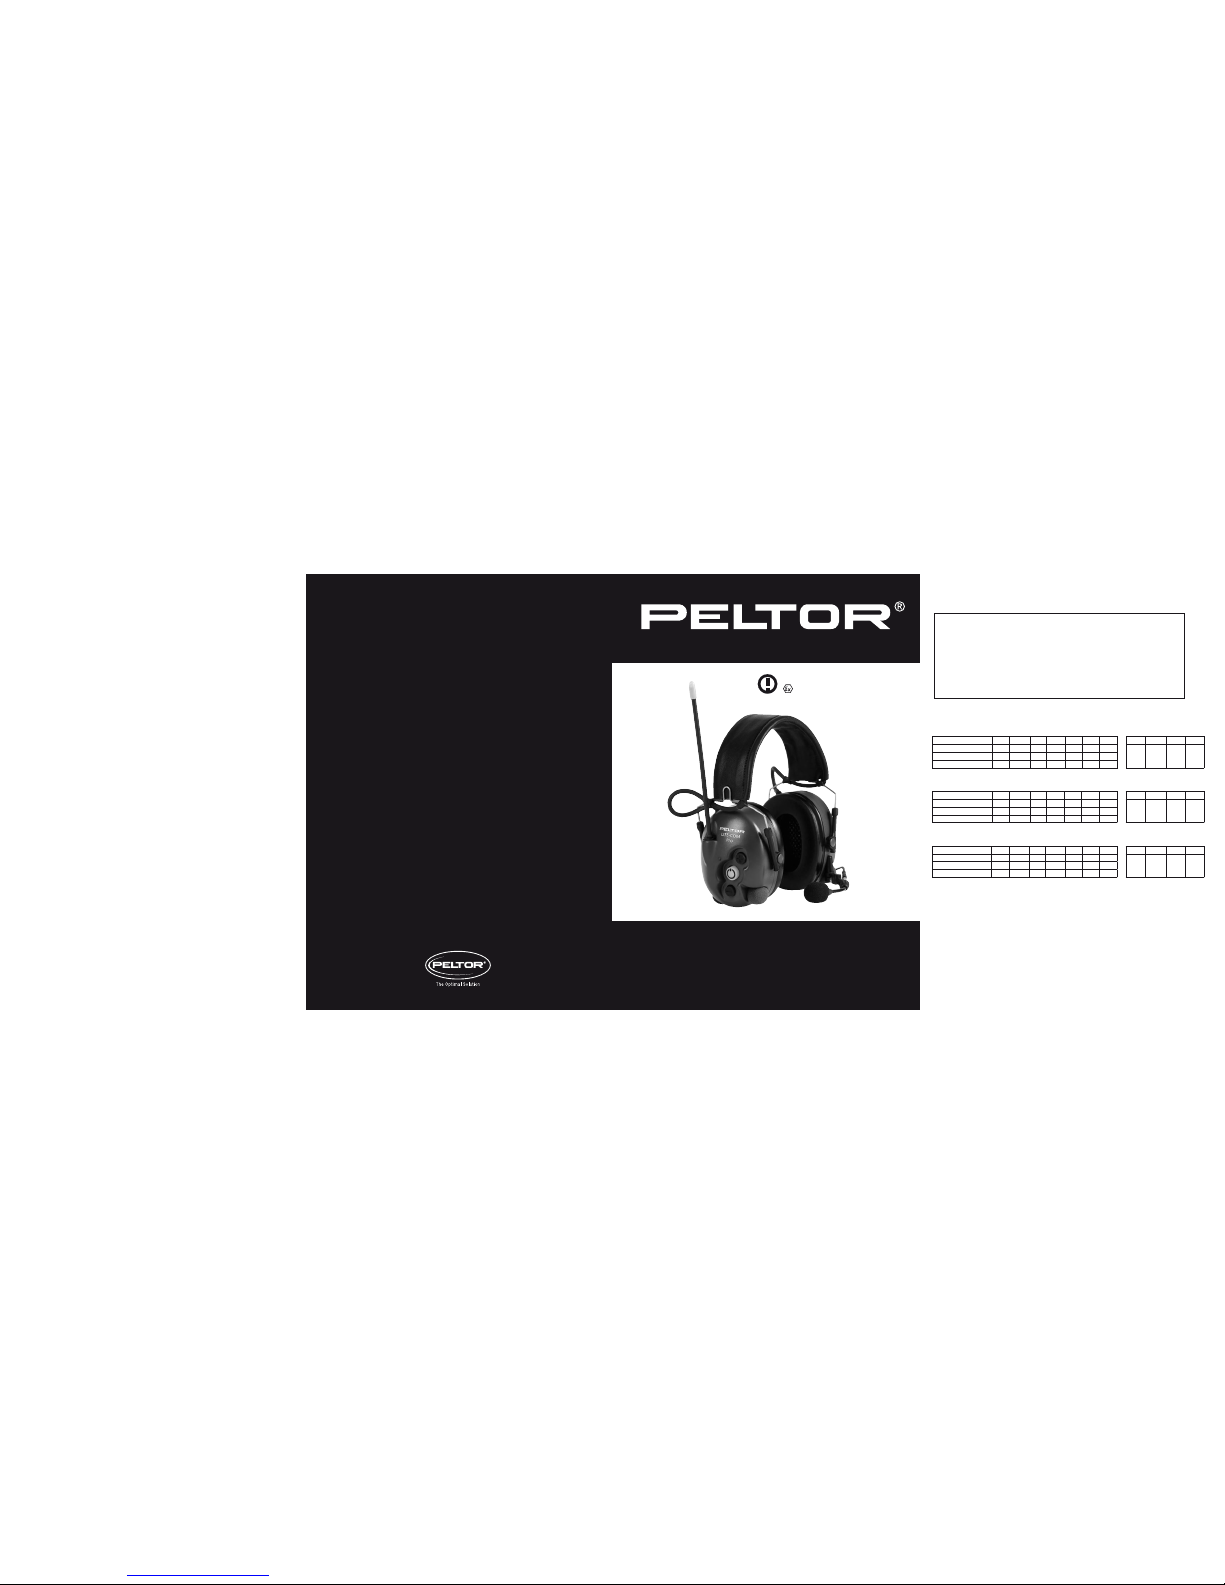
Peltor MT7H7F470-50 Lite-Com Pro User manual

Peltor Lite-Com Pro
430 – 470 MHz
II 1 G EEx ia IIC T4
Peltor AB, Box 2341, SE-331 02 Värnamo, Sweden
Aearo Ltd. First Avenue, Poynton, Stockport, Cheshire, SK12 1FJ, England
Aearo LPE SA, 300 Rue Marcel Paul, 94500 Champigny-sur-Marne, France
Aearo GmbH, Ottostraße 1, D - 76275 Ettlingen, Germany
Walter Gyr AG, Bachstrasse 41, 8912 Obfelden, Switzerland
Aearo SRL, Viale Europan° 76, 20090, CUSAGO, MI, Italy
Peltor Communications AS, Postboks 253, N-1471 Lørenskog, Norway
www.peltor.eu
FP3605 Rev b
Quick reference guide
Key Function
MODE Switches the Lite-Com Pro on and off.
Choose between the functions in the menu.
UP (+) Increases the level of the selected function.
DOWN (–) Decreases the level of the selected function.
PTT Transmits with the Lite-Com Pro.
E)
Attenuation MT7H7F470-50, MT53H7F470-50 (with head band)
Frequency (Hz) 125 250 500 1000 2000 4000 8000 H M L SNR
Mean attenuation (dB) 14.7 23.4 30.7 34.6 34.5 36.9 37.3
St. dev. (dB) 3.9 4.6 3.2 3.4 3.1 2.7 4.2 33 dB 27 dB 19 dB 30 dB
APValue (84%) 10.8 18.8 27.4 31.2 31.4 34.2 33.1
Attenuation MT7H7B470-50, MT53H7B470-50 (with neck band)
Frequency (Hz) 125 250 500 1000 2000 4000 8000 H M L SNR
Mean attenuation (dB) 15.5 23.3 31.2 35.6 35.0 36.5 40.9
St. dev. (dB) 2.6 2.3 2.0 3.2 3.4 3.4 3.3 33 dB 29 dB 21 dB 31 dB
APValue (84%) 13.0 21.0 29.2 32.4 31.6 33.2 37.6
Attenuation MT7H7P3E470-50, MT53H7P3E470-50 (with helmet attachment)
Frequency (Hz) 125 250 500 1000 2000 4000 8000 H M L SNR
Mean attenuation (dB) 16.2 22.9 31.7 35.6 34.5 37.7 40.0
St. dev. (dB) 3.2 2.2 2.0 2.9 3.0 3.9 3.3 33 dB 29 dB 21 dB 31 dB
APValue (84%) 13.0 20.7 29.7 32.7 31.5 33.8 36.8
MT7H7F470-50
MT7H7B470-50
MT7H7P3E470-50
MT53H7F470-50
MT53H7B470-50
MT53H7P3E470-50
PELTOR LITE-COM PRO PRODUCT RANGE
MT7H7F470-50 with headband
MT7H7B470-50 with neckband
MT7H7P3E470-50 with helmet attachment for Peltor G22 and G3000
hardhats (A rear plate is also included for helmet attachments for the
Peltor G2000 hardhat).
MT53H7F470-50 with headband
MT53H7B470-50 with neckband
MT53H7P3E470-50 with helmet attachment for Peltor G22 and
G3000 hardhats (A rear plate is also included for helmet attachments
for the Peltor G2000 hardhat).
TECHNICAL DATA
Frequency range: 430–470 MHz
Channels: Max 30
”Subchannels”: Analogue 38 CTCSS
Digital: 83 DCS
Channel separation: 6.25–25 kHz
Deviation: Max ±2.5 and ±5 kHz
Output: 200/20/10 mW ERP
Reception sensitivity: Typically –122 dBm for 12 dB
SINAD with CCITT lter on.
Range: Outdoors up to 3 km depending on
conditions
Trafc method: Simplex
Microphone type: Electret
Power consumption: Stand-by and receiving, 65 mA
Transmission: Low power: 110 mA
Medium power:135 mA
High power: 270 mA
Battery life span: About 40 h with 10/90% transmis-
sion/reception,
stand-by with low power and 2700
mAh batteries.
Operating temperature: –20°C to +55°C
Storage temperature: –40°C to +55°C
Weight including batteries: MT7H7F470-50 390 g
MT7H7B470-50 375 g
MT7H7P3E470-50 410 g

(Fig. H)
(Fig. A)
13
2
(J)
13
2
(K)
D:1)
D:2) Auxiliary connection
RMS
Voltage
U (mV)
Mean sound
Pressure
(dBA)
STD sound
Pressure
(dBA)
3 63.4 3.0
5 67.4 3.3
8 71.2 3.1
14 75.5 3.1
25 80.2 3.1
40 84.0 2.7
x2x 8x4x
2
4
6
8
0
16x
Average level / electronic input signal x = 22 mV
Squelch Tones and Codes
CTCSS (Continuous Tone Coded Squelch System)
1. 67.0 8. 88.5 15. 110.9 22. 141.3 29. 179.9 36. 233.6
2. 71.9 9. 91.5 16. 114.8 23. 146.2 30. 186.2 37. 241.8
3. 74.4 10. 94.8 17. 118.8 24. 151.4 31. 192.8 38. 250.3
4. 77.0 11. 97.4 18. 123.0 25. 156.7 32. 203.5
5. 79.7 12. 100.0 19. 127.3 26. 162.2 33. 210.7
6. 82.5 13. 103.5 20. 131.8 27. 167.9 34. 218.1
7. 85.4 14. 107.2 21. 136.5 28. 173.8 35. 225.7
DCS (Digitally Coded Squelch)
39. 023 53. 114 67. 174 81. 315 95. 445 109. 631
40. 025 54. 115 68. 205 82. 331 96. 464 110. 632
41. 026 55. 116 69. 223 83. 343 97. 465 111. 654
42. 031 56. 125 70. 226 84. 346 98. 466 112. 662
43. 032 57. 131 71. 243 85. 351 99. 503 113. 664
44. 043 58. 132 72. 244 86. 364 100. 506 114. 703
45. 047 59. 134 73. 245 87. 356 101. 516 115. 712
46. 051 60. 143 74. 251 88. 371 102. 532 116. 723
47. 054 61. 152 75. 261 89. 411 103. 546 117. 731
48. 065 62. 155 76. 263 90. 412 104. 565 118. 732
49. 071 63. 156 77. 265 91. 413 105. 606 119. 734
50. 072 64. 162 78. 271 92. 423 106. 612 120. 743
51. 073 65. 165 79. 306 93. 431 107. 624 121. 754
52. 074 66. 172 80. 311 94. 432 108. 627

1
EN 2-7
DE 8-14
FR 15-21
BG 22-28
CS 29-34
DA 35-40
ES 41-47
EL 48-54
ET 55-60
FI 61-66
HU 67-73
IS 74-79
IT 80-86
LT 87-92
LV 93-98
NL 99-105
NO 106-111
PL 112-118
PT 119-125
RO 126-131
RU 132-138
SK 139-144
SL 145-150
TR 151-156
SE 157-162
Lite-Com Pro

2
3
PELTOR Lite-Com Pro
Programmable wireless communication headset
The Peltor Lite-Com Pro offers reliable, efcient wireless communication between two or more people,
even in noisy environments.
The product is approved for use in explosive environments (ATEX).
Read these instructions carefully to ensure the best possible benet from your Peltor product!
PROPERTIES
• Wireless programmable communication headset for 30 radio channels in the 430–470 MHz frequency
range. The highest power gives a range of up to 3 km outdoors. Low power gives a range of up to
about 1 km.
• 38 CTCSS and 83 DCS subchannels, allowing multiple users to use the same channel without
interfering with each other.
• Operating time up to about 40 hours, depending on the type of battery and mode of use.
• Low battery alarm.
• Automatic shut-off after the last activation.
• Selected settings are conrmed with a voice message.
• The last setting is stored when the unit is switched off.
• Programmable
Special software is available for customising functions in your Lite-Com Pro.
Contact your Peltor dealer for information.
ADVANTAGES (Fig. H)
Extra broad headband (MT7H7F470-50) with soft padding for ideal comfort throughout the
working day. Specially designed helmet attachments (MT7H7P3E470-50) with slots for attaching
a visor and rain shield.
Individually sprung headband wires of stainless steel provide an even distribution of pressure
around the ears. Steel headband wires maintain their resilience better than regular plastic
headbands through a wide range of temperatures.
Low, two-point fasteners and easy height adjustment with no protruding parts.
Soft, wide foam/uid-lled ear cushions with built-in pressure-relief channels for low pressure,
effective sealing and individual comfort.
Flexible antenna with low attachment and high receptivity.
Connector for external equipment, such as another communication radio, mobile telephone, MP3
player etc.
Batteries The Lite-Com Pro is delivered with Peltor’s ACK05 NiMH battery and the applicable
battery charger. Regular AA batteries can also be used. NOTE: See BATTERIES below!
Delivered with an ambient-noise compensated speech microphone for high speech recognition
and with Quick Positioning for easy adjustment of the microphone arm.
Keypad for easy regulation of Lite-Com Pro settings.
Additional functions can be programmed with software available at authorised Peltor dealers.
PUSH-BUTTONS (Fig. A)
ON/OFF/FUNCTION (¡) Switches the Lite-Com Pro on and off, and lets you choose between
alternatives in the menu.
up (+) Increases the level of the selected function.
down (–) Decreases the level of the selected function.
PTT Transmits with the Lite-Com Pro.
1.
2.
3.
4.
5.
6.
7.
8.
9.
10.
1.
2.
3.
4.

2
3
430–470 MHz
The user is responsible for obtaining any necessary licences for using the
communication radio in the Lite-Com Pro!
II 1 G EEx ia IIC T4
The user is responsible for ensuring that the Lite-Com Pro is used according to the
applicable regulations in explosive environments!
INSTRUCTIONS FOR USE/SETTINGS
ON/OFF/MODE
Switch the Lite-Com Pro on and off by pressing and holding the ON/OFF/MODE button for about 2
seconds. A tone conrms that the unit has been switched on or off. A slowly blinking LED on the button
shows that the Lite-Com Pro is on. When the unit is transmitting or receiving, the LED blinks faster.
Press on/off/mode (¡) briey to move through the menu. Press the button slowly, one step at a time,
to conrm each step in a voice message. If you press the button faster, you will only receive voice
conrmation of the function where you stop.
Current settings are stored when the unit is switched off.
SURROUND (ambient noise level)
Ambient sound amplication – when the Lite-Com Pro is used as an active hearing protector – is
regulated with the up (+) and down (–) selectors. The change is conrmed with a voice message. You
can also switch off ambient noise by reducing the volume to its lowest position using the down (–) button,
then holding the button for about 2 seconds. A voice message says “Surround off”, conrming that the
ambient noise has been switched off.
WARNING! This setting attenuates ambient noises through the hearing protector, and they may become
inaudible. To re-activate the function, press up (+) and the Lite-Com Pro once again works as an active-
volume hearing protector that limits volume.
VOLUME
Use the up (+) and down (–) buttons to set the incoming volume in the communication radio. A voice
message conrms the new setting each time you press the button. There are max. 7 volume steps and
an off mode. To access off mode, press and hold the down (–) button for two seconds when at the lowest
volume. A voice message conrms “volume off”.
Note: No radio communication is audible in off mode.
To switch the radio back on, press the up (+) button. You start receiving on the lowest volume level.
CHANNEL
Up to 30 channels can be used in the 430–470 MHz frequency range. (Contact an approved Peltor
dealer to program your unit.)
Use the up (+) and down (–) buttons to select a channel (radio frequency) for the communication radio. A
voice message conrms the new setting each time you press the button.
VOX (Voice-operated transmission)
VOX means that the Lite-Com transmits when sounds of a certain volume reach the microphone
– hands-free transmission.
The Lite-Com Pro also has busy channel lockout (BCLO), which means that voice-operated transmission
is not possible if the channel is already in use. This prevents interference.
Use the up (+) and down (–) buttons to set the sensitivity for voice-operated transmission. A voice
message conrms the new setting each time you press the button. There are ve VOX levels and an
off mode. To access off mode, press and hold the down (–) button for two seconds. A voice message
conrms “volume off”. If you want to transmit, you must use the PTT button. To switch VOX on again,
press the up (+) button.

4
5
Note: For maximum ambient-noise compensation, position the microphone on the headset no less than
3–5 mm from the lips.
SQUELCH (hiss reduction)
Squelch means that the noise in the earphones is reduced when the incoming signal is below a set level.
This way, the user doesn’t have to listen to background hiss. When someone speaks, the amplication
returns instantly to the proper level. Use the up (+) and down (–) buttons to set the squelch level. A voice
message conrms the new setting each time you press the button. There are ve SQUELCH levels
and an off mode. Level 1 is most sensitive, renewing amplication at the lowest input signal. To access
off mode, press and hold the down (–) button for two seconds in volume step one. A voice message
conrms “Squelch off”. To switch VOX on again, press the up (+) button.
SUB CHANNEL (Selective reception)
When a radio receiver has selective reception, a certain tone or code must be transmitted along with the
speech in order to be received. This allows multiple groups of users to use the same channel without
interfering with each other.
Use the up (+) and down (–) buttons to set the subchannel. A voice message conrms the new setting
each time you press the button. There are 38 analogue CTCSS tones and 83 digital DCS codes. They
are programmed with numbers 1–121 (see table F on the inside cover). If the function is switched to
OFF, all communication on the channel can be monitored.
POWER (output)
There are three output power levels: High, medium and low. Use the up (+) and down (–) buttons to
select the output power level. A voice message conrms the new setting each time you press the button.
We recommend using medium power where possible.
Note:
The battery life/operating time depends to a great extent on the type and condition of the batteries
and how the Lite-Com Pro is used. For example, with an alkaline battery with at least 2700 mAh, the
operating time in low-power mode is about 40 hours at 15% transmission and 85% reception/stand-by.
In high-power mode, the operating time under the same conditions decreases by about 20%. With 20%
transmission and 80% reception/stand-by, the operating time is about 35 hours at medium power. TA
BORT
PTT (Push-to-talk)
Press PTT to transmit manually using the Lite-Com Pro radio.
Notes:
Switch voice control (VOX) on and off by pressing the button briey twice. A voice message, “VOX
on” or “VOX off” conrms the setting.
The Lite-Com Pro has busy channel lockout (BCLO) to block transmissions on busy channels.
ASSEMBLY/CONFIGURATION
BATTERIES
Note: When using the Lite-Com in environments with a risk for explosions, ATEX-approved batteries
are required! Never change batteries or charge accumulators in an explosive environment!
Only the following types of batteries are currently approved for use in the Peltor Lite-Com Pro in
explosive environments:
Manufacturer Battery type:
Peltor ACK05
Duracell MN1500, Procell PC1500
Energizer E91, Industrial EN91
1.
2.

4
5
Peltor’s ACK05 NiMH accumulator is included with the product. Charge only with the included FR05
charger.
In a non-explosive environment, other accumulator batteries or 1.5-volt AA alkaline batteries can be
used.
Install the batteries under the battery cover. Make sure that the + and – poles of the batteries are in the
correct position (see the gure in the cover).
WARNING! If you use rechargeable batteries, charge them only according to the charger manual.
Dry-cell batteries can explode if recharged.
Never charge batteries or accumulators in an explosive environment!
ASSEMBLY
Headband (Fig. J)
Slide out the cups and place the headset over your ears so that the ear cushions t snugly.
Adjust the height of the cups to a snug, comfortable t by sliding the cup up or down while pressing
the headband down.
The headband should lie across the top of the head.
Helmet attachment (Fig. K)
(K:1) Snap the helmet attachment into the slot on the helmet.
Note: The cups can be set in three positions: Working position (K:2), ventilation position (K:3) and
parked position (K:4). When in use, the cups must be placed in working position. Press the headband
wires inwards until you hear a click on both sides. Ensure that the shell and the headband wires in
working mode do not press against the lining or edge of the helmet so that noise leakage can occur.
100% use of a working hearing protector is the only sure protection from hearing loss.
If you spend time in environments with more than 82 dB A-weighted noise, you need to protect your
hearing, or the hearing receptors deep in your ears may be irreparably damaged. If you remove the
protectors for even a tiny portion of the time you spend in noisy situations, you are in the danger zone.
A comfortable hearing protector designed for the specic noise level in which it is used is the best
guarantee that you will wear the hearing protector 100% of the time, thereby ensuring protection from
permanent hearing loss. For the best protection, brush aside hair around the ears so the ear cushions t
snugly against the head. Spectacle frames should be as thin as possible and t close to the head.
WARNING! The external input does not have an automatic volume limit.
You must limit the volume on the external equipment manually. (D:2)
MAINTENANCE
Clean the outside of the headset regularly with soap and warm water.
Note: Do not immerse in uids.
After long hours of use, or other situations in which the Lite-Com Pro is exposed to moisture inside,
the hygiene kit should removed so the hearing protector can dry before the next use. Do not store the
headset in temperatures exceeding +55°C, for example on a dashboard or windowsill. The headset
(especially the ear cushions) can wear out over time. Inspect them often and regularly to ensure that
there are no cracks or sound leakage. Certain chemical substances may be harmful to this product.
Contact Peltor for more information. When the battery low warning sounds, it is time to replace the
batteries. The unit switches off automatically after a few minutes. Never replace or install batteries with
the unit switched on. Before switching on, make sure that the batteries are inserted correctly.
Always wear, adjust, clean and maintain the headset according to these instructions. If these
recommendations are not followed, attenuation and other functions can be impaired.
(D) INPUT SIGNAL/OPERATING TIME
Warning: The volume of the earphones in this hearing protector can lead to a daily exposure that
exceeds the permitted levels. The audio signal must therefore be adapted to the operating time. To
prevent harmful levels, the input signal should not exceed 22 mV. At a higher input voltage, the operating
1.
2.
3.

6
7
time must be decreased according to diagram D:1 (x=22 mV). An electrical input signal of 22 mV(RMS)
corresponds to 82 dB (A) equivalent sound level (average value plus one standard deviation of the
measured sound level. See table D:2). Note: The maximum output effect of the earphones must not be
exceeded.
ATTENUATION VALUES (Fig. E)
1. Frequency 2. Average value 3. Standard deviation 4. Average protection value
APPROVALS
CE
The Peltor Lite-Com Pro is tested and approved as a hearing protector according to PPE directive
89/686/EEC and applicable parts of the European EN 352-1:2002, EN 352-3:2002, EN 352-4:2001 and
EN 352-6:2002 standards. Certied by FIOH, Topeliuksenkatu 41, FI-00250 Helsinki, Finland ID#0403.
Measurements for products with a helmet attachment were performed on Peltor’s G22C hardhat.
The Lite-Com Pro is also tested and approved according to the following standards:
Radio: ETSI EN 300,296-2, ETSI EN 300,296-1
EMC: ETSI EN 301,489-5, ETSI EN 301,489-1
The electrical measurements were performed by SP, the Swedish National Testing and Research
Institute, Box 857, S-501 15 Borås, Sweden, ID# 0402.
ATEX
II 1 G EEx ia IIC T4
The Peltor Lite-Com Pro is tested and approved for use in environments with risk of explosion, in
accordance with the ATEX directive 94/9/EG EEC.
Certied by NEMKO AS, P.O. Box 73, Blindern, N-0314 OSLO, Norway.
SPARE PARTS AND ACCESSORIES
NOTE:
When using and repairing ATEX-approved equipment, all instructions and regulations must be
followed to the letter!
For more information, see:
The European Commission’s website for the ATEX directive, 94/9/EG:
http://europa.eu.int/comm/enterprise/atex/
The European Commission’s website for the 1999/92/EG directive:
http://europa.eu.int/comm/employment_social/health_safety
HY79 Hygiene kit
Easy to replace hygiene kit consisting of two attenuation cushions, two foam rings and snap-in ear
cushions. Replace at least twice a year to ensure constant attenuation, hygiene and comfort.
HY100A Clean – single-use protectors
A single-use protector that is easy to apply to the ear cushions. Packages of 100 pairs.
HYM1000 Mike Protector
Moisture and wind-tight and hygienic; protects the speech microphone and enhances its life span.
Packages of 5 metres, about 50 replacements.
M995 Wind protection for MT53-type speech microphones
Effective protection from wind noise; enhances the life span and protects the speech microphone.
One per package.
M40/1 Wind protection for MT7-type speech microphones
Effective protection from wind noise; enhances the life span and protects the speech microphone.
One per package.

6
7
M60/2 Wind protection for ambient microphones
Effective protection from wind hiss. One pair per package.
NOTE:
The following accessories can be used, but not connected or disconnected, in explosive
environments!
MT53 Electret microphone
Microphone boom with dynamic differential microphone
MT7 Dynamic microphone
Microphone boom with dynamic differential microphone
FL5602-50 External PTT
PTT attachment for external control of transmissions with the radio in the Lite-Com Pro.
ACK05 Accumulator battery
NiMH accumulator, which can replace two standard 1.5-volt AA batteries.
EX-approved NiMH accumulator. (Note: Special regulations apply for replacement and charging.)
(One is included on delivery.)
NOTE:
The following accessories must not be used in an explosive environment!
FR05 Battery charger
Battery charger for the Peltor ACK05 accumulator battery.
(One is included on delivery.)
1180 SV Battery cover
Battery cover for using standard 1.5-volt AA batteries (one is included on delivery).
FL6CS Connector cord
With 2.5 mm stereo contact for use with DECT and mobile telephones.
FL6BT Connector cord
With 3.5 mm mono connector for use with a communication radio.
FL6BS Connector cord
With 2.5 mm mono connector for use with a communication radio.
FL6BR Connector cord
With the Peltor J11 connector (Nexus TP-120-type) for use with Peltor adapters and an external
communication radio. Contact your Peltor dealer for information.

8
9
PELTOR Lite-Com Pro
Programmierbares kabelloses Kommunikationsheadset
Peltor Lite-Com Pro ermöglicht selbst in lärmbelasteter Umgebung eine zuverlässige und effektive
kabellose Kommunikation zwischen zwei oder mehr Personen.
Das Produkt ist zur Benutzung in explosiver Atmosphäre zugelassen (ATEX).
Lesen Sie bitte diese Gebrauchsanweisung sorgfältig durch, damit Sie Ihr Peltorprodukt optimal
nutzen können!
EIGENSCHAFTEN
Kabelloses programmierbares Kommunikationsheadset für 30 Funkkanäle im Frequenzbereich
430 ─ 470 MHz. Bei Höchstleistung ergibt sich im Freien eine Reichweite von bis zu ca. 3 km. Bei
niedriger Leistung ergibt sich eine Reichweite von bis zu ca. 1 km.
38 CTCSS und 83 DCS „sub channels“ bieten mehreren Nutzern die Möglichkeit, den gleichen
Kanal zu verwenden, ohne einander zu hören.
Betriebszeit ungefähr 40 Stunden, je nach Batterietyp und Anwendung.
Warnsignal bei niedriger Spannung.
Automatische Abschaltung 2 Stunden nach dem letzten Tastendruck. Die gewählten
Einstellungen werden durch eine Sprachmitteilung (auf Englisch) bestätigt.
Beim Abschalten wird jeweils die zuletzt gewählte Einstellung gespeichert.
Programmierbar
Mittels einer Software lassen sich Funktionen des Lite-Com Pro nach den Wünschen des
Anwenders ändern. Bitte wenden Sie sich an Ihren autorisierten Peltor-Händler.
VORTEILE (Abb. H)
Extra breiter Kopfbügel (MT7H7F470-50) mit weicher Polsterung für optimalen Komfort
während des ganzen Arbeitstages. Angepasste Helmbefestigung (MT7H7P3E470-50) mit
Haltern für Visier und Nackenschutz.
Individuell federnde Bügeldrähte aus rostfreiem Federstahl sorgen für eine gleichmäßige
Druckverteilung um die Ohren. Sie behalten die Spannung besser als einfache Kunststoffbügel,
innerhalb eines großen Temperaturbereichs.
Tief angesetzte Zweipunkt-Aufhängung und einfache Höheneinstellung ohne hervorstehende
Teile.
Weiche, breite, mit Schaumstoff/Flüssigkeit gefüllte Dichtungsringe mit eingebauten
Druckausgleichskanälen ermöglichen eine effektive Dichtung, schwachen Andruck und
individuellen Tragekomfort.
Flexible Antenne mit tief angesetzter Befestigung und hoher Empfangsempndlichkeit.
Steckdose zum Anschluss externer Ausrüstung wie z. B. Funkgerät, Handy, MP3-Spieler u. dgl.
Batterien. Lite-Com Pro wird mit Peltors NiMH-Akku ACK05 und dem dazugehörigen Ladegerät
geliefert. Andere Batterien vom Typ LR6 (AA) können ebenfalls verwendet werden. ACHTUNG.
Siehe unter BATTERIEN unten!
Lieferung mit lärmkompensiertem Sprechmikrofon für hohe Sprachverständlichkeit und mit
„Quick Positioning“ zur einfachen Einstellung des Mikrofonarms.
Tastensatz zur einfachen und praktischen Bedienung von Lite-Com Pro.
Weitere Funktionen sind mit Hilfe der Software programmierbar, die bei autorisierten Peltor-
Händlern erhältlich ist.
TASTEN (Abb. A)
ON/OFF/FUNKTION (¡) Ein- und Ausschalten des Lite-Com Pro sowie Wahl der Funktionen aus
dem Menü.
AUF (+) Erhöht das Niveau der gewählten Funktion.
AB (-) Senkt das Niveau der gewählten Funktion.
PTT Senden mit dem Lite-Com Pro.
•
•
•
•
•
•
•
1.
2.
3.
4.
5.
6.
7.
8.
9.
10.
1.
2.
3.
4.

8
9
430 – 470 MHz
Der Anwender trägt selbst die Verantwortung dafür, dass er die für die Benutzung
des Funkgeräts Lite-Com Pro eventuell erforderlichen Lizenzen besitzt!
II 1 G EEx ia IIC T4
Der Anwender trägt die Verantwortung dafür, dass das Lite-Com Pro in explosiver
Atmosphäre gemäß den geltenden Vorschriften benutzt wird!
GEBRAUCHSANWEISUNG / EINSTELLUNGEN
ON/OFF/MODE (Ein/Aus/Funktion)
Zum Ein- oder Ausschalten von Lite-Com Pro die Taste ON/OFF/MODE ca. 2 Sekunden lang drücken.
Ein Tonsignal bestätigt, dass das Gerät ein- oder ausgeschaltet worden ist. Eine langsam blinkende
Leuchtdiode in der Taste zeigt an, dass das Lite-Com Pro eingeschaltet ist. Beim Senden oder
Empfangen blinkt die Leuchtdiode schneller.
Durch kurzes Drücken auf ON/OFF/MODE (¡) geht man im Menü einen Schritt weiter. Bei langsamem
Drücken, einen Schritt nach dem anderen, wird jeder Schritt durch eine Sprachmitteilung bestätigt. Bei
schnellerem Drücken wird nur die aktuelle Funktion bestätigt, die zuletzt eingestellt wird.
Beim Ausschalten werden alle aktuellen Einstellungen gespeichert.
SURROUND (Lautstärke der Umgebungsgeräusche)
Wenn das Lite-Com Pro als hörender Gehörschützer benutzt wird, wird die Lautstärke der
Umgebungsgeräusche mit den Niveaureglern AUF (+) und AB (-) geregelt. Änderungen werden mit
einer Sprachmitteilung bestätigt. Die Umgebungsgeräusche lassen sich auch ganz ausschalten,
indem man die Lautstärke mit dem Niveauregler AB (-) bis zur Endlage senkt und dann die Taste
2 Sekunden lang gedrückt hält. Eine Sprachmitteilung „SURROUND OFF“ bestätigt, dass die
Umgebungsgeräusche ausgeschaltet sind.
WARNUNG! Bei dieser Einstellung werden die Umgebungsgeräusche durch den Gehörschützer stark
gedämpft, sodass sie evtl. nicht mehr aufgefasst werden. Um die Funktion Umgebungsgeräusche
wieder zu aktivieren, drückt man auf den Niveauregler AUF (+); nun funktioniert Lite-Com Pro wieder
als hörender Gehörschützer mit Lautstärkenbegrenzung.
VOLUME (Lautstärke)
Die Lautstärke für den Empfang des Funkgeräts wird mit den Tasten AUF (+) und AB (-) eingestellt.
Änderungen werden bei jedem Tastendruck durch eine Sprachmitteilung bestätigt. Es gibt 7
Lautstärkestufen und eine Aus-Stellung. Ausschalten lässt sich die Lautstärke, indem man in
der Lautstärkestufe 1 zwei Sekunden lang auf die Taste AB (-) drückt; als Bestätigung ertönt die
Sprachmitteilung „VOLUME OFF“.
Achtung! Wenn die Lautstärke ganz ausgeschaltet ist, ist auch keine Funkkommunikation zu hören.
Durch Drücken auf die Taste AUF (+) lässt sich die Lautstärke wieder einschalten. Der Empfang erfolgt
zunächst mit der niedrigsten Lautstärke.
CHANNEL (Kanal)
Im Frequenzbereich 430 – 470 MHz können maximal 30 Kanäle benutzt werden. (Die Programmierung
nimmt ein autorisierter Peltor-Händler vor.)
Der Kanal (Funkfrequenz) für das Funkgerät wird mit den Tasten AUF (+) und AB (-) eingestellt.
Änderungen werden bei jedem Tastendruck durch eine Sprachmitteilung bestätigt.
VOX (Sprachgesteuertes Senden)
VOX bedeutet, dass das Lite-Com sendet, wenn das Mikrofon Töne ausreichender Stärke empfängt,
ein sog. „hands-free“-Senden.

10
11
Lite-Com PRO hat auch BCLO (Busy Channel Lockout); bei dieser Funktion ist sprachgesteuertes
Senden nicht möglich, wenn der Kanal bereits benutzt wird. Weil hierdurch gleichzeitiges Senden
verhindert wird, können Störungen vermieden werden. Die Empndlichkeit für das sprachgesteuerte
Senden wird mit den Tasten AUF (+) und AB (-) eingestellt. Änderungen werden bei jedem
Tastendruck durch eine Sprachmitteilung bestätigt. Es gibt 5 VOX-Stufen und eine Aus-Stellung.
Zum Ausschalten drückt man 2 Sekunden lang auf die Taste AB (-); als Bestätigung ertönt die
Sprachmitteilung „VOX OFF“. Eventuelles Senden muss mit ausgeschalteter PTT-Taste erfolgen.
Durch Drücken auf die Taste AUF (+) lässt sich die Lautstärke wieder einschalten.
Achtung! Damit der Lärm optimal kompensiert werden kann, sollte sich das Mikrofon am Headset in
3-5 mm Abstand von den Lippen benden.
SQUELCH (Rauschunterdrückung)
Durch die Rauschunterdrückung wird der Ton in den Hörern reduziert, wenn das empfangene Signal
ein bestimmtes Niveau untersteigt. So bleiben dem Anwender die Hintergrundgeräusche erspart;
sobald jemand anfängt zu sprechen, geht die Verstärkung jedoch sofort wieder auf das richtige
Niveau zurück. Die Empndlichkeit der Rauschunterdrückung wird mit den Tasten AUF (+) und AB
(-) eingestellt. Änderungen werden bei jedem Tastendruck durch eine Sprachmitteilung bestätigt. Es
gibt 5 SQUELCH-Stufen und eine Aus-Stellung. Stufe 1 erfordert die niedrigste Signalstärke, um die
Rauschunterdrückung einzuschalten. Zum Ausschalten drückt man 2 Sekunden lang auf die Taste AB
(-); als Bestätigung ertönt die Sprachmitteilung „SQUELCH OFF“. Durch Drücken auf die Taste AUF
(+) lässt sich die Lautstärke wieder einschalten.
SUB CHANNEL (Selektiver Empfang)
Selektiver Empfang bedeutet, dass bestimmte Töne oder Codes zusammen mit der Stimme gesendet
werden müssen, damit ein Funkempfänger mit selektivem Empfang das Gesendete wiedergeben kann.
Diese Funktion bietet mehreren Nutzern die Möglichkeit, den gleichen Kanal zu verwenden, ohne
einander zu hören.
„Sub channel“ wird mit den Tasten AUF (+) und AB (-) eingestellt. Änderungen werden bei jedem
Tastendruck durch eine Sprachmitteilung bestätigt. Es gibt 38 analoge CTCSS-Töne und 83
digitale DCS-Codes. Sie sind mit den Nummern 1-121 programmiert. (Siehe Tabelle Fauf der
Umschlaginnenseite.) Bei Einstellung auf „OFF“ kann die gesamte Kommunikation auf dem aktuellen
Kanal abgehört werden.
POWER (Ausgangsleistung)
Die Ausgangsleistung hat drei Stufen: Hoch, mittel und niedrig. Die Ausgangsleistung wird mit
den Tasten AUF (+) und AB (-) eingestellt. Änderungen werden bei jedem Tastendruck durch eine
Sprachmitteilung bestätigt. „HIGH POWER“ bedeutet hohe Ausgangsleistung, „LOW POWER“
niedrige Ausgangsleistung. Wir empfehlen die Einstellung von „MEDIUM POWER“ (mittlere Leistung),
wo dies möglich ist.
Bitte beachten!
Die Batterielebensdauer/Betriebszeit hängt in sehr hohem Maße vom Typ und Zustand der Batterien
sowie von der Anwendung des Lite-Com Pro ab. Beispiel: mit einer alkalischen Batterie mit
mindestens 2700 mAh Energieinhalt ergibt sich im niedrigen Leistungsmodus bei 15 % Senden und 85
% Empfangen/Stand-by eine Betriebszeit von ca. 40 Stunden. Im hohen Leistungsmodus verkürzt sich
die Betriebszeit unter den gleichen Voraussetzungen um ca. 20 %.
PTT (Push-to-talk)
Zum manuellen Senden mit dem Lite-Com PRO wird die PTT-Taste gedrückt.
Hinweise:
Die Sprachsteuerung (VOX) wird durch zwei kurze Tastendrücke ein- oder ausgeschaltet. Die
Sprachmitteilung „VOX on“ bzw. „VOX off“ bestätigt die Einstellung.
Das Lite-Com Pro hat die Funktion BCLO (Busy Channel Lockout), die das Senden auf einem
bereits benutzten Kanal verhindert.
1.
2.

10
11
MONTAGE/EINSTELLUNG
BATTERIEN
Achtung! Bei Benutzung des Produkts in explosiver Atmosphäre muss dieses mit ATEX-
zugelassenen Batterien betrieben werden!
In explosiver Atmosphäre dürfen keine Batterien ausgetauscht oder Akkus aufgeladen
werden!
Zur Benutzung in explosiver Atmosphäre sind derzeit nur die folgenden Batterietypen für das Peltor
Lite-Com Pro zugelassen:
Hersteller Batterietyp
Peltor ACK05
Duracell MN1500, Procell PC1500
Energizer E91, Industrial EN91
Peltors NiMH-Akku ACK05 liegt bei Lieferung bei. Zum Auaden ausschließlich das beigefügte
Batterieladegerät FR05 verwenden.
In nicht explosiver Atmosphäre können auch andere Akkus oder alkalische 1,5-Volt-Batterien vom Typ
LR6 (AA) verwendet werden.
Die Batterien ins Batteriefach einlegen. Kontrollieren, ob die Plus- und Minuspole der Batterien korrekt
ausgerichtet sind (siehe Abbildung im Deckel).
WARNUNG! Wenn auadbare Batterien verwendet werden, dürfen diese nur gemäß den
Anweisungen in der Gebrauchsanweisung des Ladegeräts aufgeladen werden.
Trockenbatterien können explodieren, wenn sie aufgeladen werden.
In explosiver Atmosphäre dürfen keine Batterien ausgetauscht oder Akkus aufgeladen werden!
MONTAGE
Kopfbügel (Abb. J)
Die Kapseln nach außen ziehen und das Headset so aufsetzen, dass die Dichtungsringe die
Ohren ganz umschließen und dicht am Kopf anliegen.
Beide Kapseln in der Höhe einstellen, bis sie dicht und bequem sitzen. Dabei den Kopfbügel mit
der einen Hand festhalten.
Der Bügel soll über die Kopfmitte verlaufen.
Helmbefestigung (Abb. K)
(K:1) Die Helmbefestigung in den Schlitz am Helm schieben, bis sie einrastet.
Achtung! Die Kapseln haben drei feste Positionen: Betriebs- (K:2), Lüftungs- (K:3) und Ruhestellung
(K:4). Zur Benutzung die Drahtbügel aus der Lüftungs- in die Betriebsstellung nach innen drücken,
bis auf beiden Seiten ein Klicken zu hören ist. Sicherstellen, dass Kapseln und Bügeldrähte in der
Betriebsstellung nicht gegen die Einrichtung oder die Kante des Schutzhelms anliegen, damit keine
undichten Stellen entstehen können.
100 % Tragezeit und ein effektiver Gehörschutz sind der einzig sichere Schutz vor
Gehörschäden.
Wer Schallpegeln von mehr als 82 dB(A) ausgesetzt ist, sollte sein Gehör schützen. Andernfalls
besteht die Gefahr, dass die empndlichen Gehörzellen tief im Ohr geschädigt werden. Schäden an
diesen Zellen sind irreparabel. Auch wenn der Gehörschützer nur für kurze Zeit abgenommen wird,
ist das Gehör gefährdet. Ein bequemer, an die aktuelle Lärmbelastung angepasster Gehörschutz
ist die beste Garantie dafür, dass man den Schutz während der ganzen Arbeitszeit trägt. Nur so ist
man sicher vor Gehörschäden geschützt. Die optimale Dämmwirkung wird nur erreicht, wenn die
Dichtungsringe dicht am Kopf anliegen. Das Haar zurückstreichen. Brillenbügel sollten möglichst dünn
sein und ebenfalls dicht am Kopf anliegen.
1.
2.
3.

12
13
WARNUNG! Der externe Eingang hat keine automatische Lautstärkebegrenzung.
Die Lautstärke muss daher an der externen Ausrüstung manuell begrenzt werden. (D:2)
PFLEGE
Das Headset regelmäßig äußerlich mit Seife und lauwarmem Wasser reinigen.
Achtung! Darf nicht in Flüssigkeit getaucht werden.
Nach längerer Anwendung, oder wenn das Lite-Com Pro auf andere Weise innen feucht geworden ist, sollte
man den Hygienesatz demontieren und den Schutz vor der nächsten Benutzung richtig trocknen lassen.
Das Headset nicht bei Temperaturen über +55°C aufbewahren, wie sie z. B. hinter einem Fenster oder
einer Windschutzscheibe erreicht werden können. Das Headset und besonders die Dichtungsringe
können im Laufe der Zeit Alterungserscheinungen zeigen. Sie sollten häug und regelmäßig auf Risse
und Undichtigkeiten untersucht werden. Dieses Produkt kann durch bestimmte chemische Stoffe
beeinträchtigt werden. Weitere Informationen können bei Peltor angefordert werden. Wenn das Lite-
Com Pro niedrige Batteriespannung („Battery Low“) signalisiert, müssen die Batterien ausgetauscht
werden. Nach einigen Minuten schaltet sich das Gerät automatisch aus. Batterien niemals bei
eingeschalteter Elektronik einlegen oder austauschen. Vor dem Einschalten überprüfen, ob die
Batterien richtig eingelegt sind.
Das Headset ist gemäß den Anweisungen in dieser Gebrauchsanleitung zu benutzen,
einzustellen, zu reinigen und zu warten. Wenn diese Empfehlungen nicht befolgt werden, können
Dämmwirkung und Funktion beeinträchtigt werden.
(D) EINGANGSSIGNALSTÄRKE/ANWENDUNGSZEIT
Warnung: Die Lautstärke aus den Hörern dieses Gehörschützers kann die zulässige tägliche
Lärmdosis überschreiten. Das Audiosignal ist daher an die Anwendungszeit anzupassen. Damit keine
schädliche Lautstärke erreicht wird, darf das Eingangssignal 22 mV nicht überschreiten. Bei höheren
Eingangsspannungen muss die Anwendungszeit dem Diagramm D:1 (x=22 mV) entsprechend verkürzt
werden. Die elektrische Eingangssignalstärke 22 mV(RMS) entspricht 82 dB(A) äquivalentem Schallpegel
(Mittelwert plus 1 Standardabweichung des gemessenen Schallpegels. Siehe Tabelle D:2). Achtung!
Die Höchstleistung der Hörer darf nicht überschritten werden.
DÄMMWERTE (Abb. E)
1. Frequenz 2. Mittelwert 3. Standardabweichung 4. Average Protection Value (APV-Wert)
ZULASSUNGEN
CE
Peltor Lite-Com Pro wurde gemäß der PSA-Richtlinie 89/686/EWG sowie den zutreffenden Teilen
der Europanormen EN 352-1:2002, EN 352-3:2002, EN 352-4:2001 och EN 352-6:2002 geprüft, und
das Produkt wurde dementsprechend als Gehörschützer zugelassen. Zertikat ausgestellt von FIOH,
Topeliusg. 41a, FIN-00250 Helsinki, ID# 0403.
Für die Ausführung mit Helmbefestigung wurden die Messungen am Peltor Schutzhelm G22C
durchgeführt.
Lite-Com Pro wurde auch gemäß folgenden Normen geprüft und zugelassen:
Funk: ETSI EN 300 296-2, ETSI EN 300 296-1
EMC: ETSI EN 301 489-5, ETSI EN 301 489-1
Die elektrischen Messungen wurden ausgeführt von SP, Sveriges Provnings- och Forskningsinstitut,
Box 857, S-501 15 BORÅS, ID# 0402.
ATEX
II 1 G EEx ia IIC T4
Peltor Lite-Com Pro ist gemäß der ATEX-Richtlinie 94/9/EG EWG für die Anwendung in explosiver
Atmosphäre geprüft und zugelassen. Prüfzertikat ausgestellt von NEMKO AS, P.O. Box 73, Blindern,
N-0314 OSLO, Norwegen.

12
13
ZUBEHÖR UND ERSATZTEILE
ACHTUNG!
Bei der Benutzung und Reparatur von explosionsgeschützter Ausrüstung (ATEX) sind
unbedingt alle geltenden Anweisungen und Vorschriften zu befolgen!
Siehe z. B.
Die Webseite der Europäischen Kommission zur ATEX-Richtlinie 94/9/EG:
http://europa.eu.int/comm/enterprise/atex/
Die Webseite der Europäischen Kommission zur Richtlinie 1999/92/EG:
http://europa.eu.int/comm/employment_social/health_safety
HY79 Hygienesatz
Einfach austauschbarer Hygienesatz, bestehend aus zwei Dämmkissen, zwei Schaumstoffringen
und Dichtungsringen mit Schnappverschluss. Mindestens zweimal pro Jahr auswechseln, damit
Dämmwirkung, Hygiene und Komfort auf einem gleichmäßig hohen Niveau erhalten bleiben.
HY100A Clean – Einmalschutz
Hygienischer Einmalschutz, als Auage auf dem Dichtungsring. Einfach anzubringen. Verpackung mit
100 Einweg-Paaren.
HYM1000 Mike Protector – Mikrofonschutz
Schutz für das Sprechmikrofon, feuchtigkeits- und winddicht sowie hygienisch; verlängert die
Lebensdauer. Verpackung à 5 Meter, für ca. 50 Wechsel.
M995 Windschutz für Sprechmikrofone vom Typ MT53
Ein wirkungsvoller Schutz vor Windgeräuschen, schützt das Sprechmikrofon und verlängert seine
Lebensdauer. Ein Schutz pro Verpackung.
M40/1 Windschutz für Sprechmikrofone vom Typ MT7
Ein wirkungsvoller Schutz vor Windgeräuschen, schützt das Sprechmikrofon und verlängert seine
Lebensdauer. Ein Schutz pro Verpackung.
M60/2 Windschutz für Umgebungsmikrofone
Ein effektiver Schutz vor Windgeräuschen. Ein Paar pro Verpackung.
ACHTUNG!
Das nachstehende Zubehör darf in explosiver Atmosphäre benutzt, aber nicht angeschlossen
oder demontiert werden!
MT53 Elektretmikrofon
Mikrofonarm mit dynamischem Differentialmikrofon
MT7 Dynamisches Mikrofon
Mikrofonarm mit dynamischem Differentialmikrofon
FL5602-50 Externe PTT
PTT zur externen Steuerung des Sendens mit dem Lite-Com Pro-Funkgerät.
ACK05 Akku
NiMH-Akku, kann zwei 1,5-V-Standardbatterien vom Typ AA ersetzen.
Ex-zugelassener NiMH-Akku. (Achtung! Für das Austauschen und Auaden gelten besondere
Vorschriften.)
(Bei Lieferung liegt 1 Ladegerät bei.)
ACHTUNG!
Das nachstehende Zubehör darf nicht in explosiver Atmosphäre benutzt werden!

14
15
FR05 Batterieladegerät
Batterieladegerät für Peltors Akku ACK05
(Bei Lieferung liegt 1 Ladegerät bei.)
1180 SV Batteriedeckel
Batteriedeckel, wird benötigt zur Verwendung von losen 1,5-V-Batterien vom Typ LR6 (AA) (Bei
Lieferung liegt 1 Batteriedeckel bei.)
Achtung: Standardbatterien dürfen nicht in explosiver Atmosphäre benutzt werden!
FL6CS Anschlusskabel
Mit 2,5-mm-Stereostecker für DECT- und Mobiltelefone.
FL6BT Anschlusskabel
Mit 3,5-mm-Monostecker, zum Anschluss eines Funkgeräts.
FL6BS Anschlusskabel
Mit 2,5-mm-Monostecker, zum Anschluss eines Funkgeräts.
FL6BR Anschlusskabel
Mit Peltor-Stecker J11 (Typ Nexus TP-120) zum Anschluss an einen Peltoradapter für ein externes
Funkgerät. Bitte wenden Sie sich an Ihren Peltor-Händler für mehr Information.

14
15
PELTOR Lite-Com Pro
Headset de communication sans l programmable
Peltor Lite-Com Pro offre une communication sans l able et efcace entre deux ou plusieurs
personnes, même en milieux bruyants.
Le produit a été homologué pour utilisation en environnements explosifs (ATEX).
Lisez attentivement ce mode d’emploi. Vous proterez au maximum de votre produit Peltor.
CARACTÉRISTIQUES
Headset de communication sans l programmable pour 30 canaux radio dans la plage de
fréquences 430 à 470 MHz. La puissance la plus élevée offre une portée à l’extérieur jusqu’à 3
km. La puissance basse offre une portée jusqu’à 1 km.
38 “sous-canaux” CTCSS et 83 DCS permettent à plusieurs utilisateurs d’utiliser le même canal
sans être obligés d’écouter la conversation des autres.
Durée d’utilisation jusqu’à environ 40 heures selon le type de piles et d’utilisation.
Signal d’avertissement en cas de basse tension.
Coupure automatique 2 heures après la dernière activation.
Les réglages sélectionnés sont conrmés par un message vocal (en anglais). Le dernier réglage
est mémorisé lors de la coupure.
Programmable
Il est possible d’adapter des fonctions de Lite-Com Pro selon les souhaits de l’utilisateur à l’aide
d’un logiciel. Contactez un revendeur agréé Peltor pour de plus amples renseignements.
AVANTAGES (Fig. H)
Serre-tête extra large (MT7H7F470-50) avec rembourrage doux pour un confort optimal durant
toute la journée de travail. Attaches pour casque (MT7H7P3E470-50) avec xation pour visière
et couvre-nuque.
Arceaux indépendants à ressort en acier inoxydable permettant une pression régulièrement
répartie autour des oreilles. Les arceaux en acier maintiennent mieux leur tension que les brides
en plastique dans une large plage de températures.
Basse xation bipoints et simple réglage en hauteur sans déport.
Anneaux d’étanchéité larges et doux remplis de mousse + liquide avec des canaux de
décompression incorporés permettant une pression basse, une étanchéité efcace et un confort
personnalisé.
Antenne exible avec xation basse et sensibilité de réception élevée.
Connecteur pour le raccordement d’un équipement externe, tel qu’une radiocom
supplémentaire, un téléphone portable, un lecteur mp3, etc.
Piles. Lite-Com Pro est fourni avec des piles NiMH Peltor ACK05 et un chargeur de piles.
D’autres piles de type LR6 (AA) peuvent également être utilisées. NOTA. Voir PILES ci-dessous !
Livré avec microphone pour parler à compensation de bruit pour perceptibilité élevée et avec
“Quick Positioning” pour réglage souple du bras microphone.
Ensemble de boutons permettant un réglage simple et souple de Lite-Com Pro.
D’autres fonctions peuvent être programmées avec un logiciel que vous trouverez auprès de
revendeurs agréés Peltor.
TOUCHES (Fig. A)
MARCHE/ARRÊT/FONCTION (¡) Marche et arrêt de la Lite-Com Pro et sélection entre les
fonctions du menu.
UP (+) Augmente le niveau de la fonction sélectionnée.
DOWN (-) Réduit le niveau de la fonction sélectionnée.
PTT Émission avec Lite-Com Pro.
•
•
•
•
•
•
•
1.
2.
3.
4.
5.
6.
7.
8.
9.
10.
11.
1.
2.
3.
4.

16
17
430 à 470 MHz
L’utilisateur a la responsabilité de l’éventuelle détention d’une éventuelle licence
d’utilisation de la radiocom pour le Lite-Com Pro !
II 1 G EEx ia IIC T4
L’utilisateur est responsable de l’utilisation du Lite-Com Pro en conformité avec les
directives concernant les milieux explosifs.
INSTRUCTIONS D’UTILISATION / RÉGLAGES
MARCHE/ARRÊT/FONCTION (On/Off/Mode)
Mise sous tension ou hors tension de Lite-Com Pro en appuyant sur la touche ON/OFF/MODE
pendant env. 2 secondes.
Un signal sonore conrme la mise en marche ou l’arrêt. Une diode luminescente qui clignote lentement
dans la touche indique également que Lite-Com Pro est sous tension. La diode luminescente clignote
plus rapidement en cas d’émission ou de réception.
Un appui bref sur la touche ON/OFF/MODE (¡) permet d’avancer d’un cran dans le menu. En cas
d’appui prolongé, un cran à la fois, chaque cran est conrmé par un message vocal. En cas de
pression plus brève, seule la fonction actuelle est conrmée, là où le réglage a été terminé.
Tous les réglages en cours sont mémorisés lors de la mise hors tension.
SURROUND (Volume des sons environnants)
En cas d’utilisation de Lite-Com Pro comme protection auditive d’écoute, la puissance des sons
ambiants se règle avec les sélectionneurs de niveau HAUT (+) ou BAS (-). Les modications sont
conrmées par un message vocal. Les sons ambiants peuvent être aussi complètement coupés en
diminuant le volume jusqu’en position limite avec le sélectionneur BAS (-), puis en gardant la touche
enfoncée pendant 2 secondes. Un message vocal “SURROUND OFF” conrme que le son ambiant a
été coupé.
AVERTISSEMENT ! Ce réglage signie que les sons ambiants sont réduits par la protection auditive
et ne sont plus perçus. Pour réactiver les sons ambiants, appuyez sur le sélectionneur de niveau
HAUT (+). Lite-Com Pro fonctionne de nouveau comme protection auditive d’écoute avec limitation du
niveau sonore.
VOLUME (Niveau sonore)
Utilisez les touches HAUT (+) et BAS (-) pour régler le niveau sonore de la réception de la radiocom.
Un message vocal conrme le nouveau réglage à chaque pression de touche. Il y a 5 étages de
volume et une position arrêt. La position arrêt est atteinte en appuyant 2 secondes à l’étage de volume
1 sur la touche BAS (-), puis conrmée par un message vocal “VOLUME OFF”.
ATTENTION ! Aucune communication radio n’est entendue en position arrêt.
Le raccordement s’effectue en appuyant sur la touche HAUT (+). La réception démarre avec le niveau
sonore le plus faible.
CHANNEL (Canal)
30 canaux au maximum peuvent être utilisés dans la plage de fréquences 430 à 470 MHz. (La
programmation est effectuée par un revendeur agréé Peltor).
Utilisez les touches HAUT (+) et BAS (-) pour sélectionner le canal (fréquence radio) de la radiocom.
Un message vocal conrme le nouveau réglage à chaque pression de touche.
VOX (Émission à commande vocale)
VOX signie que le Lite-Com émet lorsqu’un son d’une puissance sufsante atteint le microphone,
c’est-à-dire émission main libre.

16
17
Le Lite-Com Pro dispose également de BCLO (Busy Channel Lockout), ce qui signie que l’émission
à commande vocale est impossible si le canal est déjà occupé. Les perturbations sont évitées du fait
que deux émissions ne peuvent pas avoir lieu simultanément.
Utilisez les touches HAUT (+) et BAS (-) pour régler la sensibilité d’émission à commande vocale. Un
message vocal conrme le nouveau réglage à chaque pression de touche. Il y a 5 niveaux de VOX et
une position arrêt. La position arrêt est atteinte en appuyant 2 secondes sur la touche BAS (-), puis
conrmée par un message vocal “VOX OFF”. Une émission doit être effectuée avec la touche PTT en
position arrêt. Le raccordement s’effectue en appuyant sur la touche HAUT (+).
ATTENTION ! Pour atteindre une compensation optimale du bruit le microphone du headset doit être
placé de 3 à 5 mm des lèvres.
SQUELCH (Antibruit de fond)
Le squelch signie que le son dans les écouteurs est réduit lorsque le signal reçu est inférieur à un
niveau déterminé. L’utilisateur évite d’entendre seulement du bruit de fond, mais lorsque quelqu’un
parle, l’amplication revient immédiatement au niveau adéquat.
Utilisez les touches HAUT (+) et BAS (-) pour régler le niveau du squelch. Un message vocal conrme
le nouveau réglage à chaque pression de touche. Il y a 5 niveaux de SQUELCH et une position arrêt.
Le niveau 1 nécessite le degré sonore le plus faible pour ouvrir l’antibruit de fond. La position arrêt
est atteinte en appuyant 2 secondes sur la touche BAS (-), qui est ensuite conrmée par un message
vocal “SQUELCH OFF”. Le raccordement s’effectue en appuyant sur la touche HAUT (+).
SUB CHANNEL/SOUS-CANAL (Réception sélective)
La réception sélective signie qu’une tonalité ou un code doit être émis avec la parole pour qu’un
récepteur radio à réception sélective puisse reproduire l’émission. Cela permet à plusieurs groupes
d’utilisateurs d’utiliser le même canal sans être obligés d’écouter la conversation des autres.
Utilisez les touches HAUT (+) et BAS (-) pour régler le sous-canal. Un message vocal conrme le
nouveau réglage à chaque pression de touche. Il y a 38 tonalités analogues CTCSS et 83 codes
numériques DCS. Ils sont programmés de 1 à 121. (Voir tableau F à l’intérieur de la couverture). Il est
possible d’écouter toute communication sur le canal actuel avec le réglage “OFF”.
POWER (Puissance de sortie)
Il y a trois niveaux de puissance de sortie : Élevé, moyen et faible. Utilisez les touches HAUT (+)
et BAS (-) pour régler le niveau de la puissance de sortie. Un message vocal conrme le nouveau
réglage à chaque pression de touche. “HIGH POWER” correspond à puissance élevée et “LOW
POWER” à puissance faible. Nous recommandons l’utilisation de ”MEDIUM POWER” (puissance
moyenne) chaque fois que cela est possible.
Attention !
La durée de vie des piles/la durée d’utilisation dépend beaucoup du type et de la condition des piles et
de l’utilisation de Lite-Com Pro.
Par exemple, avec une pile alcaline de 2700 mAh de contenu énergétique, la durée d’utilisation en
position puissance faible sera d’env. 40 heures avec 15% d’émission, 85% de réception/de stand-by.
En position de puissance élevée la durée d’utilisation diminue dans les mêmes conditions d’env. 20%.
PTT (Push-to-talk/Pousser pour parler)
L’émission manuelle via Lite-Com PRO s’effectue avec la touche PTT enfoncée.
Nota :
La commande vocale (VOX) est activée ou désactivée par 2 brèves pressions de touche. Le
message vocal ”VOX on” ou ”VOX off” conrme le réglage.
Lite-Com Pro est équipé de la fonction BCLO (Busy Channel Lockout) pour blocage d’émission
sur un canal déjà occupé.
1.
2.

18
19
MONTAGE / RÉGLAGE
PILES
ATTENTION ! Il est impératif d’utiliser des piles certiées ATEX en cas d’utilisation en milieux
explosifs. Le remplacement des piles ou le chargement d’accumulateurs ne doit pas être
effectué en milieu explosif !
Pour l’instant, seulement les types de pile suivant sont certiés pour utilisation avec Lite-Com Pro
Peltor en milieu explosif :
Fabricant Type de pile
Peltor ACK05
Duracell MN1500, Procell PC1500
Energizer E91, Industrial EN91
L’accumulateur NiMH Peltor ACK05 est fourni à la livraison. Le chargement doit être effectué avec le
chargeur fourni FR05.
D’autres accumulateurs ou piles alcalines de 1,5 Volt de type LR6 (AA) peuvent être utilisés en milieu
non explosif.
Les piles sont montées dans le boîtier à piles. Vériez que les pôles + et – sont placés correctement
(voir g. dans le couvercle du boîtier à piles).
AVERTISSEMENT ! Si des piles rechargeables sont utilisées, elles doivent être chargées selon le
manuel du chargeur de batteries.
Des piles sèches peuvent exploser si elles sont chargées.
Le remplacement des piles ou le chargement ne doit pas être effectué en milieu explosif !
MONTAGE
Serre-tête (Fig. J)
Dégagez les coquilles et placez le headset sur les oreilles de sorte que les anneaux d’étanchéité
les entourent totalement.
Réglez la hauteur des coquilles pour une adaptation étanche et confortable. Pour cela poussez la
coquille vers le haut ou le bas, tout en maintenant le serre-tête vers le bas.
La bride doit être placée au-dessus de la tête.
Attaches pour casque (Fig. K)
(K:1) Montez les attaches pour casque sur la fente du casque jusqu’à “l’encliquetage”.
ATTENTION ! Les coquilles peuvent être réglées en trois positions : Travail (K:2), aération (K:3) et
repos (K:4). Lors de l’utilisation les arceaux doivent être pressés vers l’intérieur jusqu’à ce que vous
entendiez un “clic” des deux côtés, de la position d’aération à la position de travail. Assurez-vous que
la coquille et l’arceau en position de travail n’appuient pas contre la structure intérieure ou le bord du
casque antichoc, ce qui pourrait occasionner des pertes d’atténuation.
100 % d’utilisation d’une protection auditive en parfait état est la seule protection sûre contre
les lésions auditives.
Si vous vous exposez dans des milieux avec des niveaux de pression acoustiques supérieurs à 82
dB(A), vous devez protéger votre ouïe. Sinon les cellules auditives du fond de l’oreille peuvent subir
des dommages irréversibles. Les lésions sont permanentes. Si vous retirez votre protection, même
brièvement, vous vous exposez à des risques de lésions. Une protection confortable, adaptée au
niveau sonore auquel on est exposé, offre la meilleure garantie d’un temps d’utilisation à 100% et, en
conséquence, la meilleure protection contre des lésions auditives permanentes. Pour une protection
optimale, écartez les cheveux autour des oreilles de sorte que les anneaux d’étanchéité s’appliquent
fermement contre la tête. Les branches de lunettes doivent être aussi nes que possible et aussi près
que possible de la tête.
1.
2.
3.
This manual suits for next models
5
Table of contents
Languages:
Other Peltor Headphones manuals