PEM SprayWand P-300 Operating instructions

PEM P-300
SprayWand™ Pretreatment Application System
Installation • Operation • Maintenance • Troubleshooting
Revision 11.16.15


1 | P a g e
Table of Contents
Introduction ..................................................................................................3
General specifications........................................................................................3
Limited warranty................................................................................................4
Safety .................................................................................................................6
Safety Rules....................................................................................................6
Installation ..................................................................................................10
Machine delivery and inspection.....................................................................10
Machine identification.....................................................................................10
Machine location .............................................................................................10
Machine setup .................................................................................................11
Electrical service ..........................................................................................11
Mechanical (gas) service..............................................................................12
Burner fuel pressure ................................................................................12
Guide to gas line pipe size .......................................................................13
Venting the machine to the outside........................................................14
Water supply................................................................................................15
Coil conditioner............................................................................................15
Neutralizer ...................................................................................................16
Wand and Hose............................................................................................16
Initial start-up..............................................................................................17
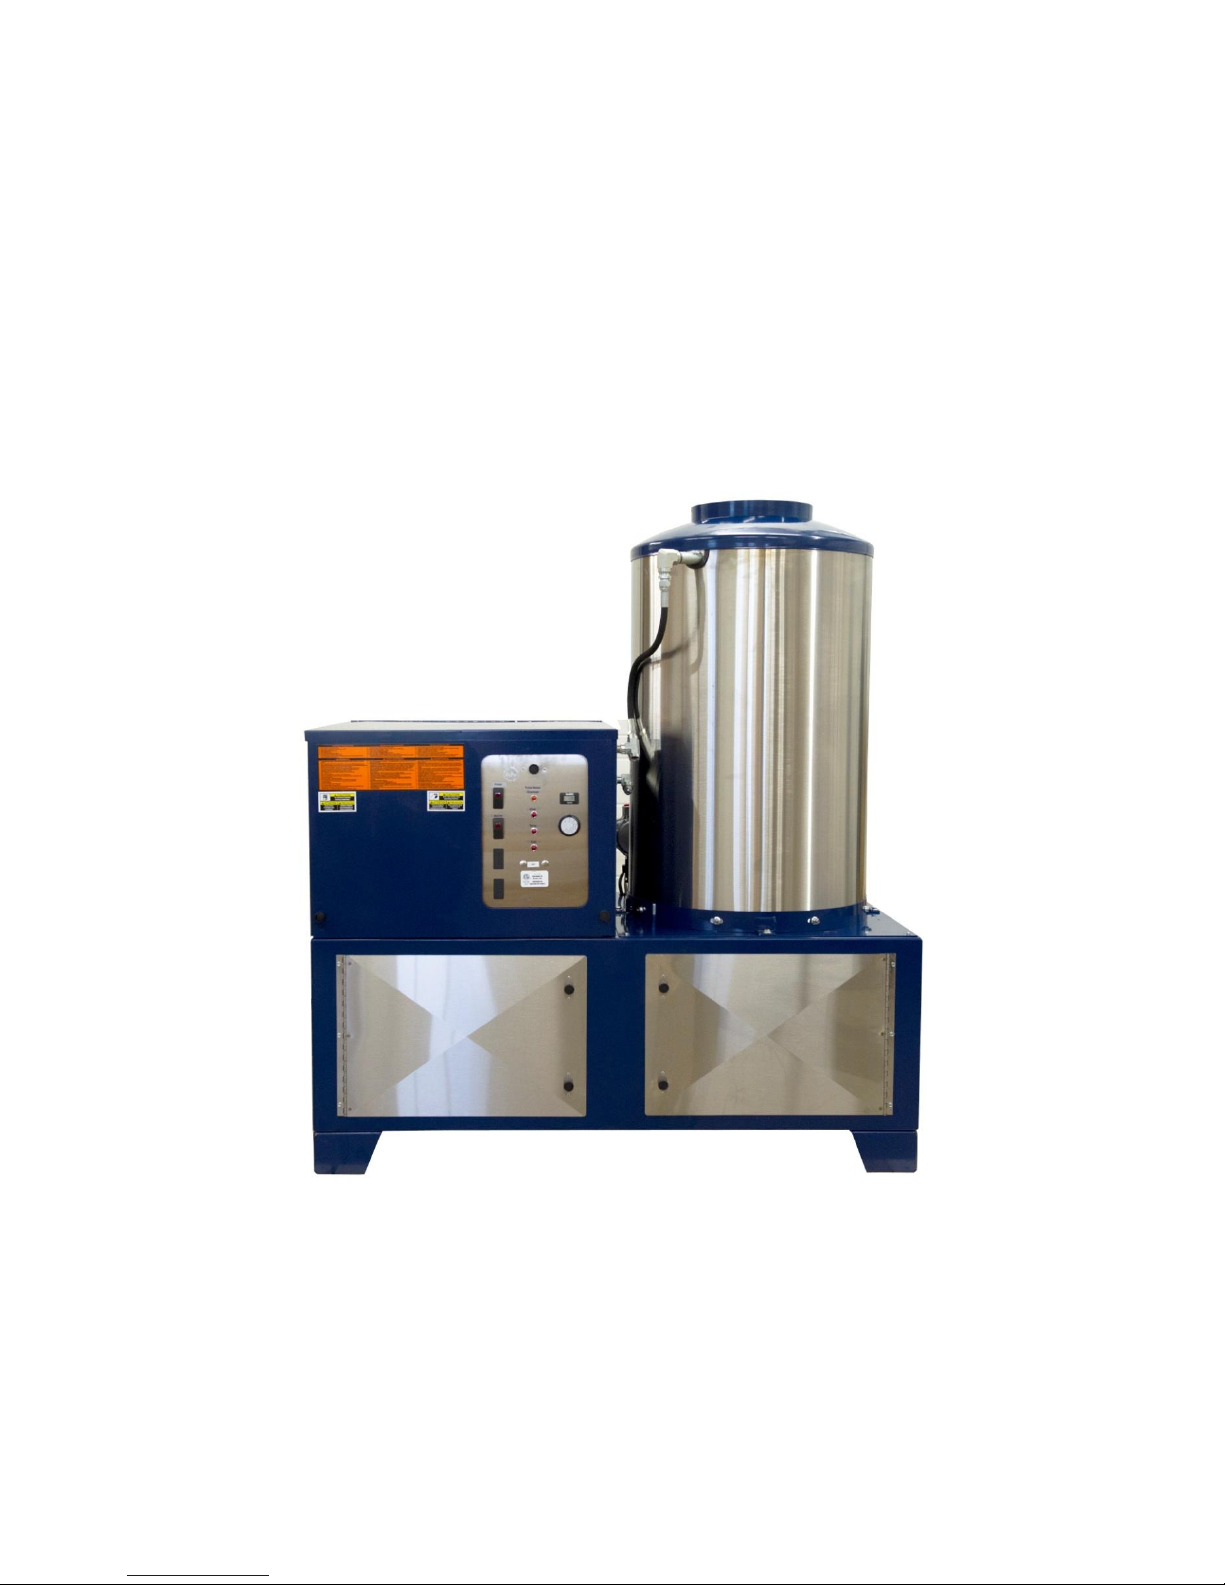
Control panel ...................................................................................................17
Switches.......................................................................................................17
Pump switch.............................................................................................17
Burner switch...........................................................................................17
Indicator lights.............................................................................................17
Pump motor overload indicator light ......................................................17
Flow indictor light ....................................................................................17
Temp indicator light.................................................................................17
Fuel indicator light ...................................................................................17
Temperature control ...................................................................................18
Initial startup procedure..............................................................................19
Adjusting chemical concentration...............................................................20
Daily Operation............................................................................................22
Starting the machine........................................................................................22

2 | P a g e
Shutting down the machine.............................................................................22
Winterizing the machine..................................................................................23
Predictive maintenance................................................................................24
Pressure hose...................................................................................................24
Water inlet tank filter screen...........................................................................25
Pump................................................................................................................25
Pump lubrication..........................................................................................25
Pump belt.....................................................................................................26
High-pressure filter ..........................................................................................27
Heating coil descaling ......................................................................................28
Machine exterior..............................................................................................30
Repair..........................................................................................................31
Pump................................................................................................................31
Servicing the pumping section.....................................................................31
Servicing the ceramic plungers and V-packings...........................................32
Removing the pump manifold head ........................................................32
Replacing plungers...................................................................................33
Replacing V-packings ...............................................................................34
Reinstalling the manifold head ................................................................34
Intermittent ignition device.............................................................................38
Wiring...........................................................................................................38
Engineering data..........................................................................................39
Gas Valve..........................................................................................................40
Adjusting the pilot light ...............................................................................41
Troubleshooting ..........................................................................................42
Gas burner malfunction...................................................................................43
Intermittent ignition device problems.............................................................44
Pump malfunction and pressure delivery problems........................................44
General malfunctions.......................................................................................46
Chemical system malfunction..........................................................................46
Electrical malfunction ......................................................................................47
Service record..............................................................................................49

3 | P a g e
Introduction
The PEM P-300 Spraywand™ Pretreatment Application System is designed to
meet the demands of high production environments. The heavy-duty system
and precision fixed-ration chemical injectors ensure consistent outputs and
results.
The PEM system features an optional air-activated gel pump. This allows the
operator to apply gel products to metal surfaces that standard cleaners cannot
handle.
Another option delivers sealer right from the drum through a low-volume, low-
pressure pump.
Warning: To prevent injury and equipment damage, thoroughly read
and understand the contents of this manual before operating the P-300.
General specifications
Model: P300
HP: 7.5
Electrical: 230 V, 3 phase –20 A
460 V, 3 phase –10 A
Connection: 4 wire through junction box
GPM: 5
Pressure
- Phosphatize: 1500 PSI
- Optional seal rinse: 800 PSI
Burner output: 550,000 B.T.U.
Gas connection: ¾ NPT
Fuel requirements:
- Natural gas: 5”-9” W.C.
- L.P.: 11” WC
Stack size: 12”
Water connection: Standard garden hose, female swivel
Dimensions (L,W,H): 56” x 28” x 64”

4 | P a g e
Weight:
- Dry: 900 lbs.
- Shipping: 1100 lbs.
Nozzles: 1-15085 x ¼ NPT
Note: The manufacturer reserves the right to make improvements in design
and/or changes in specifications at any time without incurring any obligation to
install them on units previously sold. Some photos and/or illustrations may not
be exact representations of your particular machine; however, the technical
information will apply.
Limited warranty
PEM Corporation warrants each machine sold by us to be free from
manufacturing defects in normal service for 90 days commencing with the
delivery of the machine to the original owner.
If the machine is used with approved products, the warranty is extended to two
full years or 2000 hours, whichever occurs first.
Three (3) Years Parts
• Belt guards
• Frame
• Float tank
• Pump drive assembly
• Float tank
• Coil wrapper
•Heating coils (Self-contained
and stationary models)
Two (2) Years Parts
Plumbing
One (1) Year Parts
• Control switches
•Electric motors
•Float valves
•Safety switches
•Pulleys
•Thermostat
• Ground fault circuit
interrupter
Ninety (90) Days Parts
• Lights
• Trigger gun
• Unloaders
• Wand
• Ignition module
• Coil wrapper
Our obligation under this warranty is expressly limited at our option to the
replacement or repair by our company approval, or a service facility designated
by us¸ of such part or parts as inspection shall disclose have been defective. This
warranty does not apply to defects caused by damage or unreasonable use
(including failure to provide reasonable and necessary maintenance) while in
the possession of the consumer.

5 | P a g e
This warranty does not apply to nozzles, V-belts, hoses, pump wear parts, filters
or 0-rings or damage to the wand or gun due to mishandling.
PEM Corporation shall not be liable for consequential damage of anything,
including but not limited to the consequential labor costs or transportation
charges in connection with the replacement or repair of the defective parts.
PEM Corporation makes no warranty with the respect to trade accessories. They
are subject to the warranties of their manufacturers.
Any implied or statutory warranties, including any warranty of merchantability
or fitness for a particular purpose are expressly limited to the duration of this
written warranty. We make no other express warranty, nor is anyone
authorized to make any on our behalf of PEM Corporation.

6 | P a g e
Safety
This safety alert symbol indicts important messages in this manual. When you
see this symbol, carefully read the message that follows, and be alert to the
possibility of personal injury or death if you do not adhere to the requirements
of the safety message. Also be review and follow the safety decals on the
machine.
Note: PEM Corporation encourages the use of environmentally friendly
chemicals and waste storage and disposal practices. Always store and/or
dispose of chemicals in a manner that complies with local, state and federal
regulations. Furthermore, always read and follow the directions printed on
product labels when using chemicals.
Safety Rules
PEM Corporation cannot anticipate every possible circumstance that might
involve a potential hazard. The warnings and cautions in this manual are
therefore not all inclusive. If you use an operating procedure, installation or
work method not specifically recommended, you must satisfy yourself that it is
safe for you and for other persons. You must also ensure that the product will
not be damaged or made unsafe by the procedure that you use.
Warning: Fluids under pressure spray can be nearly invisible and can
penetrate the skin and cause extremely serious injury. Avoid contact with high
pressure spray. Specifically:
•Never point the spray gun at any part of your body or at any other
persons.
•Never put your hands or fingers over the spray tip while the machine is
in operation.
•Never use your hands to stop or detect leaks.
•Always shut of the machine and trigger the pressure gun to relieve
system pressure before removing the spray tip or servicing the machine.
•Always wear full eye protection (preferably a face shield), protective
clothing and rubber boots when operating the machine to protect you
from burns caused by hot spray, fluid injection or debris dislodged by
high-pressure spray.
•If any fluid appears to have penetrated the skin, get emergency medical
care at once. Do not treat as a simple cut. Tell the doctor exactly what
was injected. For treatment instructions, have your doctor call the
National Poison Control Network at 412-681-6669.

7 | P a g e
Warning: Operate and maintain the machine in a manner that prevents
injury to you and others and damage to equipment. Specifically:
•Never alter or modify the equipment.
•Never exceed the factory pressure or temperature rating of the system.
Be sure all accessory equipment and system components used will
withstand the pressure developed.
•Never let the pump or burner run without water supply flowing through
the unit.
•Never attempt to run or relight the burner if ignition does not take place
the first time. Unburned gas, which may cause a fire or explosion, may
have accumulated.
•Never allow children or any unauthorized or untrained persons to
operate, adjust or repair this machine.
•Always keep other persons at a safe distance when using this machine.
•Never attempt to clean or wash down the machine using its own spray
gun. Cleaning the machine in this manner will increase the hazard of
electrical shock and/or damage to the machine. The machine is water
resistant but not water proof.
•Never leave an operating machine unattended. Always shut off the
machine and relieve pressure before leaving the machine.
•Never spray inflammable or toxic liquids or chemicals such as
insecticides or weed killer.
•Never operate the machine when combustible fumes or dust may be
present.
•Never use detergents that are not compatible with the discharge hose.
Read and follow instructions provided by the detergent manufacturer.
Also follow directions on the container regarding contact with the eyes,
nose or skin.
•Always provide approved vent stacks if the machine is to be used in an
enclosed area. Exhaust fumes contain odorless, invisible gasses that can
kill without warning. Comply with all federal, state and local codes for
locating, venting and using the machine in an enclosed area.
•Always connect the machine to the correct electrical supply outlet.
Comply with all federal, state and local codes and ordinances regarding
electrical requirements.
•Never allow electrical extension cord connections to fall or lay in water.
Use only extension cords rated for use with this machine.
•Always respect and be alert for the potential hazards of electrical
equipment, hot burners, moving parts, high-pressure spray and steam.

8 | P a g e
•Always be certain that the machine safety decals are kept clean and
legible. Replace any decals that become damaged, lost or painted over.
•Always disconnect the electrical plug before performing any repairs or
service on machine.
•Never attempt repairs or modifications that you do not understand.
Contact your service dealer or contractor.
•Always keep protective guards covers and shields in place. Replace any
that were removed for service or that were damaged before operating
the machine.
•Always use a gas regulator of the specified type on LP tanks for butane
or propane-fired machines.
•Never exceed the 210° F temperature setting for hot water, high-
pressure cleaning. Be sure the correct nozzle is used.
Danger: Chemicals used for cleaning are dangerous. Keep all chemicals
out of reach of children and untrained adults. Take proper safety precautions
before handing any chemicals. Read and follow all directions and instructions on
the product label as well as the safety data sheets before using the chemical.
Wear eye protection and rubber gloves when handling or using chemicals.
Always have a clean supply of water available to wash off any contact with the
skin or eyes. Should any chemical contact the eyes, immediately flood the eyes
with clean water and seek medical attention at once. If skin contact occurs,
flood the affected area with plenty of water for 15 minutes. If irritation persists,
seek medical attention. If chemicals are swallowed, follow the product label
directions and get immediate medical attention.
Warning: Do not start the machine unless you have the trigger gun or
wand assembly completely under your control. Left loose, the gun or wand
could recoil and damage property or cause injury.
Warning: The discharge hose supplied with the machine is designed for
use on steam and high-pressure cleaners. Special care, handling, and
maintenance are required to provide proper and safe operation. Follow the
guidelines to ensure safe operation and maximum hose service life:
•Never exceed rated machine pressure or temperature.
•Do not route the hose in a manner that will cause sharp bending,
kinking, cutting, abrasion or exterior damage.
•Do not pull on the hose to move the machine, untangle knots or pull
excessively or cause stress on the hose.

9 | P a g e
•Do not use the hose if cuts, leaks, abrasions, bulges or coupling damage
is evident.
•Do not use the hose if any reinforcement is exposed.
•Do not attempt field repairs through an unauthorized hydraulic hose
repair shop. Special couplings and crimping specifications are required
for steam and high-pressure washer discharge hose. Contact a qualified
pressure washer service representative for repair of damaged hose. If
you have any doubt about the hose condition, replace it immediately.
•Always examine hose couplings and the quick disconnect (if provided)
before each operations. If leaking is evident, do not use the hose.
Contact a qualified pressure washer service representative.
•Never leave the discharge hose lying on the floor or ground to be driven
over by vehicles or damaged by falling objects. Always coil and hang the
hose immediately after use.
Danger: To prevent unexpected energizing, startup or release of energy
that could cause injury to people working on the machine follow the steps of
the OSHA Lockout/Tagout Rule below to ensure that power to the machine will
be under control:
1. Turn of the equipment.
2. Dissipate or release all residual energy in the machine.
3. Shut of the main power cord near the machine, and tag the switch.
4. Check all previous steps, and then try to operate the machine to ensure
that it won’t work.

10 | P a g e
Installation
Machine delivery and inspection
Before unpacking, check the machine for any damage that may have occurred
during shipment. Note any damage and immediately contact the carrier to make
a damage or shortage claim.
Machine identification
The machine model number, serial number and specifications are stamped on
an identification plate that is permanently attached to the right rear side of the
machine main frame. See Figure 1.
For future reference, record the information from this plate in Table 1.
Figure 1: Identification plate location on the back of the machine.
Model___________________________________
Output________ Gpm_________ Psi__________
Fuel_____________________________________
Elec._______Ph______ Volts_____ Amps_______
Serial Number_____________________________
Table 1: Machine identification from the plate.
Machine location
The gas-fired pressure cleaners are designed specifically for use as stationary
unit in a well-ventilated area. Position the machine for easy and safe access to
controls, power, water, and fuel supplies. Also consider the best possible
location for access to the machine for routine maintenance or service.

11 | P a g e
Danger: Do not locate the machine in a small, enclosed area. Without
adequate ventilation, incomplete combustion carbon monoxide and
overheating will result. Carbon monoxide can cause death.
If the machine must be located out of sight of the operator, special equipment
or controls may be required to provide proper operation and ensure operator
safety. Contact your dealer or qualified service representative before installing
or using the machine from a remote location.
Avoid locating the machine in direct spray; the SprayBay® is not an appropriate
location for this equipment.
Avoid locating the machine on slippery surface areas or where water may
accumulate.
Danger: Do not locate the burner where fumes, dust, or other
flammable materials may be present.
Machine setup
Exact machine setup may vary somewhat between machine models; however,
the following information will be a general guideline. Contact your dealer or
authorized service representative for special installation or setup requirements.
Note: In order to avoid unnecessary expense of complying with or correcting
the violation of a regulation, investigate all applicable state and local codes
before attempting to install the machine.
Electrical service
Caution: Do not attempt to operate this machine on less than 90% of
rated system voltage. Overheating, poor performance or component damage
could occur. Contact a qualified electrical technician to check for proper system
voltage.
Note: The pump is designed to operate in either direction; rotation direction is
not an issue.
Refer to the machine date plate to determine the exact electrical supply
requirements for your machine. Be sure all machine control switches are turned
off before connecting the electrical supply.

12 | P a g e
To further ensure machine grounding, a separate external grounding lug has
been provided. It is located below the nameplate. In certain areas, it is either
recommended or required that a separate ground wire be attached to this lug
and to an available ground source, such as a metal water line or ground rod.
(See Figure 2).
Figure 2: Ground
The electrical supply must be connected directly to the electrical service supply
box on the machine. Electrical connection and supply for these machines must
be made by a licensed electrician and must conform to all federal, state and
local codes and ordnances regarding three-phase electrical requirements.
Mechanical (gas) service
Have a HVAC expert set up gas connections.
Burner fuel pressure
Adjust the pressure to the type of burner fuel as follows:
Natural gas-fired machines:
Operate on 3 ½” of water column (2 oz.) pressure at the valve
and must have from 5” to 9” water column (3 to 4 oz.) pressure
supplied to the unit at the inlet. The water column check points
are as follows:
Check the water column pressure at the valve with the burner
operating. The most accurate way to check gas pressure is to
install a manometer in the 1/8” N.P.T port on the front face of
the gas shutoff valve.

13 | P a g e
Butane or propane gas-fired machines:
Operate on 11” (3.6 oz.) water column pressure. These propane
(LP) gas machines are not equipped with a gas regulator.
Therefore, install on the LP tank a gas regulator (see Figure 3) of
sufficient size to allow for pressure drop from the tank to the
machine.
Figure 3: Gas Regulator
Warning: Maximum inlet gas pressure is 0.32 PSI (14” water column or
an 8.9 oz. per square inch).
Install a gas shutoff valve in back of the machine on the gas line with a union
between the valve and the gas regulator (see Figure 4). Prior to operating the
burner system, purge the new lines. If this is not done, starting the burner can
be difficult.
Figure 4: Gas Valve
Guide to gas line pipe size
See Table 2 for the minimum gas line iron pipe size required for gas supply per
length of gas line from the valve side of the meter (Natural Gas) or valve is
based on a pressure drop of 0.03-inch water column pressure and 0.60 specific
gravity. See your gas supplier for assistance if your system has many fittings or
unknown loads.

14 | P a g e
Pipe length (feet)
Pipe diameter (inches)
10’
¾”
10’ – 30’
1”
30’ – 125’
1 ¼”
125’ – 200’
1 ½”
Table 2: Minimum gas line iron pipe size
Venting the machine to the outside
Caution: Chimney stacking for the burner venting should be made by a
licensed technician and conforms to all federal, state and local codes regarding
burner ventilation.
In northern locations, ensure provisions are made to prevent cold down
(negative pressure) drafts from freezing the coil when the machine is not in use.
Install UL listed weather cap (on top of the building).
If the machine is used in an enclosed area and you are putting a chimney on it,
be sure a draft diverter (available as an option, see Figure 4) is installed and the
chimney is as at least the same size as the stack on the machine (12 inches).
Poor draft will cause the unit to soot and not operate efficiently. Position the
machine to ensure the straightest stack possible.
Figure 5: Optional draft diverter. It is installed just above the burner.
Caution: Never reduce the size of the stack. Do not retrofit to a smaller
stack. If the stack is restricted, there the machine will have enough air
movement.

15 | P a g e
Water supply
Connect the machine to a cold water supply tap in the back of the machine (see
Figure 6). The water supply must equal to at least 1.5 times the gallon per
minute (gpm) output of the machine. If wide variations in water pressure occur,
install a pressure regulator in the supply line. Use at least a ¾-inch ID supply
hose.
Figure 6: Water connection in the back of the machine
Caution: To prevent machine damage, use only perfectly clean water. If
the water supply exceeds 6 grains of hardness (100 ppm), the coil conditioner
will extend the coil life and maintain machine efficiency.
Coil conditioner
The chemical supplier sets the coil conditioner flow rate by adjusting the
conditioner pump (see Figure 7) located under the top cover. Coil conditioner is
pumped into the float tank. The float tank is next to the pump and can be
accessed by lifting up the top cover (see Figure 8).
Figure 7: Conditioner and Neutralizer Pumps

16 | P a g e
Figure 8: Float Tank
Neutralizer
The chemical supplier sets the neutralizer flow rate by adjusting the neutralizer
pump, which is located next to the conditioner pump (see Figure 7). Place the
neutralizer discharge tube into or near the drain of the wash bay where the
machine is used.
Wand and Hose
Caution: The chemical injector is sensitive to pressure. If the nozzles
are damaged or are the wrong size, the injector may not work. If the hose is
damaged or kinked (e.g., ran over by a forklift), it may also cause the injector to
malfunction. Non-standard piping or the addition of valves and elbows may also
cause injection problems.
Black wand will be used for Rinse ONLY. Do not use the black wands for
chemical application.
Consult a PEM representative before purchasing additional or replacement
wands as the color representation varies.

17 | P a g e
Initial start-up
Control panel
Warning: To assure safe operation, familiarize yourself with the
machine controls and indicator lights before starting or operating the machine.
See Figure 8.
Switches
Pump switch –This switch will start the pump operation. Turn on this switch to
start the pump motor. Turn off this switch to shut down the entire machine,
including the burner.
Burner switch –This switch will turn on the igniter, which lights the pilot light.
During normal operation, turn off the burner switch to shut down the burner,
and let the coil cool down before shutting off the Pump switch.
Indicator lights
Pump motor overload indicator light –This light will glow orange if the pump
motor overload protector switch has tripped because the machine has drawn
too many amps. This may indicate the wiring to the motor or the motor itself is
faulty. If the indicator light turns on, turn off the pump switch and let the
machine cool down. Turn the pump switch on again. If the pump motor
continues to shut down, call P.E.M.
Flow indictor light –This light will glow red during normal operation when the
gun trigger is pulled, indicating the circuit through the flow switch is good. It will
turn out when the gun trigger is released. If the light remains out when the
trigger is pulled, it may indicate faulty flow switch or wiring.
Temp indicator light –This light will glow red during normal operation and
indicates the pilot light is lit and the thermostat-controlled circuit through the
temperature control switch is complete. The light will go out during normal
operation whenever the water temperature reaches its preset limit setting
(when the thermostat shuts off the circuit).
Fuel indicator light –This light will glow red during normal operation and
indicates the circuit to the gas valve is complete. It will stay on whenever the
burner rocker switch, which controls gas flow to the burner, is on (when the
wand trigger is pulled).

18 | P a g e
Temperature control
Located to the right of the indicator lights, this knob (Figure 9) is turned to set
the water temperature (210° F Max). The burner will cycle on and off to
maintain the selected water temperature.
Caution: Left loose, the gun or wand assembly could damage and cause
injury to personal or property damage. Do not start the machine without having
the trigger gun or wand completely under your control.
Caution: Never run the cleaning unit dry. Costly damage to the pump
will result. Always be sure the water supply is completely turned on before
operating the machine.
Figure 9: Control panel
Table of contents
Other PEM Industrial Equipment manuals