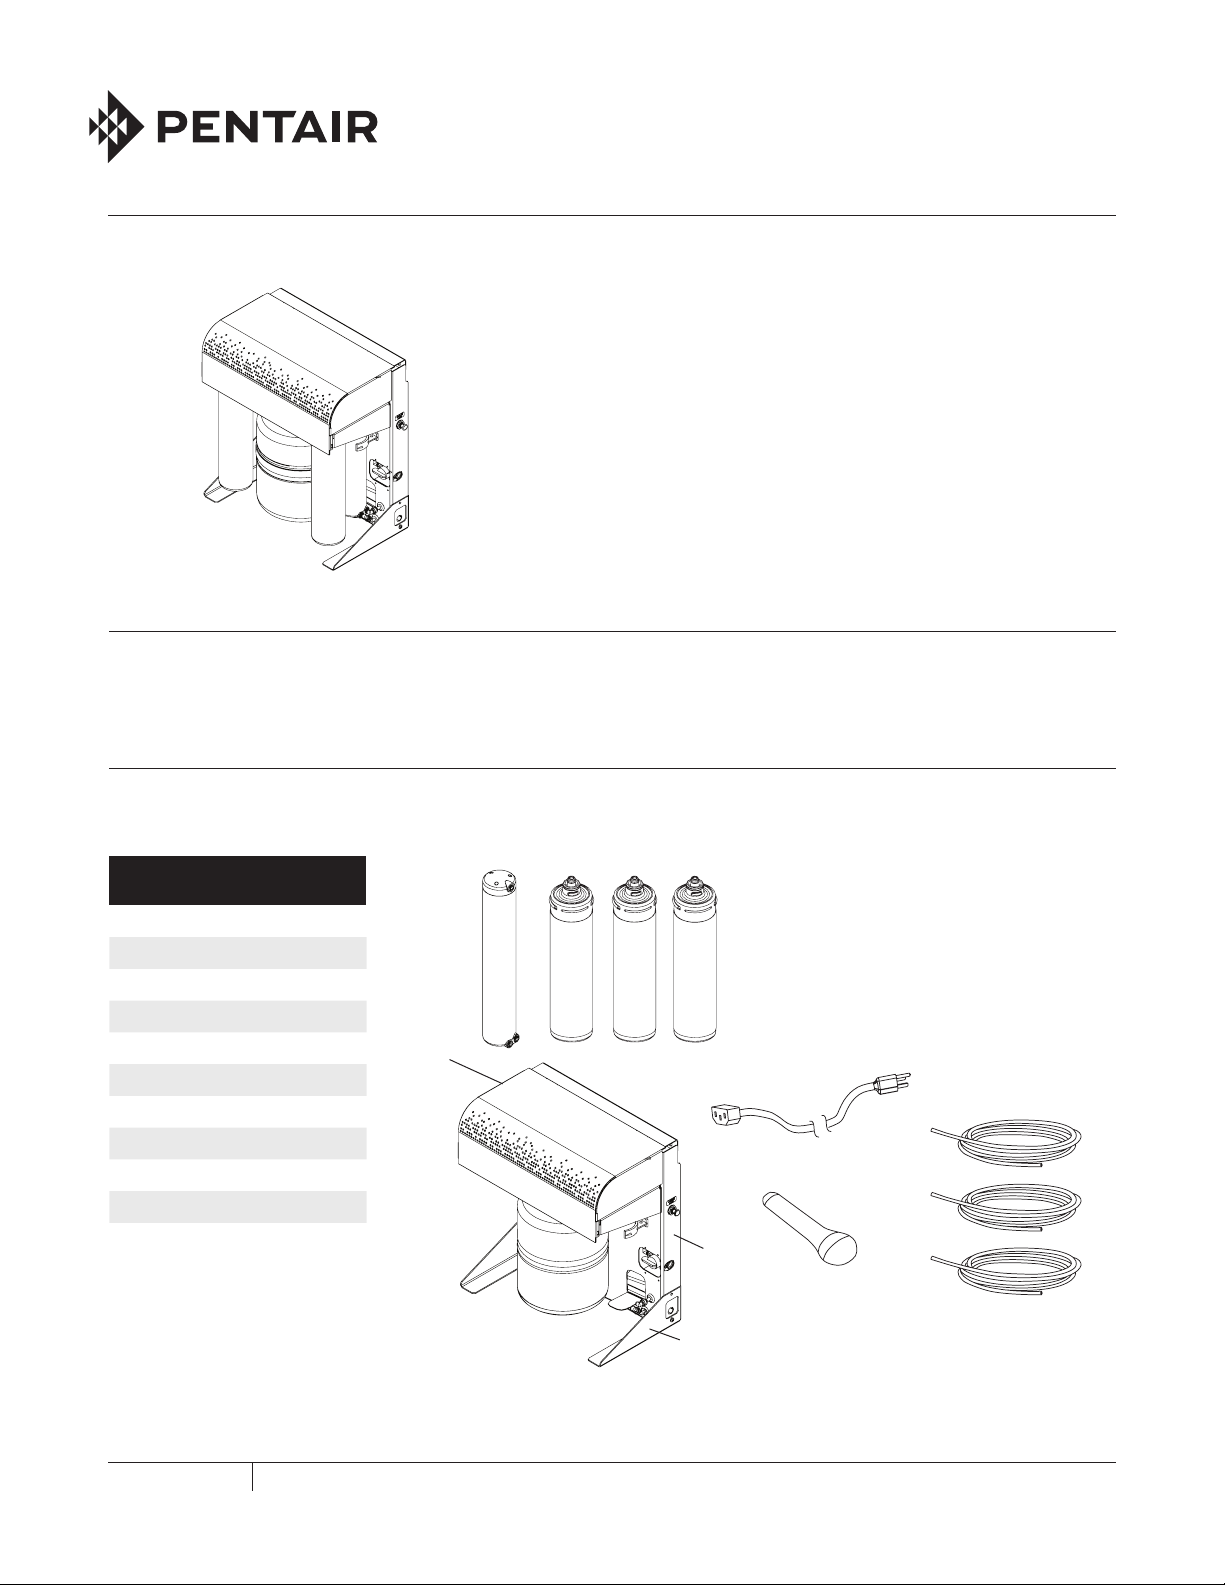
3EVERPURE®CONSERV®75E HIGH EFFICIENCY RO SYSTEM INSTALLATION AND OPERATION GUIDE
WARNING: This appliance must be grounded. This
appliance is equipped with a cord having
an appliance-grounding conductor and
a grounding plug. The plug must be
plugged into an appropriate outlet that
is installed and grounded in accordance
with all local codes and ordinances. If
the supply cord is damaged, it must be
replaced by the manufacturer, its service
agent or similarly qualified persons in
order to avoid a hazard.
WARNING: Improper connection of the appliance-
grounding conductor can result in a risk
of electric shock. Check with a qualified
electrician or service representative if
you are in doubt whether the appliance
is properly grounded. Do not modify the
plug provided with the appliance; if it will
not fit in the outlet, have a proper outlet
installed by a qualified technician.
WARNING: The appliance is intended to be
permanently connected to the water
mains and not connected by a hose-
set. The appliance is not suitable for
installation in an area where a water jet
could be used and must not be cleaned by
a water jet.
WARNING: Before installing the system, make certain
your water supply complies with the
following operating specifications. Failure
to do so may reduce the effectiveness of
the system and will void the warranty.
Consult your local water treatment
utility or a certified water testing lab to
determine the quality of your water.
WARNING: Do not use with water that is
microbiologically unsafe or of unknown
quality without adequate disinfection
before or after the system. The Everpure®
Conserv®75E System will not protect
against disease-causing bacteria or
remove harmless, naturally-occurring
bacteria.
WARNING: The Conserv 75E System contains
replaceable components that are
critical to the efficiency of the system.
Replacement of the reverse osmosis
component should be with one of
identical specifications, as defined by
the manufacturer, to assure the same
efficiency and contaminant reduction
performance.
WARNING: The Conserv 75E System contains
filter cartridges and an RO membrane
cartridge included with the system that
have limited service lives. critical for
the effective reduction of total dissolved
solids. Product water should be tested
periodically to verify that the system is
working properly.
WARNING: The Conserv 75E System shall only be
used for arsenic reduction on chlorinated
water supplies containing detectable
residual free chlorine at the system
inlet. Water systems using an in-line
chlorinator should provide one (1) minute
of chlorine contact time before the unit.
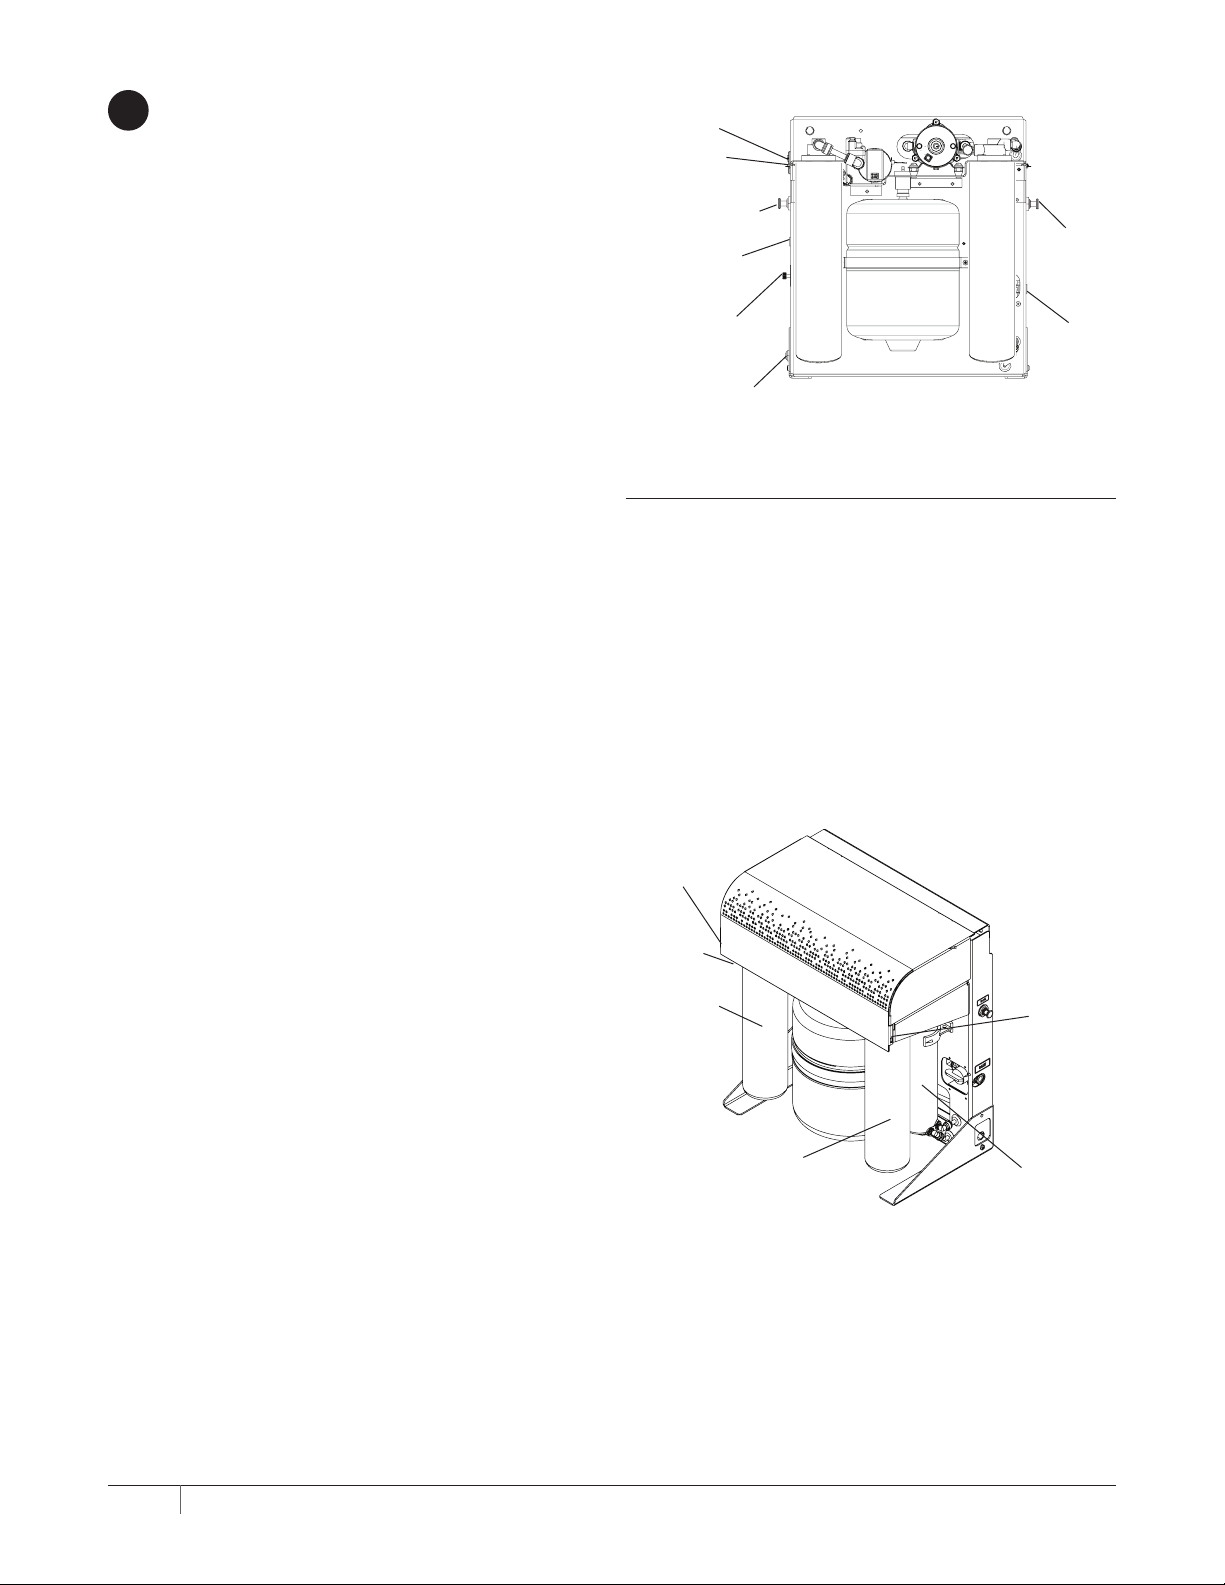
CAUTION: The Conserv 75E System must be
protected against freezing which can
cause the filter housing to crack,
resulting in water leakage. Do not use
electrical heating tape or propane torch
on this unit.
CAUTION: Make certain the unit is firmly attached to
wall to prevent it from falling and possibly
becoming damaged.
NOTE: Substances listed as reduced are not
necessarily in your water. System must be
maintained according to manufacturer's
instructions, including replacement of filter
cartridges.
NOTE: Your water must be within required limits
for satisfactory operation. If not, the RO
membrane cartridge’s life may be shortened
and your warranty will be voided (see
Operating Specifications).
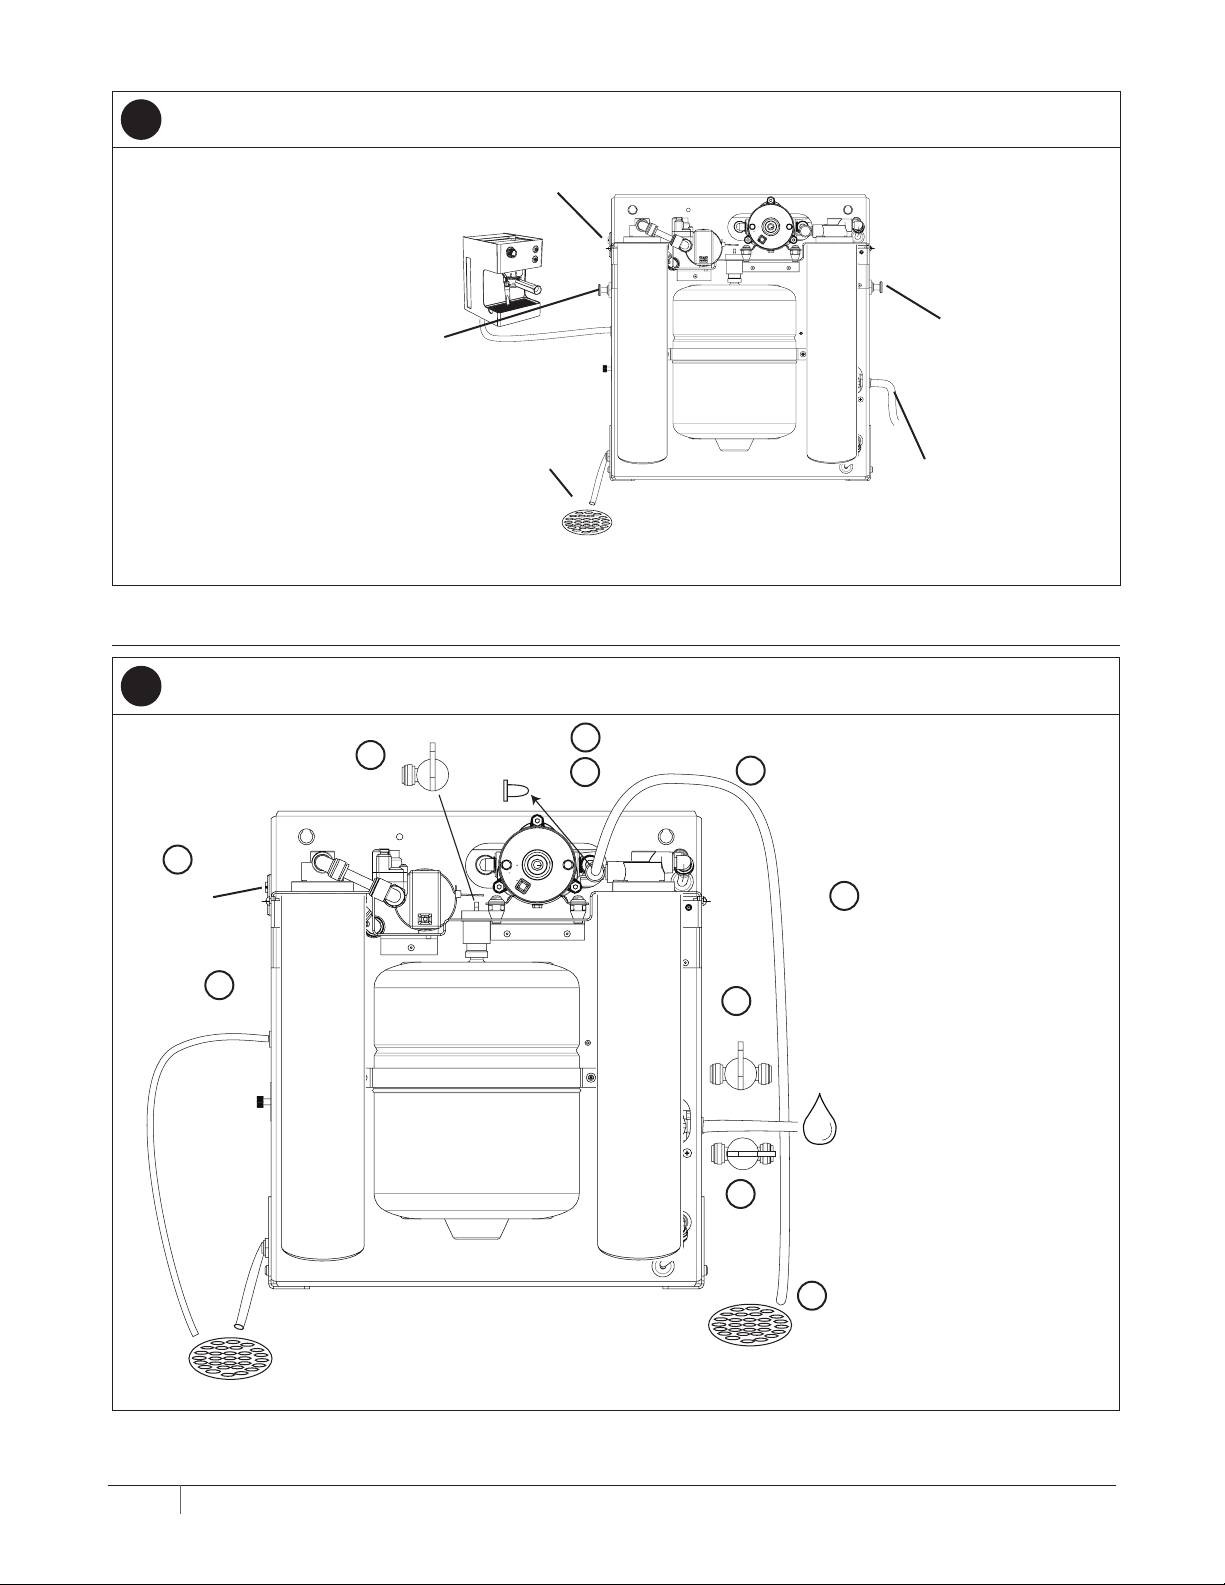
NOTE: Install on cold water line only.
NOTE: Do not install where system will be exposed to
direct sunlight.
NOTE: Make certain that installation complies with all
state and local laws and regulations.
NOTE: Use only plumbers tape without adhesive
backing to seal joints. Do not use pipe
compound (“pipe dope”), sticks, or similar
compounds with this unit; they contain
petroleum derivatives which can cause
crazing and cracking of the plastic in the filter
housing.
NOTE: Use only soap and water to clean components.
NOTE: Do not use aerosol sprays (bug spray, cleaning
fluids, etc.) near the Conserv 75E System.
They contain organic solvents which can cause
crazing and cracking of the plastic in the filter
housing.
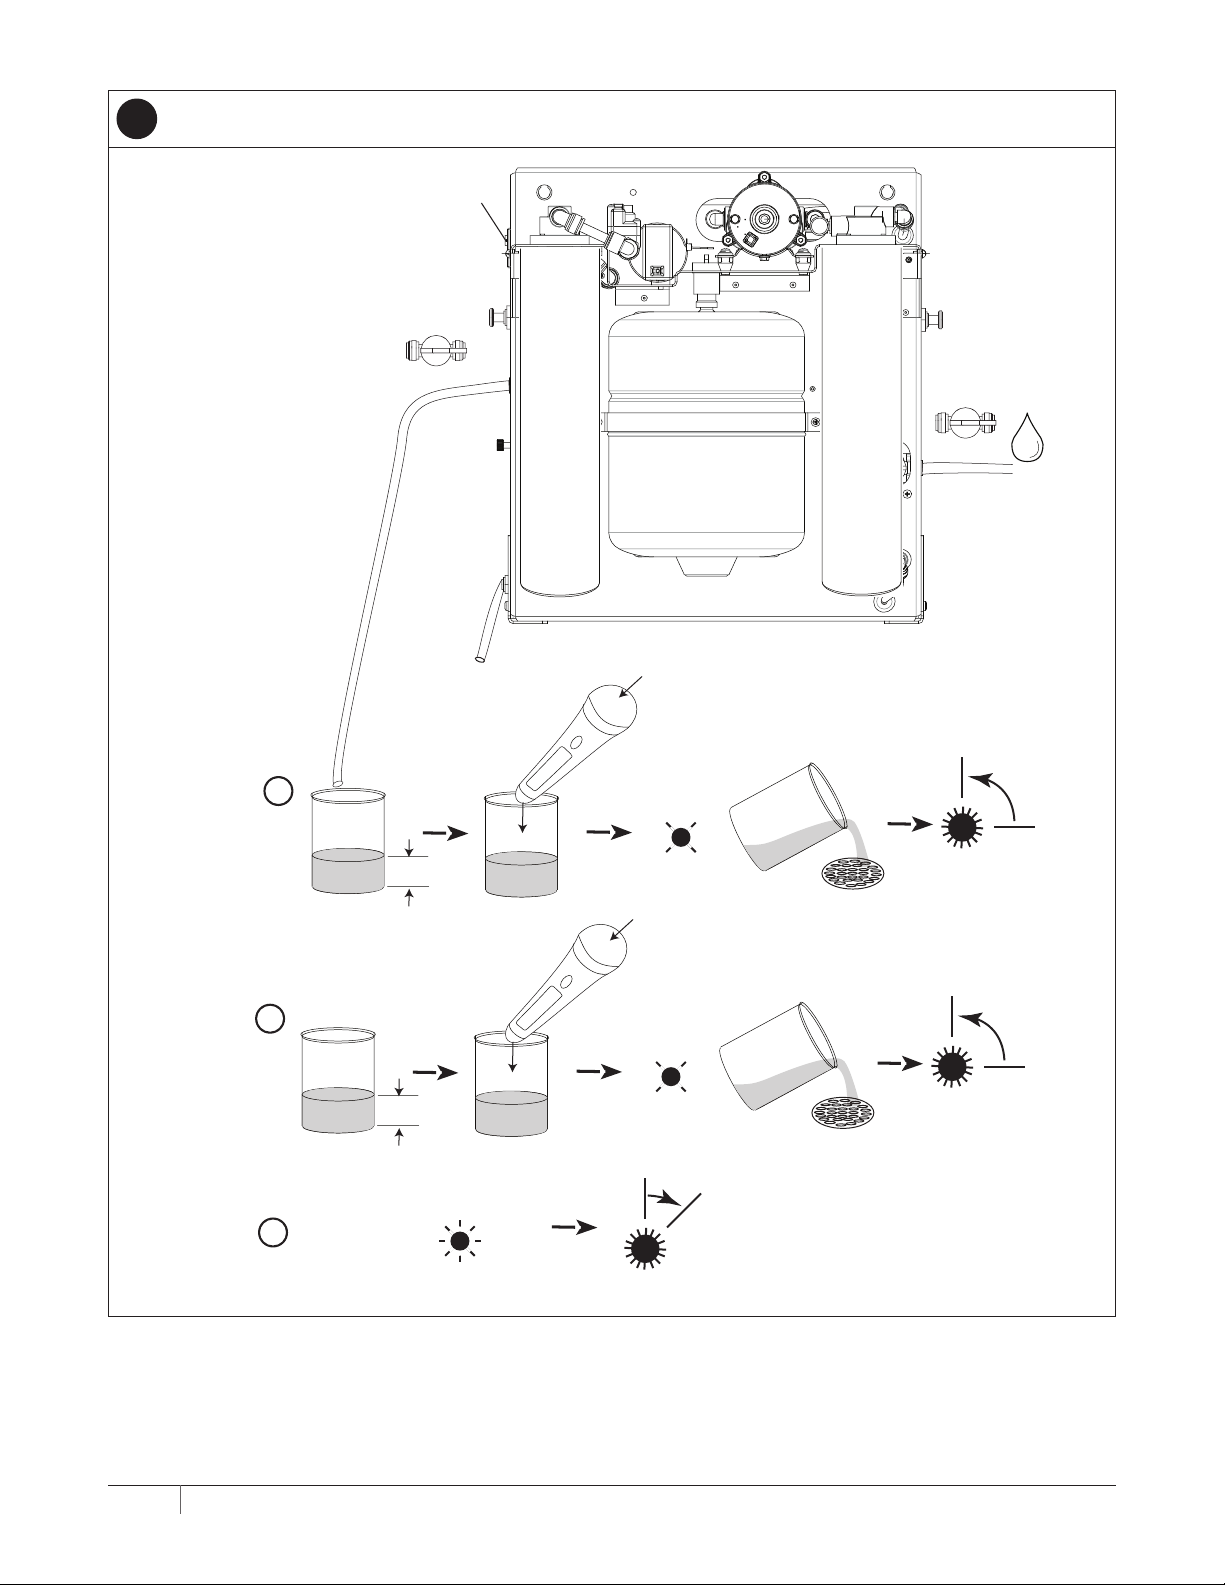
During extended periods of non-use, turn OFF the water
supply to the unit and remove the cartridges. Place the
cartridges in a sealed plastic bag. Store them in a refrigerator
for future use. When restarting the unit, the cartridges are
reinstalled and flushed per instructions.