manuals.online logo
Brands
  1. Home
  2. •
  3. Brands
  4. •
  5. Pentair
  6. •
  7. Water Pump
  8. •
  9. Pentair AURORA 1070 Series Operating instructions

Pentair AURORA 1070 Series Operating instructions

NOTE! To the installer: Please make sure you provide this manual to the owner of the equipment or to the responsible
party who maintains the system.
1070 SERIES
INLINE CIRCULATING PUMPS
INSTRUCTION, INSTALLATION, MAINTENANCE AND REPAIR MANUAL
Part # A-03-334 | © 2015 Pentair Ltd. | 07/06/15
1070 SERIES
2
Always disconnect power supply from motor before
servicing.
INSTALLATION:
For convenience, Aurora Circulators generally are installed
in vertical pipelines, but may be changed easily on the job for
horizontal pipelines or for opposite flow directions. To make
the change, remove the body capscrews, taking care body
gasket is kept in position, and rotate body to desired direction at
90˚ or 180˚ from the original position.
With arrow on body pointing in direction of flow, insert
body capscrews and tighten evenly. [On Models 325-357 and
1A–2A, a gap between bearing bracket and pump body (volute)
is normal. Do no overtighten body capscrews!] Turn pump
shaft manually at coupler to make sure shaft turns freely and
impeller does not rub in body. Always install with motor shaft
in a horizontal position with pump oil cups or oil well cover
on top.
Models 325-346 are shipped for down-discharge. All other
models are shipped for up-discharge as pumps of this size
usually are installed to pump upward on hydronic systems, so
the point of zero pressure change – namely, the compression
tank connection – can be made easily to the system on the
suction side of the circulator.
The pump should be installed in a position to permit proper
lubrication and servicing. Motor and bearing bracket are to be
kept free of insulation. Pump and motor unit are designed to
be supported by the inline piping only. Do not support in any
other manner. A height of approximately 4 feet above floor is
recommended. When placing pump between flanges, tighten
flange bolts evenly and do not tighten excessively.
Gate valves should be installed on discharge and suction side of
pump to facilitate service. On larger pump sizes, a check valve
should be located on discharge side of pump between pump
body and gate valve to prevent damage due to water hammer.
SYSTEM CLEANLINESS:
Before starting the pump, the system must be thoroughly
cleaned, flushed and drained, then replenished with clean
liquid. Welding slag and other foreign materials, “stopleak” and
cleaning compounds, excessive or improper water treatment –
all are detrimental to the pump internals. Guarantee will be void
if any of these conditions is allowed to exist.
STARTING UP:
The pump must be fully primed on start-up. Fill system piping
and pump body with liquid and vent complete system, turning
pump by hand to dislodge air from body. Make sure fittings and
drain valves are airtight, then add any additional fill required.
Check motor electrics against available supply, then start pump
making sure rotation is correct. When viewed from motor end,
rotation is counterclockwise on Models 325-346. On all other
models, rotation is clockwise. If pressure does not develop, stop
pump, recheck, vent and fill. Never attempt to fill system when
pump is running.
LUBRICATION:
Stop motor before lubricating. Do not over-oil or spill on
resilient motor rings. Do not force oil into cups, and stop
if cup fills before addition of specified amount.
PUMP LUBRICATION:
Immediately after pump is installed and before running, slowly
add the oil (SAE 30 non-detergent regular, supplied with pump)
to pump oil cup, located on top of bearing bracket:
Models 325–357 and 1A–2A 1/4 oz.
Models 369, 363–368 and 1-1/2B–3B 2 oz.
At the start of each following heating season, lubricate
with SAE 30 oil. For Models 325–357 and 1A–2A, add
approximately 1/4 oz. (Lubricate every 6 months for high
temperature or constant operation.) On Models 369, 363–368
and 1-1/2B–3B, be sure oil is visible at the top and center of
window on side of bracket and maintain this level at all times.
MOTOR LUBRICATION:
Stop motor before lubricating. Do not over-oil or spill on
resilient motor rings.
This motor has been lubricated properly at the factory. At
the start of each following heating season, however, on motors
with oil cups, add 15 drops SAE 30 non-detergent oil to each
motor cup.
If motor is fitted with grease fittings, follow the motor
manufacturer’s recommended procedure. Motors without oil
cups or grease fittings are custom-greased for several years
operation and require little or no attention.
CAUTION
CAUTION
CAUTION
CALIFORNIA PROPOSITION 65 WARNING:
This product and related accessories
contain chemicals known to the State of California to cause
cancer, birth defects or other reproductive harm.
1070 SERIES
3
SEAL REPLACEMENT:
Remove pump bracket from body. Remove the impeller,
damaged seal assembly, ceramic insert and rubber cup. Clean
the recess in bearing bracket coverplate and install a new
retainer cup and ceramic. Check the condition of the shaft
sleeve. If scored, replace the shaft assembly. Otherwise, clean
shaft extension and polish sleeve with fine crocus cloth, using a
rotating motion, if required.
Press against coupler end of shaft to take up play while pressing
new seal firmly against the stationary face. A slight amount of
clean vaseline may be put on shaft sleeve to assist installation.
Press down firmly and evenly, using 2 screwdrivers and
pushing against the 4 ears of driving band (the metal ring
around rubber bellows), or around top outer edge of driving
band on Models 325–357 and 1A–2A.
Do not use spring washer on Models 325, 332 & 335 current
style circulators, where recess to locate spring is provided on
impeller hub.
Continue pressing against coupler end of shaft, remount
impeller and reassemble the seal bearing assembly into body. If
necessary, install a new body gasket and clean gasket surface of
both volute and bracket.
Before operating pump, carefully check:
1. Is the pump primed?
2. Is rotation correct?
3. Is pump properly lubricated?
4. Does the power supply agree with data on
motor nameplate?
5. Is overload protection provided?
6. Is the system clean?
For domestic water systems use bronze body pumps.
CAUTION
WARRANTY
Seller warrants equipment (and its component parts) of its own manufacture against defects in materials and workmanship under normal use
and service for one (1) year from the date of installation or start-up, or for eighteen (18) months after the date of shipment, whichever occurs
first. Seller does not warrant accessories or components that are not manufactured by Seller; however, to the extent possible, Seller agrees to
assign to Buyer its rights under the original manufacturer's warranty, without recourse to Seller. Buyer must give Seller notice in writing of
any alleged defect covered by this warranty (together with all identifying details, including the serial number, the type of equipment, and the
date of purchase) within thirty (30) days of the discovery of such defect during the warranty period. No claim made more than 30 days after
the expiration of the warranty period shall be valid. Guarantees of performance and warranties are based on the use of original equipment
manufactured (OEM) replacement parts. Seller assumes no responsibility or liability if alterations, non-authorized design modifications
and/or non-OEM replacement parts are incorporated If requested by Seller, any equipment (or its component parts) must be promptly
returned to Seller prior to any attempted repair, or sent to an authorized service station designated by Seller, and Buyer shall prepay all
shipping expenses. Seller shall not be liable for any loss or damage to goods in transit, nor will any warranty claim be valid unless the
returned goods are received intact and undamaged as a result of shipment. Repaired or replaced material returned to customer will be
shipped F.O.B., Seller's factory. Seller will not give Buyer credit for parts or equipment returned to Seller, and will not accept delivery of
any such parts or equipment, unless Buyer has obtained Seller's approval in writing. The warranty extends to repaired or replaced parts of
Seller's manufacture for ninety (90) days or for the remainder of the original warranty period applicable to the equipment or parts being
repaired or replaced, whichever is greater. This warranty applies to the repaired or replaced part and is not extended to the product or any
other component of the product being repaired. Repair parts of its own manufacture sold after the original warranty period are warranted for
a period of one (1) year from shipment against defects in materials and workmanship under normal use and service. This warranty applies to
the replacement part only and is not extended to the product or any other component of the product being repaired. Seller may substitute
new equipment or improve part(s) of any equipment judged defective without further liability. All repairs or services performed by Seller,
which are not covered by this warranty, will be charged in accordance with Seller's standard prices then in effect.
THIS WARRANTY IS THE SOLE WARRANTY OF SELLER AND SELLER HEREBY EXPRESSLY DISCLAIMS AND BUYER
WAIVES ALL OTHER WARRANTIES EXPRESSED, IMPLIED IN LAW OR IMPLIED IN FACT, INCLUDING ANY WARRANTIES
OF MERCHANTABILITY OR FITNESS FOR A PARTICULAR PURPOSE. Seller's sole obligation under this warranty shall be, at its
option, to repair or replace any equipment (or its component parts) which has a defect covered by this warranty, or to refund the purchase
price of such equipment or part. Under the terms of this warranty, Seller shall not be liable for (a) consequential, collateral, special or
liquidated losses or damages; (b) equipment conditions caused by normal wear and tear, abnormal conditions of use, accident, neglect, or
misuse of said equipment; (c) the expense of, and loss or damage caused by, repairs or alterations made by anyone other than the Seller; (d)
damage caused by abrasive materials, chemicals, scale deposits, corrosion, lightning, improper voltage, mishandling, or other similar
conditions; (e) any loss, damage, or expense relating to or resulting from installation, removal or reinstallation of equipment; (f) any labor
costs or charges incurred in repairing or replacing defective equipment or parts, including the cost of reinstalling parts that are repaired or
replaced by Seller; (g) any expense of shipment of equipment or repaired or replacement parts; or (h) any other loss, damage or expense of
any nature.
The above warranty shall not apply to any equipment which may be separately covered by any alternate or special warranties.
PERFORMANCE: In the absence of Certified Pump Performance Tests, equipment performance is not warranted or guaranteed.
Performance curves and other information submitted to Buyer are approximate and no warranty or guarantee shall be deemed to arise as a
result of such submittal. All testing shall be done in accordance with Seller's standard policy under Hydraulic Institute procedures.
LIABILITY LIMITATIONS: Under no circumstances shall the Seller have any liability under the Order or otherwise for liquidated
damages or for collateral, consequential or special damages or for loss of profits, or for actual losses or for loss of production or progress of
construction, regardless of the cause of such damages or losses. In any event, Seller's aggregate total liability under the Order or otherwise
shall not exceed the contract price.
ACTS OF GOD: Seller shall in no event be liable for delays in delivery of the equipment or other failures to perform caused by fires, acts of
God, strikes, labor difficulties, acts of governmental or military authorities, delays in transportation or procuring materials, or causes of any
kind beyond Seller's control.
COMPLIANCE WITH LAW: Seller agrees to comply with all United States laws and regulations applicable to the manufacturing of the
subject equipment. Such compliance shall include: The Fair Labor Standards Acts of 1938, as amended; Equal Employment Opportunity
clauses of Executive Order 11246, as amended; Occupational Safety and Health Act of 1970 and the standards promulgated thereunder, if
applicable. Since compliance with the various Federal, State, and Local laws and regulations concerning occupational health and safety,
pollution or local codes are affected by the use, installation and operation of the equipment and other matters over which Seller has no
control, Seller assumes no responsibility for compliance with those laws and regulations, whether by way of indemnity, warranty, or
otherwise. It is incumbent upon the Buyer to specify equipment which complies with local codes and ordinances.
800 Airport Road
North Aurora, Illinois 60542
630-859-7000
www.aurorapump.com


Other Pentair Water Pump manuals

Pentair STA-RITE Signature 2000 User manual

Pentair

Pentair STA-RITE Signature 2000 User manual

Pentair Fleck 3150 Downflow User manual

Pentair

Pentair Fleck 3150 Downflow User manual

Pentair Hydromatic C4SP Manual

Pentair

Pentair Hydromatic C4SP Manual

Pentair Fairbanks Nijhuis 1500 Series User manual

Pentair

Pentair Fairbanks Nijhuis 1500 Series User manual

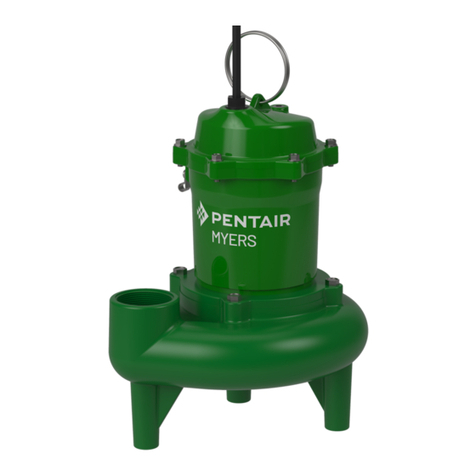
Pentair Myers MPN Series User manual

Pentair

Pentair Myers MPN Series User manual

Pentair SuperFlo User manual

Pentair

Pentair SuperFlo User manual

Pentair Edwards 400 User manual

Pentair

Pentair Edwards 400 User manual

Pentair Myers WG20 Manual

Pentair

Pentair Myers WG20 Manual

Pentair HYPRO 9302C Series User manual

Pentair

Pentair HYPRO 9302C Series User manual

Pentair FAIRBANKS HIJHUIS 5800 Instructions for use

Pentair

Pentair FAIRBANKS HIJHUIS 5800 Instructions for use

Pentair SHURFLO AQUA KING User manual

Pentair

Pentair SHURFLO AQUA KING User manual

Pentair Fairbanks Nijhuis 7100 19A User manual

Pentair

Pentair Fairbanks Nijhuis 7100 19A User manual

Pentair Flotec FP14KVX User manual

Pentair

Pentair Flotec FP14KVX User manual

Pentair HYDROMATIC HPGF Manual

Pentair

Pentair HYDROMATIC HPGF Manual

Pentair MAX Series User manual

Pentair

Pentair MAX Series User manual

Pentair Berkeley B2X User manual

Pentair

Pentair Berkeley B2X User manual

Pentair MYERS MSP50 User manual

Pentair

Pentair MYERS MSP50 User manual

Pentair SHURFLO 5059 series Use and care manual

Pentair

Pentair SHURFLO 5059 series Use and care manual

Pentair Fairbanks Nijhuis 1590F Operating instructions

Pentair

Pentair Fairbanks Nijhuis 1590F Operating instructions

Pentair PPC5 Series User manual

Pentair

Pentair PPC5 Series User manual

Pentair Aurora Edwards 150 User manual

Pentair

Pentair Aurora Edwards 150 User manual

Pentair BERKELEY HN Series User manual

Pentair

Pentair BERKELEY HN Series User manual

Pentair Hypro 9203 Series User guide

Pentair

Pentair Hypro 9203 Series User guide

Pentair Myers WHR Series Manual

Pentair

Pentair Myers WHR Series Manual

Popular Water Pump manuals by other brands

All Pond Solutions 8000PP instruction manual

All Pond Solutions

All Pond Solutions 8000PP instruction manual

A-C Fire Pump Series 1580 instruction manual

A-C Fire Pump

A-C Fire Pump Series 1580 instruction manual

Little Giant 8-CIM Safety guide

Little Giant

Little Giant 8-CIM Safety guide

red lion RL Series owner's manual

red lion

red lion RL Series owner's manual

Little Giant WGP-65-PW user manual

Little Giant

Little Giant WGP-65-PW user manual

Little Giant 6 Series owner's manual

Little Giant

Little Giant 6 Series owner's manual

Little Giant WRS-5 instruction sheet

Little Giant

Little Giant WRS-5 instruction sheet

Little Giant 6EN-CIA-SFS manual

Little Giant

Little Giant 6EN-CIA-SFS manual

Ecoflo ECD Series owner's manual

Ecoflo

Ecoflo ECD Series owner's manual

WaterAce Pedestal Series owner's manual

WaterAce

WaterAce Pedestal Series owner's manual

Crystal Clear KoiAir KA Series installation instructions

Crystal Clear

Crystal Clear KoiAir KA Series installation instructions

PROCRAFT PN21 manual

PROCRAFT

PROCRAFT PN21 manual

Becker VT 3.6 Translation of the operating instructions

Becker

Becker VT 3.6 Translation of the operating instructions

Ecoplus ECOair 1 instructions

Ecoplus

Ecoplus ECOair 1 instructions

Little Giant 6EC-CIA-SFS 6 installation guide

Little Giant

Little Giant 6EC-CIA-SFS 6 installation guide

Rovin MWA632 Operation instructions

Rovin

Rovin MWA632 Operation instructions

Little Giant 9EH manual

Little Giant

Little Giant 9EH manual

FLORABEST FGPS 1100 C3 Translation of the original instructions

FLORABEST

FLORABEST FGPS 1100 C3 Translation of the original instructions

manuals.online logo
manuals.online logoBrands
  • About & Mission
  • Contact us
  • Privacy Policy
  • Terms and Conditions

Copyright 2025 Manuals.Online. All Rights Reserved.