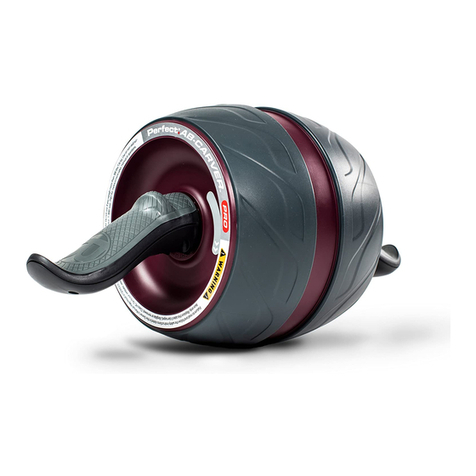
Perfect Fitness MULTI-GYM pro User manual

1
©2017 Implus LLC • All rights reserved.
Perfect Fitness®, Perfect®, and Multi-Gym® are registered trademarks of Implus LLC.
U.S. and International Patents Pending.
www.PerfectOnline.com
No part of this booklet may be reproduced or utilized in any form or by any means
electronic, mechanical or otherwise without the expressed written consent of the
copyright holder.
User Guide

2 3
Introduction
Comments or Questions?
IMPORTANT:
This Owner’s Manual is the authoritative source of information about your Perfect Multi-
Gym. Please read it carefully and follow all the instructions.
If you have any comments or questions about your Perfect product, please email, call or
write to our Customer Service Specialists. Our goal is your complete satisfaction.
Perfect® Customer Service Department, 2001 T.W. Alexander Drive, Box 13925, Durham,
North Carolina 27709-3925
Call Toll Free: 1 877 974 7733, Monday through Friday, 8:00am to 5:00pm, EST
Email: [email protected]
www.PerfectOnline.com
Important Safety Information
1) Consult your physician before starting
this or any other exercise program. Fitness
training can result in serious injury or death.
Risk of injury can be lessened when safe
technique and common sense are practiced.
Before beginning your first workout,
become familiar with the Perfect-Multi-
Gym® and review all exercise guidelines
prior to using the equipment. If you have
any questions consult your physician. Your
physician should assist you in determining
the target heart rate zone appropriate for
your age and physical condition. Certain
exercise programs or types of equipment
may not be appropriate for all people. This
is especially important for people over
the age of 35, pregnant women, or those
with preexisting health problems or wrist,
elbow, shoulder or other joint and muscle
impairments. If you are taking medication
which may affect your heart rate, a
physician’s advice is absolutely essential
before use of this equipment.
2) Warm up before any exercise program
by doing 5 to 10 minutes of gentle aerobic
exercise, such as walking, followed by
stretching.
3) Start out slowly and progress sensibly.
Even if you are an experienced exerciser,
start with the beginner workout and become
familiar with all of the exercises before
moving on to more advanced workouts or
exercises.
4) Do not overexert yourself with this or
any other exercise program. Listen to
your body and respond to any reactions
you may be having. You must learn to
distinguish “good” pain, like fatigue,
from “bad” pain, which hurts. If you
experience any pain or tightness
in your chest, an irregular heartbeat,
dizziness, nausea, or shortness of
breath, stop exercising at once and
consult your physician immediately.
5) Before EACH use, visually inspect the
equipment. Never use this equipment if
it is not working properly or if there are
damaged or worn parts. Call our
Customer Service Department to order
replacement parts.
6) Use this equipment ONLY for the
intended use as described by the
manufacturer. DO NOT modify the
equipment or use attachments not
recommended by the manufacturer.
7) Have plenty of clearance space on all
sides of your equipment. It is important
to keep children, pets, furniture and
other objects out of the way when using
your equipment to avoid unnecessary
contact.
8) Wear appropriate clothing when
exercising. Workout clothing should
be comfortable and lightweight, and
should allow freedom of movement.
Wear comfortable athletic shoes
made of good support with non-slip
soles, such as running or aerobic shoes.
9) THIS EQUIPMENT IS NOT FOR USE BY
CHILDREN. To prevent injuries, keep
this and all fitness equipment out of
the reach of children. Follow these
simple rules:
– Keep children out of rooms where you
have your exercise equipment.
– Store exercise equipment in a
room that can be locked.
– Know exactly where your children
are when you work out.
– If you have small children at
home, don’t wear headphones
while you work out.
– Talk to your kids about the
dangers of exercise equipment.
FAILURE TO READ AND FOLLOW THE SAFETY INSTRUCTIONS STATED
IN THIS USER GUIDE AND ON THE WORKOUT CHART MAY RESULT IN
SERIOUS INJURY, DEATH OR PROPERTY DAMAGE.
Getting in shape takes a positive attitude and determination. The right equipment
makes achieving your fitness goals easier, so congratulations on your purchase of
the Perfect Multi-Gym® Pro. The Perfect Multi-Gym® Pro is key to an effective, time-
efficient exercise regimen. No matter your fitness level, you can progress at a rate
that’s right for you using Perfect Fitness products.
Sticking with a program of regular exercise takes persistence. We encourage you go
to www.PerfectOnline.com to find out about new products, get workout tips and view
workout videos.
Like us on Facebook at www.facebook.com/perfectfitness - it’s a great place to share
your progress. Follow us on Instagram Perfect_Fitness_ Many of our top users have
created their own exercise routines using our products and use hashtag
#PerfectFitness

4 5
Equipment Warning Label
Specifications & Parts
10) Breathe naturally, never holding your
breath during an exercise. Avoid over-
training. You should be able to carry on a
conversation while exercising.
11) Cool down after an exercise session
with 5 to10 minutes of gentle aerobic
exercise, such as walking, followed by
stretching.
12) Handicapped, disabled, or injured
people must have medical approval
before using this equipment and should
be under close supervision when using
any exercise equipment.
13) ONLY one pe trson at a time should
use this equipment.
14) DO NOT store in direct sunlight or
near direct heat sources.
15) DO NOT put hands, feet or any
foreign objects on or near this
equipment when in use by others. Use
caution to not pinch fingers or hands in
moving parts when setting up or using
the equipment.
16) The Perfect Multi-Gym® is designed
and constructed for PERSONAL OR
HOUSEHOLD USE ONLY. The Perfect
Multi-Gym® should NOT be used in
commercial settings including, without
limitation, health clubs and fitness
centers. Further, use of the Perfect
Multi-Gym® in a commercial setting or
resale by an unauthorized dealer voids
the warranty. See Limited Warranty Card
for details.
17) When attaching the Multi-Gym® to a
door frame, make sure the Safety Clip
is securely attached to both the Molding
and Multi-Gym®. Remove the Multi-Gym®
from the door frame when not in use.
18) Do not install this product unless
you are able to assemble and install it
properly. After installing this product,
check to make sure it has been properly
installed and can support your full
weight before beginning exercise. This
product is designed for installation
on up-to-building-code, wood-frame
doorways, 27 to 33 inches (69 – 84 cm)
wide and do not use this product if you
weigh more than 300 lbs/136 kg. If the
product is moved to a different door,
you must recheck the fit and adjust
the product to fit the new doorway if
necessary. Any other use or misuse
may result in property damage and/
or personal injury. If your anticipated
installation location or use does not
meet these criteria, you may return the
product for up to 365 days from date of
purchase.
19) When performing pullups, never pull
up with bar behind head, as this places
undue stress on shoulders and neck.
Also, when performing pullups, avoid
crossing feet during exercise, as this
places hips in an uneven position which
impacts body alignment.
IMPORTANT: See below for placement of this Warning Label on your equipment.
Failure to read and follow the safety instructions in the Owner’s Manual
and this Warning Label may result in SERIOUS INJURY OR DEATH. KEEP
CHILDREN AWAY. Inspect the equipment before each use. Never use the
equipment if it is damaged and/or not functioning properly. When attaching
the Multi-Gym® Pro to a door frame, make sure the Safety Clip is securely
attached to both the molding and Multi-Gym Pro. Remove the Multi-Gym
Pro from the door frame when not in use. Do not use if you weigh over 300
lbs/136 kg. Replace this label if damaged, illegible or removed. Class HC. Go
to our website: www.perfectonline.com or call Customer Service: 1 877 974
7733 for replacement label, user guide or questions.
Length: 38-1/2” Width: 19-1/2” Height: 7-3/4”
Product Weight: 6.4 lbs. Maximum User Weight: 300 lbs./136 kg.
Safety Clip
Handlebar
Black Pad
Crossbar
(Left and Right Bar Assemblies)
Handlebar
Black Pad

6 7
Assembly Instructions
Read and follow all instructions provided before assembling or installing this product.
Failure to properly assemble or install this product could result in damage to property and/
or personal injury. Do not install this product unless you are able to assemble and install
it properly. After installing this product, check to make sure it has been properly installed
and can support your full weight before beginning exercise. This product is designed for
installation on up-to-building-code, wood-frame doorways, 27 to 33 inches (69 - 84 cm) wide
and for use by individuals weighing no more than 300 lbs/136 kg. Any other use or misuse
may result in property damage and/or personal injury. If your anticipated installation location
or use does not meet these criteria, you may return the product for up to 365 days from date
of purchase.
LAY OUT THE PARTS of your Perfect Multi-Gym® as shown below and familiarize yourself
with the parts for easier assembly.
Left Bar
Assembly
Right Bar
Assembly
Handlebars
Safety Clip Allen Wrench
Short Allen
Bolt (2)
Long Allen
Bolt (2)
Plastic O-Ring (2) Allen Nut (4)
Connecting Bar
STEP 1
a) To begin assembly, place Left and Right bars on table with pads facing down.
b) Attach the Left and Right Bar Assembly together by first sliding the Right Bar
Assembly into the Left Bar Assembly.
Note: the LEFT Bar Assembly is keyed to the RIGHT Crossbar Assembly with an
“L-shaped” channel.
c) Hand - fasten the two bar assemblies together by turning the LEFT Bar Assembly
counter clock-wise.
STEP 2
a) Locate the holes on the LEFT and RIGHT Curved Tube Assembly. Insert the LONG Allen
Bolt into the hole of the LEFT and RIGHT Curved Tube Assemblies.
b) Place the Plastic O-Ring onto the end of the Allen Bolt prior to assembly with the
Crossbar. Insert the end of the LONG Allen Bolt into the top hole of the Crossbar, and insert
an Allen Nut into the bottom hole of the Crossbar. Start by hand-tightening the nut into the
bolt.
c) Repeat step “ B” for both of the Curved Tube Assembly
NOTE:
Doorway Installation is
necessary before tightening
all Allen Nut assemblies.
a
b
.
Right Bar
Assembly
Left Bar
Assembly
“L-shaped” channel
b
a
Allen Nut
Left and
Right Bar
Assembly
Plastic O-Ring
Hand
Grip
Handlebars
Hand
Grip Long Allen
Bolt
Long Allen
Bolt

8 9
Multi-Gym® Adjustments
STEP 3
a) While the assembly is in front of you as shown, Attach the Connector Bar to the LEFT and
RIGHT Curved Tube Assemblies. Make sure to line up the holes of the connector bar with the
holes on the Curved Tube Assemblies.
b) Insert the SHORT Allen Bolt through the hole in front of the Connector Bar, and in the hole
in the Curved Tube Assembly. Insert an Allen Nut into the hole on the back of the Connector
Bar and hand tighten.
c) Repeat step “ B” for both sides of the Connector Bar and Curved Tube Assemblites.
d) Once all of the components are assembled, use the two Allen Wrenches provided to tighten
all of the nuts and bolts.
NOTE: Doorway Installation
is necessary before tightening
all Acorn Nut assemblies.
1) Identify Front and Back of unit. 2) Inside and outside of Doorway.
Installation Of Your Multi-Gym®
Before installing in the doorway you will be using, acquaint yourself with the photos and
definitions below. Please remember, this product is designed for installation on up-to
building-code, wood-frame doorways, 27 to 33 inches (69 - 84 cm) wide and for use by
individuals weighing not more than 300 lbs/136 kg.
a
b
Handlebars
Connecting Bar
Short Allen Bolt
Allen Nut
Short Allen Bolt
Allen Nut
Outside of Doorway Inside of Doorway
Front side of unit Back side of unit
Door frames and trim (molding) vary in size. The Perfect Multi-Gym® has 2 adjustments
to accommodate different molding heights (Figures A and B) and 2 adjustments to
accommodate different doorway thicknesses (Figures C and D).
STEP 1 - Fitting the Multi-Gym® to your Doorway
After assembling the unit, try it in the door. You may need to move the bolt positions to get a
proper fit. The unit is correctly fitted in the doorway when it sits snugly at the top of the door
frame and the Hand Grips are level with the floor.
Warning: Remove the Multi-Gym® from the door frame
before making any Bolt adjustments. Failure to follow this
instruction may result in serious injury or death.
a) From the outside of the doorway (the side that does not
have the hinges), angle the Connecting Bar end through the
doorway and over the molding on the opposite side (the inside
of the doorway).
b) Adjust the Left and Right Bar Assemblies to match the
thickness of the doorway. When properly adjusted, the Black
Pads on the Left and Right Bar Assemblies should be flush
with the wall and molding. See Figures C and D shown above.
c) Adjust the Connecting Bar to match the width of the door
molding. See Figures A and B shown above. If the fit is too
loose, it will appear like the Incorrect Position shown in Figure
E. You will need to move the Left and Right Bar Assembly away
from the Hand Grip.
d) After all adjustments have been made, see Figure F for
correct positioning. Tighten the 2 Long and 2 Short Allen Bolts
with tool provided. Refer to page 7, Step 2b and page 8, Step
3b.
Doorway Installation
DC
AB
2 Adjustment
Holes
Connecting
Bar Short
Molding
2 Adjustment
Holes
Connecting
Bar Tall
Molding
2 Adjustment
Holes
2 Adjustment
Holes
Right & Left
Bar Assembly
Narrow Doorway
Right & Left
Bar Assembly
Narrow Doorway
E
F
of Doorway
Inside of Doorway
Outside
Front
of Unit
Back
of Unit
of Doorway
Inside of Doorway
Outside
Front
of Unit
Back
of Unit

10 11
STEP 2 - Installing the Safety Clip
After the Multi-Gym® has been
adjusted to fit the doorway,
remove it from the doorway
and install the Safety Clip.
a) On the inside of the doorway,
place the Safety Clip above
the molding in the center at
the top of the door.
b) Slide the pointed end between
the wall and the molding. Push
downward until Safety Clip is
flush against the molding.
Reinstall the Multi-Gym®
in the doorway.
Warning: When attaching the Multi-Gym® to a door frame, make sure the Safety
Clip is securely attached to both the molding and Multi-Gym®. Failure to follow
this instruction may result in serious injury or death.
Completed Installation
You can reinstall the Multi-Gym® in the doorway once the Safety Clip is installed.
When properly installed, the Multi-Gym® will fit in the doorway as shown below.
Warning: Remove the Multi-Gym® from the door frame when not in use. If the
product is moved to a different door, you must recheck the fit and adjust the
product to fit the new doorway if necessary. Failure to follow these instructions
may result in serious injury or death.
BlackBlack
FRONT
Wall
Molding
Left and Right
Bar Assembly
Handgrip
Connecting
Bar
Pads
Parts List & Exploded View
Door frames and trim (molding) vary in size. The Perfect Multi-Gym® has 2 adjustments to
accommodate different molding heights (Figures A and B under Multi-Gym® adjustments)
and 2 adjustments to accommodate different doorway thicknesses (Figures C and D under
Multi-Gym® adjustments).
2
2
4
2
8
9
10
M6x28mm Allen Bolt
M6x42mm Allen Bolt
M6 Allen Nut
M6x16mm Allen Bolt
Connecting Bar 1
Plastic O-Ring 2
12
Hand Grip 2
18
Safety Clip 1
20
Allen Wrench 2
21

12
Warning
Care & Storage
Workouts
Before each use, visually inspect the device. Never use the device if it is not working
properly.
Your Perfect® product has been carefully designed to require minimum maintenance.
To ensure this, we recommend that you do the following:
Keep your unit clean.
Wipe sweat, dust or other residue off the bar with a soft, clean cloth after each use.
To store your unit after use.
Store your device out of the reach of children and high traffic areas.
Go to www.perfectonline.com/workouts to download free workout guides. The downloadable
content concentrates on four key aspects of fitness: Core, Push, Pull and Strength. When
combined, the Perfect® products and programs create the perfect full body workout solution.
Table of contents
Other Perfect Fitness Fitness Equipment manuals
Popular Fitness Equipment manuals by other brands

BRONZE GYM
BRONZE GYM A Series user manual

Hang ups
Hang ups SR 250 Assembly instructions

Nautilus
Nautilus Inspiration 4-Station owner's manual

BH FITNESS
BH FITNESS L360MB Instructions for assembly and use

iReliev
iReliev iRenew ET-7070 instruction manual

Schwinn
Schwinn Active series 20 series Assembly guide