PERFECTPASS DigitalPro 6.5NG User manual

Official Speed Control of USA WaterSki & U.S. National’s
DigitalPro
By PerfectPass
Version 6.5NG
Mechanical
April 2007
Information or assistance:
PerfectPass Control Systems Inc.
14 Trider Crescent
Burnside Industrial Park
Dartmouth, Nova Scotia
CANADA B3B 1R6
By phone (902) 468-2150
By fax (902) 468-8837
By email techsupport@perfectpass.com

TABLE OF CONTENTS Page Number
Section 1 - Getting Started 1
Initial Setup
Getting Familiar with PerfectPass
Changing Modes
Section 2 - Slalom Mode 3
Using Slalom Mode
RPM Based Slalom
Speed Based Slalom
Tournament Mode 5
Setting Baselines 6
Additional Information & Settings 7
Section 3 - Jump Mode 9
Using Jump Mode
Jump Driving
Additional Information & Settings
Tournament Mode 14
Section 4 - Trick Mode 15
Using Trick Mode
Trick Settings
Section 5 - RPM Mode 17
Section 6 - Wakeboard Mode 18
Using Wakeboard Mode
Wakeboard Settings
Section 7 - Calibrating PerfectPass Speedometer (Trick /Wakeboard) 20
Section 8 - Integrated Timing 21
Using integrated Timing
Placing Smart Timers
Placing Magnets
Section 9 - Magnet Test Mode / Device Test 23
Screen Contrast
Testing Magnets
Servo Motor Tests
Section 10 - Additional Features 24
Screen Contrast
Name List
System Info
Device Test 25
Section 11 - Installation Instructions 26
Section 12 - Trouble Shooting/General Information 30
System Reset 31
APPENDIX
All Ball Timing Information
Warning: PerfectPass highly recommends you become familiar with the operation of your new boat prior to using the speed
control. (Leave in OFF position). Once you are familiar and comfortable with the operation and handling of your boat, try

the speed control in the different modes without a skier to familiarize yourself with its operation. If you feel it is not working
properly or have questions, leave in the OFF position and contact PerfectPass or your dealer immediately.

1
USER’S GUIDE
Section 1. GETTING STARTED
INITIAL SETUP - The display will guide you through this set up. Read slowly and carefully.
Your new PerfectPass system must now complete a short set up procedure to familiarize itself with your particular
boat and engine. (This may have been performed by your dealer if factory installed)
Step (1) Engine Selection. On some systems you will be asked to select the engine in your boat. It will appear as [5.7 /
MPI ^ = Yes]. This means if you have standard engine, press UP. For optional big block 6L or 8.1L, press
DOWN.
Step (2) The display will now show [read in MPH ^ = Yes]. It is asking you if you would like the display to operate in
mph. If you do; confirm by pressing the UP key. If you want kph press the DOWN key. (We have selected mph
for illustration purposes)
Step (3) [WAKEBOARDPRO ^=Y] The display will now ask if waqnt the system to be a WakeboardPro or a 3-Event
DigitalPro. Press UP Kay for WakeboardPro and press DOWN for DigitalPro.
Step (4) The display will now move into the Slalom mode, described in the next section.
GETTING FAMILIAR WITH PERFECTPASS
Turning System ON and OFF – All system functions require the PerfectPass control system to be powered up (ignition in
ON or Accessory position). The ON/OFF key turns the PerfectPass control ON or OFF. The system requires the boat to be
in neutral before turning the system ON or OFF. After pressing the ON/OFF key [IN NEUTRAL ^ =Yes] may appear to
remind the driver, and confirm the boat has been returned to neutral. When PerfectPass is OFF it will not engage. Any time
you operate your boat the system will be powered up, although it can be in the OFF mode. Every time you power up
PerfectPass it will return to the last event and speed that was used.
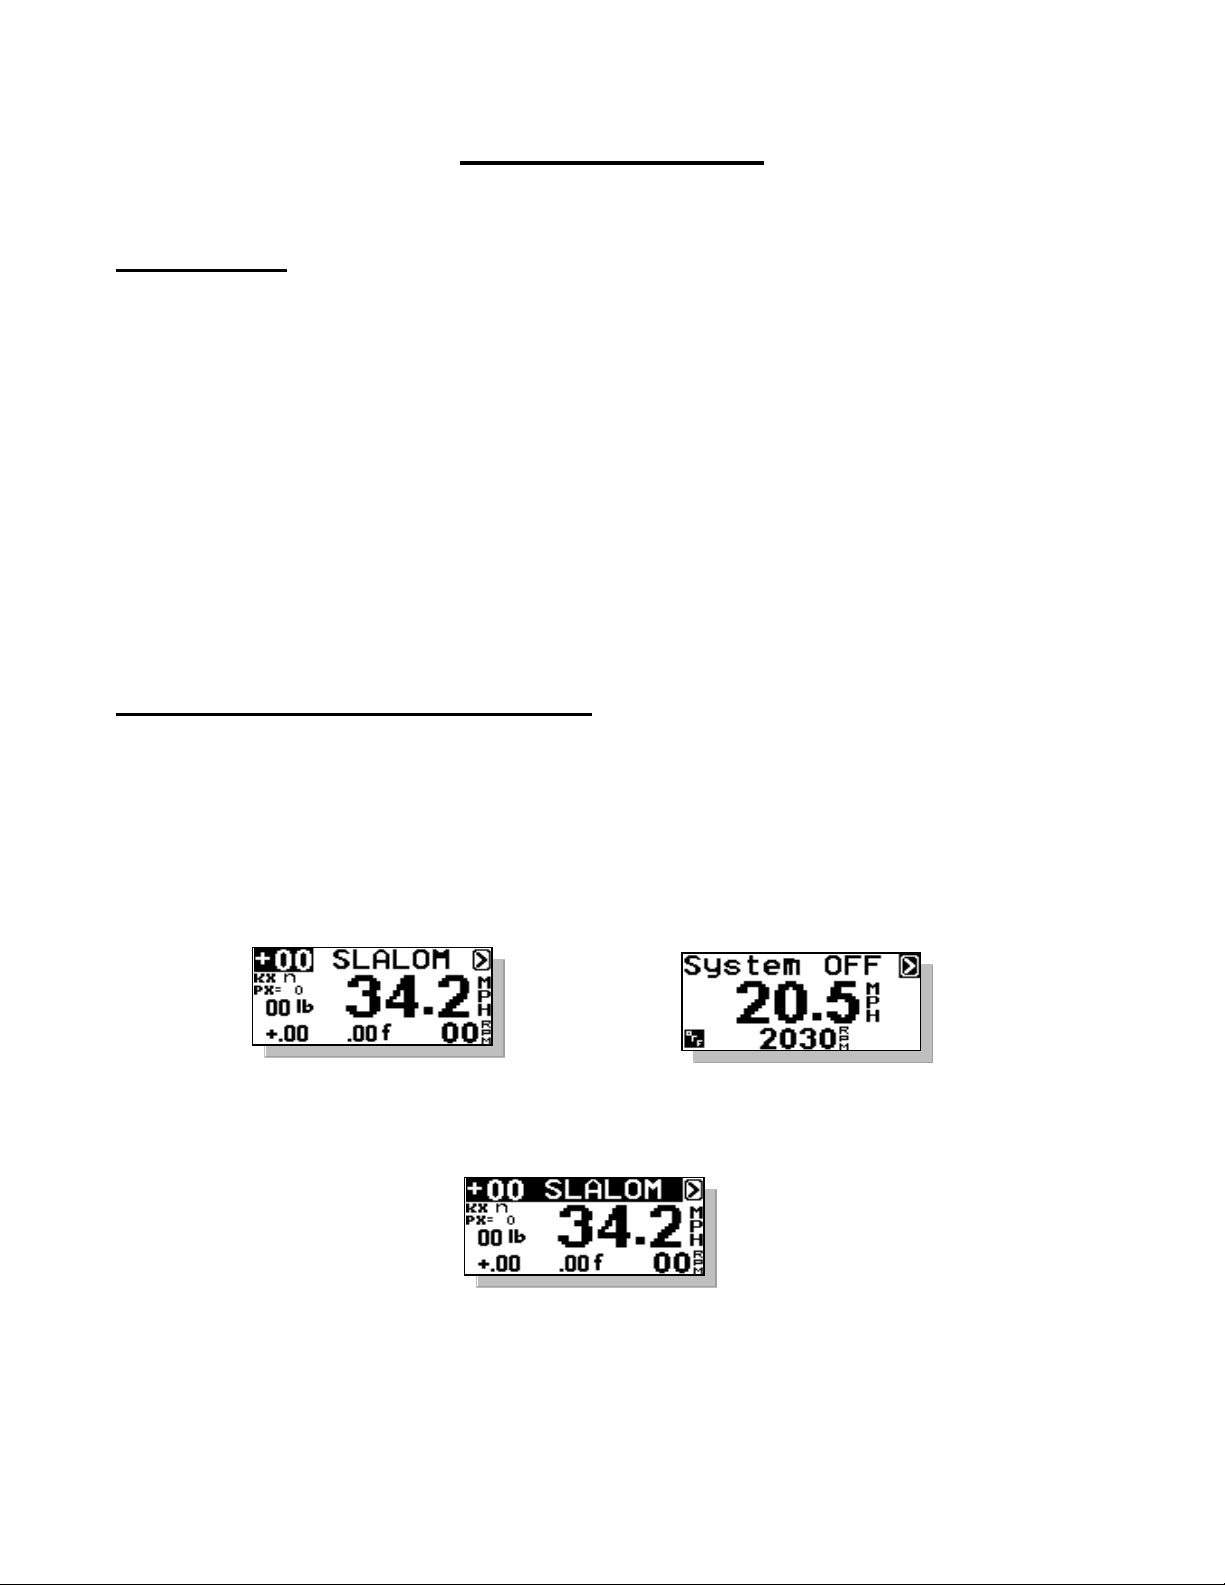
System ON System OFF
Engaging System – With PerfectPass ON, the system will automatically engage once the SETPOINT is reached.
PerfectPass requires the driver to bring the boat up to and slightly past the SETPOINT before it will engage. When the
system engages it will sound an audible beep and the top line will become highlighted. In Slalom mode the screen appears
as follows:
Disengaging System – The PerfectPass system is unable to increase throttle position past the physical position of the
throttle handle. This important feature gives the driver the power to over ride the system at any point by simply pulling ba ck
on the throttle. If the throttle handle is moved back past a point slower then where the system needs to be to control it will
disengage and boat will be under manual control.

2
Moving Around The Screen– The MENU key allows you to move around the screen to the various features. Any time yo u
scroll to the Menu Arrow Icon the system is prompting you to press either the UP or DOWN keys to select or confirm an
option. Pressing the DOWN key on the brings you into a calibration screen. The calibration screen varies depending on
the mode; the specifics of these screens will be covered within each mode description. Pressing the UP key on the brings
you into the Mode Select Screen.
MODE SELECT SCREEN
To change modes press the MENU key until the desired mode is highlighted. Press the UP key to go into the highlighted
mode. Press DOWN to go into the Mode’s background Setting Screens.
DOWN key for Mode settings UP key to Select Highlighted Mode (Trick)
SUBMENU SCREEN
To enter the SUBMENU press the MENU and UP keys together, on any of the main mode screens.
Contrast – To adjust the darkness of the lettering on the screen you can change the contrast. This value can be adjusted
from 0-5 and is saved in the memory. The smaller the number, the brighter the screen will be in bright sun.
If you turn your boat on but cannot see the screen, press MENU & UP Keys together and adjust contrast Up or Down.
Name List – You can pull or enter a name from the name list here. The full description of the Name List is in Section 10 of
the manual
System Info – General system information can be found here. The software version, engine selection, system voltage,
system hours, and water temperature (not equipped on all boats) can be found here. See Section 10. ADDITIONAL
FEATURES for more information on this feature.
Device Test – This test allow you to test for proper control of the rope switches, servo motor (Mechanical only), or throttle
feedback (DBW only). See Section 10.
Tip: Screen Contrast can be adjusted by pressing MENU and UP Keys together. Range is 0 – 5, 3 is
normal.

3

4
Section 2. SLALOM MODE
USING SLALOM MODE
The Slalom mode is designed to give a skier an optimum and consistent pull through a Slalom course while producing
perfect timing passes. This section covers the various Slalom Modes within the PerfectPass system.
The main RPM based Slalom (36 mph – 24.9 mph) screen appears as follows:
As you press the MENU key you will move around the circle following the numbers above.
1. RPM Adjust
This value directly adjusts the RPM/Speed value the system is trying to hold. If a time is fast or slow, you can
enter an RPM value for the next pass. Example: A time was a little fast and PerfectPass suggested “-20 RPM”.
Enter –20 on RPM Adjust. You may also use this in a headwind/tailwind situation.
2. Name/Mode/Crew Weight
This section of the screen displays either the Mode, Slalom or a Skier’s Name pulled from the Name List.
Press UP key to access the Name List:
Name List is discussed in Section 10.
Press DOWN key to access the Crew Weight
Enter the Crew Weight in pounds using the
UP and DOWN keys. Press the MENU
key to confirm and continue.
3. Menu Arrow
Press UP key to change modes or mode settings:
Change between modes using Menu Key.
1. RPM Adjust
2. Name/Mode/Crew
3. Menu Arrow
4. Speed/SETPOINT
5. Course Times
6. Skier Weight
8. KX (Pull)
7. PX (Rope)
Tachometer

5
Press DOWN key to Calibrate system:
The calibration screen is described
below in this section on Page 6.
4. Speed/SETPOINT
The speed readout will turn into the SETPOINT when the engine is below 1500 RPM or the Speed/SETPOINT is
highlighted. When this is highlighted the metric conversion will appear in this area of the screen.
Press UP or DOWN keys to select desired SETPOINT:
5. Course Times
This section of the screen displays the timing information from the last pass. As well as the suggested RPM
adjustment based on the times. These screens will scroll automatically at the end of each pass. The result of this
check is shown to the right of the times as shown below.
With the times highlighted on the screen you can press the DOWN key to view the All Buoy Timing information.
ABT
All buoy times are displayed on one
screen with full course error and full
course time at the top. Press any key to
return to main screen.
Full Course Error and Time
Full Course Error
1st and 2nd Segment Times
1st and 2nd Segment Errors
Suggested RPM
Adjust
Tolerance Indicator
= Good Times
= Slow Times
= Fast Times

6

7
6. Skier Wight
To enter or adjust skier weight simply highlight this section of the screen and press the UP or DOWN keys to make
adjustments. The skier weight is entered in pounds, i.e. the above example shows a skier with a weight of 135
pounds. The skier weight is required so the PerfectPass system can apply the correct amount of RPM to
compensate for their pull. ( 1 pound = 1 RPM).
7. PX (Rope Switch Setting)
Factory setting is 0, which is the off position (typical values range from 5 – 10). If the optional Slalom Switch is
used, this is the percentage of skier weight which is applied during each pull (i.e. A value of 10 would apply 20 rpm
to a 200 pound skier). A value of 0 means no pull from the switch.
8. KX (Throttle Response)
The KX value represents the throttle control response of the system. Under the current rules, a skier is encouraged
to use the factory settings or normal (represented by an “n” on the screen), but has the option for a higher more
immediate throttle response setting (+ or ++). As well they have the option for a lower KX (-).
Tips:
1. Crew Calculator – When on Crew Weight, press UP and DOWN together to access Crew Calculator. See
Page 13.
2. Skier Weight (Shortcut) – To make a change between skier’s you can hold MENU Key for a few seconds
and weight will become highlighted.
Tournament Mode – Slalom
If you press the Up & Down Keys together while in slalom mode, the new Tournament Mode will appear. The only
difference in this mode is the screen layout, particularly the size of the timing data.
Baselines should be set and established in standard slalom mode.
RPM Adjust
Skier Weight
Set Speed
Times

8

9
SLALOM CALIBRATION / SETTING BASELINES
(Your new system must be calibrated for accuracy)
Your system must be calibrated for accuracy in a course. This is often called setting Baseline RPM Values. In slalom
mode (without a skier) you must complete a timed slalom pass at each official speed you intend to use.
This must be done in a course using magnets and Mag Sensor or a PerfectPass Hand Timer. Once calibrated, these new
settings will be maintained in the system memory.
Step 1. In Slalom Mode, enter accurate Crew Weight, set Skier Weight to 0 and RPM Adjust to 0.
Step 2. Set speed (ex: 34.2) and engage system prior to course.
Step 3. Mag Sensor will trigger at entrance gate, ball 3 gate and exit gate. (Alternatively, if using Hand Timer push button
at same gate locations).
Step 4. Stop boat, highlight Key and press Down to access “Quick Calibrate”. Press Up Key to confirm Quick
Calibration request. System will confirm “Baseline and Speedometer Calibrated”.
Step 5. After system confirms calibration at 34.2, change speed and repeat procedure.
23 MPH AND LOWER
As you calibrate the various slalom speeds, you will note that 23 mph and lower are speed based. After you do a Quick
Calibrate at 23 mph, you will be asked to perform a “Master Recal”. A yes to “Master Recalibrate” will automatically
calibrate all other “under 23 mph” slalom speeds.
(These under 23 mph speeds can be timed and calibrated independently for greater accuracy if desired).
TOWING A SKIER (The Basics)
Step 1. Enter Crew Weight, Enter Speed and Skier Weight.
Step 2. Pull skier up and engage system prior to course. (You will hear an audible beep).
Step 3. As you exit course review times on screen. If time was not perfect, the system will show an rpm suggested change.
I.e. “+20 ADJUST”. You should enter an RPM Adjust value or 20 on main screen for next pass. This will speed up boat by
20 RPM. You may also use this feature in a headwind / tailwind situation.
1. Quick Calibrate
4. Menu Arrow
2. SETPOINT
Tachometer
Course Time
RPM Adjust
3. Baseline

10
ADDITIONAL SLALOM SETTINGS
Additional Slalom Settings are accessed by pressing the UP key on the Main Slalom Screen with the highlighted. Then
press the DOWN key when SLALOM is highlighted on the Mode Select Screen. The first two options can be accessed from
the Main Slalom Screen as described above as well as here in the Slalom Settings Screen.
Crew Weight – This setting can also be accessed on the main Slalom Screen as mentioned above on Page 3 or through
the Slalom Settings screen. This value should be set to represent the total Crew Weight in pounds in the boat. It is
essential this value be properly setup to ensure you get good times.
Crew Weight Calculator - The system will add the weight of up to 3 individual crewmembers. Simply go to “Crew
Adj” on the list, then press the DOWN and UP keys together, enter the weight of crew member #1, press MENU
and do the same for crew member #2. The system will total the weight automatically.
Calibrate – Press the UP key to enter the Baseline Calibration screen. This can also be accessed by pressing the DOWN
key with the highlighted on the Main Slalom Screen. To check baselines, complete a timing pass and then go to this
calibrate option. Press Up to enter Calibration Screen and then Up on Quick Calibrate to confirm calibration.
SSB (Second Segment Balance) - The percentage of skier value driven RPM that is removed during the second
segment to maintain an ideal time in slalom.
Example: If your 2nd segment is running a little on the fast side relative to the first segment time, you would raise
the SSB. The higher the value, the more RPM removed from the boat speed in the 2nd. Typical value is about 10.
RPM OFFSET – Press the UP key on this feature to view and edit the 3 Offset values, 36, 34.2 and LWR. The lower
(LWR) is used for all slower speeds. If you are finding that you are continually running less (or more) t han a skiers weight to
achieve a good time, you can enter an rpm offset value. The OFFSET value is only applied when a skier weight is entered.
With a zero skier weight the OFFSET value has no effect.
Example: On a typical boat with a skier’s actual weight entered, you have to run 25 less rpm to achieve an accurate
time. If you are consistently seeing this, you can enter an offset rpm value (i.e.: -25) and the system will allow you
to run all other values as you normally would.
The offset value is independently set for 36.0, 34.2 and speeds 32.3-24.9 (LWR).
RPM Offsets
WT (Wait Time) - For tournament use to provide each skier the same wait time between passes. The number of seconds
between passes (i.e. 40 seconds). Starts timing as boat exits the course. Two short beeps are indicated with 10 seconds left,
followed by three long beeps when time is up.
Previous Times – To reload the previous times simply highlight this item and press the UP key. The full course and
segment times can be viewed from the Main Slalom Screen. The ABT’s can be viewed by pressing the DOWN key with the
Timing Information highlighted on the Main Slalom Screen.

11
ADDITIONAL SLALOM INFORMATION
Digital Speed Readout – The digital speedometer on the screen is for information only in RPM based Slalom. If you
feel it is not reading accurately, go into Quick Calibrate feature after running any timed pass and press the UP key to
recalibrate the speedometer.
Setting Baselines / Calibrating Speedometer without a Course – If you do not have the benefit of a course,
you can manually set baselines and calibrate the speedometer. This must be done at each slalom speed and you will require
an accurate boat speedometer or GPS.
Example: Starting at 36 mph, you engage system and note actual speed on the GPS is 35. Go into the Baseline
Calibration screen and raise the RPM Baseline about 100 rpm. This will speed up the boat to about 36 (100 rpm = 1
MPH). If speed is now accurate, the final step is to calibrate digital speedometer. Note the digital speed readout
and if it is reading 37, go into Speedometer Calibration Screen. Now press the DOWN key and lower speedometer
calibration by one mph. Run boat again to confirm accuracy. Once the baseline and calibration is set, it will be
saved within the system memory. Now change speed to 34.2 and repeat. All speeds you plan to use must be done.
More Throttle – If you see the replace the on the Main Slalom Screen, the system is indicating it needs more
manual throttle in order to maintain the speed. In this case just move the manual throttle forward a little.
Smart Timer False Triggered - The Smart Timer is sensitive and will false trigger outside the course on waves, etc.
To avoid false triggering, always slow the boat slightly to disengage the system after exiting the course between passes.
The system will not false trigger if it is not engaged. (In the event the Timer does trigger before the course, press the UP key
to reset Timer). If your timer(s) is securely fastened to the floor but false trigger often, including in Mag Test Mode, move
location of timer(s) forward or back.
Optional Slalom Switch - If you have a Slalom Switch, refer to detailed instructions sent with switch. The switch is
beneficial to “short line skiers”. For full details, please contact PerfectPass, or log on to www.perfectpass.com.
Tournament Mode – Slalom
If you press the UP and Down Keys together while in slalom mode, the new Tournament Mode will appear.
The only difference in this mode is the screen layout, particularly the size of the timing data.
Baselines should be set and established in standard slalom mode.
To exit Tournament Mode, press UP and DOWN keys together.
RPM Adjust
Set Speed
Times
Skier Weight

12
Section 3. JUMP MODE
USING JUMP MODE
WARNING: (Timing must be used in Jump mode and a proper two segment jump course is required for system to work
properly. Do not use PerfectPass in Jump mode without a proper course, integrated timing and experienced operator.
Because the counter cut pull and cut to the ramp are different, you must have timing activated and running as the boat
heads towards the ramp.
The Jump mode is RPM based and therefore baseline values must be established just as in Slalom mode. Setting the jump
baseline values must be done in a proper two segment jump course. Jump Letter must be set at A for this process.
The Jump mode main screen will appear as follows:
1. RPM Adjust
RPM adjust allows the driver to increase or decrease the overall times (1st & 2ng segment) by putting in a positive
or negative RPM adjustment.
Example: If the times are running consistently slow on both segments, you could add a value such as +20 rpm and
the speed will be increased. You may wish to do this for a particular jumper (a heavy puller) or for a number of
jumpers if the times are drifting in a certain direction
2. Name/Mode/Crew/New Jumper
This section of the screen displays either the Mode Name or a Skier’s Name pulled from the Name List.
Press UP key to access the Name List:
Name List is discussed in Section 10.
Press DOWN key to access the New Jumper and Crew Weight
Press the UP key to enter a new jumper or
DOWN key to enter or edit the crew
weight. New Jumper is covered
below.
1. RPM Adjust
2. Name/Mode/Crew/
New Jumper
3. Menu Arrow
5. Course Times
6. Jump Letter
8. S2 Fine
7. S2 Percent
Tachometer
4. Speed/SETPOINT

13
Enter the Crew Weight in pounds using the
UP and DOWN keys. Press the MENU
key to confirm and continue.
3. Menu Arrow
Press UP key to change modes or mode settings:
This allows you to change modes and
mode settings. The Additional Jump
Settings will be discussed below.
Press DOWN key to Calibrate system:
The calibration screen is described
below in this section.
4. Speed/SETPOINT
The speed readout will turn into the SETPOINT when the engine is below 1500 RPM or the Speed/SETPOINT is
highlighted. When this is highlighted the metric conversion will appear in this area of the screen.
Press UP or DOWN keys to select desired SETPOINT.
5. Course Times
This section of the screen displays the timing information from the last pass If Jump Letter is set to A and RTB, the
second segment error from Return to Baseline will be displayed after segment errors as seen below:
1st and 2nd Segment Times
1st and 2nd Segment Errors
2nd Segment Error
from Return to
Baseline Times
Tolerance Indicator
= Good Times
= Slow Times
= Fast Times

14
6. Jump Letter
The Jump Letter is a combination of Jumper Weight, Jumper Distance and ability. . This Jump Letter represents
how much throttle will be applied once the Rope Switch is closed as the skier pulls. The higher the Jump Letter
selected the more aggressive the pull will be. If you are unsure what Jump Letter you should use then start by
using the ‘New Jumper’ feature as described below. This will automatically generate a Jump Letter based on your
weight and distance.
7. Second Segment Percent (S2%)
This is a percent of the Jump Letter RPM that is applied once the boat enters the 2nd segment. Under IWSF and
AWSA rules, the boat is permitted to speed up in the 2nd segment. The higher the number, the more the boat will
accelerate. A typically value for S2% is +60, the higher the value, the faster the 2nd segment.
Example: If the 1st segment times are good, but the 2nd is a little slow, you would raise the number.
S2 RTB – Works similar to S2%. Used when “Return to Baseline” is selected. Only app licable if skiers are
activating switch and use a Jump Letter of J or higher.
8. Second Segment Fine Adjust (S2 Fine)
This adjustment allows the driver to effectively fine adjust the 2nd segment only. It comes set at 0, which means a
neutral effect. A number such as 30 would increase the 2nd segment by 30 rpm. Higher number speeds up the
second segment. If skier does not trigger switch or has a letter less than J, S2 fine should be used to speed up
second segment.
Example: A jumper that does not cut and does not fully activate the switch may require extra rpm in the 2nd
segment to keep the 2nd segment in tolerance. (In this case, S2 Fine is more effective than S2%).
Entering a New Jumper – To enter a new jumper highlight the NAME/MODE/CREW/NEW JUMPER section of the
screen and press the DOWN key. Then press the UP key to confirm you would like to enter a New Jumper.
You will be asked to enter and answer the following information after which a Jump Letter will be calculated for you and
displayed on the main screen. Move to the next selection by pressing MENU.
Select desired SETPOINT
Enter jumper weight in pounds
Enter typical jumping distance in feet
Toggles between Fast Second Segment
and Return to Baseline
Return to Baseline (RTB) – If you selected Return to Baseline the screen will show to the right of the Jump Letter.
When RTB is selected the boat speed will immediately go to the baseline value as boat enters the second segment. If you
have a skier using the switch with a value of J or higher, you can enter an S2 value which is a % of switch driven RPM. A
setting above 0 will speed up boat in second segment if required to balance times. (This is similar to S2% used when Faster
2nd Segment is selected).
Fast 2nd Segment – If you selected to run the fast 2nd segment, the screen will show to the right of the Jump Letter.

15
Calibrating RPM Baselines - You can set RPM Baseline values for all of the official jump speeds (28, 29.8, 31.7, 33.6, and
35.4) or just the ones you use regularly. Let us assume you wish to set up 33.6 mph (54 kph). Enter the SETPOINT of 33.6
mph by pressing the MENU key until the ‘Speed/SETPOINT’ section of the screen is highlighted, then adjust the
SETPOINT to 33.6 = 54K. Set the Jump Letter to A. Now bring the boat smoothly up to the SETPOINT to engage the
system. (The system engages as soon as the default RPM Baseline value is reached, the NAME/MODE section will become
highlighted, and an audible beep will sound). Enter the jump course and time both segments. As you exit the course the
times will be displayed and then the difference from actuals. The display screen will show the 33.6 mph times. The jump
letter is set at A, RTB (return to baseline times are used). An example of this is shown in JUMP TIMING screens shown
earlier in this section.
If the times are not in tolerance or close to actuals then the RPM Baseline values will require adjustment. The easiest way to
do this in Jump mode is to go to Quick Recalibrate by pressing the DOWN key with the highlighted. This will bring you
to the Calibration screen as seen below.
Press the UP key on the Quick Calibrate message to recalibrate the baseline based on the times recorded from the last pass.
In this example it is suggesting your RPM Baseline should be increased by 135 rpm. When you perform a Quick Calibrate
the suggested adjust of 135 will be added to the baseline and saved in memory. The system will also calibrate the digital
speedometer if the times are with in the “OK” tolerance.
Now engage system and time boat again. If the times are still not close enough, repeat above steps until accurate. If you
wish to set up RPM Baseline values for other speeds (i.e. 31.7 mph), change the SETPOINT and repeat the above steps.
JUMP DRIVING
WARNING – Using the Jump mode with Jump Switch is for experienced drivers and skiers only. Please read carefully prior to
operating. The pull is very aggressive and designed for tournament water skiers only. You M UST have integrated timing and a proper
jump course for system to operate properly.
Assuming the RPM Baseline values have been accurately set, you are now ready to tow skiers.
First enter your Jump Letter or enter a “New Jumper” as explained above. The Jump Letter can be changed by pressing the
UP or DOWN keys with the Jump Letter highlighted on the screen.
The key to a good pull and good times is to get the correct Jump Letter. If the pull to the ramp is solid and t he first segment
time is good, you know the Jump Letter is OK. If the time on the 1st segment was slow, you will require a higher letter on the
next pass and vice versa.
If the first segment time was good, but the 2nd was slow, raise the S2%.
Important Note: If the timer is triggered prior to entering the course, it must be reset by pressing the UP key. Failure to reset
will result in an improper pull to the ramp.
1. Quick Calibrate
4. Menu Arrow
2. SETPOINT
Tachometer
Course Time
RPM Adjust
3. Baseline

16
ADDITIONAL SETTINGS
Additional Jump Settings are accessed by pressing the UP key on the Main Slalom Screen with the highlighted. Then
press the DOWN key when JUMP is highlighted on the Mode Select Screen. The first three options can be accessed from
the Main Slalom Screen as described above as well as in the Jump Settings Screen.
Crew Weight – This setting can also be accessed on the main Slalom Screen as mentioned above or through the Jump
Settings screen. This value should be set to represent the total Crew Weight in pounds in the boat. It is essential this va lue
be properly setup to ensure you get good times.
Crew Weight Calculator - The system will add the weight of up to 3 individual crewmembers. Simply go to “Crew
Adj” on the list, then press the DOWN and UP keys together, enter the weight of crew member #1, press MENU
and do the same for crew member #2. The system will total the weight automatically.
Calibrate – Press the UP key to enter the Baseline Calibration screen. This can also be accessed by pressing the DOWN
key with the highlighted on the Main Jump Screen.
New Jumper – Details for entering a new jumper are outlined above. This should be used when unsure what Jump Letter to
select.
CT (Counter Cut Time) - The maximum length of time the system will throttle once the skier pulls and closes the switch on
the counter cut. Example: a value of 175 is 1.75 seconds and may be used in a tail wind. In a head wind you may want a
longer pull so you could move it to 200 – 220 (2.0 – 2.2 seconds). The factory default is 190, or 1.9 seconds.
x8u and x8d - These settings were always riding in the software, but were not adjustable values. With the higher
horsepower engines and strong props being produced, these values are available for adjustment if needed for high -end
jumpers.
x8u – Represents the rate of throttle up on counter cut and cut for ramp once switch is activated. The larger the
value, the softer the start will be. In other words, the pull will not be as aggressive on the start, but more gradual.
The smaller the value, the more aggressive it will throttle up as switch closes.
Example: A strong 6 Litre engine may need a larger X8u to avoid a strong initial pull as switch closes.
x8d – Represents the rate of throttle down once skier stops pulling. The higher the value, the slower (softer) the
throttle will return. The lower the value, the more aggressive it will throttle back.
Example: If a boat was not slowing quickly enough in the 2nd segment, you would lower the value.
Typical values 2005 Promo Boats
5.7L 6.0L
x8u 85 200
x8d 250 200
ADDITIONAL INFORMATION
Jump Switch - For details on the optional Jump Switch (Slalom Switch) contact PerfectPass or log on to
www.perfectpass.com .
Jump Settings
New Times (Faster Second Segment)
Examples for when towing jumpers over 120 Feet.

17
Jump Settings
S2%
S2 RTB
CT
Ski Nautique
Faster 40
Faster 0
190
MasterCraft
Faster 40
Faster 0
190
Malibu
Faster 40
Slower 0
190
Others
Faster 40
Slower 0
190
Table of contents
Other PERFECTPASS Boating Equipment manuals
Popular Boating Equipment manuals by other brands

Quick
Quick Prince DP1 Series user manual

Power-Pole
Power-Pole Blade installation manual

Zattini Group
Zattini Group bamar 12 Use and maintenance instruction manual

DAVIS
DAVIS Wheel-a-Weigh 1482 Standart instruction manual

Scanstrut
Scanstrut Scanpod SPR-1i-RM installation instructions

Engbo
Engbo MAXI 31 User and installation manual