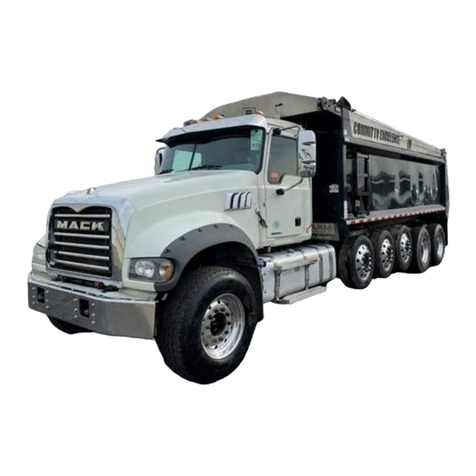
Peterbilt 320 User manual

MODEL 320
OPERATOR’S
MANUAL

California
Proposition 65 Warning
•Diesel engine exhaust and some of its constituents are
known to the State of California to cause cancer, birth
defects, and other reproductive harm.
•Other chemicals in this vehicle are also known to the
State of California to cause cancer, birth defects or
other reproductive harm.
•Battery posts, terminals, and related accessories con-
tain lead and lead compounds, chemicals known to the
State of California to cause cancer and reproductive
harm. Wash hands after handling.
Quick Table of Contents
•Introduction............................................ 1
•Cab, Frame Access, & Cab Ladder........... 5
•Getting To Your Engine................................. 8
•Controls And Displays ................................... 12
•Seat And Restraint Systems............................. 49
•Driver’s Checklists................................................ 58
•Starting And Operating The Vehicle........................ 62
•Maintenance and Service........................................... 96
•Vehicle Identification.................................................... 166
•Consumer Information .................................................... 167
•Subject Index ............................................................ 169

PART 1: INTRODUCTION
PB1319 (CAT. NO. 5296 ) —1— 22-01691 (R02/02)
This manual contains useful information for the safe and efficient
operation of your Model 320. It also provides information on main-
taining your vehicle in the best condition, with an outline for perform-
ing safety checks and basic preventive maintenance inspections.
We have tried to present the information you’ll need to learn about
your vehicle’s functions, controls, and operation - and to present it as
clearly as possible. We hope you’ll find this manual easy to use.
There will be times when you need to take this manual out of your
Peterbilt. When you do, please be sure to return it to the cab when
you are finished using it. That way it will be there when you need it
the next time or when you pass the vehicle on to the next user.
Your Model 320 may not have all the features or options mentioned in
this manual. Therefore, you should pay careful attention to the
instructions that pertain to just your vehicle. In addition, if your vehicle
is equipped with special equipment or options not discussed in this
manual, consult your dealer or the manufacturer of the equipment.
All information contained in this manual is based on the latest produc-
tion information available at the time of publication. Peterbilt Motors
Company reserves the right to make changes at any time without
notice.
Warnings
We’ve put a number of warning messages in this manual. They are
there for your protection and information. Please read them and fol-
low them. They can help you to avoid injury to yourself & your pas-
sengers as well as to prevent costly damage to your vehicle. We’ve
used certain symbols and “signal words” to indicate what kind of mes-
sage is going to follow. When you see these symbols & words, you
know that you need to pay special attention. Please don’t ignore any
of these signals.
When you see this symbol & word, the message that follows is espe-
cially vital. This signals something that can cause serious injury or
death. This message will tell you what the hazard is, what can hap-
pen if you don’t heed the warning, and how to avoid it. For example:
WARNING!
WARNING! Attempting repair work without sufficient
training, service manuals, and the proper tools can be
dangerous. You could be injured or you could make
your vehicle unsafe. Do only those tasks you are fully
qualified to do.

PART 1: INTRODUCTION
PB1319 (CAT. NO. 5296 ) —2— 22-01691 (R02/02)
This symbol & word signals something that could damage your vehi-
cle. And you might receive an injury, too. For example:
Gives you information we feel you’d like to have. It could have to do
with care of your vehicle or with driving more efficiently:
Please take the time to read these messages when you see them.
And remember:
WARNING! Something that could injure you seriously.
CAUTION: Something that could cause injury to you or your
vehicle.
NOTE: Useful information
Vehicle Safety
Make sure your Peterbilt is in top working condition before heading out on
the road—it is the
responsible
driver's duty to do so. Inspect the vehicle
according to PART 6: DRIVER’S CHECKLIST.
Please remember, this manual is not a training manual. It cannot tell
you everything you need to know about driving your Peterbilt vehicle.
For that you need a good training program or truck driving school. If
CAUTION:
CAUTION: Continuing to operate a vehicle with insuf-
ficient oil pressure will cause serious engine damage.
NOTE:
NOTE: A cold compressor can cause refrigerant to liquefy
and warp the valve plates or cause a hydraulic lock. Warm
the engine before starting the air conditioner.
WARNING! Do not drink and drive. Your reflexes, percep-
tions, and judgment can be affected by even a small
amount of alcohol. You could have a serious—or even fatal
accident—if you drive after drinking. Please do not drink
and drive or ride with a driver who has been drinking.
WARNING! The use of alcohol, drugs, and certain medica-
tions will seriously impair perception, reactions, and driv-
ing ability. These circumstances can substantially increase
the risk of an accident and personal injury.

PART 1: INTRODUCTION
PB1319 (CAT. NO. 5296 ) —3— 22-01691 (R02/02)
you have not been trained, get the proper training before you drive.
Only qualified drivers should drive this vehicle.
Every new Peterbilt vehicle is designed to conform to all Federal
Motor Vehicle Safety Standards applicable at the time of manufacture.
However, even with these safety features, continued safe and reliable
operation depends greatly upon regular vehicle maintenance. The
vehicle must be operated within the range of its mechanical capabili-
ties and the limits of its load ratings. See the axle and tire load rating
information located on the driver’s door jamb.
How to Find What You Want
There are several tools built into this manual to help you find what you
need quickly and easily.
First is the Quick Table of Contents. Located at the front of the
manual, this lists the main subjects covered and gives page numbers
where you can find these subjects. Use the Quick Table of Contents
to find information on a large subject like “Maintenance.”
Cross-referenced Citations also help you get the information you
need. If some other part of the manual contains further information
on the subject you are reading about, we’ll indicate that in a cross-ref-
erence like this: (See PART 6: DRIVER’S CHECKLIST). You won’t
have to go searching for more information.
Finally you’ll find a helpful Subject Index. It’s in the back of the man-
ual and alphabetically lists the subjects covered. So if you want infor-
mation on brakes, for example, just look under Brake in the Subject
Index. You’ll find all the pages listed where brakes or braking are dis-
cussed.
A Special Word about Repairs
Your Peterbilt dealer’s service center is the best place to have your
vehicle repaired. You can find Peterbilt dealers all over the country
with the equipment and trained personnel to get you back on the road
quickly - and keep you there.
Your vehicle is a complex machine. Anyone attempting repairs on it
needs good mechanical training and the proper tools. If you are sure
you have these requirements, then you can probably perform some
repairs yourself. However, all warranty repairs must be performed by
an authorized Peterbilt service facility. If you aren’t an experienced
mechanic, or don’t have the right equipment, please leave all repairs
to an authorized service facility. They are the ones equipped to do
the job safely and correctly.


PART 1: INTRODUCTION
PB1319 (CAT. NO. 5296 ) —4— 22-01691 (R02/02)
Maintenance Manuals. If you do decide to do any complex repair
work, you’ll need the Peterbilt Maintenance manuals. Order them
from your authorized dealer. Please provide your Chassis Serial
Number when you order, to be sure you get the correct manuals for
your vehicle. Allow about four weeks for delivery. There will be a
charge for these manuals.
Final Chassis Bill of Material. A complete, nonillustrated computer
printout listing of the parts used to custom-build your Peterbilt vehicle
is available through the Peterbilt dealer from whom your purchased
your vehicle.
Additional Sources of Information
Operator’s manuals are also supplied by the manufacturers of compo-
nents such as the engine, seats, transmission, and radio in your
Peterbilt. If you are missing any of these manuals, ask your Peterbilt
dealer to supply them.
Your new Peterbilt also contains a copy of the Truck Driver’s Hand-
book, published by the American Trucking Association. Refer to it for
important information on driving your vehicle. Another place to learn
more about trucking is a local truck driving school. Contact one near
you to find out what kinds of instruction it offers.
Federal and state agencies also have information you can ask for.
The Interstate Commerce Commission can give you information
about regulations governing transportation across state lines. And
various agencies in state governments are sources for regulations
which differ from state to state.
WARNING! Attempting repair work without sufficient
training, service manuals, and the proper tools can be
dangerous. You could be injured or you could make
your vehicle unsafe. Do only those tasks you are fully
qualified to do.
WARNING! Modifying your vehicle can make it unsafe.
Some modifications can affect your truck’s electrical
system, stability, or other important functions. Before
modifying your vehicle, check with your dealer to make
sure it can be done safely.

PART 2: GETTING INTO AND OUT OF THE CAB,
FRAME ACCESS, AND CAB LADDERiii
PB1319 (CAT. NO. 5296 ) —5— 22-01691 (R02/02)
Be careful whenever you get into or out of your vehicle’s cab. Always
maintain at least three points of contact with your hands on the grab
handles and your feet on the steps.
The pictures below show the best way to enter and exit a Model 320.
Three points of contact as you Three points of contact as you
begin climb up or down
Three points of contact as you
step in or out
WARNING! Jumping out of the cab or getting into the
cab without proper caution is dangerous. You could slip
and fall, possibly suffering a serious injury. Keep steps
clean. Clean any fuel, oil, or grease off of the steps
before entering the cab. Use the steps and grab han-
dles provided, and always keep at least three points of
contact between your hands and feet and the truck.
Look where you are going.
02871 02872
02873

PART 2: GETTING INTO AND OUT OF THE CAB,
FRAME ACCESS, AND CAB LADDER
PB1319 (CAT. NO. 5296 ) —6— 22-01691 (R02/02)
Door Lock and Keys
Doors can be locked from the inside by using the lock button. Close
the door then push the button down to lock. Doors automatically
unlock when you open them from the inside, and can be locked from
the outside with a key only.
To lock or unlock the doors from outside the cab, insert the key in the
lock. Turn the key toward the rear to lock; forward to unlock.
Climbing Onto the Deck Plate
WARNING! To lessen the chance and/or severity of per-
sonal injury in case of an accident, always lock the
doors while driving. Along with using the lap/shoulder
belts, properly locking the doors helps prevent occu-
pants from being thrown from the vehicle.
WARNING!
•
If there is no deck plate, or if proper steps and grab
handles aren’t provided, don’t climb onto the area
behind the cab. Peterbilt did not intend for an area to
be a step if handrails or proper steps are not provided.
•
You could fall and injure yourself if you step onto a
fuel tank surface. A fuel tank is not a step. The tank
surface can get very slippery, and you might not be
able to prevent a fall. Don’t step onto the surface of a
fuel tank. Use only the steps and handholds provided,
not chain hooks, etc.
•
You can be hurt if you aren’t careful climbing onto and
off the deck plate. You can slip and fall, especially if
the surfaces are wet or icy, or if you step in oil, fuel, or
grease. Keep steps clean. When you are climbing
onto and off the deckplate, always maintain at least
three points of contact with your hands on the grab
handles and your feet on the steps.
NOTE: Any alteration (adding bulkheads, headache racks,
tool boxes, etc.) behind the cab or sleeper that affects the
utilization of grab handles, deck plates, or frame access
steps installed by Peterbilt must comply with FMCSR 399.

PART 2: GETTING INTO AND OUT OF THE CAB,
FRAME ACCESS, AND CAB LADDERiii
PB1319 (CAT. NO. 5296 ) —7— 22-01691 (R02/02)
Front Cab Guard/Ladder
The optional front cab guard/ladder is used on front-loading refuse
vehicles to protect the cab from damage and to stand on in order to
remove debris from above the cab.
WARNING!
•
Do not climb on the cab roof. The cab roof is not a
slip-resistant surface and is not equipped with hand-
holds. A slip and fall could cause serious injury.
•
Do not step or stand on the top rung of the ladder.
This is not a step; it is meant to be used only as a
handhold. You could slip or fall and injure yourself if
you use it as a step.

PART 3: GETTING TO YOUR ENGINE
PB1319 (CAT. NO. 5296 ) —8— 22-01691 (R02/02)
Cab Tilting
Raising the Cab
An independent hydraulic system raises and lowers the cab. A posi-
tive, dual-locking device ensures safety and eliminates danger of mis-
haps while driving.
The following cab tilting instructions are labelled and installed on the
base of the companion seat:
WARNING! You can be seriously injured by the cab if
you do not follow safety precautions. Whenever you
raise, lower, or work under the cab, please remember
the following safety rules:
•
Be sure no one is under the front of the cab. Whether
you are raising or lowering the cab, KEEP CLEAR.
•
Perform work only with the cab in the full tilt position
with the locking bar engaged.
•
To avoid possible damage or serious injury
- Never allow a cab door to fall open with the cab tilted.
- Never use a cab door to support your weight with the
cab tilted.
•
When a cab hydraulic system needs service or repair:
- Have maintenance and repair done only by someone
qualified in hydraulic systems.
- Be sure no one tries to bleed the system with the cab
raised. This will defeat the safety system. The cab
can fall and crush anyone under it.
- Never work under a raised cab unless it is properly
supported. This means using an overhead hoist of
sufficient capacity to support the cab safely. Never
prop the cab up instead of using a hoist. The prop
could fail and let the cab fall on you or anyone else
working under it.
- Do not tamper with any part of the cab tilt cylinders,
including removing the velocity fuses. To do so will
defeat their purpose. The cab could fall and crush
anyone under it. If you have any need for repair
involving the velocity fuses, have a qualified truck
mechanic do the work.
NOTE: In case of oil loss in the system or a lock-up in the tilt
cylinders, refer to the maintenance manual for repair instruc-
tions.

PART 3: GETTING TO YOUR ENGINE
PB1319 (CAT. NO. 5296 ) —9— 22-01691 (R02/02)
.
1. Park the vehicle on a level surface.
2. Apply the parking brake.
3. Make sure the shift lever is in Neutral. This will prevent the shift
lever from getting caught on the cab during tilting operations.
4. Secure or remove all loose items in the cab and luggage compart-
ments. Close all doors.
5. Check the clearance above and ahead of the cab. Ensure there
will be enough room to clear roof antennae when you tilt the cab.
Check for obstructions overhead (branches, power lines, lights,
etc.) and in front (walls, work benches, other vehicles, etc.)
6. Place the control valve handle in the “Raise” position.
Handle in “Raise” Position
7. Attach pump handle to the pump and pump to raise the cab (the
latch hooks will release automatically when pump is actuated).
Pump until the locking bar can be positioned on the anchormounted
below the right-hand cab support as shown in the next illustration.
WARNING! Do not get any part of your body under an
unsecured cab. It could cause a serious or fatal acci-
dent. The cab could fall and crush you. Always ensure
the locking bar is fully engaged before getting under the
cab, or before letting anyone else get under it (see fol-
lowing instructions on using the locking bar).
CAUTION:
•
Raising the cab with heavy objects in the cab or lug-
gage compartment can cause serious damage to the
cab tilting mechanism and cab. Before raising the cab,
remove heavy items such as tire chains and tools.
Remove or stow securely any loose items. And shut
the doors tightly.
•
Straighten the front wheels before tilting the cab or
cab/tire damage could occur.
02874

PART 3: GETTING TO YOUR ENGINE
PB1319 (CAT. NO. 5296 ) —10— 22-01691 (R02/02)
Locking Bar in Anchored Positioned
8. Place the control valve handle in the “Lower” position and allow the
cab to settle down slightly on the locking bar
Handle in “Lower” Position
Cab in Full Tilt Position
02875
02876
02877

PART 3: GETTING TO YOUR ENGINE
PB1319 (CAT. NO. 5296 ) —11— 22-01691 (R02/02)
Lowering the Cab
1. Place the control valve handle in the “Raise” position and pump
until the locking bar can be removed from the anchor and fastened
in its stored position.
Locking Bar In Stored Position
.
2. Place the control valve handle in the “Lower” position. The cab
should settle down on the rear mounts.
Upper and Lower Rear Cab Mount
3. Allow at least 20 seconds after the cab touches down for the full
spring force to develop in the latch hooks in the rear mounts.
4. Remove the pump handle and store in the cab.
5. Visually inspect the cab latch hooks to ensure they are closed.
6. Ensure that the control valve handle is in the “Lower” position
when operating the vehicle.
CAUTION: Do not try to pump the cab down or hold it
down with hydraulic force. If you do, cab damage will
occur.
02878
02879

PART 4: CONTROLS AND DISPLAYS
PB1319 (CAT. NO. 5296 ) —12— 22-01691 (R02/02)
This part explains the location of the various features on your vehicle
and describes their function. For information on using these features
in driving, see the paragraphs that follow.
Your Instrument Panel
Please remember that each Peterbilt is custom-made. Your instru-
ment panel may not look exactly like the one in the illustrations on the
pages that follow.
We have tried to describe all the most common features and controls
available, so your vehicle may not have some of the ones that appear
in this section. You can pick out the parts that apply to you and read
them to be fully informed on how your particular vehicle operates.

PART 4: CONTROLS AND DISPLAYS
PB1319 (CAT. NO. 5296 ) —13— 22-01691 (R02/02)
Typical Instruments & Controls: Left-Hand Drive Station
LEFT SIDE
1. Turn Signal/Hazard Flasher 15. Panel Light Knob
2. Accelerator Pedal 16. Speedometer w/ Message
3. Brake Pedal Center (SMC)
4. High Beam Switch 17. Primary Air Pressure
5. Clutch Pedal 18. Fuel
6. Ignition Key Switch 19. Transmission Oil Temperature
7. Clearance Lamps Switch 20. Secondary Air Pressure
8. SMC Select/Reset Switch 21. Gearshift or Shift Selector
9. Headlight Switch 22. Heater Control Panel
10. Voltmeter 23. Cigar Lighter
11. Engine Oil Pressure 24. Interaxle Differential Lock
12. Engine Coolant Temperature 25. Parking Brake Valve
13. Tachometer 26. Windshield Wiper Valves
14. LED Warning Light Bar 27. Windshield Washer Switch
24
1
2
3
4
5
689
10
11
12 13 14 16 17 18
15
19
20
21
22 26
27
25
23
7

PART 4: CONTROLS AND DISPLAYS
PB1319 (CAT. NO. 5296 ) —14— 22-01691 (R02/02)
Typical Instruments & Controls: Right-Hand Drive Station
RIGHT SIDE
1. Turn Signal/Hazard Flasher 9. Secondary Air Pressure
2. Transmission Controls 10. Starter Switch
3. Parking Brake Valve 11. Stop Switch
4. Horn Button 12. Primary Air Pressure
5. Windshield Washer Revervoir 13. Engine Oil Pressure
6. Working Brake Switch 14. Safety Chain
7. Warning Lights 15. Brake Pedal
8. Headlight Switch 16. Accelerator Pedal
1
2
3
46
7
8
9
10
5
15
16
11
12 13
14

PART 4: CONTROLS AND DISPLAYS
PB1319 (CAT. NO. 5296 ) —15— 22-01691 (R02/02)
Steering Column-Mounted Controls
Turn Signal and Indicator Lights
Turn Signal
The turn signal body is mounted on the left side of the steering column,
below the steering wheel.
•At a right-hand drive station, the turn signal body is mounted on a
stub shaft under the dash behind the steering wheel.
To operate either signal, move the lever in the direction of the turn.
•The left turn indicator light is displayed in the tachometer face.
•The right turn indicator light is displayed in the speedometer face.
NOTE: The ignition key must be turned to ON for the signal/
switch to operate.
WARNING! After you complete a turn, shut the system off
by returning the lever to the “OFF” (center) position. The
switch's lever action is NOT self-canceling. Failure to shut
off a turn signal could confuse other drivers and result in
an injury accident. An indicator light in the instrument
panel will flash until the turn signal is turned off.
02882

PART 4: CONTROLS AND DISPLAYS
PB1319 (CAT. NO. 5296 ) —16— 22-01691 (R02/02)
Hazard Flasher
Hazard Flasher
The four-way Hazard Flasher switch is on the turn signal body, just
below the turn signal lever.
•At a right-hand drive station, the switch is above the lever.
The flasher will operate with the key switch in the on or off position.
Pull it out to activate the system. All turn signals will flash at once. To
turn it off, move the turn signal lever up or down.
Use your hazard flasher whenever you are off the road or on the side
of the road, or in a potentially hazardous situation.
Of course, in normal stopping in traffic, such as at a stop light, you do
not use your flashers.
WARNING! Use your Hazard Flasher Warning System any
time you have to stop off the road or on the side of the
road, day or night. A hard-to-see vehicle can result in an
injury accident. Another vehicle could run into you if you
do not set your flashers. Always move the vehicle a safe
distance off the road when stalled or stopped for repairs.
WARNING! Your disabled vehicle can be dangerous for
you and others. The hot exhaust system could ignite
dry grass, spilled fuel, or other substances. Do not park
or operate your vehicle where the exhaust system could
contact dry grass, brush, spilled fuel, or any other mate-
rial that could cause a fire.
02883

PART 4: CONTROLS AND DISPLAYS
PB1319 (CAT. NO. 5296 ) —17— 22-01691 (R02/02)
High Beam Headlights
All Model 320 vehicles come equipped with a combination turn signal
and high beam / low beam switch that is mounted to the steering col-
umn. To switch your headlights, push and release the button on the
end of the turn signal lever. The high beam indicator light is displayed
in the tachometer face.
High Beam Headlight Switch Button
Trailer Brake Hand Valve
If your vehicle is a tractor, it will be equipped with a trailer brake hand
valve. This hand valve provides air pressure to apply the trailer
brakes only. It operates independently of the foot treadle valve.
To operate the trailer brake hand valve: Pull down on the lever on
the right side of the steering column, below the steering wheel.
02884
02885

PART 4: CONTROLS AND DISPLAYS
PB1319 (CAT. NO. 5296 ) —18— 22-01691 (R02/02)
See “Emergency Braking”for more complete information on when
and how to use your trailer brake. Or see the Index, under Brake.
Electric Horn
Electric Horn Button
Your Model 320 has an electric horn. To sound the horn, press on the
button in the center of the steering wheel.
•At a right-hand stand-up drive station, the horn button is located on
the dash panel to the right of the steering wheel.
Air Horn
Your Peterbilt has an air horn in addition to an electric horn. Control
the air horn by pulling on the lanyard extending from the overhead
header panel.
WARNING! It is dangerous to use air-applied trailer
brakes for parking or holding a vehicle. Air system
pressure can bleed down and release the brakes. You
could have a vehicle roll-away resulting in an accident.
You or others could be badly injured. Always apply the
parking brakes for parking or holding your vehicle on
grade.
NOTE: The trailer brake is not to be used as the main
means of braking. To use this brake frequently instead of
using the foot brake will wear out the trailer brake sooner.
02886
Table of contents
Other Peterbilt Truck manuals

Peterbilt
Peterbilt 389 2017 User manual

Peterbilt
Peterbilt 330 User manual

Peterbilt
Peterbilt 220 User manual

Peterbilt
Peterbilt 220 User manual

Peterbilt
Peterbilt 579 User manual

Peterbilt
Peterbilt 389 2017 User manual

Peterbilt
Peterbilt 210 User manual

Peterbilt
Peterbilt 535 User manual

Peterbilt
Peterbilt 348 2017 User manual

Peterbilt
Peterbilt 365 User manual