Pfaff cvreative 3.0 User manual

Owner's manual

This household sewing machine is designed to comply with IEC/EN 60335-2-28 and UL1594
IMPORTANT SAFETY INSTRUCTIONS
When using an electrical appliance, basic safety precautions should always be followed, including the following:
Read all instructions before using this household sewing machine.
DANGER – To reduce the risk of electric shock:
$VHZLQJPDFKLQHVKRXOGQHYHUEHOHIWXQDWWHQGHGZKHQSOXJJHGLQ$OZD\VXQSOXJWKLVVHZLQJPDFKLQH
from the electric outlet immediately after using and before cleaning.
WARNING ²7RUHGXFHWKHULVNRIEXUQVÀUHHOHFWULFVKRFN
or injury to person:
7KLVVHZLQJPDFKLQHLVQRWLQWHQGHGIRUXVHE\SHUVRQVLQFOXGLQJFKLOGUHQZLWKUHGXFHGSK\VLFDO
VHQVRU\RUPHQWDOFDSDELOLWLHVRUODFNRIH[SHULHQFHDQGNQRZOHGJHXQOHVVWKH\KDYHEHHQJLYHQ
VXSHUYLVLRQRULQVWUXFWLRQFRQFHUQLQJXVHRIWKHVHZLQJPDFKLQHE\DSHUVRQUHVSRQVLEOHIRUWKHLUVDIHW\
&KLOGUHQVKRXOGEHVXSHUYLVHGWRHQVXUHWKDWWKH\GRQRWSOD\ZLWKWKHVHZLQJPDFKLQH
8VHWKLVVHZLQJPDFKLQHRQO\IRULWVLQWHQGHGXVHDVGHVFULEHGLQWKLVPDQXDO8VHRQO\DWWDFKPHQWV
recommended by the manufacturer as contained in this manual.
1HYHURSHUDWHWKLVVHZLQJPDFKLQHLILWKDVDGDPDJHGFRUGRUSOXJLILWLVQRWZRUNLQJSURSHUO\LILWKDV
been dropped or damaged, or dropped into water. Return the sewing machine to the nearest authorized
GHDOHURUVHUYLFHFHQWHUIRUH[DPLQDWLRQUHSDLUHOHFWULFDORUPHFKDQLFDODGMXVWPHQW
1HYHURSHUDWHWKHVHZLQJPDFKLQHZLWKDQ\DLURSHQLQJVEORFNHG.HHSYHQWLODWLRQRSHQLQJVRIWKH
sewing machine and foot controller free from the accumulation of lint, dust, and loose cloth.
.HHSÀQJHUVDZD\IURPDOOPRYLQJSDUWV6SHFLDOFDUHLVUHTXLUHGDURXQGWKHVHZLQJPDFKLQHQHHGOH
$OZD\VXVHWKHSURSHUQHHGOHSODWH7KHZURQJSODWHFDQFDXVHWKHQHHGOHWREUHDN
'RQRWXVHEHQWQHHGOHV
'RQRWSXOORUSXVKIDEULFZKLOHVWLWFKLQJ,WPD\GHÁHFWWKHQHHGOHFDXVLQJLWWREUHDN
:HDUVDIHW\JODVVHV
6ZLWFKWKHVHZLQJPDFKLQHRII´µZKHQPDNLQJDQ\DGMXVWPHQWLQWKHQHHGOHDUHDVXFKDVWKUHDGLQJ
needle, changing needle, threading bobbin, or changing presser foot, etc.
$OZD\VXQSOXJVHZLQJPDFKLQHIURPWKHHOHFWULFDORXWOHWZKHQUHPRYLQJFRYHUVOXEULFDWLQJRUZKHQ
PDNLQJDQ\RWKHUXVHUVHUYLFLQJDGMXVWPHQWVPHQWLRQHGLQWKHLQVWUXFWLRQPDQXDO
1HYHUGURSRULQVHUWDQ\REMHFWLQWRDQ\RSHQLQJ
'RQRWXVHRXWGRRUV
'RQRWRSHUDWHZKHUHDHURVROVSUD\SURGXFWVDUHEHLQJXVHGRUZKHUHR[\JHQLVEHLQJDGPLQLVWUDWHG
7RGLVFRQQHFWWXUQDOOFRQWUROVWRWKHRII´µSRVLWLRQWKHQUHPRYHSOXJIURPRXWOHW
'RQRWXQSOXJE\SXOOLQJRQFRUG7RXQSOXJJUDVSWKHSOXJQRWWKHFRUG
+ROGSOXJZKHQUHZLQGLQJLQWRFRUGUHHO'RQRWDOORZSOXJWRZKLSZKHQUHZLQGLQJ
7KLVVHZLQJPDFKLQHLVSURYLGHGZLWKGRXEOHLQVXODWLRQ8VHRQO\LGHQWLFDOUHSODFHPHQWSDUWV
6HHLQVWUXFWLRQVIRU6HUYLFLQJRI'RXEOH,QVXODWHG$SSOLDQFHV
SAVE THESE INSTRUCTIONS
SERVICING OF DOUBLE INSULATED PRODUCTS
,QDGRXEOHLQVXODWHGSURGXFWWZRV\VWHPVRILQVXODWLRQDUHSURYLGHGLQVWHDGRIJURXQGLQJ1RJURXQG
PHDQVLVSURYLGHGRQDGRXEOHLQVXODWHGSURGXFWQRUVKRXOGDPHDQVIRUJURXQGLQJEHDGGHGWRWKHSURGXFW
6HUYLFLQJRIDGRXEOHLQVXODWHGSURGXFWUHTXLUHVH[WUHPHFDUHDQGNQRZOHGJHRIWKHV\VWHPDQGVKRXOGEH
GRQHRQO\E\TXDOLÀHGVHUYLFHSHUVRQQHO5HSODFHPHQWSDUWVIRUDGRXEOHLQVXODWHGSURGXFWPXVWEHLGHQWLFDO
WRWKRVHSDUWVLQWKHSURGXFW$GRXEOHLQVXODWHGSURGXFWLVPDUNHGZLWKWKHZRUGV¶'28%/(,168/$7,21·
RU¶'28%/(,168/$7('·

&RQJUDWXODWLRQVRQSXUFKDVLQJ\RXU
QHZ3)$))®creative™VHZLQJDQG
embroidery machine.
$VDVHZLQJHQWKXVLDVW\RXKDYH
DFTXLUHGRQHRIWKHPRVWDGYDQFHGDQG
FRPSUHKHQVLYHVHZLQJDQGHPEURLGHU\
machines in the world; it will enable
\RXWRWUDQVIRUPDOO\RXUFUHDWLYHLGHDV
into reality using the most highly tuned
technology and features.
%HIRUH\RXVWDUWSOHDVHVSHQGVRPH
WLPHUHDGLQJWKLVRZQHU·VPDQXDO<RX
ZLOOVRRQGLVFRYHUKRZWRPD[LPL]HWKH
XVHRI\RXUPDFKLQH2XUDXWKRUL]HG
3)$))®dealers will of course also be
SOHDVHGWRDGYLVH\RXDWDQ\WLPH
<RXU3)$))® creative™VHZLQJDQG
HPEURLGHU\PDFKLQHZLOOGHÀQLWHO\
enable you to experience a totally new
dimension of sewing and embroidery.
Congratulations!

TABLE OF CONTENTS
Introduction 1:7
0DFKLQHRYHUYLHZ
Front side......................................................................
Rear side .......................................................................
7RSSDUWV.......................................................................
$FFHVVRU\WUD\..............................................................
Parts of the embroidery unit......................................
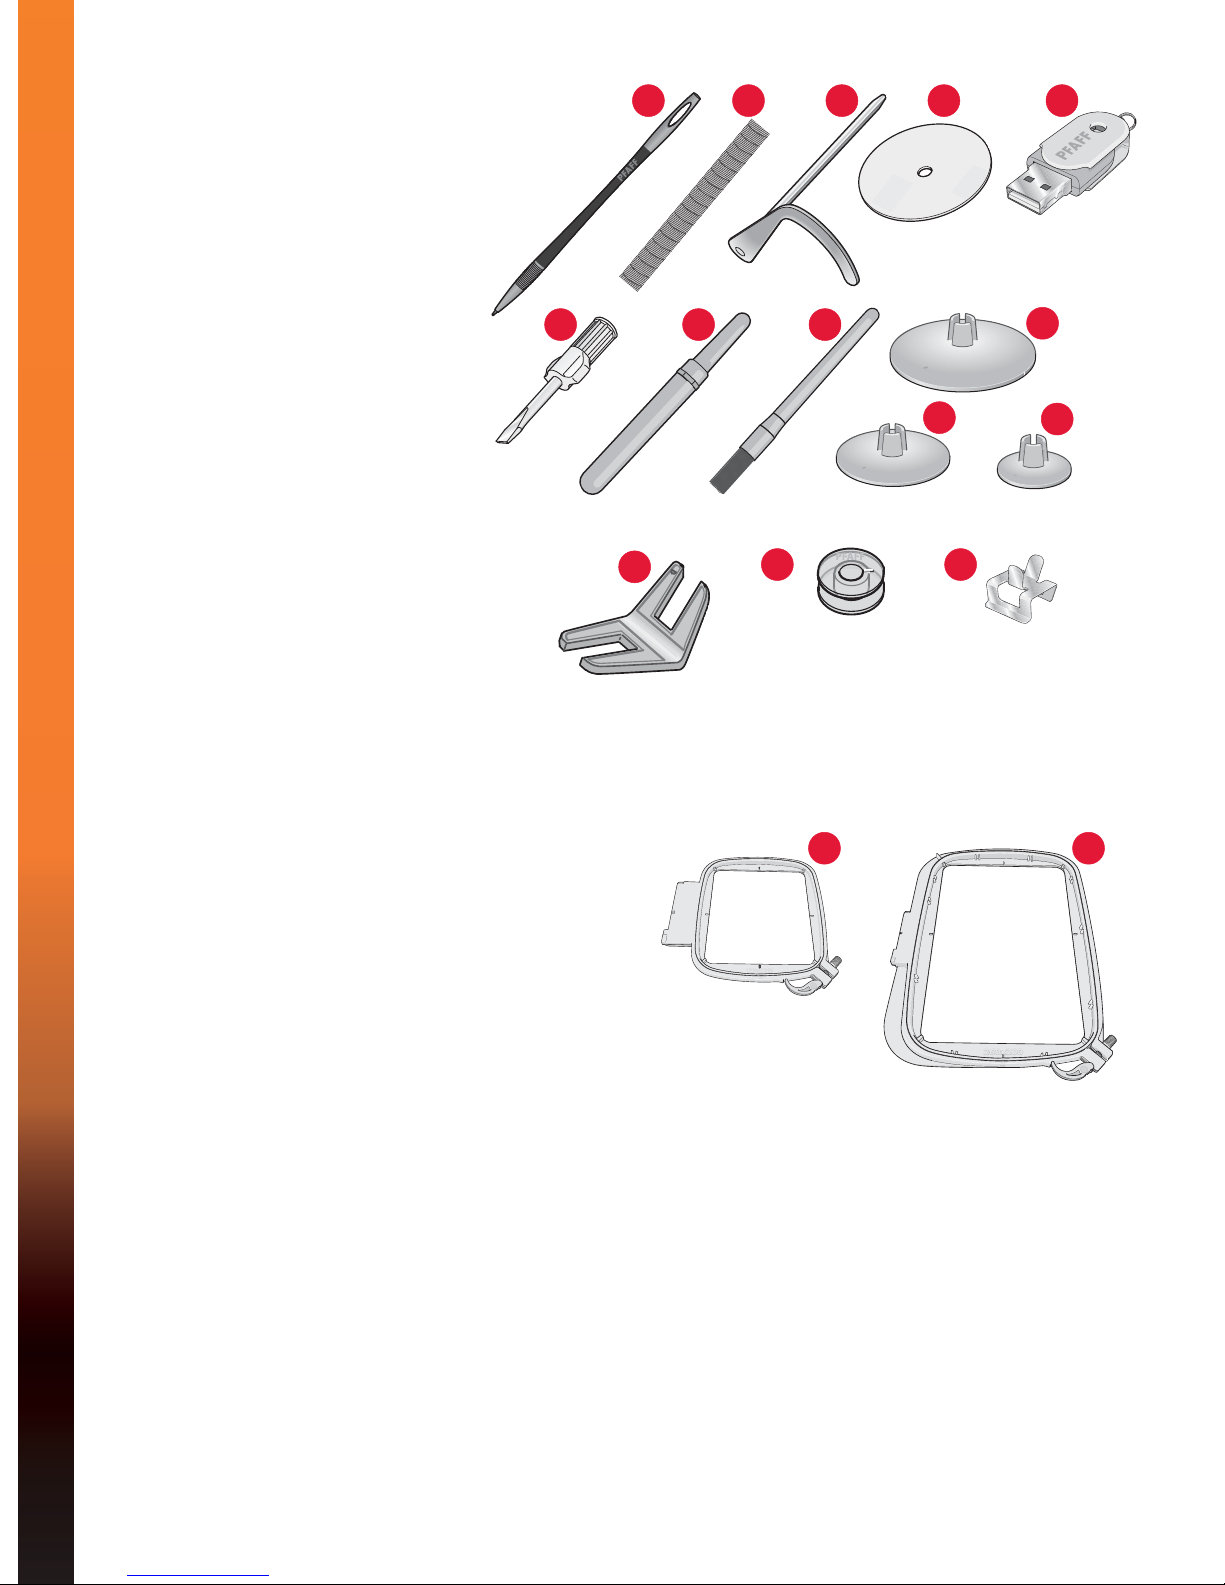
,QFOXGHGDFFHVVRULHV
Presser feet..................................................................
6WLWFKRYHUYLHZ
8WLOLW\VWLWFKHV ............................................................
'HFRUDWLYHVWLWFKHV ....................................................
$OSKDEHWV....................................................................
Preparations 2:1
8QSDFNLQJ
&RQQHFWLQJWKHIRRWFRQWUROFRUG
&RQQHFWWKHSRZHUFRUG
DQGIRRWFRQWURO
3DFNDZD\DIWHUVHZLQJ
/('OLJKWV
)UHHDUP
7KUHDGFXWWHU
6SRROSLQV
7KUHDGLQJWKHPDFKLQH
1HHGOHWKUHDGHU ...........................................................
7KUHDGVHQVRU
%REELQZLQGLQJ
,QVHUWLQJWKHEREELQ
IDT™V\VWHP,QWHJUDWHG'XDO)HHG
&KDQJLQJWKHSUHVVHUIRRW
&KDQJLQJWKHQHHGOH
/RZHULQJIHHGGRJV
1HHGOHV
7KUHDGV
6WDELOL]HUV
86%SRUW
86%HPEURLGHU\VWLFN ...............................................
&RPSOLPHQWDU\VRIWZDUH3&
+RZWRXSGDWH\RXUPDFKLQH
Machine settings & buttons 3:1
7RXFKVFUHHQ
7RXFKVFUHHQRYHUYLHZ
6HWWLQJVPHQX
Machine settings ......................................................... 3:3
6HZLQJVHWWLQJV ............................................................
(PEURLGHU\VHWWLQJV....................................................
Machine information ..................................................
%XWWRQVDQGLQGLFDWRUV
&RPPRQLFRQV
Sewing mode 4:1
6HZLQJPRGH
6WDUWYLHZ......................................................................
6HZLQJPRGHRYHUYLHZ
6HOHFWLRQPHQX
6HOHFWLQJDVWLWFK ..........................................................
6HOHFWLQJDIRQW.............................................................
6WLWFKVHWWLQJV
6WLWFKZLGWK ..................................................................
6WLWFKSRVLWLRQLQJ.........................................................
6WLWFKOHQJWK..................................................................
6WLWFKGHQVLW\................................................................
%DODQFH ..........................................................................
7KUHDGWHQVLRQ .............................................................
Mirroring ......................................................................
6DYHWRSHUVRQDOPHQX
)UHHPRWLRQRSWLRQV
7LHRIIRSWLRQV
6HZLQJSURJUDPV
6HTXHQFLQJ
6WLWFK&UHDWRU
6HZLQJWHFKQLTXHV
6HZLQJLQ]LSSHUV ......................................................
6HZLQJKHPVLQKHDY\IDEULF ...................................
7KUHHVWHS]LJ]DJVWLWFK............................................
%OLQGKHPVWLWFK..........................................................
%XWWRQKROHV.................................................................
6HZRQDEXWWRQ .........................................................
'DUQLQJ .......................................................................
Quilting.......................................................................
6SHFLDOVHZLQJWHFKQLTXHV
&RPPRQVHZLQJSRSXSV
1
2
3
4

Stitch Creator™feature 6:1
Stitch Creator™IHDWXUH
Stitch Creator™IHDWXUHRYHUYLHZ
2SHQDQGH[LWStitch Creator™feature......................
'HÀQLWLRQRIDVWLWFKSRLQW ........................................
6WDUWFUHDWLQJDGGDVWLWFK
or stitch point ...............................................................
6HOHFWVWLWFKSRLQWV.......................................................
'XSOLFDWHVHOHFWHGVWLWFKSRLQW...................................
,QVHUWDQHZVWLWFKSRLQW .............................................
7ULSOHVWLWFK...................................................................
Mirroring side to side .................................................
Mirroring end to end ..................................................
'HOHWHVHOHFWHGVWLWFKSRLQW ........................................
7RXFKIXQFWLRQV
3RVLWLRQRIWKHPDUNHGVWLWFKSRLQW
/RDGLQJDQGVHZLQJDVWLWFK
6DYLQJDVWLWFK
&RPPRQStitch Creator™IHDWXUHSRSXSV
Embroidery mode – preparations 7:1
(PEURLGHU\XQLWRYHUYLHZ
(PEURLGHU\KRRSRYHUYLHZ
$WWDFKWKHHPEURLGH\IRRW$
%XLOWLQGHVLJQV
creative™(PEURLGHU\FROOHFWLRQ
&RQQHFWWKHHPEURLGHU\XQLW
5HPRYHWKHHPEURLGHU\XQLW
7RKRRSWKHIDEULF
6OLGHRQRIIWKHKRRS
*HWWLQJVWDUWHGHPEURLGHULQJ
Sequencing 5:1
6HTXHQFLQJ
6HTXHQFLQJRYHUYLHZ
2SHQDQGH[LWVHTXHQFLQJ
&UHDWHDVHTXHQFH
6HTXHQFHFRPPDQGV...................................................
/RDGLQJDQGVHZLQJDVHTXHQFH
6DYLQJDVHTXHQFH
,PSRUWDQWVHTXHQFLQJLQIRUPDWLRQ
&RPPRQVHTXHQFLQJSRSXSV
56
7

Embroidery mode – edit 8:1
(PEURLGHU\PRGHHGLW
(PEURLGHU\HGLWRYHUYLHZ
6HOHFWLRQPHQX
/RDGDGHVLJQ
/RDGDIRQW
/RDGIURPSHUVRQDOÀOHV86%GHYLFH ......................
7RXFKIXQFWLRQV
0RYH..............................................................................
6FDOH...............................................................................
Rotate ............................................................................
6HOHFWGHVLJQ
0RYHGHVLJQLQWRKRRS
0LUURUDGHVLJQ
'HOHWHDGHVLJQ
2SWLRQEDULQHPEURLGHU\HGLW
6DYHWRSHUVRQDOÀOHV...................................................
=RRPRSWLRQVSDQ......................................................
6HOHFWKRRS....................................................................
(PEURLGHU\WH[WHGLWRU ...............................................
(PEURLGHU\VWLWFKRXW.................................................
(PEURLGHU\HGLWSRSXSV
Embroidery mode – stitch-out 9:1
7RHQWHU(PEURLGHU\VWLWFKRXW
(PEURLGHU\VWLWFKRXWRYHUYLHZ
6SHHGFRQWURO
&URVVKDLU
%DVWLQJ
0RQRFKURPH
6WHSVWLWFKE\VWLWFK
7KUHDGWHQVLRQ
(PEURLGHU\LQIRUPDWLRQ
2SWLRQEDU
%DVLFSUHFLVHSRVLWLRQLQJ ............................................
=RRPRSWLRQVSDQ......................................................
+RRSSRVLWLRQ ..............................................................
&RORUEORFNOLVW.............................................................
5HWXUQWR(PEURLGHU\HGLW .........................................
+RZWRXVHEDVLFSUHFLVHSRVLWLRQLQJ
&RUQHULFRQV .................................................................
Zoom to crosshair........................................................
&RPPRQ(PEURLGHU\VWLWFKRXWSRSXSV
3HUVRQDOÀOHV
3HUVRQDOÀOHV
)LOHIRUPDWV
%URZVHSHUVRQDOÀOHV
/RDGDÀOH
2SHQDIROGHU
0RYHXSRQHIROGHUOHYHO .........................................
2UJDQL]H
&RPPRQSHUVRQDOÀOHVSRSXSV
Maintenance 11:1
&OHDQLQJWKHPDFKLQH
1RQRULJLQDOSDUWVDQGDFFHVVRULHV
7URXEOHVKRRWLQJ
,QGH[
,QWHOOHFWXDO3URSHUW\
8
9
11

Introduction 1

1:8
Introduction
PFAFF
10
20
30
40
50
2
1
mm
inch
00
Quilt
Machine overview
Front side
/LGZLWKVWLWFKFDWHJRULHV
7KUHDGLQJVORWV
3. 7KUHDGFXWWHU
6HQVRUPDWLFEXWWRQKROH
foot socket
/('OLJKWV
Free arm
5HYHUVH
5HYHUVHLQGLFDWRU
$FWLRQLQGLFDWRU
7KUHDGVQLSV
6WDUWVWRS
3UHVVHUIRRWGRZQDQGSLYRW
toggle
Presser foot up and extra lift
toggle
,PPHGLDWHWLHRII
6WLWFKUHVWDUW
6SHHGFRQWURO
1HHGOHXSGRZQ
3)$))®creative™&RORU
7RXFK6FUHHQ
%XWWRQUXOHU
+DQGZKHHO
%XLOWLQ86%SRUW
6W\OXVKROGHU
Main switch, connectors for
power cord and foot control
6OLGHIRUORZHULQJWKHIHHG
dogs
Needle area
%XLOWLQneedle threader
%REELQFRYHU
1HHGOHSODWH
Presser foot
Presser foot bar and presser
foot holder
1HHGOHWKUHDGJXLGH
1HHGOHVFUHZ
1HHGOHEDU
24
31
29
26
27
30
28
25
1
2
3
45
6
7
8
9
13
12
11 10
14 15 16 17
19
18
20
21
22
23
32
5

1:9
Introduction
33
34
35
47
48
49
Rear side
33. +DQGOH
IDT™system
(PEURLGHU\XQLWFRQQHFWLRQVRFNHW
Top parts
3UHWHQVLRQGLVNIRUWKUHDGLQJDQGEREELQ
winding
%REELQZLQGHUWKUHDGJXLGH
7KUHDGJXLGH
%REELQZLQGHUWKUHDGJXLGHV
%REELQZLQGHUWKUHDGFXWWHU
%REELQZLQGHUVSLQGOH
$X[LOLDU\VSRROSLQ
6SRROFDSV
6SRROSLQ
7KUHDGWHQVLRQGLVN
7DNHXSOHYHU
Accessory tray
7KHDFFHVVRU\WUD\IHDWXUHVVSHFLDOFRPSDUWPHQWV
for presser feet and bobbins, plus space for needles
DQGRWKHUDFFHVVRULHV6WRUHWKHDFFHVVRULHVLQWKH
tray so they are easily accessible.
6SDFHIRUDFFHVVRULHV
5HPRYDEOHWUD\IRUSUHVVHUIHHW
5HPRYDEOHEREELQKROGHU
Parts of the embroidery unit
W\SH%(
(PEURLGHU\XQLWUHOHDVHEXWWRQ
/HYHODGMXVWLQJIHHW
(PEURLGHU\XQLWVRFNHW
(PEURLGHU\KRRSFRQQHFWLRQDVVHPEO\
(PEURLGHU\DUP
36 37 38 39 40 41
42434446 45
50
51
51
54
53
52

1:10
Introduction
Included accessories
Accessories
6W\OXV
7KUHDGQHW
(GJHJXLGH
)HOWSDG
86%HPEURLGHU\VWLFN
6FUHZGULYHU
6HDPULSSHU
%UXVK
6SRROFDSODUJH
6SRROFDSPHGLXP
6SRROFDSVPDOO
0XOWLSXUSRVHWRRO
%REELQV
+RRSFOLSV
Included hoops
creative™6TXDUHKRRS[
creative™(OLWHKRRS[
Included accessories not in picture
Foot control
Power cord
1HHGOHV
&DUU\LQJFDVH
0LFURÀEHUFORWK
creative™3.0 (PEURLGHU\FROOHFWLRQ
4XLFNVWDUWHPEURLGHU\NLW
:DUUDQW\
69 70
55 56 57 58 59
60 61 62 63
64 65
66 67 68

1:11
Introduction
Presser feet
0A - Standard presser foot for IDT™system
(attached on the machine upon delivery)
7KLVIRRWLVXVHGPDLQO\IRUVWUDLJKWVWLWFKLQJDQG]LJ]DJVWLWFKLQJZLWKDVWLWFKOHQJWK
ORQJHUWKDQPP
1A - Fancy stitch foot for IDT™system
7KLVIRRWLVXVHGIRUGHFRUDWLYHVWLWFKHV7KHJURRYHRQWKHXQGHUVLGHRIWKHIRRWLV
GHVLJQHGWRÁRZVPRRWKO\RYHUWKHVWLWFKHV
2A - Fancy stitch foot
:KHQVHZLQJGHFRUDWLYHVWLWFKHVRUVKRUW]LJ]DJVWLWFKHVDQGRWKHUXWLOLW\VWLWFKHVZLWKOHVV
WKDQPPVWLWFKOHQJWKXVHWKLVIRRW7KHJURRYHRQWKHXQGHUVLGHRIWKHIRRWLVGHVLJQHG
WRÁRZVPRRWKO\RYHUWKHVWLWFKHV
3 - Blindhem foot for IDT™system
7KLVIRRWLVXVHGIRUEOLQGKHPVWLWFKHV7KHWRHRQWKHIRRWJXLGHVWKHIDEULF7KHUHGJXLGH
on the foot is designed to ride along the fold of the hem edge.
4 - Zipper foot for IDT™system
7KLVIRRWFDQEHVQDSSHGRQHLWKHUWKHULJKWRUWKHOHIWRIWKHQHHGOHPDNLQJLWHDV\WRVHZ
FORVHWRERWKVLGHVRIWKH]LSSHUWHHWK0RYHQHHGOHSRVLWLRQWRULJKWRUOHIWWRVHZFORVHUWR
zipper teeth.
5A - Sensormatic buttonhole foot
When connected to the machine, the buttonhole is sewn in the length that has been entered
into the machine.
5M - Manual buttonhole foot
7KLVIRRWLVXVHGIRUVHZLQJPDQXDOEXWWRQKROHV8VHWKHPDUNLQJVRQWKHIRRWWRSRVLWLRQ
WKHJDUPHQWHGJH7KHÀQJHURQWKHEDFNRIWKHIRRWKROGVFRUGLQJIRUFRUGHGEXWWRQKROH
6A - Embroidery/Sensormatic free-motion foot
7KLVIRRWLVXVHGIRUHPEURLGHU\DQGIUHHPRWLRQVHZLQJ7KLVIRRWFDQDOVREHXVHGIRU
darning.
Important: Make sure that the IDT™system is disengaged when using presser foot 2A, 5A, 5M, and 6A.

1:12
Introduction
Stitch overview
Utility stitches
Stitch Stitch number Name Description
1.1.1 Straight stitch
For seaming and topstitching. Select from 37 different needle
positions.
Note: This stitch makes a stronger tie-off than stitch 2.1.1.
1.1.2 Stretch triple straight
stitch Reinforced seam. Topstitching.
1.1.3 Straight stitch reverse Sew continuous reverse with strong tie-off.
1.1.4 Basting stitch
Single stitch used for basting. Lower the feed dogs. Touch foot
control to sew one stitch. Move fabric manually to desired position
and touch foot control again to sew another stitch.
1.1.5 Zigzag stitch 5HLQIRUFHVHDPVFOHDQÀQLVKVWUHWFKVHZLQJODFHLQVHUWLRQ
1.1.6 Zigzag stitch, right or
left needle position 5HLQIRUFHVHDPVFOHDQÀQLVKVWUHWFKVHZLQJ
1.1.7 Z-zigzag stitch Applique, couching, eyelets.
1.1.8 Stretch triple zigzag
stitch Elastic stitch for decorative hems or topstitching.
1.1.9 Three-step zigzag
stitch Sewing elastic, darning, patching and decorative sewing.
1.1.10 Elastic stitch Sewing elastic, darning, patching.
1.1.11 Triple stretch stitch Sewing elastic, darning, patching and decorative sewing.
1.1.12 Honeycomb stitch Decorative stitch for stretch fabrics and hems. Also used with elastic
thread in the bobbin.
1.1.13 Bridging stitch Joining fabrics and quilt batting, decorative stitch for quilting,
hemstitching.
1.1.14 Foundation elastic
stitch
Joining stitch for terry cloth, leather, bulky fabrics where overlapping
the seams.
1.1.15 Crosshem stitch Elastic decorative hem for stretch fabrics.
1.1.16 Blindhem stitch Sewing blindhems on woven fabrics.
1.1.17 Elastic blindhem stitch Sewing blindhems on stretch fabrics.
1.1.18 Stretch tricot stitch Sewing seams on stretch fabrics.
1.2.1 Closed overlock Seam and overcast stretch fabrics in one step.

1:13
Introduction
&ORVHGRYHUORFN 6HDPDQGRYHUFDVWLQRQHVWHS
&ORVHGRYHUORFN 6HDPDQGRYHUFDVWLQRQHVWHSZLWKUHLQIRUFHGHGJH
(ODVWLFRYHUFDVW 6HDPDQGRYHUFDVWVWUHWFKIDEULFVLQRQHVWHS
6WDQGDUGRYHUFDVW 6HDPDQGRYHUFDVWVWUHWFKIDEULFVLQRQHVWHSZLWKUHLQIRUFHGHGJH
2YHUORFN 6HDPDQGRYHUFDVWVWUHWFKIDEULFVLQRQHVWHS
&ORVHGRYHUORFN 6HDPDQGRYHUFDVWLQRQHVWHSSDWFKKHP
6WUHWFKNQLWRYHUORFN 6HDPDQGRYHUFDVWVWUHWFKIDEULFVLQRQHVWHS
5HLQIRUFHGRYHUORFN 6HDPDQGRYHUFDVWVWUHWFKIDEULFVLQRQHVWHSDQGUHLQIRUFH
)LQLVKHGHGJHRYHUORFN 6HDPDQGRYHUFDVWVWUHWFKIDEULFVLQRQHVWHSZLWKUHLQIRUFHGHGJH
0RFNFRYHUKHP &UHDWHWKHORRNRIDVHUJHUFRYHUKHPIRUVWUHWFKIDEULFV
2SHQRYHUORFN
blindhem &UHDWHGHFRUDWLYHRYHUORFNEOLQGKHPIRUZRYHQIDEULFV
&ORVHGRYHUORFN
blindhem &UHDWHGHFRUDWLYHRYHUORFNEOLQGKHPIRUVWUHWFKIDEULFV
/LQHQEXWWRQKROH %XWWRQKROHIRUEORXVHVVKLUWVDQGOLQHQ
6WDQGDUGEXWWRQKROH %DVLFEXWWRQKROHIRUEORXVHVVKLUWVDQGMDFNHWV$OVRIRUKRPHGpFRU
Rounded buttonhole
with pointed tack %XWWRQKROHIRUJDUPHQWV
Rounded buttonhole
with lengthwise tack %XWWRQKROHIRUJDUPHQWV
(\HOHWEXWWRQKROHZLWK
pointed tack 7DLORUVEXWWRQKROHRUGHFRUDWLYHEXWWRQKROH
(\HOHWEXWWRQKROHZLWK
lengthwise tack 7DLORUVEXWWRQKROHIRUMDFNHWVDQGWURXVHUV
Rounded buttonhole %XWWRQKROHIRUOLJKWJDUPHQWVRUMDFNHWV
6WUHWFKEXWWRQKROH %XWWRQKROHIRUVWUHWFKIDEULFV
&URVVVWLWFKEXWWRQKROH 'HFRUDWLYHEXWWRQKROH

1:14
Introduction
1.3.10 Decorative eyelet
buttonhole Decorative buttonhole for jackets.
1.3.11
Heirloom round
buttonhole with
pointed tack
Decorative heirloom buttonhole.
1.3.12 Bound buttonhole Foundation stitch for bound buttonhole.
1.3.13 Button sewing Sew on buttons or tacking. Lower the feed dogs.
1.4.1 Decorative eyelet Decorative eyelet for heirloom sewing.
1.4.2 Programmable darning
stitch Darning holes or damaged fabric.
1.4.3
Programmable
reinforced darning
stitch
Reinforced darning holes or damaged fabric.
1.4.4 Bartack Automatically reinforce seams and pockets.
1.4.5 Denim bartack Automatically reinforce seams and pockets decoratively.
1.4.6 Decorative bartack Automatically reinforce seams and pockets decoratively.
1.4.7 Cross bartack Automatically reinforce seams and pockets.

1:15
Introduction
Decorative stitches
2.1 Quilt stitches -
Handlook stitches
2.2 Quilt stitches -
Antique quilt stitches
2.3 Quilt stitches -
Stippling stitches
3.1 Needle art stitches -
Cross stitches
2.4 Quilt stitches -
Crazy patch stitches
3.2 Needle art stitches -
Hemstitches
3.3 Needle art stitches -
Antique hand embroidery stitches
2.4 Quilt stitches -
Crazy patch stitches
3.3 Needle art stitches -
Antique hand embroidery stitches
4.1 Decorative stitches -
Satin and edge stitches
3.4 Needle art stitches -
Smocking stitches
4.1 Decorative stitches -
Satin and edge stitches

1:16
Introduction
4.2 Decorative stitches -
Floral and ornamental stitches
4.3 Decorative stitches -
Art stitches
4.4 Decorative stitches -
Fun stitches
5.1 Sewing techniques -
Optional feet stitches
5.2 Sewing techniques -
Handlook quilt stitches
4.2 Decorative stitches -
Floral and ornamental stitches
4.3 Decorative stitches -
Art stitches
4.4 Decorative stitches -
Fun stitches
Comic
CyrillicOutline
Script
Alphabets

2
Preparations

2:2
Preparations
C A B
Unpacking
3ODFHWKHER[RQDVWHDG\ÁDWVXUIDFH/LIWWKHPDFKLQHRXWRIWKHER[DQGUHPRYHWKHRXWHUSDFNDJLQJ
and lift off the machine carrying case.
5HPRYHDOORWKHUSDFNLQJPDWHULDODQGWKHSODVWLFEDJV
6OLGHRIIWKHDFFHVVRU\WUD\DQGUHPRYHWKHVW\URIRDPXQGHUQHDWKWKHIUHHDUP
Note: Styrofoam left in the accessory tray while sewing may affect stitch quality. The styrofoam is for packing
purposes only and should be removed.
Note: Your creative™3.0 sewing and embroidery machine is adjusted to provide the best stitch result at normal room
temperature. Extreme hot and cold temperatures can affect the sewn result.
For the USA and Canada
7KLVVHZLQJPDFKLQHKDVDSRODUL]HGSOXJRQH
EODGHZLGHUWKDQWKHRWKHU7RUHGXFHWKHULVN
RIHOHFWULFVKRFNWKLVSOXJLVLQWHQGHGWRÀWLQD
SRODUL]HGRXWOHWRQO\RQHZD\,IWKHSOXJGRHV
QRWÀWIXOO\LQWKHRXWOHWUHYHUVHWKHSOXJ,ILW
VWLOOGRHVQRWÀWFRQWDFWDTXDOLÀHGHOHFWULFLDQWR
LQVWDOOWKHSURSHURXWOHW'RQRWPRGLI\WKHSOXJ
in any way.
Connecting the foot control cord
$PRQJWKHDFFHVVRULHV\RXZLOOÀQGWKHIRRWFRQWURO
FRUG&RQQHFWLQJWKHIRRWFRQWUROFRUGWRWKHIRRW
FRQWUROLVRQO\QHFFHVVDU\WKHYHU\ÀUVWWLPH\RXDUH
going to use the machine.
7DNHRXWWKHIRRWFRQWUROFRUG7XUQWKHIRRW
FRQWURORYHU&RQQHFWWKHFRUGWRWKHVRFNHW
inside the open space on the underside of the
foot control as shown.
3XVKÀUPO\WRPDNHVXUHLWLVSURSHUO\
connected.
3. Pull the cord into the slot to the left of the socket
WRHQVXUHWKDWWKHIRRWFRQWUROZLOOUHVWHYHQO\
RQWKHÁRRU
Connect the power cord
and foot control
Note: Before plugging in the foot control, check to ensure
that it is type “FR5” (see underside of foot control).
&RQQHFWWKHIRRWFRQWUROFRUGWRWKHIURQWVRFNHW
RQWKHERWWRPULJKWVLGHRIWKHPDFKLQH$
&RQQHFWWKHSRZHUFRUGWRWKHUHDUVRFNHWRQ
WKHERWWRPULJKWVLGHRIWKHPDFKLQH%3OXJ
the cord into a wall socket.
3UHVVWKH,2VZLWFKWR,WRWXUQRQSRZHUDQG
OLJKW&

2:3
Preparations
Pack away after sewing
7XUQWKHPDLQVZLWFK,2WR2&
8QSOXJWKHFRUGIURPWKHZDOOVRFNHWDQGWKHQ
IURPWKHPDFKLQH%
8QSOXJWKHIRRWFRQWUROFRUGIURPWKHPDFKLQH
$:LQGWKHIRRWFRQWUROFRUGDQGSODFHLQVLGH
the open area on the underside of the foot
control.
3ODFHDOODFFHVVRULHVLQWKHDFFHVVRU\WUD\6OLGH
the tray on to the machine around the free arm.
3ODFHWKHIRRWFRQWUROLQWKHVSDFHDERYHWKHIUHH
arm.
3XWRQWKHKDUGFRYHU
LED lights
<RXUPDFKLQHKDV/('OLJKWVZKLFKGLVWULEXWHWKH
OLJKWHYHQO\RYHUWKHVHZLQJDUHDDQGHOLPLQDWHV
shadows.
Free arm
7RXVHWKHIUHHDUPVOLGHRIIWKHaccessory tray.
When attached, a hook keeps the accessory tray
ORFNHGWRWKHPDFKLQH5HPRYHWKHWUD\E\VOLGLQJLW
to the left.
Thread cutter
7RXVHWKHWKUHDGFXWWHUSXOOWKHWKUHDGIURPEDFN
to front as shown.

2:4
Preparations
Small spool cap
Main spool pin in vertical position
Large spool cap
Spool pins
Your machine has two spool pins, a main spool
pin and an auxiliary spool pin. The spool pins
are designed for all types of thread. The main
spool pin is adjustable and can be used both in a
horizontal position (the thread reels off the spool)
and a vertical position (the thread spool rotates).
Use the horizontal position for normal threads and
the vertical position for large spools or specialty
threads.
Horizontal position
Place a spool cap and the thread spool on the spool
pin. Make sure that the thread reels off the spool
counter clock-wise and slide on a second spool cap.
Note: Not all thread spools are manufactured in the same
way. If you experience problems with the thread, turn it
in the opposite way or use the vertical position.
Use a spool cap slightly larger than the thread
spool. For narrow thread spools, use a smaller spool
cap in front of the spool. For large thread spools,
use a larger spool cap in front of the spool.
7KHÁDWVLGHRIWKHVSRROFDSVKRXOGEHSUHVVHG
ÀUPO\DJDLQVWWKHVSRRO7KHUHVKRXOGEHQRVSDFH
between the spool cap and the thread spool.
Vertical position
Raise the spool pin to the vertical position. Slide
on the large spool cap and place a felt pad under
the thread spool. This is to prevent the thread from
reeling off too fast.
Do not place a spool cap on top of the spool pin as
that would prevent the spool from rotating.
Note: When the spool pin is used in the vertical position,
the thread tension might need to be adjusted manually.
Auxiliary spool pin
The auxiliary spool pin is used when winding a
bobbin thread from a second spool of thread or for a
second spool when sewing with a twin needle.
Raise the auxiliary spool pin. Slide on a large spool
cap and place a felt pad under the thread spool.
Auxiliary spool pin and main spool pin in vertical
position.
Table of contents
Other Pfaff Sewing Machine manuals

Pfaff
Pfaff 8330 User manual

Pfaff
Pfaff smart 100s User manual

Pfaff
Pfaff 8303-040 User manual

Pfaff
Pfaff 571 User manual

Pfaff
Pfaff 918 User manual

Pfaff
Pfaff 138 User manual

Pfaff
Pfaff 418 Series User manual

Pfaff
Pfaff CREATIVE 4.0 - User manual

Pfaff
Pfaff ClassicStyle 1525 User manual

Pfaff
Pfaff 469 User manual

Pfaff
Pfaff Creative stylist MN 110 Instruction Manual

Pfaff
Pfaff powerquilter 16.0 User manual

Pfaff
Pfaff ClassicStyle 1525 User manual

Pfaff
Pfaff Quilt Expressions 4.0 User manual

Pfaff
Pfaff ClassicStyle 1525 User manual

Pfaff
Pfaff creative 2170 User manual

Pfaff
Pfaff 5483 Series User manual

Pfaff
Pfaff 1245 User manual

Pfaff
Pfaff 3574-2/02 User manual

Pfaff
Pfaff 118 User manual