manuals.online logo
Brands
  1. Home
  2. •
  3. Brands
  4. •
  5. Pfeiffer Vacuum
  6. •
  7. Water Pump
  8. •
  9. Pfeiffer Vacuum DUO 1.6 MC User manual

Pfeiffer Vacuum DUO 1.6 MC User manual

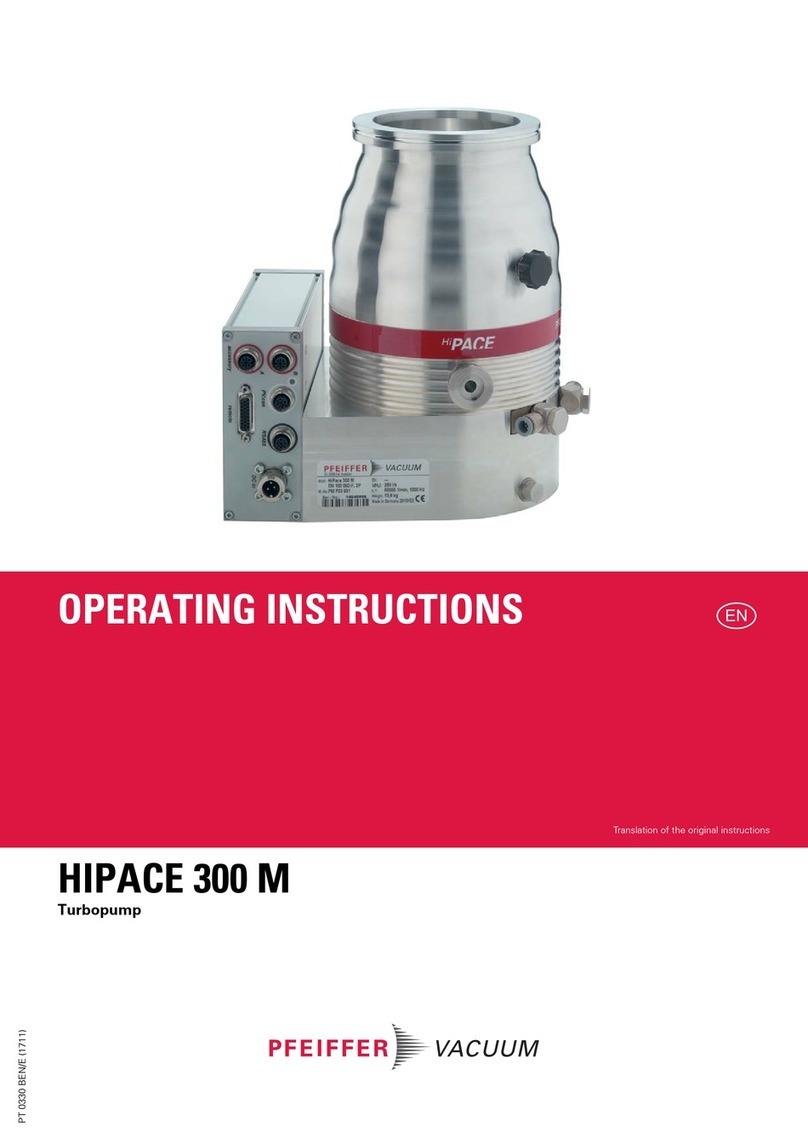
PD 0061 BEN/G (1708)
OPERATING INSTRUCTIONS EN
Translation of the original instructions
DUO 1.6 / DUO 1.6 M / DUO 1.6 MC
Rotary Vane Pump
Table of contents
2
Table of contents
1 About this manual . . . . . . . . . . . . . . . . . . . . . . . . . . . . . . . . . . . . . . . . . . . . . . . 3
1.1 Validity. . . . . . . . . . . . . . . . . . . . . . . . . . . . . . . . . . . . . . . . . . . . . . . . . . . . . 3
1.2 Conventions . . . . . . . . . . . . . . . . . . . . . . . . . . . . . . . . . . . . . . . . . . . . . . . . 3
2 Safety . . . . . . . . . . . . . . . . . . . . . . . . . . . . . . . . . . . . . . . . . . . . . . . . . . . . . . . . . 5
2.1 Safety precautions . . . . . . . . . . . . . . . . . . . . . . . . . . . . . . . . . . . . . . . . . . . 5
2.2 Protective equipment . . . . . . . . . . . . . . . . . . . . . . . . . . . . . . . . . . . . . . . . . 5
2.3 Proper use . . . . . . . . . . . . . . . . . . . . . . . . . . . . . . . . . . . . . . . . . . . . . . . . . 6
2.4 Improper use. . . . . . . . . . . . . . . . . . . . . . . . . . . . . . . . . . . . . . . . . . . . . . . . 6
3 Transport and storage. . . . . . . . . . . . . . . . . . . . . . . . . . . . . . . . . . . . . . . . . . . . 7
3.1 Transport. . . . . . . . . . . . . . . . . . . . . . . . . . . . . . . . . . . . . . . . . . . . . . . . . . . 7
3.2 Storage . . . . . . . . . . . . . . . . . . . . . . . . . . . . . . . . . . . . . . . . . . . . . . . . . . . . 7
4 Product description. . . . . . . . . . . . . . . . . . . . . . . . . . . . . . . . . . . . . . . . . . . . . . 8
4.1 Product identification. . . . . . . . . . . . . . . . . . . . . . . . . . . . . . . . . . . . . . . . . . 8
4.2 Function . . . . . . . . . . . . . . . . . . . . . . . . . . . . . . . . . . . . . . . . . . . . . . . . . . . 9
5 Installation . . . . . . . . . . . . . . . . . . . . . . . . . . . . . . . . . . . . . . . . . . . . . . . . . . . . . 9
5.1 Set-up . . . . . . . . . . . . . . . . . . . . . . . . . . . . . . . . . . . . . . . . . . . . . . . . . . . . . 9
5.2 Connecting the vacuum side. . . . . . . . . . . . . . . . . . . . . . . . . . . . . . . . . . . 10
5.3 Connecting the exhaust side. . . . . . . . . . . . . . . . . . . . . . . . . . . . . . . . . . . 10
5.4 Connecting to the mains power supply. . . . . . . . . . . . . . . . . . . . . . . . . . . 13
5.5 Filling up the operating fluid . . . . . . . . . . . . . . . . . . . . . . . . . . . . . . . . . . . 16
6 Operation . . . . . . . . . . . . . . . . . . . . . . . . . . . . . . . . . . . . . . . . . . . . . . . . . . . . . 17
6.1 Before switching on the pump. . . . . . . . . . . . . . . . . . . . . . . . . . . . . . . . . . 17
6.2 Switching on . . . . . . . . . . . . . . . . . . . . . . . . . . . . . . . . . . . . . . . . . . . . . . . 17
6.3 Pumping condensable vapours. . . . . . . . . . . . . . . . . . . . . . . . . . . . . . . . . 17
6.4 Topping up the operating fluid. . . . . . . . . . . . . . . . . . . . . . . . . . . . . . . . . . 20
6.5 Switching off the pump . . . . . . . . . . . . . . . . . . . . . . . . . . . . . . . . . . . . . . . 21
7 Maintenance. . . . . . . . . . . . . . . . . . . . . . . . . . . . . . . . . . . . . . . . . . . . . . . . . . . 22
7.1 Precautions . . . . . . . . . . . . . . . . . . . . . . . . . . . . . . . . . . . . . . . . . . . . . . . . 22
7.2 Changing the operating fluid. . . . . . . . . . . . . . . . . . . . . . . . . . . . . . . . . . . 24
7.3 Changing the kind of operating fluid . . . . . . . . . . . . . . . . . . . . . . . . . . . . . 26
7.4 Cleaning the gas ballast valve . . . . . . . . . . . . . . . . . . . . . . . . . . . . . . . . . 27
8 Decommissioning . . . . . . . . . . . . . . . . . . . . . . . . . . . . . . . . . . . . . . . . . . . . . . 28
8.1 Shutting down for longer periods . . . . . . . . . . . . . . . . . . . . . . . . . . . . . . . 28
8.2 Re-starting . . . . . . . . . . . . . . . . . . . . . . . . . . . . . . . . . . . . . . . . . . . . . . . . 28
8.3 Disposal . . . . . . . . . . . . . . . . . . . . . . . . . . . . . . . . . . . . . . . . . . . . . . . . . . 28
9 Malfunctions . . . . . . . . . . . . . . . . . . . . . . . . . . . . . . . . . . . . . . . . . . . . . . . . . . 29
9.1 Rectifying malfunctions. . . . . . . . . . . . . . . . . . . . . . . . . . . . . . . . . . . . . . . 29
10 Service . . . . . . . . . . . . . . . . . . . . . . . . . . . . . . . . . . . . . . . . . . . . . . . . . . . . . . . 31
11 Spare parts . . . . . . . . . . . . . . . . . . . . . . . . . . . . . . . . . . . . . . . . . . . . . . . . . . . . 32
11.1 Spare parts packages . . . . . . . . . . . . . . . . . . . . . . . . . . . . . . . . . . . . . . . . 32
12 Accessories . . . . . . . . . . . . . . . . . . . . . . . . . . . . . . . . . . . . . . . . . . . . . . . . . . . 34
13 Technical data and dimensions . . . . . . . . . . . . . . . . . . . . . . . . . . . . . . . . . . . 34
13.1 General . . . . . . . . . . . . . . . . . . . . . . . . . . . . . . . . . . . . . . . . . . . . . . . . . . . 34
13.2 Technical data . . . . . . . . . . . . . . . . . . . . . . . . . . . . . . . . . . . . . . . . . . . . . . 35
13.3 Dimensions . . . . . . . . . . . . . . . . . . . . . . . . . . . . . . . . . . . . . . . . . . . . . . . . 35
Declaration of conformity . . . . . . . . . . . . . . . . . . . . . . . . . . . . . . . . . . . . . . . . 37
About this manual
3
1 About this manual
1.1 Validity
This operating manual is for customers of Pfeiffer Vacuum. It describes the functioning
of the designated product and provides the most important information for safe use of
the unit. The description follows applicable EU guidelines. All information provided in this
operating manual refers to the current state of the product's development. The documen-
tation remains valid as long as the customer does not make any changes to the product.
Up-to-date operating instructions can also be downloaded from
www.pfeiffer-vacuum.com.
Applicable docu-
ments
*also available via www.pfeiffer-vacuum.com
For information about other certifications, if applicable, please see the signet on the prod-
uct or:
●www.tuvdotcom.com
●TUVdotCOM-ID 0000021320
1.2 Conventions
Safety instructions The safety instructions in Pfeiffer Vacuum operating instructions are the result of risk
evaluations and hazard analyses and are oriented on international certification stan-
dards as specified by UL, CSA, ANSI Z-535, SEMI S1, ISO 3864 and DIN 4844. In this
document, the following hazard levels and information are considered:
Duo 1.6 / Duo 1.6 M / Duo 1.6 MC Operating instructions
Declaration of Conformity Part of this document
Operating instructions for accessories (order-specifically) see section "accessories"*
DANGER
Imminent danger
Indicates an imminent hazardous situation that will result in death or serious injury.
WARNING
Possibly imminent danger
Indicates an imminent hazardous situation that can result in death or serious injury.
CAUTION
Possibly imminent danger
Indicates an imminent hazardous situation that can result in minor or moderate injury.
NOTICE
Command or note
Command to perform an action or information about properties, the disregarding of
which may result in damage to the product.
4
About this manual
Pictographs
Instructions in the
text
Work instruction: here you have to do something.
Abbreviations M version: Version with magnetic coupling
MC version: C-Version with magnetic coupling
RSSR: Radial Shaft Seal Ring
OME: Oil mist eliminator
ODK: Oil drain kit with return unit
Symbols used The following symbols are used consistently throughout in all illustrations:
Vacuum flange
Exhaust flange
Gas ballast valve
Power connection
Prohibition of an action to avoid any risk of accidents, the disregarding
of which may result in serious accidents
Warning of a displayed source of danger in connection with operation of
the unit or equipment
Command to perform an action or task associated with a source of dan-
ger, the disregarding of which may result in serious accidents
Important information about the product or this document
V
G
Safety
5
2Safety
2.1 Safety precautions
●Do not expose any body parts to the vacuum.
●Observe the safety and accident prevention regulations.
●Check regularly that all safety precautions are being complied with.
●Do not carry out any unauthorised modifications or conversions to the pumps.
●Depending on the operating and ambient conditions, the surface temperature of the
pumps may rise above 70 °C. Use suitable finger guards if necessary.
●When returning the pumps to us please note the instructions in the Service section.
The following safety instructions are only valid for the disassembly of the drive
system for a vacuum pump with a magnetic coupling:
●When disassembling the drive system from the pump housing, the strong magnetic
field may influence the function and operational reliability of electrical and electronic
devices.
●Persons with cardiac pacemakers must keep away from the magnetic coupling.
–Minimum distance: 2 m!
●Disassembled magnetic couplings must be kept away from computers, data storage
media and other electronic components.
●Keep the disassembled components of the magnetic coupling separate at all times.
Danger of crushing!
●Do not allow any magnetised parts into the vicinity of the magnetic coupling. Danger
of injury!
2.2 Protective equipment
Determined situations concerning the handling of vacuum pumps require wearing of per-
sonal protective equipment. The owner, respectively the employer are obligated to pro-
vide an adequate equipment to any operating persons.
Duty to inform
Each person involved in the installation, operation or maintenance of the vacuum pump
must read and observe the safety-related parts of these operating instructions.
The operator is obligated to make operating personnel aware of dangers originating
from the vacuum pump, the pumped medium and the entire system.
Installation and operation of accessories
Pfeiffer Vacuum pumps can be equipped with a series of adapted accessories. The in-
stallation, operation and maintenance of connected devices are described in detail in
the operating instructions of the individual components.
For information on order numbers of components, see "Accessories".
Use original accessory parts only.
DANGER
Danger to health by hazardous substances during maintenance or installation
Depending on the process vacuum pumps, components or operating fluids can be con-
taminated by toxic, reactive or radioactive substances.
Wear adequate protective equipment during maintenance and repairs or in case of
reinstallation.
6
Safety
2.3 Proper use
●The vacuum pump may only be used to generate a vacuum.
●Only use the vacuum pump for applications with oxygen concentration ≤21%.
●Installation, operating and maintenance regulations must be complied with.
●Other accessories, than those described in this manual, must not be used without the
agreement of Pfeiffer Vacuum.
2.4 Improper use
Improper use will cause all claims for liability and warranties to be forfeited. Improper use
is defined as usage for purposes deviating from those mentioned above, especially:
●pumping of corrosive gases
●pumping of explosive media
●operation in potentially explosive areas
●pumping of gases containing impurities such as particles, dusts and condensate; note
the vapour compatibility levels of the pump
●pumping of substances that tend to sublime
●use of the vacuum pump to generate pressure
●pumping of liquids
●the use of operating fluids not specified by Pfeiffer Vacuum
●connection to pumps or units which are not suitable for this purpose according to their
operating instructions
●connection to units which have exposed voltage-carrying parts
CAUTION
Risk of injury through hot surfaces
Vacuum pumps can become hot during operation.
Allow the pump to cool before maintenance and repairs.
If necessary wear protective gloves according to EN 420.
CAUTION
Increased noise emission!
Increased noise emission can occur within a limited area surrounding the vacuum
pump.
Provide noise protection or
wear hearing protection.
NOTICE
EC conformity
The manufacturer's declaration of conformity becomes invalid if the operator modifies
the original product or installs additional components.
Following installation into a plant and before commissioning, the operator must check
the entire system for compliance with the valid EU directives and reassess it accord-
ingly.
Transport and storage
7
3 Transport and storage
3.1 Transport
Transport instructions
Remove the locking cap from the vacuum and exhaust flange immediately before con-
necting!
– Check the cone strainer, paying attention to the O-ring.
Use only the handle on the top side of the pump to lift the pump.
Fig. 1: Transporting the pump
3.2 Storage
Check that all the openings on the pump are securely closed.
Fill up the pump with new operating fluid to the top edge of the sight glass.
Store the pump only dry and dust-free indoors within the specified environmental con-
ditions.
– In rooms with moist or aggressive atmospheres, the pump must be airproof shrink-
wrapped in a plastic bag together with a bag of desiccant.
– After storage periods longer than two years, it is recommended to carry out main-
tenance and change the operating fluid before using the pump.
8
Product description
4 Product description
4.1 Product identification
To correctly identify the product when communicating with Pfeiffer Vacuum, always have
the information from the rating plate available.
●Pump model and model number
●Type and amount of operating fluid
●Date of manufacture
Please find the voltage range and motor-related data on the separately attached motor
rating plate.
Fig. 2: Product identification on the rating plate
Scope of delivery ●Pump with drive unit
●Operating fluid (except F4 and F5)
●Cone strainer and centering ring/centering ring with nozzle with O-rings
●Locking cap for vacuum and exhaust flange
●Operating instructions
Variants
D-35641 Asslar
Mod.: DUO 3
Mod.-Nr.: PK D57 XXX
Ser.- Nr.: 0014440
S : max. 2.5/2.9 m /h
Oil : P3 0.4 l
Mass : 11,2 kg
n : XXXX 1/min
(N )
2
3
max.
Made in Germany 2005/01
Pump type Pump versions
Duo 1.6 Standard version of pump
Duo 1.6 M M version of pump; differences from the standard version:
●Magnetic coupling
Duo 1.6 MC C version of pump; differences from the standard version:
●Operating fluid F4
●Magnetic coupling capsulated on pump side
●Vane material changed
●Hose connection at the gas ballast valve
●Leak rate ≤1 • 10-8 Pa m3/s
Installation
9
4.2 Function
Vacuum pumps of the Duo series are oil-sealed, two-stage rotary vane vacuum pumps.
The vacuum pumps are equipped with a safety valve which, when the pump is at a stand-
still, closes the vacuum chamber vacuum tight and at the same time vents the pump.
The version with magnetic coupling has as an alternative to conventional shaft
feedthrough a static and maintenance-free seal towards the outside.
Fig. 3: Duo 1.6
5 Installation
5.1 Set-up
Installation location Observe the following requirements when setting up the pump:
●Consider the load-bearing capacity of the installation site.
●Maximum installation altitude 2000 m (above mean sea level)
●Permissible ambient temperature: +12 ... 40°C
●Maximum relative humidity 85%
1 Vacuum flange
2 Exhaust flange
6 Connector IEC/C14
23 Inlet port operating fluid
return line
60 Gas ballast valve
302 Casing
304 Operating fluid filler screw
306 O-ring
308 Operating fluid drain screw
310 O-ring
318 Sight glass
406 Motor
1
23
6
2
304/306 15
318 308/310 302 60 406
V
G
10
Installation
Fig. 4: Setting up the pump
Fill up with operating fluid before operating the first time (see p. 16, chap. 5.5).
– Amount and type according to rating plate
Always place the pump on a firm, even surface.
Where stationary installation is involved, anchor the pump on site; if necessary, ex-
change the base for one with mounting holes (on request).
When installing the pump in a closed housing, ensure there is sufficient air circulation.
– Sight glass and gas ballast valve must be visible and readily accessible.
– Voltage and frequency information given on the motor rating plate must be visible.
5.2 Connecting the vacuum side
Remove locking cap from the vacuum flange;
– pay attention to the cone strainer and the respective O-ring in the intake port.
The connection between the pump and the vacuum chamber should be kept as short
as possible.
– Depending on the pump type, use metallic hoses or PVC hoses with flange con-
nections.
– Separators, filters etc. may be installed upstream to protect the pump (see acces-
sories). However, please observe the loss of pumping capacity due to the conduc-
tivity of the accessories.
5.3 Connecting the exhaust side
max. 10
°
> 35 mm
WARNING
Emission of toxic substances from the exhaust!
Danger of poisoning from emitted gases or vapours, which can be detrimental to health
and/or can pollute the environment, depending on the particular application.
Comply with the applicable regulations when working with toxic substances.
Only officially approved filter systems may be used to separate and remove these
substances.
CAUTION
High pressure in the exhaust line!
Danger of damage to the seals and danger of the pump bursting.
Observe the maximum permissible pressure of 1500 hPa (absolute), activate shut-
off valves in such a way that they open before or at the same time as the pump is
started.
Installation
11
Before attaching the piping at the exhaust flange remove locking cap and insert cen-
tering ring/centering ring with nozzle with the respective O-rings.
Choose the cross-section of the exhaust line to be at least the size of the nominal
connection diameter of the vacuum pump's exhaust connection.
Piping to the pump must be suspended or supported.
– Physical forces from the piping system must not be allowed to act on vacuum
pumps.
Lay piping from the pump sloping downward so that no condensate can flow back into
the pump; otherwise fit a condensate separator.
– If an air trap is created in the system, then a device for draining condensation water
must be provided at the lowest point.
Fitting the OME and
the oil return line
ODK (option)
Turn off the vacuum pump, vent to atmospheric pressure and allow to cool.
Remove the protective cap from the connection flange.
Zentrierring mit Düse 87 durch einen Standard-Zentrierring (DN 16 ISO-KF) ersetzen.
Place OME on the exhaust side of the pump with flange pointing downwards and fit
with clamping ring (accessories), pay attention to centering ring.
NOTICE
Reduced pressure in the exhaust line!
Reduced pressure in the exhaust line can cause malfunctions and damage the pump.
It is only allowed in pumps with magnetic coupling.
Ensure that when discharging gases the exhaust pressure is at least 250 hPa higher
than the suction pressure.
86 Cone strainer
87 Centering ring with nozzle
92 O-ring
310 O-ring
92
86
87
310
12
Installation
Fig. 5: Duo 1.6 with operating fluid return line
Note: As the hexagon socket of the locking screw is not metric, a special spanner (3/
16") (provided as part of the scope of supply) is required.
Unscrew locking screw 8.
Drain off operating fluid if so and fill in the pump.
Screw in fitting 9 in place of the locking screw 8; take care with seal ring.
Unscrew and remove the union nut of the screw fitting 28 and remove the sealing plug
29.
Insert spring 11 into hose 10 (anti-kink device).
Fit operating fluid return hose 10 at both sides,
– keep the hose as short as possible and protect it from bending.
Tighten the union nuts of both screw fittings.
8 Locking screw
9 Fitting
10 Operating fluid return hose
11 Spring (inside the hose)
28 Fitting
29 Locking cap
S Clamping ring
Z Centering ring
X
S
ONF/OME
Z
9
810/11
29
28
Installation
13
5.4 Connecting to the mains power supply
Depending on the pump type, different motor versions or mains voltages are possible:
●Single phase motor for fixed voltage with
– built-in thermal protection switch,
– mains switch and
– mains connection socket (C14)
●Single phase motor with switchable voltage range,
– thermal protection switch,
– mains switch and
– mains connection socket (C14)
Single phase motors The vacuum pumps are equipped with single-phase motors with built-in thermal protec-
tion switch. This interrupts the motor current in case of overheating, but provides no per-
manent shutdown of the motor.
DANGER
Voltage-bearing elements
Danger to life from electric shock.
The electrical connection can be carried out only by trained and authorised electri-
cians.
Disconnect the power supply and secure it against being switched back on.
Ensure the system is adequately earthed.
NOTICE
Excess voltage!
Danger of destroying the motor.
Power connections must comply with local regulations. Voltage and frequency infor-
mation given on the motor rating plate must correspond to the mains voltage and fre-
quency values.
To protect the motor and supply cable in case of malfunction, mains fuse protection
must be implemented.
WARNING
Danger of injury from moving parts!
After power failure or motor shutdown due to overheating, the motor may restart auto-
matically.
Secure the motor so that it cannot be switched on while any work is being performed
on the pump.
If necessary, dismantle the pump from the installation for inspection.
14
Installation
Fig. 6: Motor circuit diagram with switch
Fuse protection
To protect the motor in case of malfunction, additionally provide a fuse protection in
accordance with the regional regulations.
– Select a fuse with slow characteristics according to the table below.
The transmission power of the pump’s magnetic coupling is so great that the cou-
pling is no overload protection for the motor.
Motor
voltage [V], ± 10 %
Frequency
[Hz]
Nominal
current [A]
Recommended
fuse, slow [A]
Cable/plug version
230 ... 240
230 ... 240
50
60
1.15
1
2.5
2.5
Safety plug (C14) at
terminal box
105
115 ... 125
50
60
1.7
2.5
4
5
Safety plug (C14) at
terminal box
100
95 ... 105
50
60
1.8
2.6
4
5
Safety plug (C14) at
terminal box
Installation
15
Changing the voltage range
Only valid for pumps with reversible motor:
The mains voltage must be determined on-site each time before the pump is installed
or moved to a different location.
Disconnect the pump from the power supply.
Set the desired voltage range on the voltage selector switch using a suitable screw-
driver.
NOTICE
Overvoltage!
An incorrect voltage range setting can damage the motor.
Always check the set voltage range before switching on the pump.
Only change the voltage range when the pump is disconnected from the power
mains.
0
1
11 5
230
11 5
230
Switch position: "115" "230"
Voltage range
Motor 115/230 V
115 V 10%, 50/60 Hz 230 V 10%, 50/60 Hz
Voltage range
Motor 100/200 V
100 V 10%, 50/60 Hz 200 V 10%, 50/60 Hz
16
Installation
5.5 Filling up the operating fluid
The type and amount of operating fluid should be visible on the pump's rating plate for
every rotary vane pump.
Permissible operating fluids
●P3 (Standard operating fluid)
●F4 (Operating fluid for corrosive gas versions)
Filling up the operat-
ing fluid
Fig. 7: Filling up the operating fluid
Unscrew operating fluid filler screw 304.
Fill up the operating fluid.
– First fill when the pump is cold: Maximum 3/4 of the min./max. range.
Screw in operating fluid filler screw 304; pay attention to O-ring 306.
NOTICE
Use approved operating fluids only!
The use of operating fluids that have not been approved by Pfeiffer Vacuum shall result
in a limited warranty. In such cases, it is not possible to guarantee that product-specific
performance data will be achieved.
Prior consultation is required before using other application-specific operating fluids.
304/306 (0.3 Nm)
max.
min.
WARNING
Toxic vapours!
Danger of poisoning when igniting and heating synthetic operating fluids (e.g. F4/F5)
above 300 °C.
Observe the application instructions.
Do not allow operating fluid to make contact with tobacco products; observe safety
precautions when handling chemicals.
Operation
17
6Operation
6.1 Before switching on the pump
Check the operating fluid level in the sight glass.
Compare the voltage and frequency information on the rating plate with the mains volt-
age and frequency values.
Check that the exhaust connection allows free flow (max. permissible pressure 1500
hPa absolute).
– Activate the shut-off valves in such a way that they open before or at the same time
as the pump is started.
Protect the pump sufficiently from taking in contaminants by means of suitable precau-
tions (e.g. dust filters); if necessary, check operating fluid regularly or replace at short-
er intervals.
6.2 Switching on
The pump can be switched on in any pressure range between atmospheric and
ultimate pressure.
The ideal operating condition of the pump is achieved during continuous operation. Cy-
clic operation is possible, but 10 cycles per hour should not be exceeded and the oper-
ating phase should always be longer than the downtime (non-operation time).
No special precautions are necessary when pumping dry gases. In order to attain the
lowest possible ultimate pressures, the gas ballast valve should be closed.
Switch on pump at main switch 15.
Switch on the pump with the vacuum flange closed and allow to warm up for 30 min-
utes.
Check operating fluid level only when the pump is warm and running; therefore
– close vacuum flange and gas ballast valve,
– correct filling level during operations: within the markings at the sight glass frame,
– check operating fluid daily in non-stop operation, otherwise whenever the pump is
switched on. Refilling is possible when the pump is in final vacuum operation.
6.3 Pumping condensable vapours
Should the process gases contain condensable gases, the rotary vane pump must be
operated with gas ballast (i.e. with an open gas ballast valve).
CAUTION
Hot surface!
Danger of burns if hot parts are touched. Depending on the operating and ambient con-
ditions, the surface temperature of the pump may rise above 70 °C.
In this case, use suitable finger guards.
NOTICE
Bad final vacuum and damage to the pump!
Danger of condensation and corrosion due to exceeding the water vapour compatibility
during operation without gas ballast or in case of insufficient supply of flushing gas.
Only pump vapours when the pump is warm and the gas ballast valve is open.
When the process has been completed, allow the pump to continue running for
about 30 minutes with the vacuum flange closed and the gas ballast open for oper-
ating fluid regeneration purposes.
18
Operation
Gas ballast valve,
standard version
To avoid condensation in the pump when pumping condensable vapours, air is periodi-
cally fed into the working chamber at the beginning of the compression phase via the gas
ballast valve 42.
The gas ballast valve is closed when turning to the right to position 0 and open when turn-
ing to the left to position 1. Intermediate settings are not possible.
Fig. 8: Standard version 42 of gas ballast valve
Operation with acces-
sories
Gas ballast valve with flushing gas connection
If the pumping process requires flushing gas, the gas ballast valve with the flushing gas
connection must be used.
Fig. 9: Gas ballast valve with flushing gas connection
1
1
0
0
1
1
0
0
geöffnet/
open
geschlossen/
closed
NOTICE
Flushing gas pressure higher than allowed endangers the operational reliability
of the pump.
The power input of the pump, the temperature and the ejection of operating fluid will in-
crease.
Observe the maximum permissible flushing gas pressure of 1500 hPa (absolute).
Set the amount of flushing gas on site; dosing is not possible when using a solenoid
valve!
7.3
7.4
83(1.0 Nm)
Operation
19
Tighten screws 83, torque of 1 Nm.
Connect flushing gas at the flushing gas connection 7.4.
Set flushing gas pressure; maximum pressure 1500 hPa (absolute).
– Select the type and amount of flushing gas depending on the process; consult Pfei-
ffer Vacuum if necessary.
Use the proportioning screw 7.3 to set the desired amount of gas.
– Closed when fully turned to the right; open when fully turned to the left.
– Amount of flushing gas max. 180 l/h.
Gas ballast valve with solenoid valve
To control the flow of the flushing gas externally, an electromagnetic valve can also be
used as an alternative to the versions described above. The valve makes it easier to op-
erate the gas ballast and allows clean air or other gas to be let in in a process-controlled
manner.
Fig. 10: Assembling the solenoid valve at the gas ballast inlet
7.3 Proportioning screw
7.4 Flushing gas connection (for DN 5 mm hose)
83 Schrauben
NOTICE
Flushing gas pressure higher than allowed endangers the operational reliability
of the pump.
The power input of the pump, the temperature and the ejection of operating fluid will in-
crease.
Observe the maximum permissible flushing gas pressure of 1500 hPa (absolute).
Set the amount of flushing gas on site; dosing is not possible when using a solenoid
valve!
Performance data of the solenoid valve
2/2 way valve closed when disconnected
Supply voltage 24 V DC, +/- 10 %
Power input 4 W
Socket Type 2506
Threaded connection of flushing gas 1/8" inside
Flushing gas pressure max. 1500 hPa (absolute)
Amount of flushing gas max. 180 l/h
20
Operation
6.4 Topping up the operating fluid
If the operating fluid has reached its minimum filling level, the operating fluid must be
topped up. The fluid can be topped up during operation in the final vacuum.
Filling up the operat-
ing fluid
Fig. 11: Filling up the operating fluid
Unscrew operating fluid filler screw 304.
When the pump is at operation temperature, top up the operating fluid up to the "max."
marking.
Screw in operating fluid filler screw 304; pay attention to O-ring 306.
304/306 (0.3 Nm)
max.
min.

This manual suits for next models

2

Other Pfeiffer Vacuum Water Pump manuals

Pfeiffer Vacuum HILOBE 1002 User manual

Pfeiffer Vacuum

Pfeiffer Vacuum HILOBE 1002 User manual

Pfeiffer Vacuum MVP 015-4 User manual

Pfeiffer Vacuum

Pfeiffer Vacuum MVP 015-4 User manual

Pfeiffer Vacuum MVP 015 2 User manual

Pfeiffer Vacuum

Pfeiffer Vacuum MVP 015 2 User manual

Pfeiffer Vacuum MVP 015-4 User manual

Pfeiffer Vacuum

Pfeiffer Vacuum MVP 015-4 User manual

Pfeiffer Vacuum HIPACE 1200 User manual

Pfeiffer Vacuum

Pfeiffer Vacuum HIPACE 1200 User manual

Pfeiffer Vacuum TMH 1600M User manual

Pfeiffer Vacuum

Pfeiffer Vacuum TMH 1600M User manual

Pfeiffer Vacuum HEPTA 200 P User manual

Pfeiffer Vacuum

Pfeiffer Vacuum HEPTA 200 P User manual

Pfeiffer Vacuum HIPACE 300 PLUS User manual

Pfeiffer Vacuum

Pfeiffer Vacuum HIPACE 300 PLUS User manual

Pfeiffer Vacuum UNO User manual

Pfeiffer Vacuum

Pfeiffer Vacuum UNO User manual

Pfeiffer Vacuum TSH 071 User manual

Pfeiffer Vacuum

Pfeiffer Vacuum TSH 071 User manual

Pfeiffer Vacuum HEPTA 950 L User manual

Pfeiffer Vacuum

Pfeiffer Vacuum HEPTA 950 L User manual

Pfeiffer Vacuum OKTA 4000 User manual

Pfeiffer Vacuum

Pfeiffer Vacuum OKTA 4000 User manual

Pfeiffer Vacuum HILOBE 1001 User manual

Pfeiffer Vacuum

Pfeiffer Vacuum HILOBE 1001 User manual

Pfeiffer Vacuum TMH 1601 P C User manual

Pfeiffer Vacuum

Pfeiffer Vacuum TMH 1601 P C User manual

Pfeiffer Vacuum HiPace 800 User manual

Pfeiffer Vacuum

Pfeiffer Vacuum HiPace 800 User manual

Pfeiffer Vacuum HEPTA DRY 100 User manual

Pfeiffer Vacuum

Pfeiffer Vacuum HEPTA DRY 100 User manual

Pfeiffer Vacuum ACP 28R Owner's manual

Pfeiffer Vacuum

Pfeiffer Vacuum ACP 28R Owner's manual

Pfeiffer Vacuum UnoLine UNO 200 User manual

Pfeiffer Vacuum

Pfeiffer Vacuum UnoLine UNO 200 User manual

Pfeiffer Vacuum UNO 6 User manual

Pfeiffer Vacuum

Pfeiffer Vacuum UNO 6 User manual

Pfeiffer Vacuum MVP 040-2 User manual

Pfeiffer Vacuum

Pfeiffer Vacuum MVP 040-2 User manual

Pfeiffer Vacuum HIPACE 1200 I User manual

Pfeiffer Vacuum

Pfeiffer Vacuum HIPACE 1200 I User manual

Pfeiffer Vacuum HIPACE 10 User manual

Pfeiffer Vacuum

Pfeiffer Vacuum HIPACE 10 User manual

Pfeiffer Vacuum DUO 20 MC User manual

Pfeiffer Vacuum

Pfeiffer Vacuum DUO 20 MC User manual

Pfeiffer Vacuum HEPTA 450 L User manual

Pfeiffer Vacuum

Pfeiffer Vacuum HEPTA 450 L User manual

Popular Water Pump manuals by other brands

ITT Goulds Pumps 3500 Installation, operation and maintenance instructions

ITT

ITT Goulds Pumps 3500 Installation, operation and maintenance instructions

Kessel aqualift f Installation, operating and maintenance instructions

Kessel

Kessel aqualift f Installation, operating and maintenance instructions

LEYBOLD E 250 operating instructions

LEYBOLD

LEYBOLD E 250 operating instructions

Emerson Control Wave SCADA RTU brochure

Emerson

Emerson Control Wave SCADA RTU brochure

Becker DVT 3.80/0-56 operating instructions

Becker

Becker DVT 3.80/0-56 operating instructions

TapFlo TF50 Original instruction

TapFlo

TapFlo TF50 Original instruction

Graco Dura-Flo 600 Instructions - parts

Graco

Graco Dura-Flo 600 Instructions - parts

Everflo EF 7000 owner's manual

Everflo

Everflo EF 7000 owner's manual

Bell and Gossett Ecocirc Vario series instruction manual

Bell and Gossett

Bell and Gossett Ecocirc Vario series instruction manual

EBARA ESA25-D instruction manual

EBARA

EBARA ESA25-D instruction manual

EINHELL BG-PP 1750 N Original operating instructions

EINHELL

EINHELL BG-PP 1750 N Original operating instructions

Viking pump 32 Series Technical & service manual

Viking pump

Viking pump 32 Series Technical & service manual

Weir SPM QWS 2500 XL Operation Instruction and Service Manual

Weir

Weir SPM QWS 2500 XL Operation Instruction and Service Manual

Pentair myers aplex Series Installation and service manual

Pentair

Pentair myers aplex Series Installation and service manual

Everbilt ESE60W-HD Use and care guide

Everbilt

Everbilt ESE60W-HD Use and care guide

Everbilt AUTOJ100A2 Use and care guide

Everbilt

Everbilt AUTOJ100A2 Use and care guide

Varian SH-100 instruction manual

Varian

Varian SH-100 instruction manual

TE Connectivity 523199-3 Customer's manual

TE Connectivity

TE Connectivity 523199-3 Customer's manual

manuals.online logo
manuals.online logoBrands
  • About & Mission
  • Contact us
  • Privacy Policy
  • Terms and Conditions

Copyright 2025 Manuals.Online. All Rights Reserved.