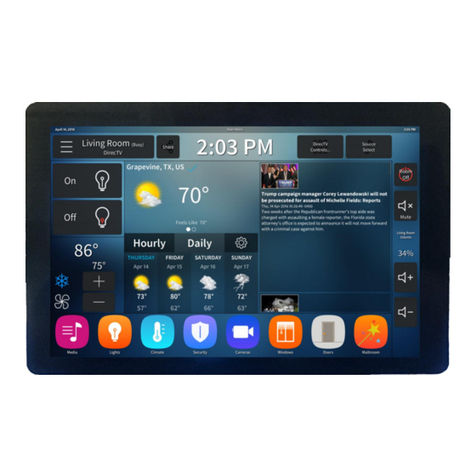
Pharos Omega PS200 Operator's manual

Installation and Configuration Guide
Document Version: PS200-Install-1.1
Distribution Date: December 2010
Pharos Omega PS200 1.0.0

2
© 2010 Pharos Systems International, Inc.
Pharos Blueprint, Secure Release Here, and Policy Print are trademarks or registered trademarks of
Pharos Systems International.

Installation and Configuration Guide
3
Table of Contents
Introduction .......................................................................................................................... 6
About This Document ............................................................................................................................... 6
Getting Help.............................................................................................................................................. 6
Omega Troubleshooting Guide............................................................................................................. 6
Pharos Website ..................................................................................................................................... 6
Contact Details...................................................................................................................................... 6
Omega PS200 Hardware Components.................................................................................... 7
PS200 Hardware Components .................................................................................................................. 7
Installation Overview ............................................................................................................ 8
Package Contents...................................................................................................................................... 8
Pre-Installation Tasks................................................................................................................................ 9
Pre-Installation Checklist ...................................................................................................................... 9
Pharos Uniprint System .................................................................................................................... 9
Pharos Blueprint Enterprise System ...............................................................................................10
Setting up Omega PS200 Hardware...................................................................................... 11
Attaching the desk stand to the PS200 Touchscreen .............................................................................11
Connecting the PS200 hardware components .......................................................................................12
Logging on to the PS200 ...................................................................................................... 14
Using the Touchscreen............................................................................................................................14
Using the Omega Web Administrator.....................................................................................................15
Installing the PS200 firmware .............................................................................................. 16
Installing the PS200 firmware.................................................................................................................16
Configuring Omega PS200.................................................................................................... 17
Upgrading the Omega Firmware ............................................................................................................ 17
Checking the Firmware version...........................................................................................................17
Upgrading the Omega Firmware.........................................................................................................17
Configuring the Network Details of the PS200 .......................................................................................18
Configuring the IP address of the PS200............................................................................................. 18
Configuring the PS200 hostname .......................................................................................................19
Configuring the PEDI settings.............................................................................................................. 19
Testing EDI Connection...........................................................................................................................19
Training the Omega to detect copier signals .......................................................................................... 20

Installation and Configuration Guide
4
PS200 Touchscreen Administrator ....................................................................................... 23
Demo...................................................................................................................................................23
Firewall................................................................................................................................................24
Network ..............................................................................................................................................25
Network - LAN................................................................................................................................. 25
Network - Network .........................................................................................................................26
PEDI Settings .......................................................................................................................................27
Pref......................................................................................................................................................28
Station.................................................................................................................................................28
Syslog .................................................................................................................................................. 29
System.................................................................................................................................................30
System - LAN ...................................................................................................................................30
System - Print Port .......................................................................................................................... 30
System - Network............................................................................................................................31
System - Version .............................................................................................................................31
Using the Omega Web Administrator................................................................................... 32
Opening the Omega Administrator.........................................................................................................32
Upgrading PS200 Firmware ....................................................................................................................33
Editing Omega Themes ...........................................................................................................................33
Editing Styles.......................................................................................................................................33
Extracting Themes from the Thin Client .................................................................................................33
Editing Themes Manually........................................................................................................................ 34
Adding Screen Saver Images................................................................................................................... 34
Changing the Administrator Password ................................................................................................... 34
Configuring Network Details of thePS200 ..............................................................................................34
Configuring IP address ........................................................................................................................35
Configuring the PS200 hostname .......................................................................................................35
Configuring the PEDI settings.............................................................................................................. 35
Showing other PS200 terminals..............................................................................................................36
PS200 Networking ............................................................................................................... 37
Using the PS200 as a Network Hub.........................................................................................................37
Using the PS200 as a Firewall ................................................................................................................. 37
Omega PS200 Troubleshooting ............................................................................................ 38
Appendix 1: Using Touchscreen in Demo Mode.................................................................... 39
Appendix 2: Uniprint Configuration Settings ........................................................................ 40

Installation and Configuration Guide
5
General Properties.................................................................................................................................. 40
Printing Properties .................................................................................................................................. 41
Card Reader ............................................................................................................................................ 42
Copier......................................................................................................................................................43
Logon....................................................................................................................................................... 45
Printer ..................................................................................................................................................... 46
Session .................................................................................................................................................... 46
Third Party Charging ...............................................................................................................................48
Appendix 3: Blueprint Configuration Settings....................................................................... 49
Settings....................................................................................................................................................49
PS200 Configuration ............................................................................................................................... 50
Appendix 6: Power Usage .................................................................................................... 51

Installation and Configuration Guide Introduction
6
Introduction
About This Document
This document provides instructions on the process of installing and configuring the Pharos Omega
PS200.
Getting Help
Below is a list of options for obtaining support in the event you have questions or encounter issues
during or after your installation of Omega PS200.
Omega Troubleshooting Guide
See the “Omega PS200 Troubleshooting” section for the common errors and problems that you are
likely to encounter when installing and configuring your PS200. This guide also includes the possible
cause of the errors and gives you recommendations on how to solve the issues.
Pharos Website
The Pharos website (www.pharos.com) contains information about Pharos products, including product
updates, fixes, and firmware releases. It also includes the Pharos Knowledge Base, which provides a
comprehensive source of solutions and workarounds to known problems and issues. It also provides you
with configuration examples. The Knowledge Base is constantly updated to ensure that it always
contains the latest information.
Contact Details
Corporate Headquarters
Post-Sales Technical Assistance
Phone: (585) 249-8999
Fax: (585) 249-9229
Address: 100 WillowBrook Office Park
Fairport, NY 14450
United States of America
Email: [email protected]m
North America:
877 848 0397
Australia/New Zealand:
+64 9 523 0737
Rest of the world:
+1 (585) 249-8999 Ext1

Installation and Configuration Guide Omega PS200 Hardware Components
7
Omega PS200 Hardware Components
Omega PS200 is a device that interfaces with Pharos Uniprint and Blueprint Enterprise to provide
photocopying and print job release services. PS200 provides a Touchscreen user interface at the print
device that allows users to log on, view and release print jobs.
Before you begin your installation, it is important to understand the basic hardware components of
PS200. This section gives you an overview of the PS200 device including the hardware components.
PS200 Hardware Components
Omega PS200 consists of the following hardware components:
Components
Description
Pharos Omega PS200 Touchscreen
This refers to device that users use to complete printing or
copying activities. The PS200 interfaces with the Pharos system
to control printing and copying.
Pharos Omega PS200 SmartLink for
Copy
An assembly that connects the PS200 to the MFP it controls,
consisting of the Copier Adapter Cable and the Copy Link.
These components are connected to the network as well as the MFP to track and charge for printing
and/or copying.

Installation and Configuration Guide Installation Overview
8
Installation Overview
Generally, installing Omega PS200 involves setting up the hardware components and configuring the
PS200 to connect to the Pharos server. This
section gives you an overview of installing your
PS200 terminal including the initial configuration
necessary after the installation.
If you want to upgrade from an earlier version of
the PS200 firmware, see “Upgrading the PS200
Firmware” section.
The steps below give an overview of what's required to set up an Omega PS200:
1. Install the PS200 hardware components. The first step in setting up the PS200 itself is to
physically install the device. This usually requires connecting the device to the network and to
the printer or MFD that it will control access to. If the PS200 will also be used with Off-The-Glass
to control copying on an MFD, it will need to be attached to the Foreign Device Interface (FDI) of
the copier.
2. Install the PS200 firmware (if it is does not have the latest firmware). The PS200 is shipped with
a default firmware. However, it is best to always have the latest available firmware. You can
download the latest firmware from the Pharos website. You can install the PS200 firmware using
the Omega Web Administrator or by using a USB memory stick.
3. Configure the PS200. Once the PS200 firmware is upgraded to the latest firmware, you will need
to configure the PS200 with details of the Pharos system.
Package Contents
Ensure you have the following items before beginning the installation process:
PS200 Touchscreen
PS200 Power Supply
Cable wire loom
Desk Stand
o2 pieces plastic stand (pedestal and base)
o5 pcs mounting screws
o1 thumb screw
Copier Adapter Cable (optional)*
Copy Link (optional)*
Magnetic Card Swipe Reader (optional) with mounting bracket
Proximity reader
Quick Start Guide
RMA Documentation
Note: It is recommended that a working
Pharos system (Uniprint or Blueprint) must
already be set up before installing Omega
PS200.

Installation and Configuration Guide Installation Overview
9
*The PS200 SmartLink for Copy requires a Copier Adapter cable customized for the copier model. This
may be supplied separately, or with the Copy Link.
Pre-Installation Tasks
Before installing PS200, you must complete the following pre-installation tasks:
Configure the Pharos product (Uniprint or Blueprint Enterprise) that you are going to use. See
“Pre-Installation Checklist” section for more information on how to prepare your Pharos product
for PS200 installation.
Make sure that you have installed an EDI Server before installing PS200.
Determine the location for mounting your PS200 and the mounting option that is suitable for
your environment.
oFor more information on mounting options for the Touchscreen, see “Mounting the
Touchscreen” section.
oFor more information on mounting options for the Thin Client, see “Appendix A:
Mounting Options for the Thin Client”.
Verify that you have all the PS200 components as described in the “Package Contents” section.
In most cases, you will have already installed the SSL Certificate on the EDI Server machine
during the install, if you haven’t, you have to install SSL certificates and apply SSL. (optional, but
recommended).
Note down the MAC Address found at the
bottom of the PS200. You need the MAC
address to later access your PS200
terminal for configuration.
Pre-Installation Checklist
It is recommended that a working Pharos system must be present before installing Omega.
Pharos Uniprint System
The following Uniprint components must be set up before installing PS200. (Refer to the Pharos Help for
more information):
At least one Print Server.
The Pharos EDI Server (set to use the appropriate Print Server).
All Printers and Copiers to be controlled by OmegaPS200 terminals (including Job Cost Methods
and copy lines for Copiers).
The Pharos Bank(s) used for authentication and charging.
A Charging Model, if Third Party Charging is being used.
Note: Review the Readme.htm file for
additional information on software
prerequisites, special scenarios, and known
issues that might affect how you proceed
with your installation

Installation and Configuration Guide Installation Overview
10
If you are using a version of Pharos earlier than Pharos 7.2, you must upgrade to 7.2 or later before
installing Omega.
Pharos Blueprint Enterprise System
The following Blueprint components must be set up before installing PS200. (Refer the Blueprint Help
for more information):
The Blueprint Analyst must be installed.
All Blueprint Collectors must be installed
and registered with the Analyst.
You must be licensed to use the Secure
Release Here™ system in Blueprint.
Note: Pharos Omega PS200 1.0.0 supports
Pharos Blueprint versions 3.5 R2 and 4.1.

Installation and Configuration Guide Setting up Omega PS200 Hardware
11
Setting up Omega PS200 Hardware
This section provides you with the step-by-step procedures in setting up the PS200 including instructions
on connecting the various PS200 components.
Attaching the desk stand to the PS200 Touchscreen
A desk stand is supplied with the PS200. This desk stand attaches to the back of the Touchscreen and
can be fastened to a desk, a bench or to the MFP. For more information on the mounting options for
the Touchscreen, see “Mounting the Touchscreen” section.
Before attaching the desk stand to the PS200, ensure that you have all the necessary components. The
desk stand includes:
2 pcs plastic stand (pedestal and base)
4 pcs mounting screws + 1 spare
1 thumb head screw
2 pcs plastic wire ties
To attach the desk stand to the PS200:
1. Locate the four threaded holes at the back of
the PS200 Touchscreen,
2. Align the threaded holes of the PS200
Touchscreen with the holes of the pedestal
3. Secure the pedestal to the PS200 Touchscreen
using the supplied mounting screws.
4. Attach the pedestal to the base using the thumb
screw provided.
Note: Make sure you position the cable wire tie
down point at the left rear of the base (see
illustration)
Rotate the thumb screw until the pedestal is in
place

Installation and Configuration Guide Setting up Omega PS200 Hardware
12
Connecting the PS200 hardware components
Maintaining good cable management is essential to a successful installation. The PS200 package comes
with cables bundled in a wire loom. One end of the loom will plug into the PS200 Touchscreen and the
other end will plug into the network cables, power adaptor, and Copy Link (if required). Using the
bundled cables in the wire loom, you can now connect the cables.
1. Connect all four plugs to the PS200 Touchscreen as per diagram
2. Connect the other end of the wire loom as per diagram:

Installation and Configuration Guide Setting up Omega PS200 Hardware
13
3. Optional: Connect the card reader to one of the USB ports on the PS200.
4. Optional: Attach the Copy Cable and Smart Link (For Copying)
If the PS150 will be used to control a copier, you need to attach the Copy Cable and the Smart
Link to the PS150. The Copy Cable and the Smart Link are packed separately. Before you begin,
attach the Copy Cable to the SmartLink.
a. Connect the USB cable of the SmartLink into the USB extension socket.
b. Connect the copy cable to the FDI of the MFP using the custom copier adapter cable
c. Activate the FDI - you need a copier technician to do this.
5. Plug the power supply to an AC wall outlet.
6. Turn on the PS200 by pressing the green button on the front panel. The power button turns
green when powered on.

Installation and Configuration Guide Logging on to the PS200
14
Logging on to the PS200
After setting up the PS200 hardware, the next step is to configure your PS200 to connect to the Pharos
server (Blueprint Enterprise or Uniprint) that you want to use. This section includes instructions on how
to access your PS200 unit after it has been set up.
You can access and configure the Omega PS200 in two ways:
PS200 Touchscreen Administrator. This is the main menu screen which allows you to manage
and configure your PS200 device. You can access the Touchscreen Administrator by tapping the
top left corner of the PS200 Touchscreen five times. For more information on how to access the
PS200 Terminal configuration menu, see “Logging on to the PS200” section.
PS200 Omega Web Administrator. This is the web user interface used to manage and configure
PS200 remotely. For more information on how to use the Omega Web Administrator, see “Using
the Omega Web Administrator” section.
Using the Touchscreen
To access the PS200 Terminal using the Touchscreen:
1. Tap the top left corner of the PS200
terminal Touchscreen (Figure 24) five
times until the administrator logon
screen appears.
2. In the PS200 Administrator Logon
screen (Figure 25), log on with the
username “root” and the password
“pharos”. This opens the Omega PS200
Touchscreen Administrator.
These are the default administrator
details for a new PS200—they can be
changed later in the Omega Web
Administrator or the Touchscreen Administrator.
Figure 24 PS200 Welcome Screen
Figure 25 PS200 Administrator Logon
Screen

Installation and Configuration Guide Logging on to the PS200
15
Using the Omega Web Administrator
To access the PS200 using the Omega Web Administrator:
The Omega Web Administrator can be viewed with Microsoft Internet Explorer 7.0 or later and Mozilla
Firefox 3.0 or later. Other browsers, for example Opera, may work, but are not officially supported.
1. Open a web browser and navigate to http://hostname:8080, where hostname is the network
hostname of the PS200 terminal you
want to configure.
2. On the logon screen, enter the
administrative password of the PS200
terminal. By default, the password is
set to “pharos”.
3. Optional: If you want to use SSL, tick
the Secure Connection box.
4. Click the Log on button. This opens the
Omega Web Administrator .
If you receive a warning about security certificates, select the appropriate option to accept the
certificate and continue. The label for this option will differ depending on the browser you are using.
Note: If you have not yet configured a
hostname for your PS200, you can use its
default host name. The default hostname
for a new PS200 is omega-XXXXXX, where
XXXXXX is the last six digits of the device’s
MAC address.
The MAC address is printed on a label in the
Thin Client next to the Serial Number.

Installation and Configuration Guide Installing the PS200 firmware
16
Installing the PS200 firmware
The PS200 is shipped with a firmware already installed. However, if you need to re-install the firmware,
you can do so using a USB memory stick (minimum size 128MB). This section provides you with the
instructions on how to install the PS200 firmware from a USB memory stick.
Caution: All contents on the memory stick will be overwritten.
Installing the PS200 firmware
To install the firmware using a USB memory stick:
1. Extract the firmware ZIP file to a temporary directory.
2. Browse to the SmartHub sub-directory.
3. Using Wordpad, open the readme.txt and go through the install instructions.
Note: In order to support USB upgrades, the
Omega BIOS is set to allow booting from
USB. This can present a security risk—you
may want to disable this if you do not
intend to upgrade via USB.

Installation and Configuration Guide Configuring Omega PS200
17
Configuring Omega PS200
After installing the PS200, the device has to be configured and verified to communicate with the Pharos
server. This section describes the initial network configuration tasks that you have to complete to
establish connectivity between your PS200 and your Pharos server.
The following steps show the typical order of initially configuring your PS200 terminal:
1. Upgrading the Omega firmware (If you do not have the latest available firmware).
2. Configuring the Network Details of your PS200 terminal.
3. Testing the EDI connection to verify that the PS200 can communicate with the EDI server.
4. Training the PS200 to detect the Copiers (if required).
Upgrading the Omega Firmware
The Omega PS200 comes with a default firmware installed. You have to ensure that your PS200 has the
most recent available firmware release. The latest firmware releases can be downloaded from the
Pharos website: http://pharos.com/Support/Terminals/Index.html
Checking the Firmware version
Before performing a firmware upgrade, check the version of the firmware installed with your PS200.
To check the firmware version of the PS200, do one of the following:
Using the Omega Web Administrator, select System Info from the menu on the left. This screen
shows the Omega Component Versions.
Using the Touchscreen Administrator, select system.info > version from the configuration
menu.
Take note of the current version and compare it with the latest firmware release from the Pharos
website. Check to see if a firmware upgrade is necessary.
Upgrading the Omega Firmware
Firmware upgrades can be performed from the Omega Web Administrator
To upgrade firmware from the Omega Web Administrator:
1. Download the latest firmware from the Pharos website -
http://pharos.com/Support/Terminals/Index.html.
2. Extract the firmware ZIP file to a temporary directory.
3. Open the Omega Web Administrator by browsing to http://hostname:8080, where
hostname is the hostname of the PS200 terminal that you want to upgrade.
4. From the System menu on the left, click Upgrade.

Installation and Configuration Guide Configuring Omega PS200
18
5. In the firmware field, click Browse to the file web-upgrade-firmware.bin, located in the PS200
sub-directory under the temporary directory you extracted the firmware ZIP file to.
6. Click the Upgrade Selected button. This starts the upgrade process for your PS200 terminal.
Upgrading the firmware resets the theme to the default –once the firmware is updated, any custom
theme must be updated as well.
Configuring the Network Details of the PS200
Once the firmware has been upgraded and verified to run the latest release, you can now configure the
networking details necessary for establishing the connection between your Pharos product and the
PS200.
You can configure the host name, IP address and the PEDI settings of your PS200 terminal using the
Touchscreen Administrator or the Omega Web Administrator.
This section provides you with instructions on how to configure the network details of your PS 150
terminal using the Touchscreen Administrator. For more information on how to configure networking
details of PS200 using the Web Administrator, see “Using Omega Administrator” section.
Configure the following networking details of the Omega:
IP address
Host name
Pharos External Device Interface(PEDI) settings
Configuring the IP address of the PS200
To configure the IP address of the Omega:
1. From the Touchscreen Administrator, select network.ini and then click the Edit button.
2. Select LAN and click Edit.
3. Choose the parameter usedhcp and click Edit.
a. Set dhcp to “Yes” if the IP address will be assigned via DHCP. No further network
configuration is necessary.
b. Set dhcp to “No” if the PS200 will use a static IP address. Enter the static IP address for
the PS200 under the IP property. Enter all the other network properties.
4. Press the Back button to exit all the menus and save the configuration details by clicking the
Apply Changes button.

Installation and Configuration Guide Configuring Omega PS200
19
Configuring the PS200 hostname
The default host name for a new PS200 is omega-XXXXXX, where XXXXXX is the last six digits of the
MAC address of the PS200. This hostname is visible on the upper right corner of the PS200 Welcome
screen.
To configure the Omega hostname:
1. From the Touchscreen Administrator, select network.ini and then choose network.
2. Select hostname and enter the host name of the PS200 Terminal. This must correspond to the
terminal name that you want to use for the PS200. For Uniprint, this corresponds to your
Network Terminal name, for Blueprint –this is your Terminal name.
Configuring the PEDI settings
The Pharos External Device Interface (PEDI) is a service that functions as an intermediary between the
Pharos system and third party devices and applications
To configure the PEDI settings:
1. Select pedi.ini from the configuration menu.
2. In the URL setting, click Edit and enter the URL for the Pharos Server file. Refer to the PEDI
settings for more information on the URL settings.
3. In the timeout setting, enter a timeout value (in seconds) for connecting to the EDI.
4. In the password setting, enter the password used to authenticate clients against the EDI.
For Uniprint, the EDI password is set when you installed the EDI Server. The EDI password
can also be viewed at System Settings > Server Configuration context of the Pharos
Administrator.
For Blueprint, the password is set by default to ‘pharos’.
Once network configuration is complete, you can now test the EDI Connection.
Testing EDI Connection
Ensure that the communication between the EDI server
and the Pharos system is successfully established prior to
configuring the PS200.
Note: In the Omega Web Administrator,
after saving the PEDI configuration
settings, the Omega automatically tests
the connection to the EDI server.

Installation and Configuration Guide Configuring Omega PS200
20
To test the EDI connection:
After the PEDI settings have been configured, scroll down the screen to see the Test Connectivity
button. Click this button to verify if you have entered the correct settings for the PEDI. If connection is
successful, the Omega will return a message “Established a Pharos EDI session”.
If the connection is unsuccessful, check your URL and password settings in the PEDI. If the test is still
unsuccessful, see the Omega Troubleshooting section. Press the Back button to exit all the menus and
click the Apply Changes button to save the configuration details.
If you encounter the error "The Terminal <terminal name> does not exist, perhaps the hostname of your
PS200 does not match any terminal in your Pharos server. Open Pharos Administrator or Blueprint
Administrator and check that the hostname that you have configured for your device matches a
terminal entry. In Pharos Administrator, Network terminals are found in the Release Stations context
while in Blueprint Administrator, terminals are added and edited in the Device Management >
Terminals screen.
Training the Omega to detect copier signals
The PS200 must be “trained” to recognize the signals
sent by the copier it is attached to. Omega allows you to
perform a series of tests to determine the configuration
values for a copier.
The Learn Copier button at the bottom of the Station >
Copier screen detects the copier properties and
automatically fills in the copier configuration settings
and sends them to the Pharos Database.
The following series of screens is displayed when the Learn Copier button is clicked:
Step 1. Configuring the copier interface
Ensure that the PS200 is correctly wired in to the
copier’s Foreign Device Interface (FDI) and that the
FDI is enabled, then press Next.
You are asked to make a single copy to confirm
that Omega can detect signals from the copier. If
you are confident that the FDI is enabled and
wired correctly, you can skip this initial test by
pressing the Skip Test button.
Note: In most cases it will be easier to
use the Learn Copier button to configure
Copiers. However, you can manually edit
the copier values in Pharos
Administrator at Pharos Stations >
Release Stations > Copier category.
Table of contents