2
INTRODUCTION
Thank you for purchasing the Phase3 Models Chipmunk 370. Before completing the final assembly of your new airplane,
please carefully read through these operating instructions in their entirety. Doing so will ensure your success the first time
around. As you can see, there's not much to it!
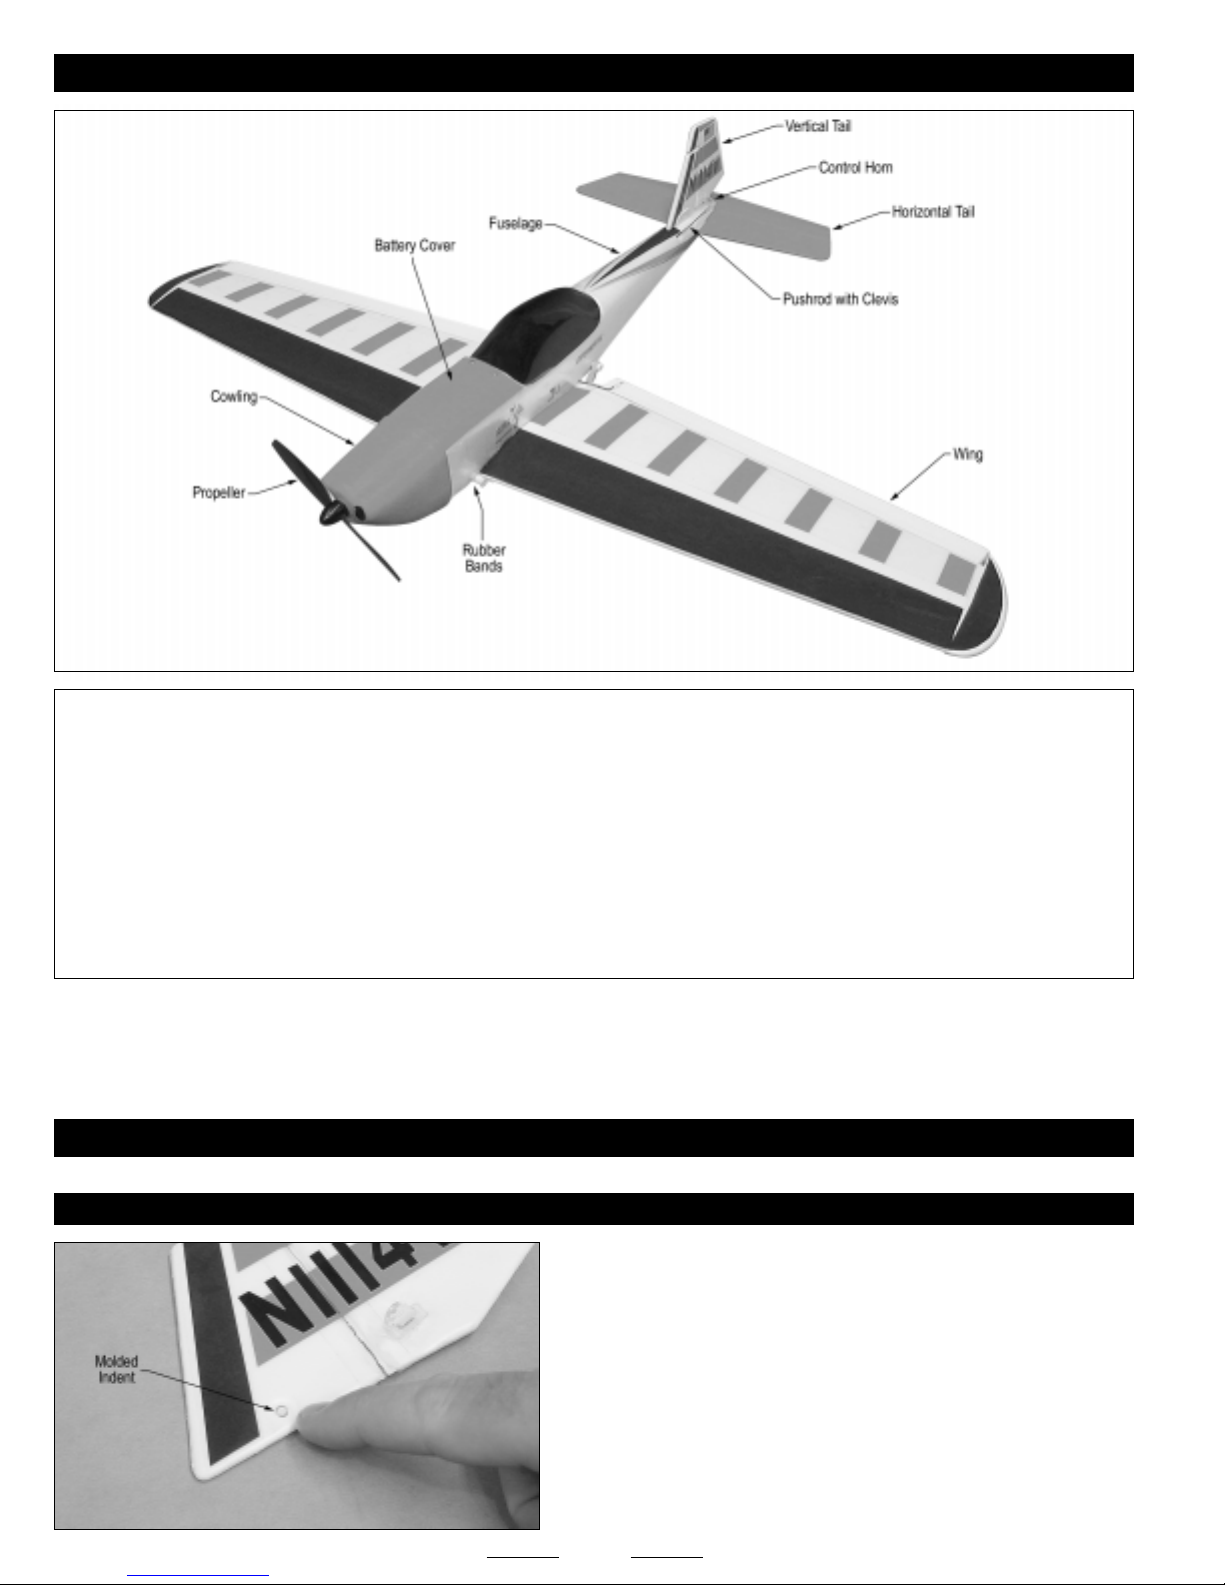
●Identify the Parts and Familiarize Yourself with Your New Chipmunk 370
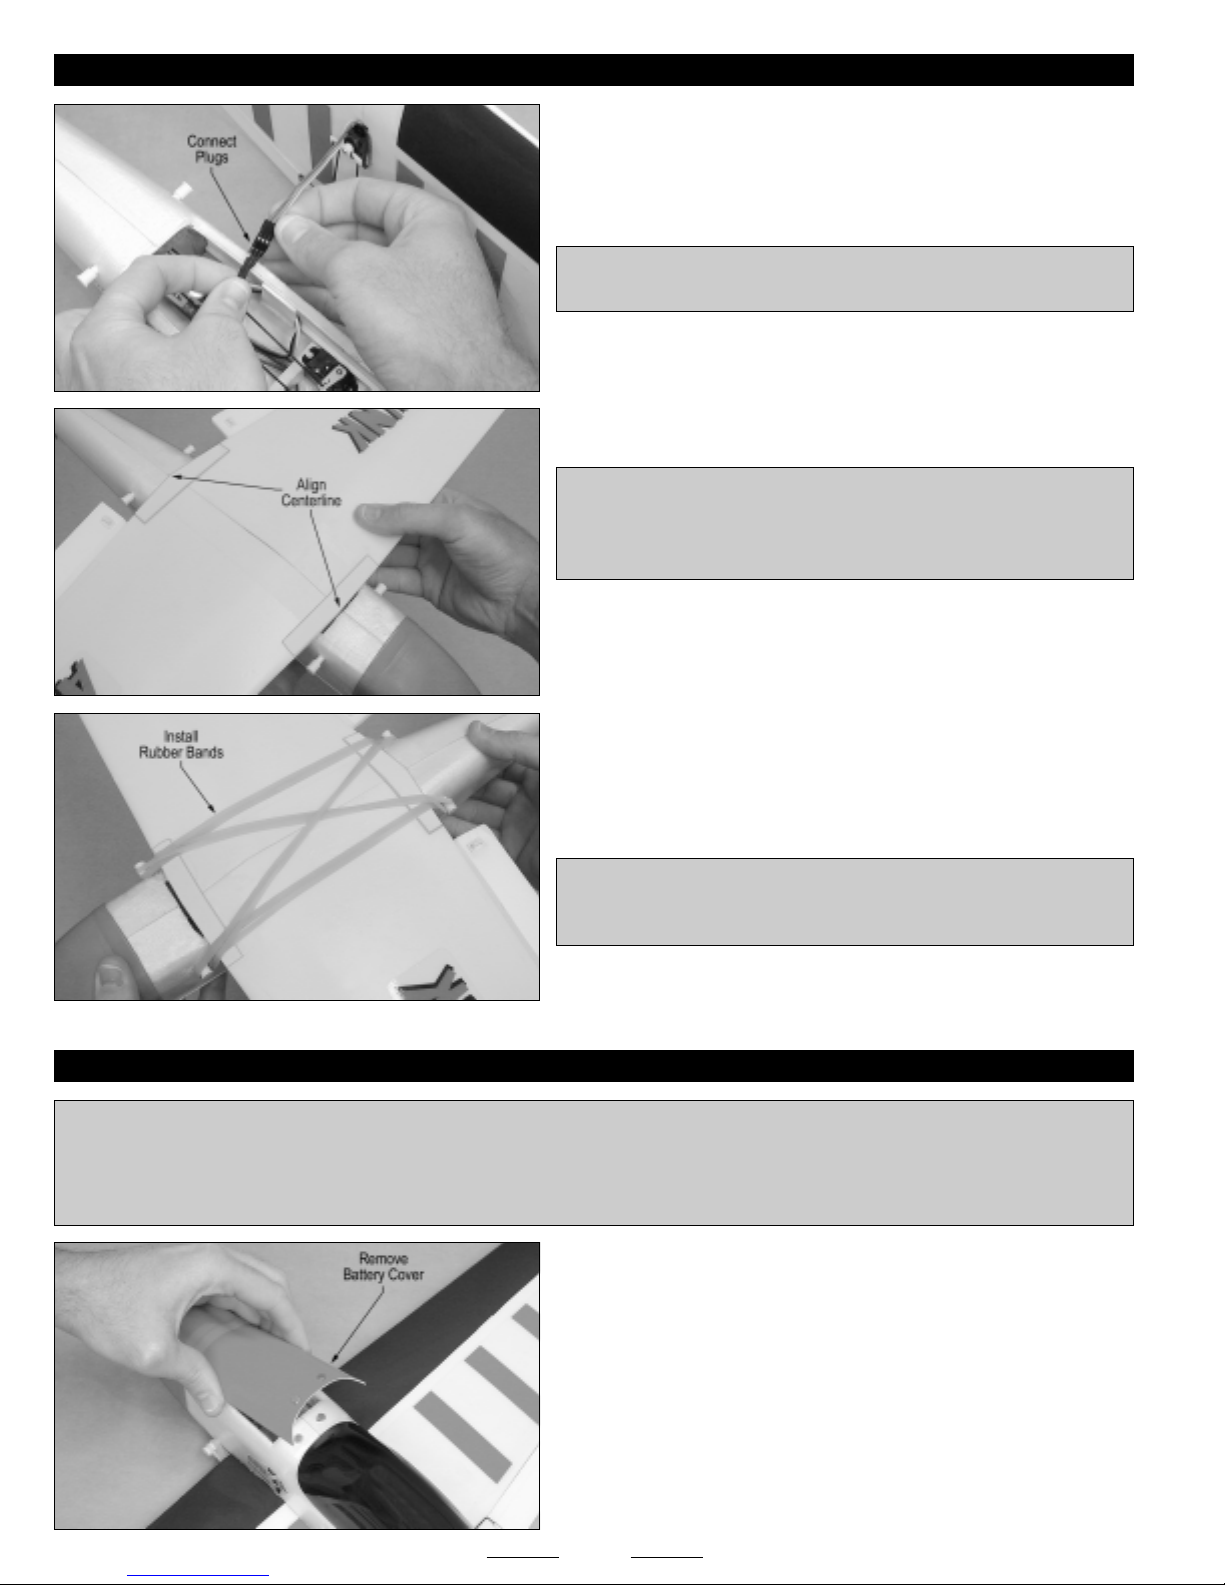
●Install the Vertical Tail, Wing and Battery
●Test the Controls
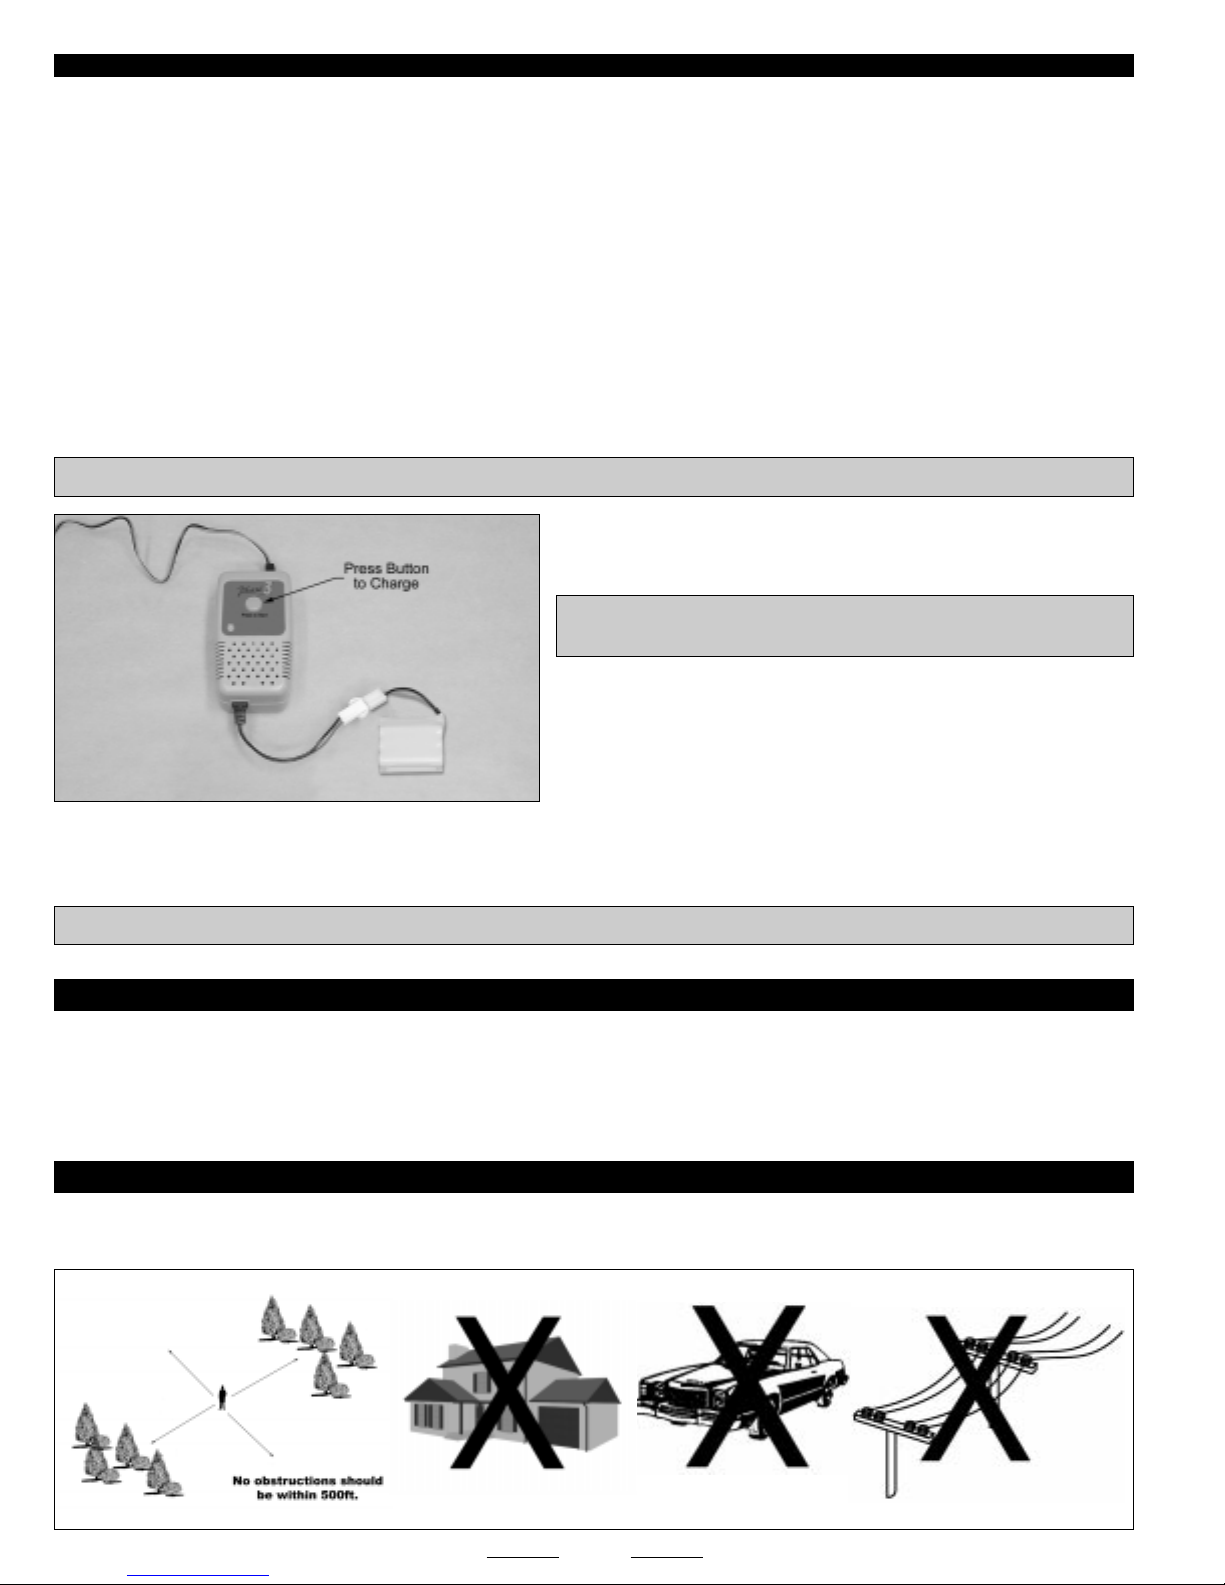
●Charge the Battery
●Choose Your Flying Field and Fly!
FOR YOUR SAFETY - PLEASE READ AND UNDERSTAND THESE WARNINGS!
●Do not fly your airplane if another model is on the same
frequency as you.
●Never fly your airplane from the street or at night. Always fly in
an open area free of obstructions.
●When flying, make sure any spectators are behind you.
●Always be conscious of the spinning propeller. Be careful not to
allow loose clothing to be drawn into the propeller.
●Because your airplane is operated by radio control, it is important
to make sure you are always using fresh and/or fully charged
batteries. Never allow the batteries to run low or you could lose
control of the airplane.
●Never attempt to disassemble any of the airplane's components,
especially the electronics.
●Do not allow any of the electrical components to get wet or
electrical damage may occur.
●You should complete a successful range check of your radio
equipment prior to each new day of flying, or prior to the first flight
of a new or repaired airplane.
●If your airplane gets dirty, do not use any solvents to clean it.
Solvents will damage the foam and plastic. Use a dry cloth to
clean any dirt from the outside of the airplane.
GENERAL WARNINGS
●Never overcharge the battery or damage to the battery may
occur.
●To prevent the battery from overheating during the charging
process, allow the battery to completely cool before recharging it.
●Always completely discharge the battery by running the motor
until it stops before recharging the battery.
●Never attempt to disassemble the battery or dispose of it in fire.
The battery should be recycled at an authorized recycling center.
●Always turn on your transmitter before turning on the airplane
and always turn off the airplane before turning off your transmitter.
●Always unplug the battery when not flying the airplane.
●Never cut the receiver antenna shorter or you could lose control
of the airplane during flight.
●When flying the airplane, make sure your transmitter antenna is
completely extended.
●Never attempt to disassemble or modify any of the radio system
components.
FLIGHT BATTERY WARNINGS
RADIO SYSTEM WARNINGS
For more information about the Chipmunk 370 and other Phase3 Models
airplanes and accessories, please visit our website at:
WWW.PHASE3MODELS.COM