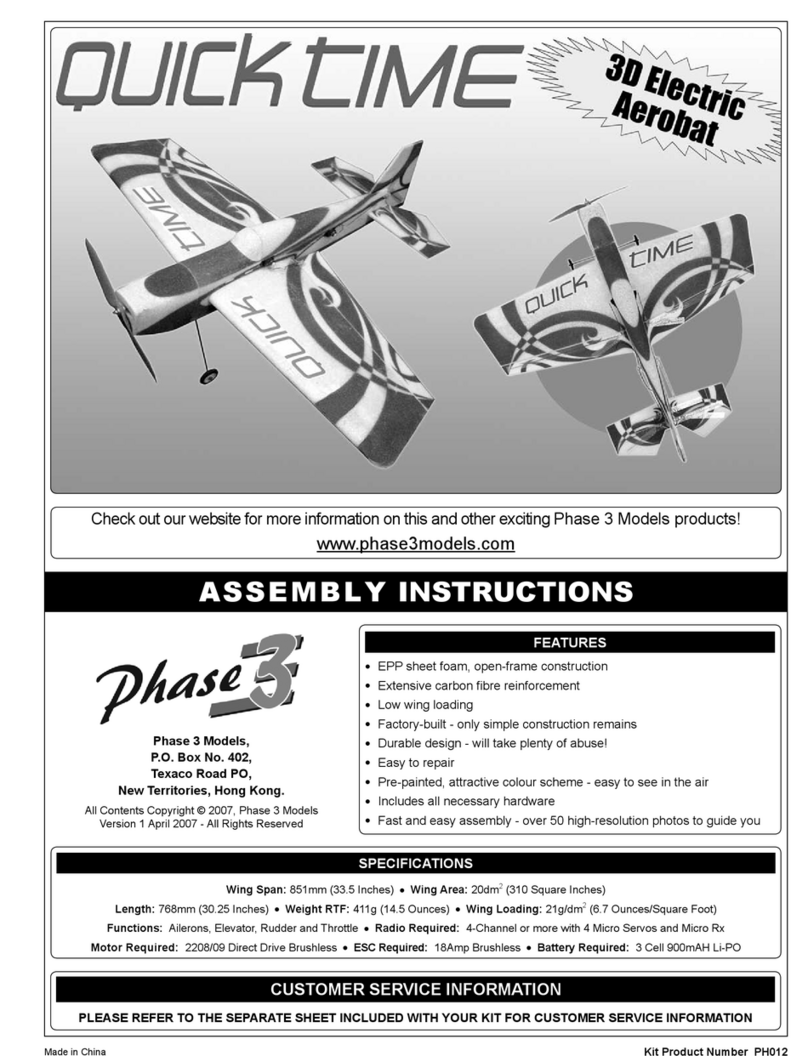
Phase3 J-3 CUB 370 RTF User manual

1
✦IMPORTANT✦Before beginning assembly, please read and understand the warnings listed on the next page. Failure to
read and understand these warnings could lead to bodily harm and/or injury. The Phase 3 J-3 Cub 370 RTF is not intended
for those under 14 years of age, unless closely supervised by an adult.
OPERATING INSTRUCTIONS
SPECIFICATIONS AND FEATURES:
●Wing Span: 36.5 Inches (93cm)
●Wing Area: 200 Square Inches (12.9dm2)
●Length: 25 Inches (63.5cm)
●Weight RTF: 18 Ounces (510gr)
●Wing Loading: 13 Ounces Per Square Foot (39.5gr/dm2)
●Molded from Durable Plastic and Foam
●Preinstalled 4Ch FM 27MHz (USA) Radio Control System
35MHz (EU)
●Three-Channel Control - Elevator, Rudder and Throttle
●Rechargeable NiMH Flight Battery
●AC Charger and 12V DC Fast-Charger
●Direct Drive 370 Size Motor with Propeller and Safety Spinner
●Easy-to-Access Flight Battery
Kit Product Number: 107100
Includes:
27MHz (USA/France)
35MHz (EU - except France)
FM Radio Control System and 600mAH NiMH Flight
Battery!
The Phase 3 J-3 Cub 370 RTF is distributed exclusively in North
America by Global Hobby Distributors and in the EU by Ripmax Ltd
All contents copyright © 2004, Phase 3
Version V1.0 December 2004

2
FOR YOUR SAFETY - PLEASE READ AND UNDERSTAND THESE WARNINGS!
● Do not y your airplane if another model is on the same
frequency as you. The frequency number is printed on the front
of the radio transmitter and on the receiver.
● Neveryyourairplanefromthestreetoratnight.Alwaysy
in an open area free of obstructions.
● Whenying,makesureanyspectatorsarebehindyou.
●Always be conscious of the spinning propeller. Be careful not
to allow loose clothing to be drawn into the propeller.
●Because your airplane is operated by radio control, it is
importanttomakesureyouarealwaysusingfreshand/orfully
charged batteries. Never allow the batteries to run low or you
could lose control of the airplane.
●Never attempt to disassemble any of the airplane's
components,especiallythetransmitterandightbattery.
●Do not allow any of the components to get wet or electrical
damage may occur.
●Youshouldcompleteasuccessfulrangecheckofyourradio
equipmentpriortoeachnewdayofying,orpriortotherst
ightofaneworrepairedairplane.
●If your airplane gets dirty, do not use any solvents to clean it.
Solvents will damage the foam and plastic. Use a dry cloth to
clean any dirt from the outside of the airplane.
GENERAL WARNINGS
● Neveroverchargetheightbatteryordamagetotheight
battery may occur.
● To prevent the ight battery from overheating during the
charging process, allow the ight battery to completely cool
before recharging it.
● Alwayscompletelydischargetheightbatterybyrunningthe
motoruntilitstopsbeforerechargingtheightbattery.
● Neverattempttodisassembletheightbatteryordisposeof
itinre.Theightbatteryshouldberecycledatanauthorized
recycling center.
●Always turn on the transmitter before turning on the airplane
and always turn off the airplane before turning off the transmitter.
●Always unplug the flight battery when not flying the
airplane.
●Never cut the receiver antenna shorter or you could lose
controloftheairplaneduringight.
● Whenyingtheairplane,makesurethetransmitterantenna
is completely extended.
●Never attempt to disassemble or modify any of the radio
FLIGHT BATTERY WARNINGS
RADIO SYSTEM WARNINGS
OUR GUARANTEE
Phase3guaranteesthiskittobefreefromdefectsinbothmaterialandworkmanshipatthedateofpurchase.Thisdoesnotcoveranycomponentpartsdamagedby
use,misuseormodication.In no case shall Phase 3's liability exceed the original cost of the purchased kit.
InthatPhase3hasnocontroloverthenalassemblyormaterialusedfornalassembly,noliabilityshallbeassumedforanydamageresultingfromtheusebythe
userofthenaluser-assembledproduct.Bytheactofusingthenaluser-assembledproduct,theuseracceptsallresultingliability.

3
INTRODUCTION
Thank you for purchasing the Phase 3 J-3 Cub 370 RTF. Before completing the nal assembly of your new airplane,
please carefully read through these operating instructions in their entirety. Doing so will ensure your success the rst time
around!
Beforebeginningassembly,removethedifferentpartsfromtheboxandusethephotosbelowtoverifythatyourkitcontainsallof
thecorrectparts.Ifyourkitismissingapartorifapartappearstobedamaged,pleasecontactusimmediately,usingtheCustomer
Service Information on page # 2.
PARTS IDENTIFICATION
Transmitter and Flag
Flight BatteryHorizontal & Vertical TailsAC Charger
Wing Assembly
Fuselage Assembly NOT SHOWN: SMALL WOOD SCREWS (12)
Landing Gear
Wing Struts and Clips (4)Propeller and Spinner
Phase 3 is proud to present the J-3 Cub. This trainer aircraft is modeled after aircraft from the Golden Age of Aviation and made for
newyerstolearnandmasterrealradiocontrolight.You'llndyournewPhase3J-3Cubgentleintheairandgoodlookinginthe
Hangar.Andmostimportant,you'llbeyingwithcondenceinnotime.GetaCub,GetFlying,andEnjoyModelAviation.
●Molded from Durable Plastic and Foam
●Preinstalled 4Ch FM 27MHz (USA) Radio Control System
35MHz (EU)
●Three-Channel Control - Elevator, Rudder and Throttle
●Rechargeable NiMH Flight Battery
●AC Charger and 12V DC Fast-Charger
●Direct Drive 370 Size Motor with Propeller and Safety Spinner
●Easy-to-Access Flight Battery
Wing Brace and Bands (2) DC Fast-Charger

4
●8 Pack AA Alkaline batteries for the transmitter
●Small Phillips Head Screwdriver and Small Adjustable Wrench
Thissectionliststheitemsyouwillneedtoyyournewairplane.Asyoucansee,there'snotmuchtoit!
RECOMMENDED ITEMS
Eachairplanetransmittercomeswithastickeronthecrystalmountshowingwhichfrequencyinthe27MHzband(USA)or35MHz
(EU)thattheradiocontrolsystemoperateson.The27Mhzbandissharedbetweenmodelairplanes,carsandboats,socheckthe
frequency if others are in the area before turning on the radio control system. The 35MHz band is exclusive to aircraft in the EU. No
two models can operate near each other if they are on the same frequency.
BECOMING FAMILIAR WITH YOUR J-3 CUB 370 RTF
Antenna: Transmits the signal from the transmitter to the receiver inside the airplane.
Crystal Mount: This is where the transmitter's crystal is located. The radio's frequency is printed on the crystal mount.
Elevator/Rudder Control Stick:Thisstickcanmovebothrightandleft,andupanddownatthesametime.Thestickmovesthe
airplane'selevatorandrudderwhichmaketheairplaneclimb,descend,turnrightandturnleft.
On/Off Switch: Turns the transmitter on and off.
Red LED: This LED glows red when the transmitter is turned on.
Servo Reversing Switches: These switches allow you to electronically change the direction the servos move.
Throttle Control Stick:Thisstickcanmovebothrightandleft,andupanddownatthesametime,andisusedtoapplypowerto
themotor.Thestickisproportional,meaningthatmotorpowercanbeappliedgraduallyfromofftofullpower.Inthisairplane,there
isnorightorleftfunctionforthethrottlecontrolstick.
Trim Tab:Usedtoelectronicallymakeminortrimadjustmentstothecontrolsurfaces.
Voltage Scale: When the transmitter is turned on, the voltage scale displays the status of the transmitter batteries.
Continued On Next Page ☛
YourJ-3Cub370RTFincludesa7cellNickelMetal-Hydrideightbattery.Ifyouwantto,youcanpurchaseasecondightbattery
(P/N109015)sothatyouhavetwo.Thatway,youcantaketwofully-chargedbatterieswithyoutoy.Thatmeanstwiceasmuch
fun!SeeyourlocalPhase3dealerforpurchasinginformation.
UPGRADE TIPS
Upgrading the transmitter to use rechargeable NiCD cells is easy. All you need to do is purchase
8 AA rechargeable NiCD cells and a 110V (USA) or 230V (EU) AC Tx overnight charger - both
available at your local hobby dealer. This will save you money in the long run, since the NiCD
batteriescanberecharged.ThismeansnomorebuyingAAAlkalinebatteries!
Channel # Frequency
01 16.995
02 27.045
03 27.095
04 27.145
05 27.195
06 27.255
27MHz
(USA)
63 35.030
66 35.060
69 35.090
73 35.130
76 35.160
78 35.180
35MHz
(EU)

5
BECOMING FAMILIAR WITH YOUR J-3 CUB 370 RTF, CONTINUED....
Arming Switch:Thisisasafetydevice.Whentheightbatteryispluggedin,themotorcanbeturnedononlyafterpressingthis
switch once.
Control Horn: A plastic piece that is secured to the control surfaces. The pushrod wire from the servo inside the airplane attaches
to the control horn, so the control surface can be moved.
Fuselage: The main body of the airplane. All of the main airplane assemblies are attached to the fuselage.
Horizontal Tail:Providesstabilityfortheairplaneduringlevelight.
Landing Gear: Comprised of a length of wire, two wheels and two strut covers, the landing gear supports the airplane while on
theground.Thelandinggearallowsyoutotakeoffandlandfromhardsurfaces.
Propeller: The propeller is attached to the front of the motor. When spinning, the propeller creates forward thrust which pulls the
airplane forward.
Vertical Tail: Provides stability for the airplane during turns.
Wing: The wing has a special airfoil shape and provides the main source of lift for the airplane.
Theightbatteryincludedwithyourairplanecomesfromthefactorypartiallycharged.DO NOT charge the
ight battery until after testing the motor.Thiswillensurethattheightbatteryisrundowncompletelybeforerechargingit.
Thisisimportanttoensurethattheightbatteryreceivesafullchargeandiscycledbeforeyourrstight.
WARNING
Photo May Differ From
Production Model
The J-3 Cub 370 RTF's Center of Gravity (Balance Point) is located 1-3/8" (35mm) behind the
leading edge of the wing, measured at the fuselage sides. The airplane should be balanced right side up
with the ight battery and the wing struts installed.
LOCATING THE CENTER OF GRAVITY
Theairplaneisdesignedtobalanceproperlydirectlyoutoftheboxwhenusingtheincludedightbattery.Youmaywishtodouble-
checkthebalanceoftheairplane,though,beforeyingitforthersttimeorafteranyrepairsaremade.

6
PRO TIP
❑ Install8freshAAAlkalinebatteries,beingcarefultomakesure
that the polarity is correct for each battery.
IfyouuserechargeableAANiCDcells,double-check
tomakesurethattheyarefullychargedbeforeinstallingtheminto
the transmitter. Never attempt to charge or recharge Alkaline
cells.
❑ After double-checking that the batteries are installed correctly,
reinstallthebatterycover,makingsureit'srmlyseatedintoplace.
❑ Carefullyremovethebatterycoverfromthebackofthetransmitter
by pulling down on it with one hand while holding the transmitter with
your other hand.
ASSEMBLING YOUR J-3 CUB 370 RTF
STEP 1: INSTALLING THE TRANSMITTER BATTERIES
Continued On Next Page ☛
STEP 2: INSTALLING THE HORIZONTAL TAIL
❑ Carefullyslidethe horizontal tail into the slot in the backofthe
fuselage. When aligned properly, the horizontal tail should be pushed
forward all the way and the outside edges of the strips of plastic tape
should be centered with the outside edges of the fuselage, on both the
top and the bottom.
✦IMPORTANT✦Makesurethatwhenyouinstallthehorizontaltail
that the plastic control horn is toward the bottom of the fuselage.
✦IMPORTANT✦Beforesecuringthehorizontaltailintoplaceinthenextprocedure,makesurethatthereceiverantennaexitsthe
backofthefuselagebelow the horizontal tail. It's important that the receiver antenna not be pinched between the fuselage and
the horizontal tail.

7Continued On Next Page ☛
❑ While holding the horizontal tail in place and aligned, secure it to
the fuselage by threading eight small screws through the predrilled
holes in the fuselage and into the plastic tape on the horizontal tail.
✦IMPORTANT✦Four screws should be installed on the top and
four on the bottom. Tighten the screws gently. Overtightening them
can strip the plastic tape.
PRO TIP
X 8
Ifyouhaveaproblemthreadingthescrewsintotheplastictape,carefullyuseapush-pintomakeapilotholeinthe
plastic tape for each of the screws.
STEP 3: INSTALLING THE VERTICAL TAIL
❑ Carefully slide the front portion of the vertical tail down into the
mounting slot in the fuselage.
❑ Push the vertical tail down in position. When aligned properly, the
tabinthebaseoftheverticaltailshouldtintothenotchinthemiddle
ofthehorizontaltail,andtheverticaltailshouldbepusheddownrmly
against the top of the horizontal tail.
❑ While holding the vertical tail in place and aligned, secure it to
the fuselage by threading four small screws through the predrilled
holes in the fuselage and into the plastic tape.
✦IMPORTANT✦Two screws should be installed on each side.
Tighten the screws gently. Overtightening them can strip the plastic
tape.
PRO TIP
X 4
Ifyouhaveaproblemthreadingthescrewsintotheplastictape,carefullyuseapush-pintomakeapilotholeinthe
plastic tape for each of the screws.

8
STEP 4: CONNECTING THE PUSHROD WIRES
PRO TIP
❑ Carefully snap the plastic clevis on the pushrod wire into the
outermost hole in the elevator control horn.
We suggest installing the clevis into the outermost
holeinthecontrolhornforyourrstfewights.Thiswillmakeit
easiertocontroltheairplane.Onceyou'reprocientatyingthe
airplane, you can move the pushrod wire into the middle or inner
hole to increase the control response.
✦IMPORTANT✦When you snap the plastic clevises into the plastic control horns in the next two procedures, the elevator and
rudder(controlsurfacesonthebackofthehorizontaltailandtheverticaltail)mightnotbecentered.That'sokayfornow.We'll
centerthembyadjustingthecleviseswhenwetesttheradiosystemlater.
PRO TIP
❑ Carefully snap the plastic clevis on the pushrod wire into the
outermost hole in the rudder control horn.
We suggest installing the clevis into the outermost
holeinthecontrolhornforyourrstfewights.Thiswillmakeit
easiertocontroltheairplane.Onceyou'reprocientatyingthe
airplane, you can move the pushrod wire into the middle or inner
hole to increase the control response.
Continued On Next Page ☛
STEP 5: INSTALLING THE LANDING GEAR ASSEMBLY
❑ Installthelandinggearassemblybyrstgentlysqueezingthe
two landing gear wire legs together, then by pushing the landing gear
assemblyrmlyintotheslotinthebottomofthefuselageuntilthe
assembly "snaps" into place.
☞The straight edge of the plastic landing gear fairings should be
toward the front of the airplane, as shown.
✦IMPORTANT✦Afterinstallation,pulldownonthelandinggearassemblytoensurethatit'ssnappedrmlyintoplace.

9Continued On Next Page ☛
STEP 6: INSTALLING THE PROPELLER AND SAFETY SPINNER
❑ Slidethepropellerontothepropellershaft,makingsurethatthe
backofthepropellerslidesrmlyoverthehexnut.
☞Thebackofthepropellerismoldedtotoverthehexnut.
❑ Slidetheatwasherupagainstthepropellerandthreadonthe
secondhexnut.Tightenthehexnut,usinganadjustablewrench,to
hold the propeller in place.
❑Thread one hex nut onto the propeller shaft and tighten it by hand until it will not thread on any further.
❑Install the rubber safety spinner over the front of the propeller, as
shown. To ensure that the safety spinner is held securely in place,
makesuretopushitrmlyontothefrontofthepropeller.
☞Theinsideoftherubbersafetyspinnerismoldedtotsecurely
over the hex nut and threaded propeller shaft.
STEP 7: INSTALLING THE WING
❑ Set the wing onto the top of the fuselage.
❑ Lineupthemoldeddimplesatthefrontandthebackofthewing
with the sides of the fuselage. This will ensure that the wing is cen-
tered.
❑ Placetheplasticwingbraceoverthetopofthewing,makingsure
to line up the molded contours of the wing brace with the top and sides
of the fuselage.
✦IMPORTANT✦Whenyoupositiontheplasticwingbrace,makesurethatthewingstayslinedupwiththefuselage.Youwillneedto
pushtheplasticwingbracedownrmlyagainstthewing,sothatthetopofthewingbracewillbeevenwiththetopofthefuselage.
✦WARNING✦Donotoperatethemotororytheairplanewithouttherubbersafetyspinnerinstalled.

10 Continued On Next Page ☛
❑ Securethewingtothefuselageusingtworubberbands,making
sure that they are looped securely over the mounts at the front and
backofthewing.
✦IMPORTANT✦The rubber bands should overlap the mounting
tabs on the plastic wing brace. This will ensure that the plastic wing
brace(aswellasthewing)isheldrmlyinplace.
STEP 8: INSTALLING THE WING STRUTS
❑ Carefully slip one front wing strut (longer strut) over the plastic
mountatthebaseofthefuselage,thenrotatethestrut90ºtolockit
into place.
✦IMPORTANT✦Makesurethatthemolded"step"intheendof
the wing strut overlaps the mount, as shown.
PRO TIP
There are four plastic wing struts included. There are two longer ones (for the front) and two shorter ones (for the
rear).Wheninstallingtheminthenextfewprocedures,makesuretoinstallthetwofrontwingstrutsrst,followedbythetworear
wing struts. This will ensure that they line up properly.
❑ With the airplane upside down, slip the predrilled hole in the outer
end of the wing strut over the forward-most plastic post in the bottom
of the wing.
❑Secure the wing strut to the plastic post by carefully pushing one
metal clip through the predrilled hole in the plastic post.
✦WARNING✦Theplasticwingbracenotonlykeepstherubberbandsfromdiggingintoanddamagingthefrontandbackofthe
wing,italsostrengthensthecenterofthewing.Neverytheairplanewithouttheplasticwingbraceinstalledorthewingwillfail
duringight.

11
❑ Install the rear wing strut (shorter strut) into place by securing
the end of it over the plastic mount at the base of the fuselage, using
the same technique that you used to install the front wing strut.
☞Notice that the rear wing strut is installed on top of the front wing
strut.
❑ Secure the outer end of the rear wing strut to the rear-most plastic
post in the wing, using one metal clip.
❑Repeat the previous procedures to install the front and rear wing
struts onto the other side of the airplane.
STEP 9: INSTALLING THE FLIGHT BATTERY
✦WARNING✦Donotchargetheightbatterybeforeinstallingit.Chargingwillbedonelater.Beforeinstallingtheightbattery,
you'llneedtomakesurethatthetransmitteris turned on.
❑ Turn on the transmitter. The needle in the voltage meter should move into the silver "safe" area. If it doesn't, replace the batteries
with a fresh set.
Alwaysmakesureyouturnonthetransmitterrst,beforeplugginginandinstallingtheightbattery.Afteryou're
doneying,unplugandremovetheightbatteryrst,thenturnoffthetransmitter.Thiswillpreventunexpectedradiosignalsfrom
interfering with your radio system.
✦WARNING✦The J-3 Cub 370 RTF does not have an on/off
switch. When you plug in the ight battery, the receiver and
servos will be powered up. The motor will not power up until
the red arming switch is pressed.
❑ Remove the plastic battery door on the bottom of the fuselage by
carefullypullingback,thenup,onthelatchatthefrontofthebattery
door.
PRO TIP
Continued On Next Page ☛

12
Beforeactuallyyingyourairplaneyoushouldunderstandhowtheairplaneiscontrolled.Belowwelistthefourbasicightmodes:
Climb:Climbingiscontrolledbypushingthethrottlecontrolstickonthetransmitter(theleft-handstick)completelyforwardtoturn
onthemotor,thenbypullingbackontheelevatorcontrolstick(theright-handstick).Whenyoupushforwardonthethrottlecontrol
stick,themotorwillturnon.Whenyoupullbackontheelevatorcontrolstick,theelevatorwillmoveup,causingtheairplanetopitch
up and climb.
Descent:Descentisalsocontrolledbythethrottleandelevatorcontrolsticks.Whenyoupullthethrottlecontrolstickalltheway
back,themotorwillturnoffandtheairplanewillbegintoslowlydescend.Tomaketheairplanedescendfaster,youcanalsopush
forwardontheelevatorcontrolstick.Thiswillmaketheelevatormovedown,causingtheairplanetopitchdownanddescend.
Right Turn:Arightturnisdonebymovingtheruddercontrolstick(theright-handstick)onthetransmitter.Thisisthesamestick
astheelevatorcontrolstick,onlyitmovesrightandleft.Whenyoumovethesticktotheright,theruddermovesright,causingthe
airplanetobankandturnright.
Left Turn:Aleftturnisdonebymovingtheruddercontrolstickonthetransmittertotheleft.Whenyoumovethesticktotheleft,
theruddermovesleft,causingtheairplanetobankandturnleft.
LEARNING TO FLY YOUR J-3 CUB 370 RTF
STEP 1: BASIC OPERATION
Continued On Next Page ☛
❑ Plugtheconnectorontheightbatteryintotheconnectorthatis
inside the fuselage. When plugged in properly, the connectors should
"click"together.
✦IMPORTANT✦As a safety feature, the connectors can only be
plugged in one way.
❑ Pushtheightbatterydownintoitsslotbetweenthepieces
ofwhitestyrofoam,makingsurethatit'spushedasfarforward
aspossible.Theightbatteryshouldbeheldrmlyinplace.
❑ Reinstallthebatterydoor,makingsurethatthelatch"snaps"intoplace.
✦WARNING✦It'simportantthattheightbatterybepushedasfarforwardaspossible.Thiswillensurethattheightbattery
isinstalledinthecorrectposition,whichwillmaketheairplaneybetter.Iftheightbatteryisinstalledtoofarback,theairplane
couldbecomeuncontrollableduringight.
❑ Withthetransmitterturnedon,double-checkthatthethrottlecontrolstick(left-sidestick)ispulledallthewaybacktowardthe
bottom of the transmitter.
✦IMPORTANT✦Afteracrashorhardlanding,removethebatterydooranddouble-checkthattheightbatteryhasnotmoved
back.Itshouldbeheldrmlyinplaceandnotmovebackduringnormalight.
STEP 2: GROUND OPERATIONS TESTING
Nowthatyou'refamiliarwiththefourbasicightmodes,youcantesttheradiocontrolsystemandthemotorwhileseeingrst-hand
howthedifferentcontrolsoperatetomaketheairplaneclimb,descend,turnrightandturnleft.
You'llwanttodoGroundOperationsTestinguntiltheightbatterynolongerhasenoughpowertooperatethemotor.
This will allow you enough time to become familiar with how the different controls react to the inputs from the transmitter control
sticksanditwillpreparetheightbatteryforitsrstfullrechargebeforeight.
PRO TIP

13
❑ First,makesurethattheon/offswitchonthetransmitterisinthe"ON"positionandthattheightbatteryisinstalledandplugged
in. The wing and wing struts should be installed, too.
✦WARNING✦Do not press the red motor arming switch yet.
PRO TIP
❑ Carefullyadjustthethreecontroltrimtabsonthetransmitterso
that they are centered, as shown.
Thehorizontaltrimtabbelowthethrottlecontrolstick
is not used in this application.
❑ Looking from the back of the airplane, push the right-hand
controlstickcompletelytotheright.Theruddershouldmoveright.
❑ Again,lookingfromthebackoftheairplane,pushtheright-hand
controlstickcompletelytotheleft.Theruddershouldmoveleft.
If the rudder does not
moveinthecorrectdirection,ipthe
CH 1 servo reversing switch on the
front of the transmitter, as shown.
PRO TIP
❑ Lookingfromthebackoftheairplane,pulltheright-handcontrol
stickcompletelyback.Theelevatorshouldmoveup.
❑ Again,lookingfromthebackoftheairplane,pushtheright-hand
controlstickcompletelyforward.Theelevatorshouldmovedown.
If the elevator does not
moveinthecorrectdirection,ipthe
CH 2 servo reversing switch on the
front of the transmitter, as shown.
PRO TIP
Continued On Next Page ☛
❑ If the control surfaces are not exactly even with the tail, unsnap
the clevises and thread them in or out until the control surfaces are
evenwiththetail.Afteryou'resatisedwiththealignment,snapthe
clevisesbackintotheoutermost hole in the control horns.

14
GETTING READY TO FLY YOUR J-3 CUB 370 RTF
STEP 1: CHARGING THE FLIGHT BATTERY
❑To unplug the connectors, squeeze the tab on the battery connector and pull the two connectors apart.
❑ Afterchargingtheightbattery,installitinthefuselage,usingthesametechniquesaswhenyouinstalleditpreviously.
✦WARNING✦Alwaysremovetheightbatteryfromthefuselageforthechargingprocess.
❑ Plugtheightbatteryconnectorintothebatterychargerconnector.When
pluggedinproperlytheconnectorsshould"click"together.
As a safety feature, the connectors can only be plugged
in one way.
❑ Plug the charger into an AC wall outlet.
❑ Chargetheightbatteryfor2-3hours.Be careful not to overcharge
the ight battery.
PRO TIP
Iftheightbatteryishottothe
touch, it is fully charged. Unplug
it from the charger immediately.
✦IMPORTANT✦Beforechargingtheightbattery,theightbatterymustbefullydischarged.Dischargetheightbatterybyrunning
themotoruntilitstops.Thiswillensurethatyoudon'toverchargetheightbattery.
The ight battery can be charged using either the AC charger or the DC fast-charger. Note that the DC fast-charger features
a socket-style input connector. This connector can be plugged into your vehicle's cigarette lighter or 12V power socket.
Note that depending on your vehicle, you may need to turn the key into the accessory position to power the charger.
Flight Battery Charging Tips:
● Alwaysrunthemotoruntilitstopsbeforerechargingtheightbattery.Thiswillensurethatthebatteryisproperlydischarged.
●Charge-time using the AC wall charger for a fully discharged battery is approximately 2-3 hours.
●Charge-time using the DC fast-charger for a fully discharged battery is approximately 20-30 minutes.
● Iftheightbatterybecomeshottothetouch,unplugitfromthechargerimmediately.
●Always allow the battery to completely cool before recharging it.
●Never leave the battery unattended during the charging process.
❑ Now,testtheoperationofthemotor.Double-checkthatthethrottlecontrolstickispulledcompletelyback.Whilekeepingclear
of the propeller, press the red motor safety arming switch on the side of the fuselage once.
✦WARNING✦Duringthemotortest,keepeverythingclearofthepropeller,especiallyngersandlooseclothing.
❑ While holding the airplane upright in the air with the propeller point-
ing away from you,pushthethrottlecontrol stickcompletelyforward.
The propeller will spin at a high rate of speed.
❑ ContinuetheGroundOperationsTestinguntiltheightbatterynolonger
has enough power to operate the motor. This should give you enough time
to become familiar with how the airplane's controls operate. Once the
ightbatterynolongerhasenoughpowertooperatethemotor,remove
thebatterydoor,unplugandremovetheightbattery,andturnoffthetransmitter.
USING THE AC WALL CHARGER
Continued On Next Page ☛
If the motor
turns on when the throttle
controlstickispulledcom-
pletelyback,iptheCH3
servo reversing switch on
the transmitter, as shown.

15
❑To unplug the connectors, squeeze the tab on the battery connector and pull the two connectors apart.
❑ Afterchargingtheightbattery,installitinthefuselage,usingthesametechniquesaswhenyouinstalleditpreviously.
✦WARNING✦Alwaysremovetheightbatteryfromthefuselageforthechargingprocess.
❑ Whenthechargerhaspowerandtheightbatteryispluggedin,the
LED will be solid red.
✦IMPORTANT✦Depending on your vehicle, you may need to turn the
keyintotheaccessorypositiontopowerthecharger.
❑Press the CHARGE button once and the LED will turn green and begin
toblink.Thisindicatesthattheightbatteryischarging.
❑ Allowtheightbatterytocharge.WhentheLEDturnssolidgreen,
theightbatteryhasbeenfullychargedandshouldberemovedfromthe
charger.
PRO TIP
USING THE DC FAST-CHARGER
❑ PlugthesocketconnectorfromtheDCfast-chargerintoyourvehicle'scigarettelighteror12Vpowersocket.
❑ Plugtheightbatteryconnectorintothebatterychargerconnector.Whenpluggedinproperlytheconnectorsshould"click"
together.
As a safety feature, the connectors can only be plugged in one way.
❑ Untilyoubecomeaprocientyeryoushouldalwaysplanonyingyourairplanewhenthere'snowind.We strongly sug-
gest waiting for a calm day.Ifit'swindyandyouattempttoy,itwillonlymakelearningtoytheairplanemoredifcult.
Once you are procient at ying the airplane, you can y the airplane in light wind - no more than 8-10 miles per hour. Fly-
ing in stronger wind is not recommended.
STEP 2: CHOOSING A DAY TO FLY
❑ Tietheredagtotheendofthetransmitter'santenna.
❑ Outattheyingeld,beforeyouy,holdthetransmitterupatan
angle.Iftheaghangsdown,goaheadandy.Iftheaghangsat
a45ºangleormore,don'ty.Waitforacalmerday.
BeforeusingtheDCfast-charger,pleasereadtheightbatterychargingtipsonthenextpage.Pleasealsoreadandunderstandthe
tipsbelowthatarespecictotheDCfast-charger.
●Do not attempt to disassemble the DC fast-charger.
● DonotchargeanyothertypeorsizeofightbatteryusingtheDCfast-charger.
● Donotmodifythesocket-styleinputconnector.
● Donotblockthecoolingholesandventsduringthechargingprocess.Donotsetthechargeroncarpetduringthechargingpro-
cess.
● Yourvehiclecanberunningduringthechargingprocess,butstartyourvehiclersttopreventanypowersurgethatcoulddamage
the charger.
Continued On Next Page ☛

16
STEP 4: RANGE TESTING THE RADIO CONTROL SYSTEM
Aftergettingouttoyouryingeld,butbeforeyouyforthersttime,youmustrangetesttheradiocontrolsystem.Thiswillensure
thatthetransmitteris"talking"correctlytotheairplane.Youshouldfollowthisprocedurebeforeeveryrstightofthedayandafter
you have a hard landing, crash, or after a repair.
❑ Turnonthetransmitter,thenplugintheightbatteryandinstallitintothefuselage.
❑ Settheairplaneonthegroundandextendthetransmitter'santennacompletely.Movetheright-handcontrolstickonthetransmit-
terseveraltimestocheckthecontrols.Theyshouldoperatesmoothly.
❑ Walkapproximately75ft.(25m)fromtheairplaneandmovetheright-handcontrolstickonthetransmitteroncemore.Checkto
makesurethatthecontrolsareoperatingsmoothlyatthisdistance.Youmayneedafriendtohelpyouwiththisstep.
✦WARNING✦Iftheairplanedoesnotrangecheck,don'ty!Pleaserefertothetroubleshootingguideonpage#22.
❑ Theyingeldyouchooseshouldbealarge,openeldwithgrass.Thereshouldnotbeanyvehicles,buildings,powerlines,
trees,largerocksoranythingelsethatyourairplanecancrashinto.
STEP 3: CHOOSING YOUR FLYING FIELD
YOUR FIRST FLIGHT
Afterallthis,webetyou'rereadytoactuallygoying!Ifyou'veskippedanythingpriortothissection,wesuggestgoingbackthrough
the instructions. Doing so will help ensure your success.
Some Things to Remember:
● Withtheightbatteryfullycharged,youcanexpectanywherefrom4-6minutesofighttime,soplanyourlandingaccordingly.
● Makesurethatyouryingeldhasnoobstructionsyoucanyinto.
● Theyingeldshouldbelargeenoughthatyoucanlandanywhereifyougetintotrouble.Untilyouareprocientatyingthe
airplane, you don't want to have to worry about landing in a small, localized area.
● Thereshouldbenowindduringyourrstfewights;alsotrytoorientateyourselfsoyou'renotlookingdirectlyintothesunwhile
ying.
● Fullychargetheightbatteryjustbeforecomingtotheyingeld.Donotchargetheightbatterythenightbefore,thengoying
thenextday.Theightbatterywillhavelostsomechargeanditwon'tproducefullpower.
● Double-checkthattheelevatorandruddercontrolsurfacesaremovinginthecorrectdirection.Iftheyaren't,iptheservoreversing
switches as described on page # 13.
● Double-checkthattheelevatorandruddercontrolsurfacesarecenteredandthatthetrimtabsonthetransmitterarecentered,too.
If not, center them as described on page # 13.
***WARNING***WARNING***WARNING***WARNING***WARNING***WARNING***
Ifatanytimeduringyouright,theairplanegetsstuckupinatree,inpowerlinesoronarooftop,DO NOT attempt to retrieve the
airplane yourself.Theairplaneisnotworththerisk.Westronglysuggestcontactingaprofessionalforassistance.Attemptingto
retrieve the airplane yourself in any of these cases could potentially result in extreme harm or even death.
Continued On Next Page ☛

17
● Withthetransmitterturnedonandtheightbatteryinstalled,carefullyextendthetransmitterantennacompletely.
● Double-checkthatthethrottlecontrolstickispulledcompletelyback,thenpresstheredmotorarmingswitchonthesideofthe
fuselage once.
● Carefullygraspthefuselagedirectlybeneaththecenterofthewingwithyourthumbandforengers.Whileholdingthetransmitter
inyourotherhand,pushthethrottlecontrolstickforwardtocheckthatthemotorpowersup.Now,pullthestickcompletelyback.
● Ifthereisanywind,turntofaceit.Whileholdingthethrottlecontrolstickcompletelyforward(thepropellerwillspinveryfast),hold
theairplanejustaboveshoulderlevelandgentlytosstheairplanestraightaheadandlevel.Allowtheairplanetoystraightand
continuetoholdthethrottlecontrolstickcompletelyforwardsothattheairplaneclimbs.
Iftheairplanebeginslosingaltitudeafterlaunching,pullbackgently(onlyasmallamount)ontheright-hand
controlstick(elevator).Thiswillcausetheairplanetogentlypitchupandclimb.Theairplanemaystarttobankrightorleftafter
launching,too.Ifthishappens,gentlymovetheright-handcontrolstick(rudder)rightorlefttolevelthewing.
HAND LAUNCHING THE J-3 CUB 370 RTF
FLYING THE J-3 CUB 370 RTF
PRO TIP
Continued On Next Page ☛
TAKING OFF THE J-3 CUB 370 RTF
PRO TIP
✦IMPORTANT✦TheJ-3Cub370RTFcantakeofffromtheground,providedthesurfaceissmoothandhard,suchasasphalt,
concreteorhard-packeddirt.Theairplanecanalsotakeofffromtightlymowedgrass.Ifthereisnosuitableplacetotakeofffrom
the ground, you should hand-launch the airplane, following the procedures in the section below.
● Withthetransmitterturnedonandtheightbatteryinstalled,carefullyextendthetransmitterantennacompletely.
● Double-checkthatthethrottlecontrolstickispulledcompletelyback,thenpresstheredmotorarmingswitchonthesideofthe
fuselage once.
● Settheairplaneontheground,makingsurethattheairplaneispointingdirectlyintothewind.Slowlypushthethrottlecontrolstick
forwarduntilthemotorisrunningatfullpower.Theairplanewillquicklybegintoaccelerate.
As the motor is powered up and the airplane accelerates, the airplane will have a tendency to pull toward the left.
Thisisnormalandiscausedbythetorquefromthespinningpropeller.Gentlymoveandholdtheright-handcontrolstick(rudder)
totherighttokeepthenoseoftheairplanepointingstraightahead.
●As the airplane continues to accelerate faster, the tail of the airplane will begin to lift off the ground and the airplane will now be
rollingdowntherunwayonitsmainlandinggear.Atthispoint,theairplaneisreadytotakeoff.Totakeoff,gentlypullbackonthe
right-handcontrolstick(elevator)andtheairplanewillliftofftheground.Continuetoholdtheright-handcontrolstickbackgentlyso
thattheairplanecontinuestoclimb.Aftertheairplaneliftsoff,youcanmovetherudderbacktocenter.
✦WARNING✦Becarefulnottoclimbtoosteeplyaftertakeoffortheairplanemightslowdowntoomuchandstall.
PRO TIP
● Oncetheairplaneisintheair,keepthemotorrunningandallowtheairplanetocontinuetoclimb.Afterreachingabout80-100feet
ofaltitudeyoushouldstartmakingshallowturns,movingtheright-handcontrolstickrightorleft,tokeeptheairplanenearyou.
Werecommendtryingtokeeptheairplanenearyouwhileying.Theairplaneissmall,soifitgetstoofaraway,it
willbedifcultforyoutosee.Thiswillmakeitmoredifculttolearntoytheairplaneandcouldresultincompletevisuallossof
the airplane.
●Nowthattheairplanehasclimbedtoasafealtitudeyoucanbegintolearnthebasicsofight.Generalyingshouldbedonewith
themotoratfullpower.Youcontrolthealtitudeoftheairplanebymovingtheright-handcontrolstickeitherforwardorback.Moving
thestickforwardwillcausetheairplanetopitchdownandlosealtitude,andmovingthecontrolstickbackwillcausetheairplaneto
pitch up and gain altitude. These control inputs should be done gently, so you don't overcontrol the airplane.

18
●Landing should always be done into the wind with the wing level.
● Toprepareforlandingfromnormalight,makeashallowturnsothattheairplaneisyingdirectlyintothewind.Makesmallturns
tolevelthewing,thenpullbackcompletelyonthethrottlecontrolsticktoturnoffthemotor.Whenyoudothis,theairplanewillgradu-
ally descend straight ahead.
● Allowtheairplanetograduallydescend.Iftheairplaneseemstobedescendingtoofast,gentlypullbackontheright-hand
controlsticktomaketheairplanepitchuptolevelight.Thiswillbleedoffspeedandslowthedescent.Oncetheairplanehasslowed
down,releasethecontrolstickandallowtheairplanetocontinueitsdescent.Oncetheairplaneisabout15feet(5metres)offthe
ground,makesurethatthewingislevelandcontinueashallowdescent.Justbeforetouch-down,gentlypullbackontheright-hand
controlsticktoleveltheairplanewiththegroundforlanding.
Ifyouneedtoturntheairplanewhiledescendingforlanding,makegentle,shallowturns.Makingsteepturnsmay
causetheairplanetostallandcrash.Also,youshouldjusttrytolandanywhereonyouryingeld,aslongasit'sintothewind.
Don'ttrytolandinaparticularspot.Youcandothatonceyou'vemasteredyingtheairplane.
● Afterlanding,unplugandremovetheightbatteryfromthefuselage,thenturnoffthetransmitter.Allowtheightbatterytocool
completely,thenrechargeitforyournextight.
LANDING THE J-3 CUB 370 RTF
PRO TIP
When the airplane climbs you will notice that it will begin to lose speed. You'll also notice that the airplane will gain
speedwhentheairplanedescends.Ifyouclimbtoosteeply,theairplanemayslowdownsomuchthatitstopsyingandstalls.
Conversely,ifyoudescendtoosteeply,theairplanemayysofastthatyoubegintolosecontrol.Forthesereasons,wesuggest
using small, gentle control inputs to prevent this from happening.
● Toturntheairplane,youneedtomovetheright-handcontrolstickinthedirectionyouwanttheairplanetoturn,eitherrightorleft.
Tomakesmooth,gentleturns,gentlymovethecontrolstickinthedirectionyouwanttheairplanetoturnandHOLDthecontrolstick
in that position for a second or two and the airplane will begin to turn. After the airplane has turned in the direction you want, move
thecontrolstickgentlyintheoppositedirectiontolevelthewing,thenallowthecontrolsticktoreturntocenter.
Thelongeryouholdthecontrolstickover,thetightertheradiustheairplanewillturnin.Werecommendgentleturns
untilyouareprocientwiththeightcharacteristicsoftheairplane.
✦WARNING✦Donotholdtheright-handcontrolstickeitherrightorleftformorethanafewseconds.Holditoveronlylongenough
fortheairplanetobegintobankandturn.Holdingthecontrolstickoverlongercancausetheairplanetorolltoosteeplyandthe
nose to drop rapidly, possibly causing a crash to occur.
●When going into a turn, the airplane will have a natural tendency to lose some altitude. Unless you want to descend, you should
gentlypullbackontheright-handcontrolsticktokeeptheairplanelevelduringtheturn.Thesteepertheturnthemorealtitudethe
airplanewillloseandthemoreyouwillneedtopullbackonthecontrolstick.
● Youshouldcontinuetoy,makingcirclesandS-turnsforabout3minutesorso.Thiswillgiveyouplentyoftimeforlanding.Re-
memberfornowtokeepthemotoratfullpowerandusegentlecontrolinputstokeeptheairplanelevelthroughouttheentireight.
Alsoremembertokeepinmindthatwhenyoumaketurnstheairplanewillwanttolosealtitude,soyou'llneedtopullbackgentlyon
thecontrolsticktokeeptheairplanelevel.
Ifthereisanywindwhenyouareying,youwillnoticethatwhentheairplaneturnsintothewinditwillslowdownand
climbslightly.Whenthishappens,gentlymovethecontrolstickforwardtopitchtheairplanedownifyoudon'twanttheairplaneto
climb. When the airplane turns down-wind (with the wind), the airplane will speed up and descend slightly. You should gently pull
backonthecontrolsticktokeeptheairplanefromdescendingtoomuchwhileyingdown-wind.
●After some practice, you will learn how to minimize the amount of up and down, and right and left movements of the airplane and
be able to control the airplane in a smooth and graceful manner.
When ying toward you, you will notice that it seems that the right and left controls are reversed. An easy way to learn to
overcome this confusion is to move the right/left control stick toward the "lower" side of the wing to level the airplane.
You can also try to "envision yourself in the cockpit." This helps a lot when trying to coordinate right and left turns when
the airplane is ying toward you.
PRO TIP
PRO TIP
PRO TIP

19
Ifyou'reyingtheairplaneanditseemstoalwayswanttoturnrightorleftorpitchupordown,youcanusetheelectronictrimtabs
onthetransmittertocorrectthesetendencies.Wesuggestyingtheairplanestraightaheadandlevel,thenlettinggooftheright-
handcontrolstickforafewseconds.Watchwhattheairplanedoes.Itmaypitchupordown,oritmayturnrightorleft,oritmaydo
acombinationofthese.Dothisseveraltimestodouble-checkyourndings.Iftheairplanedoesoneofthefollowingwhileinstraight
andlevelightwithoutyourhandonthecontrolstick,movethefollowingelectronictrimtab(s)tocorrectit:
● Iftheairplanepitchesup:Movetheright-handcontrolstickverticaltrimtab(elevator)forwardacoupleofclicks.
● Iftheairplanepitchesdown:Movetheright-handcontrolstickverticaltrimtab(elevator)backacoupleofclicks.
● Iftheairplaneturnsright:Movetheright-handcontrolstickhorizontaltrimtab(rudder)leftacoupleofclicks.
● Iftheairplaneturnsleft:Movetheright-handcontrolstickhorizontaltrimtab(rudder)rightacoupleofclicks.
You can make these trim tab changes while you are ying, but we suggest having a friend move them for you so you don't
lose sight of the airplane. We also recommend moving the trim tabs only a couple of clicks at a time so you don't
over-correct for the trim problem.
FLIGHT-TRIMMING THE J-3 CUB 370 RTF
Whileyou'reyingyourairplane,therecomesatimewhenyoumightcrash.Ifthecrashisn'ttoobad,mostdamagecanberepaired
quicklyandeasily.Ifthedamageisbeyondrepair,sparepartsareavailableforpurchase.Ifafoampartisgoingtobreakduringa
crashitwillusuallybreakcleanly.Torepairacleanbreak,followtheproceduresbelow:
❑ Gluethebrokenpartstogether,usingathinlayerof5minuteepoxyorwhiteglue,followingthedirectionsonthegluebottle.Hold
the parts together and in alignment until the glue fully cures.
❑Apply a strip of clear Scotch®tapeovertheseamstostrengthenthejointevenmore.
It is very important that you use no solvents or Cyanoacrylate (C/A) glue, which can damage foam. If any of these
chemicals comes in contact with the foam parts, the parts will be destroyed. Use only epoxy or white glue to repair damaged
foam parts.
FIXING MINOR CRASH DAMAGE
PRO TIP
● Checkbeforeeveryighttoensurethatthebatteriesinthetransmitterareworkingproperly.Theneedleinthevoltagemeter
should be in the silver "safe" area. Change the batteries when the needle falls into the red "unsafe" area.
● Beforerechargingtheightbattery,letthemotorrununtiltheightbatteryisdischargedandthemotorwon'trunanylonger.This
willensureyoudon'toverchargetheightbattery.
● Donotrechargetheightbatteryifitishot.Waitfortheightbatterytocoolbeforerechargingit.
● Neverleavetheightbatterypluggedintotheairplaneunlessyouareyingortestingthecontrols.
● Beforeying,alwaysdouble-checkthatyou'veextendedthetransmitterantennacompletely.
●Never cut or otherwise shorten the receiver antenna or you will lose control of the airplane in a very short distance. Let the an-
tennahangbehindthebackofthefuselage.
● Beforeeachight,doaquickmotortesttomakesurethatthemotorisproducingfullpower.Ifitisn't,youmayneedtochargethe
ightbatterylonger.IfusingtheACwallcharger,donotchargetheightbatterylongerthan3hours.IfusingtheDCfast-charger,
donotchargetheightbatterymorethanonecycle(approximately30minutes).Chargingtheightbatterylongerthanrecommended
cancausedamagetotheightbattery.Iftheightbatterybecomeshottothetouch,removeitfromthechargerimmediately.
● Beforeeachight,double-checkthatthecontrolsurfacesaremovinginthecorrectdirection.Iftheyaren't,adjusttheservo
reversing switches on the transmitter as described on page # 13.
FLIGHT TIPS AND WARNINGS
Continued On Next Page ☛

20
● Whenyouy,orientateyourselfsothatthesunisatyourback.Don'tydirectlyintothesunoryoumaylosesightoftheair-
plane.
● Separateightbatteriescanbepurchasedandchargedbeforegoingtotheyingeld.Anextraightbatterywilldoubleyour
ighttime.Seethereplacementpartslistonthenextpageforthepartnumberoftheightbattery.
● Donotyinwindover10-15milesperhour,ortheairplanewillbeverydifculttocontrolandacrashmightoccur.
● Donotyyourairplaneifanothermodelisonthesamefrequencyasyou.Thefrequencynumberisprintedonfrontofthecrystal
mount on the transmitter and on the receiver.
●Always be conscious of the spinning propeller. Be careful not to allow loose clothing to be drawn into the propeller.
● Ifyou'reunder14yearsofagewesuggestyouywhileaccompaniedbyanadult.
● Neverattempttodisassembleanyoftheairplane'scomponents,especiallythetransmitter,chargerandightbattery.
●Do not allow any of the electrical components to get wet or damage may occur.
● Periodicallydouble-checkthatthepropellernutistight.Checkthepropellerforcracksorotherdamage.Ifthepropellerisdam-
aged, replace it immediately.
● Ifyouhaveencounteredanytroublewithanyofthestepslistedintheseoperatinginstructions,orwithhowtheairplaneies,
pleaserefertothetroubleshootingguideonpage#22.Thetroubleshootingguideisprovidedtohelpyoundaquickandim-
mediate resolution to any number of problems that might occur.
J-3 CUB 370 REPLACEMENT PARTS
WestockacompletelineofreplacementpartsforyourPhase3J-3Cub370RTF.Listedbelowarethereplacementpartsthat
are available, along with their respective part numbers for easy ordering convenience. We suggest ordering directly from your local
Phase 3 dealer.
PH109001
Instruction Manual
PH109002
Wing Assembly
PH109003
Wing Struts
PH109004
Fuselage - Complete w/o Radio
PH109005
Cowling
PH109006
Stabilizer Set (Tail Set)
PH109007
Landing Gear Assembly
PH109008
Battery Door
Continued On Next Page ☛
Table of contents
Other Phase3 Toy manuals
Popular Toy manuals by other brands

Propel Trampolines
Propel Trampolines AIR COMBAT user manual

Playskool
Playskool Swing 'n Score Baseball 06195 instruction manual

Viessmann
Viessmann 4129 Operation manual

GREAT PLANES
GREAT PLANES Mini Super Sportster EP instruction manual

Mega Bloks
Mega Bloks Barbie Build'n Play Underwater Cove manual

Eduard
Eduard Ju 88A placards quick start guide

Little Tikes
Little Tikes Dual Twister quick start guide

Fisher-Price
Fisher-Price GJW32 quick start guide

Thames & Kosmos
Thames & Kosmos BOTANY Experimental Greenhouse Science Kit Experiment manual

Kyosho
Kyosho SQS Calmato SP GP1400 instruction manual

BH Model
BH Model YAK 54 BH.47 Instruction manual book

TILLIG BAHN
TILLIG BAHN 02021 quick start guide