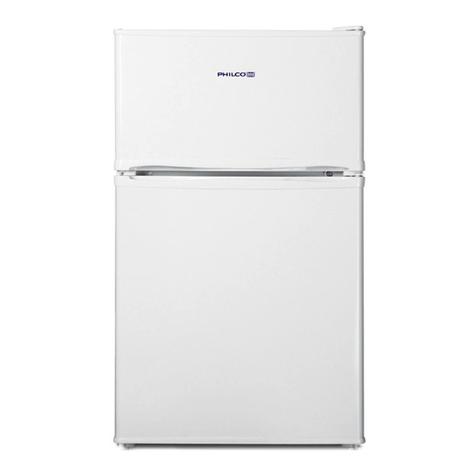
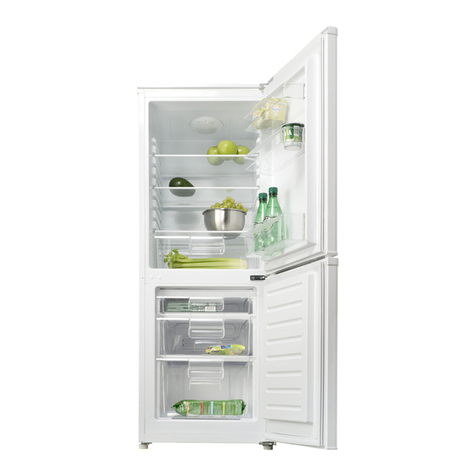
Philco PC 3181 N User manual

TWO DOOR
TWO DOOR REFRIGERATOR
USER'S MANUAL
PC 3181 N

Dear customer,
Thank you for buying a PHILCO brand product. So that your appliance serves you well, please read
all the instructions in this user's manual.

EN - 1
12/2013Copyright © 2013, Fast ČR, a. s.
CONTENTS
PART 1: BEFORE PUTTING INTO OPERATION................................................................................................. 2
Safety notices...................................................................................................................................................................................2
Safety instructions for gas R600a..............................................................................................................................................4
PART 2: DESCRIPTION OF THE DEVICE ........................................................................................................... 5
PART 3: INSTALLATION .................................................................................................................................... 6
Transport and unpacking ............................................................................................................................................................6
Placement..........................................................................................................................................................................................7
Cleaning before use.......................................................................................................................................................................8
Electrical connection.....................................................................................................................................................................8
Procedure for switching the door opening direction........................................................................................................8
PART 4: OPERATING THE APPLIANCE ........................................................................................................... 15
PART 5: ARRANGEMENT OF FOOD ............................................................................................................... 17
Advice about refrigerating food............................................................................................................................................. 17
Chart on storing food in the refrigerator ............................................................................................................................ 17
Storage of frozen food ............................................................................................................................................................... 18
Chart on storing food in the freezer ..................................................................................................................................... 19
PART 6: DEFROSTING AND REGULAR MAINTENANCE ................................................................................ 20
PART 7: WHAT SHOULD I DO WHEN.............................................................................................................. 22
PART 8: INFORMATION SHEET ...................................................................................................................... 23

EN - 2
12/2013Copyright © 2013, Fast ČR, a. s.
PART 1: BEFORE PUTTING INTO OPERATION
Safety notice
Symbols:
General advice for the optimal operation of the appliance
General dangers
Hot surfaces
Before you put the appliance into operation
• Carefully study the user's manual and installation instructions before installing and using the appliance!
This user's manual includes important information regarding the installation, operation and maintenance
of the appliance. Store the user's manual also for future reference, or for other owners of the appliance
if the appliance is sold.
Iftheapplianceistransportedinahorizontalpositiontheoilfromthecompressormayleakintothecooling
circuit. For this reason, allow the appliance to rest in a vertical position for 12 hours before turning
it on, so that the oil ows back into the compressor.
After unpacking the appliance, carefully inspect that it has in not been damaged in any way. Also check
that the power cord is not damaged. If you discover any defects, turn o the appliance and contact
the vendor or in the case of a damaged power cord contact the service centre. If the appliance
and all its parts are in order, install it according to the instructions in the relevant chapter.
• When installing the appliance in its place, or when moving the appliance, the power cord could be
penetrated or damaged. Check that the power cord is not interfering anywhere.
• Before connecting the appliance to the electricity power source check that the capacity of the system
corresponds to the specications on the appliance's rating label.
• Any kinds of home electric wiring necessary for the connection of the appliance must only be carried out
by a qualied electrician.
If you move the appliance from its usual position, it is necessary to understand, that although you
have disconnected the power cord, the components on the rear side of the appliance may remain very
hot for some time.
This appliance is not designed to be built-in. Do not cover or block the air inow or outow openings.
Insucient ventilation will cause bad operation and damage to the appliance.
Operating the appliance
• Use the appliance only for the purposes for which it has been designed.
• This appliance is designed only for household use, for storing or freezing food and for preparing ice.
• The temperature inside the freezer may rise or fall slightly, and so these appliances are not suitable for
storing products (e.g. medicines), which require a stable temperature.
Do not use any other electric appliances (e.g. heating elements, electric ice cream machines, etc.)
inside the appliance. There is a danger of explosion!

EN - 3
12/2013Copyright © 2013, Fast ČR, a. s.
Do not place food inside the refrigerator containing ammable propulsion gases (e.g. sprays) and no
explosives, contaminants or volatile substances. There is a danger of explosion!
Do not store liquids inside bottles and cans (especially beverages containing carbon dioxide) inside
the freezer compartment. The bottles and cans could crack!
• Store liquor only with a rmly tightened cap and in a vertical position.
• Do not use the base, drawers, doors of the appliance, etc. as a step or as a support. There is a danger
of injury to persons or damage to the appliance.
• Ensure that the plastic parts of the appliance and the door gasket seals are not covered with oil or grease.
The plastic parts and the gasket seals would then become porous.
• Do not consume frozen food immediately after taking it out of the freezer compartment. There is a danger
of frost bite!
Avoid prolonged hand contact with frozen food, ice or evaporating pipes. There is a danger of frost
bite and freezing to these objects!
We do not recommend placing hot liquids or food inside the refrigerator and lling containers all the
way to the rim.
Do not put fragile, heavy or unstable objects on the refrigerator.
Children in the household
• Never leave packaging and its parts with the children. There is a danger of poisoning or suocation by the
cardboard boxes and plastic sheets!
• This appliance is in no way a toy for children!
• For appliances with door locks: do not leave keys within the reach of children!
• If you will no longer be using the refrigerator, remove the doors, gasket seals and store it in a safe place.
In this way you will prevent the danger of children becoming trapped inside the freezer.
Maintenance and cleaning
Before you begin with regular or exceptional maintenance, disconnect the appliance's power cord or
disengage the fuse or circuit breaker. Never pull the electric power cord, only pull on the power plug.
Do not use mechanical or any other devices, except for devices recommended by the manufacturer
for the purpose of accelerating the defrosting process.
• Do not defrost or clean the appliance using a steam cleaning device! The steam may come into contact
with the electric components inside the appliance, where a short circuit could occur. There is a danger
of electric shock!
• Do not remove the frozen ice layer and frozen on food using a knife or a sharp object. This could damage
the cooling medium pipes. The escape of the cooling medium may cause eye injuries or may catch on re.
General instructions
• This appliance must not be used by persons (including children) with physical, sensory or psychological
impairments or by inexperienced persons, unless properly trained or schooled in the safe use of the
appliance, or unless they have been properly supervised by a person who will be responsible for their
safety. Children should be supervised so as not to play with the appliance.
• This appliance has been tested in accordance with the directives in force in the European Union.
• The tightness of the cooling circuit has been veried.
• This appliance conforms to the relevant safety provisions for electrical appliances in force in the European
Union.
EN - 4
12/2013Copyright © 2013, Fast ČR, a. s.
Technical safety
The appliance contains a cooling gas, ISOBUTHAN (R600a). Only transport or move the appliance
with the utmost care, prevent excessive impacts and shaking to prevent damaging the appliance.
If the cooling circuit becomes damaged and the cooling gas may be escaping, there is a risk of an
explosion, which may be ignited by a spark or ame. If the appliance shows signs of damage, it must
not be put into operation. In such a case contact the service centre, ventilate the room where the
appliance is located and prevent the spreading of ames or other interference with the appliance.
Safety instructions for gas R600a
Measures in case of an unexpected release
If ventilation is possible, allow the material to evaporate.
Characteristics of the gas
The gas is highly ammable, it is necessary to completely prevent contact with an open ame and hot surfaces.
Because the R600a gas is heavier than air, it may become very concentrated at the level of the ground, where
ventilation is weak.
First aid
Inhalation
Take the aected person from the contaminated area to a warm, well ventilated location. Staying in
a contaminated location for a long time may cause suocation, or potentially loss of consciousness. If
necessary, provide mouth-to-mouth resuscitation and in exceptionally serious situations, under expert
medical supervision, give oxygen.
Contact with the skin
Random contact with the skin will not endanger health, it is better to thoroughly wash the aected area. The
liquid spray or dispersed liquid may cause frost bite, wash the aected area with large amounts of water and
contact a medical doctor.
Contact with the eyes
If eyes have been aected, wash out with large amounts of water, while trying to keep the eyes open, and call
a specialised doctor as soon as possible.
If contact or inhalation of the R600a gas occurs, contact your medical doctor.

EN - 5
12/2013Copyright © 2013, Fast ČR, a. s.
PART 2: DESCRIPTION OF DEVICE
1.
2.
3.
4.
5.
6.
7.
8.
9.
10.
11.
12.
13.
14.
21.
22.
15.
16.
17.
18.
19.
20.
1. Outer case
2. Air duct cover
3. Light cover
4. Decorative button
5. Space for shelves
6. The temperature dial (in the refrigerator compartment)
7. Freezer air current control dial
8. Cover of the fruit and vegetable drawer
9. Humidity control
10. Fruit and vegetable drawer
11. Top freezer drawer
12. Middle freezer drawer
13. Bottom freezer drawer
14. Levelling feet
15. Refrigerator door
16. Egg holder
17. Top shelf
18. Bottom shelf
19. Handle
20. Freezer door
21. Freezer air supply cover
22. Freezer air supply tube outlet
NOTE:
Due to the continuous innovation of products, the actual appliance may dier from this user's manual
but the functions and methods of use remain the same. For more room in the freezer, you may remove
the drawers (except for the bottom drawer) and install grates and the ice tray.

EN - 6
12/2013Copyright © 2013, Fast ČR, a. s.
PART 3: INSTALLATION
Transport and unpacking
If the appliance is transported in a horizontal position the oil from the compressor may leak into the cooling
circuit. For this reason, allow the appliance to rest in a vertical position for 12 hours before turning it on, so that
the oil ows back into the compressor.
Remove the external packaging, remove the protective plastic lm from the surface of the appliance (if used)
and clean the external parts of the appliance with an agent designed for this purpose. Do not use steel wool or
any coarse agents, which could irreparably damage the surface of the appliance. Carefully remove all papers
and adhesive tape from the appliance, doors and other parts packed in polystyrene. Remove documents
and accessories from inside the appliance.
The packaging material is recyclable and is marked with a recycling symbol. For disposal follow the local
regulations. Packaging materials (plastic bags, polystyrene parts, etc.) must be kept out of the reach of children,
because they present a possible source of danger.
Carefully inspect the appliance. If you discover any defects, stop the installation and contact the vendor.
Operating conditions
The proper operation of the appliance, the cooling and freezing temperature are guaranteed only when
the following conditions are met:
The temperature in the room where the appliance is located conforms to the climate class stated on
the appliance's rating label.
Maximum ambient relative humidity: 90%.
The appliance must be placed at a sucient distance from heat sources (e.g. baking ovens, central heating,
direct sunlight, etc.).
The appliance must be located in such a place that it is protected against the eects of weather.
Regular maintenance is performed according to the instructions in this user's manual.
The ventilation openings in the cover of the appliance must not be covered by anything.
Correct installation (e.g. levelling, the capacity of the system correspond to the specications on the rating
label of the appliance.)
Table – Climatic class
Climatic class Ambient temperature
SN +10°C to +32°C
N +16°C to +32°C
ST +16°C to +38°C
T +16°C to +43°C

EN - 7
12/2013Copyright © 2013, Fast ČR, a. s.
Installation location
The installation location of the appliance must meet the requirements in the paragraph "Operating conditions"
and must have a stable oor with a load bearing capacity corresponding to the weight of the appliance.
Furthermore you must maintain distances and dimensions of the appliance, so that correct operation is ensured:
1. Top part at least 20 cm;
2. Rear part at least 10 cm;
3. The wall on the side where the door opens at least 30 cm.
Level the appliance using the levelling feet, ensure there is a gap between the bottom edge of the appliance
and the ground, so that there is sucient circulation of the cooling air, by which you will ensure the optimal
performance of the cooling circuit.
Check whether any cooling circulation pipes have been damaged during the installation.
Use the appliance only for the purposes for which it has been designed.
The appliance must be located on a rigid and even surface.
In this way you will ensure free circulation of the coolant and eective operation of your appliance.
If possible, place the appliance into a cool, well ventilated and dry room.
Do not locate the appliance in direct sunlight, or in a room with a high temperature, in the vicinity of any
sources of direct heat, such as heating, an oven, a stove, etc. – this would mean that the compressor would
need to work a lot harder resulting a substantially higher power consumption level.
If it is not possible to prevent the installation in the vicinity of a heat source, we recommend the insertion of an
appropriate insulating board (do not use asbestos) between the appliance and the heat source; or at least to
maintain the following minimum distances:
From a gas or electric stove 3 cm;
From a heater or oven, etc. 30 cm;
From another cooling appliance 2 cm.
Do not place any appliances on the appliance, which release heat on to the appliance, such as microwave
ovens, toasters, etc.
Never cover the ventilation grill. Pull out the power plug by pulling on the plug itself, never pull on the cord
when disconnecting the appliance.
Before turning on the appliance, allow it to stand in its nal location for 12 hours, the coolant circuit
will stabilise in this way and no operating problems will occur. Before connecting the appliance to the
power grid check that it is perfectly dry inside – especially in the corners.
Danger warning
The coolant may be highly ammable, depending on its composition. The coolant circuit was
hermetically closed and sealed and was tested many times for possible leaks. Any unqualied
tamperingwith the product may cause a re hazard. Check that there is no mechanical interruption
or eect on the coolant circulation, namely in the accessible parts around the compressor.
Only professionally qualied persons may work on the cooling system.

EN - 8
12/2013Copyright © 2013, Fast ČR, a. s.
Cleaning before use
Check that you have removed from the appliance all adhesive tape used to hold accessories . Then clean all the
inside parts using lukewarm water with a neutral cleaning agent, vinegar or sodium carbonate – in this way
you will remove the characteristic odour of new parts – then dry carefully. Do not use detergents or aggressive
agents, which could damage the surfaces.
Electrical connection
Before connecting the power plug to the power socket, check that:
Your hands are completely dry.
The voltage and frequency shown on the rating label of the appliance corresponds to that in the home
power grid (permitted tolerance from -6% to +6% for nominal voltage. For use with dierent voltages, use
a voltage changer with the corresponding parameters).
The cord and the plug are not damaged or caught under heavy objects.
The power cord is not excessively tensioned, it is not permitted to use an extension cord.
Do not connect the appliance to a voltage rectier (e.g. solar power plant) or use an extension cord.
The appliance must be connected to a working grounding lead.
If the power socket of the home system is not grounded in accordance with the current legal
regulations, connect the appliance after consulting a specialised technician to the grounding lead
itself.
The manufacturer takes no responsibility for injuries caused as a result of not following these
instructions.
If you do not correctly level the refrigerator during the installation, the doors may not close shut and
seal properly, which may cause problems with the cooling, ice build up or moisture. Levelling the
refrigerator is very important.
Level the refrigerator using the levelling feet – turn them clockwise to lift the refrigerator and turn them
anticlockwise to lower the refrigerator.
Procedure for switching the door opening direction
You can change the door opening direction - from the right (as supplied by the manufacturer) to the left if the
location of the refrigerator requires it.
WARNING!
When changing the door opening direction, the appliance must not be connected to the power
supply. Check that you have disconnected the plug of the power cord from the mains power socket.

EN - 9
12/2013Copyright © 2013, Fast ČR, a. s.
Tools
8mm socket wrench Philips screwdriver
Spatula or a narrow at screwdriver
NOTE:
Prior to starting with the change, place the appliance on its back so as to gain access to its
underside. Lay the appliance down on to a soft mat or similar material so that the cooling circuit
located in the rear of the appliance is not damaged.
To change the door opening direction, proceed as follows.
1. Stand the refrigerator upright. Take all food and shelves out of the refrigerator to prevent their possible
damage.
Shelf
2. Using the spatula or the narrow screwdriver, remove the screw hole cover in the top left corner of the
refrigerator. Screw out the screws of the top hinge cover in the top right corner of the refrigerator.
Screw hole cover Screw
Top hinge
cover (right)

EN - 10
12/2013Copyright © 2013, Fast ČR, a. s.
3. Using a screwdriver, screw out the special self-tapping screws, which are used for fastening the top hinge.
Hold the refrigerator door with one hand so that it does not fall o.
Top right hinge
Special
self-tapping
screws
4. Remove the axle of the top hinge, turn it around and secure it rmly in place.
5. Pull out the top door upwards and place it on a soft mat with the inside part facing downwards. Then using
a sharp tool, remove the handle screw cover. Screw out the self-tapping screws used to fasten the handle.
Install this on the other side, secure in place with the screws and return the screw covers back in their place.
Now screw out the door stopper screws and install it on the other side.
Handle screw cover
Special
self-tapping
screws
Handle
Screw hole
covers
Door stopper
NOTE:
When taking the door o, pay attention to the washer (washers) between the middle hinge and the door,
which could stick to the door. Do not lose them.

EN - 11
12/2013Copyright © 2013, Fast ČR, a. s.
6. Screw out the special self-tapping screws from the middle hinge and remove the middle hinge which
is holding the bottom door.
Middle hinge
Special
self-tapping
screws
7. Pull out the bottom door upwards and place it on a soft mat with the inside part facing downwards.
Now perform the same procedure as in step 5.
Handle screw
cover
Special
self-tapping
screws
Handle
Screw
hole
covers
NOTE:
When taking the door o, pay attention to the washer (washers) between the middle hinge and the door,
which could stick to the door. Do not lose them.
8. Remove the screw hole covers from the left side as shown on the picture below and move them
to the other side on to the uncovered holes.
Screw hole cover
Screw hole cover
Screw hole cover
Screw hole cover

EN - 12
12/2013Copyright © 2013, Fast ČR, a. s.
9. Place the refrigerator on its back on a soft underlay. Take o both levelling feet. Remove the front foot plate
and the bottom hinge by screwing out the special self-tapping screws.
Front
feet
plate
Bottom part
of the levelling
plate
Special
self-tapping
screws
Bottom hinge
Bottom part
levelling
plate
Special
self-tapping
screws
10. Screw out the axle of the bottom hinge, turn it over and screw it on to the other side.
11. Install the bottom hinge on to the left side and secure in place using the special self-tapping screws.
Install the front foot plate on to the other side, then install the front feet.
Bottom hinge
Front
feet
plate

EN - 13
12/2013Copyright © 2013, Fast ČR, a. s.
12. Seat the bottom door on to the hinge pin, level and secure in place.
13. Turn the middle hinge by 180° and install on the other side in the middle section. Place the hinge pin
of the middle hinge on the bottom door, level and secure in place with screws.

EN - 14
12/2013Copyright © 2013, Fast ČR, a. s.
14. Seat the top door on the hinge pin of the middle hinge. Level.
Handle
Handle
15. Install the top hinge on the other side in the top section. Place the hinge pin of the top hinge on the top
door, level and secure in place with screws. It is necessary to hold the top door in place with one's hand.
Top hinge
16. Place the screw hole cover into the top right corner of the refrigerator. Install the top hinge cover on the
top left corner and screw it in. Place the no longer required parts into the plastic bag.
Screw Top hinge
cover (left)
Screw hole
covers
17. Open the door and insert the shelves.

EN - 15
12/2013Copyright © 2013, Fast ČR, a. s.
PART 4: OPERATING THE APPLIANCE
Setting the temperature in the refrigerator
In the middle part of the refrigerator there is a temperature control dial that is used to control the temperature
inside the refrigerator. You can set the temperature in the range: Cold – Mid – Colder.
For standard operation we recommend that the appliance be set to the Mid temperature.
The higher setting you select, the more it will save on power consumption and vice versa.
IMPORTANT!
During hot summer days when the temperature control dial is set to "Colder", the compressor may run
continuously. This is normal as the compressor is trying to maintain the temperature at the set level.
NOTE:
Inside the refrigerator there are outlets from the cold air distribution ducts. These outlets must remain
freely accessible and must not be blocked so that the proper operation of the appliance is ensured.
Freezer air current control dial
In the middle part of the refrigerator there is a control dial that is used to control the temperature inside the
freezer. For normal operation we recommend that the appliance is set between "Cold" and "Colder".

EN - 16
12/2013Copyright © 2013, Fast ČR, a. s.
Refrigerator accessories
Refrigerator shelves
The refrigerator shelves can be moved to a dierent height if necessary by being inserted into a respective rail
or taken out for easy cleaning.
Shelves in the door
These are used for storing smaller-sized food such as cheeses, meat, eggs and bottles. They can be installed
at various heights as required.
Fruit and vegetable drawer
It is used for storing fruit and vegetables.
Freezer drawers
These are used for storing frozen food.

EN - 17
12/2013Copyright © 2013, Fast ČR, a. s.
PART 5: ARRANGEMENT OF FOOD
Food products, which are susceptible to the absorption of odours or that release odours must always
be stored in closed boxes or in appropriate packaging.
Fruit, vegetables and salad products can be stored unpacked in the vegetable drawers.
Appropriate wrapping materials for food is plastic wrap, aluminium foil, glass jars, etc.
The products should not touch the back wall, otherwise they may freeze on.
Always allow hot dishes to cool down before placing them into the refrigerator.
Open the door only for a short time so that the inside area of the fridge is not heated. This saves energy.
Never store explosive materials or products with ammable compressed gasses (e.g. whipped cream
sprayers with pressurised capsules/cartridges, spray cans) – DANGER OF EXPLOSION!
Do not place oils intended for meal preparation into the removable drawers in the refrigerator door.
This may cause cracks caused by the pressure in the plastic on the door.
Alcoholic beverages must always be stored in the cold zone, in a vertical position and rmly and safely
closed.
Advice about refrigerating food
While the air in the refrigerator circulates, areas with various temperatures arise. These areas are especially
useful for storing various types of food. Arrange the food in such a way that air can freely ow around the food.
The coldest zones (suitable for example for storing meat) are found immediately above the vegetable drawers.
On the other hand the zones that are less cold are at the top towards the outside and inside the door (ideal
for storing butter and cheese).
Table - Storing food in the refrigerator
Food Storage method Zone Durability
Meat and sh (various),
hard cheeses
Plastic foil, aluminium
foil, closed glass
containers, plastic
containers
Bottom part of the
refrigerator 1-2 days
Cooked dishes, cold
dishes, confectionery
Closed glass or plastic
containers Any shelf 1-2 days
Fruit and vegetables Closed packaging or
in bulk
Fruit and vegetable
drawer 3-4 days
Bananas, potatoes,
onion, garlic
Do not store in the
refrigerator --
Water, wine, beer, milk,
fruit juices, zzy drinks
Food grade glass or
plastic bottles Tray in the door Depends on expiry date
Pickled or in oil
marinated food, sauces,
butter, soft cheese, eggs
Original packaging Tray in the door Depends on expiry date
Yoghurt Original packaging Any shelf Depends on expiry date

EN - 18
12/2013Copyright © 2013, Fast ČR, a. s.
Storage of frozen food
All frozen food must be put into the freezer as soon as possible after being bought, so that they do not defrost
and cause potential contamination.
Store frozen products according to the manufacturer's instructions on the packaging.
Pay increased attention to handling the drawer, so that you do not damage the cooling circuit.
Placing fresh food into a freezer
Ensure that the freezer is clean as the freezing process itself does not sterilise food. We recommend freezing
food in the original packaging, or in various containers suitable for freezing or in special freezer bags. Never
place hot or warm dishes into the freezer. Allow dishes to fully cool down before placing them into the freezer,
wrap them in a plastic bag, aluminium foil or put them in a jar. Check the label on the freezer, to check how
many kilos of fresh food (at a room temperature of 25°C) the freezer is able to freeze in 24 hours. Never insert
more food than the permitted amount.
Never place bottles with zzy drinks into the freezer nor any other bottles.
For better freezing results give the food sucient room for air circulation.
We recommend a setting between the medium and maximum value for standard use and for long term
food storage in the freezer.
ATTENTION!
Do not store cans and bottles with beverages containing carbon dioxide in the freezer. The contents
expand during the freezing process, which may rip the bottle or can apart. Risk of injury and damage!
Consume ice cream only several minutes after removing it from the freezer – you will avoid injury to your
lips and tongue. Do not touch the inside of the freezer if you have wet hands.
Important information
Place only properly wrapped food into the freezer.
When storing deep frozen food intended for immediate consumption, note the expiry date marked by the
manufacturer.
Remember that only quality fresh food is suitable for freezing.
Freeze fresh food in appropriately sized portions.
Ensure that you use an appropriate wrapping material (plastic wrap, aluminium foil, freezing bays).
Push all air out of the packages.
To close the packages use rubber bands, plastic clips, tie wire or adhesive tape resistant to cold.
Plastic bags and tubes can also be closed using a food sealing appliance.
On the closed package write down the contents, weight and date of freezing.
Before placing plastic bags into the freezer check that they are dry so as to prevent them from freezing to
each other.
To prevent partial defrosting, place the food that is to be frozen in such a way that it is not touching the
already frozen food.
Table of contents
Other Philco Refrigerator manuals

Philco
Philco PX 5161 X User manual

Philco
Philco PTL 3352 User manual

Philco
Philco PTL 93 F User manual

Philco
Philco PXI 4551 X User manual

Philco
Philco PX 5601 NFDX User manual

Philco
Philco PCD 3122 Installation instructions

Philco
Philco PTL 1302 User manual

Philco
Philco PCD 3602 ENF User manual

Philco
Philco PLF 451 User manual

Philco
Philco PC 2252 PL User manual

Philco
Philco PRSF-5628X1/WD User manual

Philco
Philco PBTR122 User manual

Philco
Philco PX 502 Iceberg User manual

Philco
Philco PHK15BM Setup guide

Philco
Philco PFTM43SV Setup guide

Philco
Philco PTB 1132 User manual

Philco
Philco PRMF-4522X User manual

Philco
Philco PTL 3602 NX User manual

Philco
Philco PSL 441 User manual

Philco
Philco PRD-95W User manual