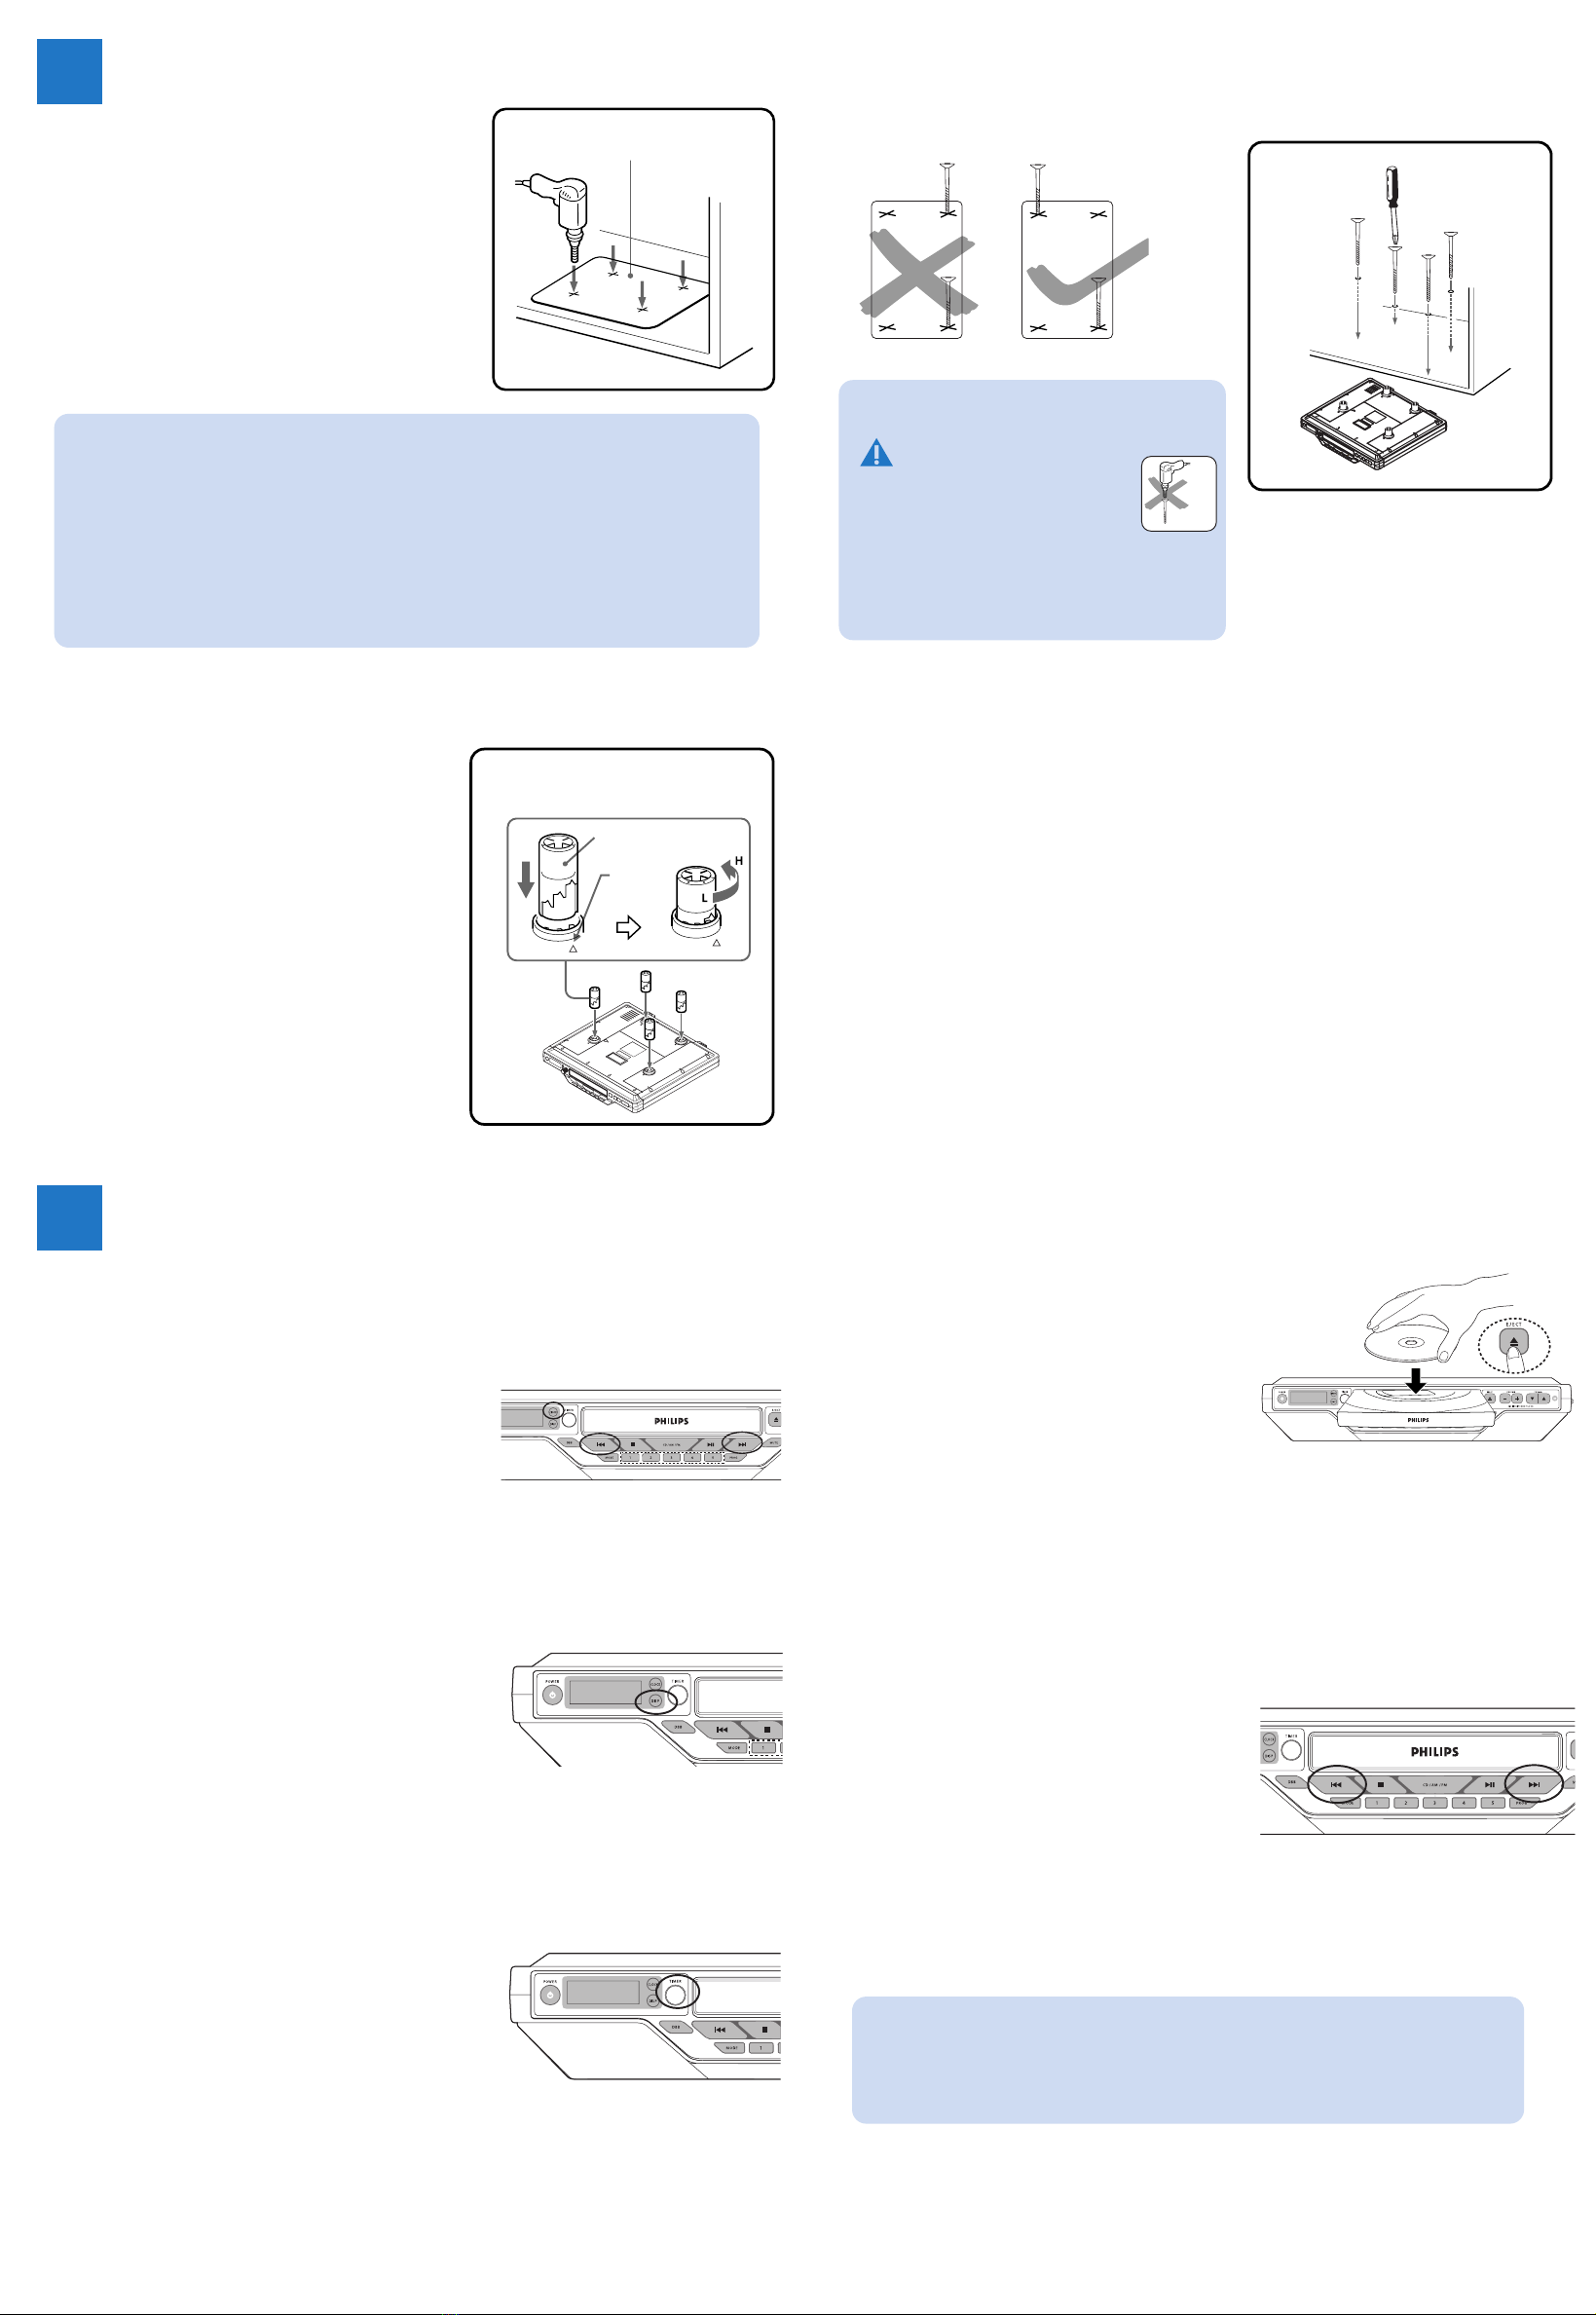
Mount it
Ask a friend to help out. An extra hand to hold
the unit makes mounting easier and quicker
A
•Cut the template to fit inside the cabinet.
•Align the template border marked "FRONT" along the
front edge of your cabinet.
•Use adhesive tape to fix the template.
•Drill 1/4 inch holes, as marked Xon the template.
•Remove the template when you finish drilling.
B
Using the spacers
On the spacers, there are 4 pairs of notch length
options. Depending on the thickness of you cabinet bot-
tom (with/ without an overhang), these notch lengths
correspond to the 4 notch height in the space holders,
and allow you to adjust to the best height to help you
mount the unit.
•Measure the height of the cabinet bottom and/over-
hang.
•Tu rn the spacer counterclockwise to determine
which of the 4 heights is most suitable: Low • •
High. Align to the arrow indication.
•Insert the spacers accordingly.
3
Template
A
Tip
– Clean the bottom of the cabinet surface and also empty your cabinet before mounting.
– Place the unit in a clean, safe place when drilling to avoid wood shavings dropping into the
ventilation slots.
– Use a nail to start each drill hole.
– Drill from the bottom upwards if you do not have enough room inside the cabinet.
– Hold your drill firmly at 90owith the cabinet bottom and drill holes at low speed.
– Clear wood shavings.
C
•Manually fasten the 8long screws down into the spacer holder holes to mount your set. Start
screwing at opposite corners of the unit for better support.
C
Tip
To prevent damage to your
set, do not use an electric
drill to secure screws when
mounting!
– If the overhang is more than 1 1/4 inch, use
longer screws (not included).
Use it
For full details, please read and follow the instructions inside the User manual.
A
Setting the clock
1On the set, press and hold CLOCK.
➜The hour digits start flashing (AM 12:00 by default).
2Hold down or press ∞or §repeatedly to set the hour.
3Press CLOCK to confirm the setting.
➜The minute digits start flashing.
4Repeat step 3to set the minute.
5Press CLOCK to confirm the setting.
To turn on the Daylight Saving Time (DST) mode
1In the standby mode, press and hold DISP on the set.
➜Current time setting moves ahead by 1 hour.
DST appears.
2Press DISP again.
➜The set returns to normal time setting. DST disappears.
B
Setting the timer
1On the set, press TIMER to activate.
➜015 flashes. TIMER appears
2Tu r n the TIMER control counter-/clockwise to
adjust your timer period (from 1 to 180 minutes).
➜Display shows selected timer period.
3Press TIMER to confirm.
➜Timer period starts to count down. TIMER flashes
4To cancel the timer, press TIMER during the countdown.
➜Display shows the clock time.
4C
Playing discs
1Press POWER to on, then press CD/AM/FM
once or more to select CD source.
2Press 0EJECT to open the CD compartment
3Insert a disc with the printed side facing up.
Press 0again to close the compartment
➜Playback starts automatically. Display shows
current track number
4To pause playback, pressÉÅ.To resume playback,
press the button again
5To stop playback, pressÇ
➜Display shows the total number of tracks
D
Tuning to radio stations
1Press POWER to on, then press then press
CD/AM/FM once or more to select radio source
(AM or FM)
2Press and hold ∞/ §until the frequency in the
display starts running
➜The radio automatically tunes to a station of
sufficient reception
3Repeat step 2if necessary until you find the desired
radio station
➜To tune to a weak station, press ∞/ §briefly
and repeatedly until optimal reception is found
MCM760 MICRO SYSTEM
MP3-CD/CD-R/CD
-RW COMPATIBLE
MICRO SYSTEM
Tip
To Improve radio reception:
– For FM, extend and adjust the AC power cord
H
L
Spacer
L (Low)
L••H (4 heights)
Arrow
B
AJ6110 QSG-Eng 4/10/06 1:52 PM Page 2


