3 Move the shaving heads over your
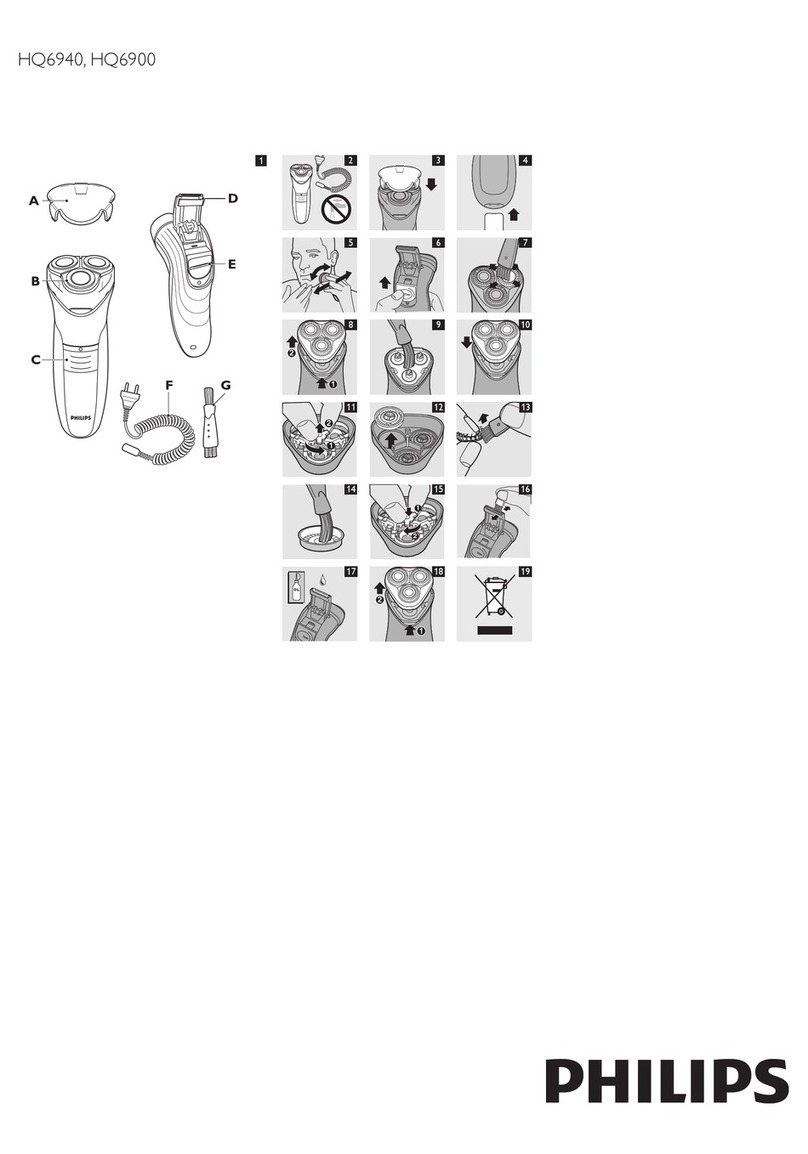
skin. Make both straight and circular
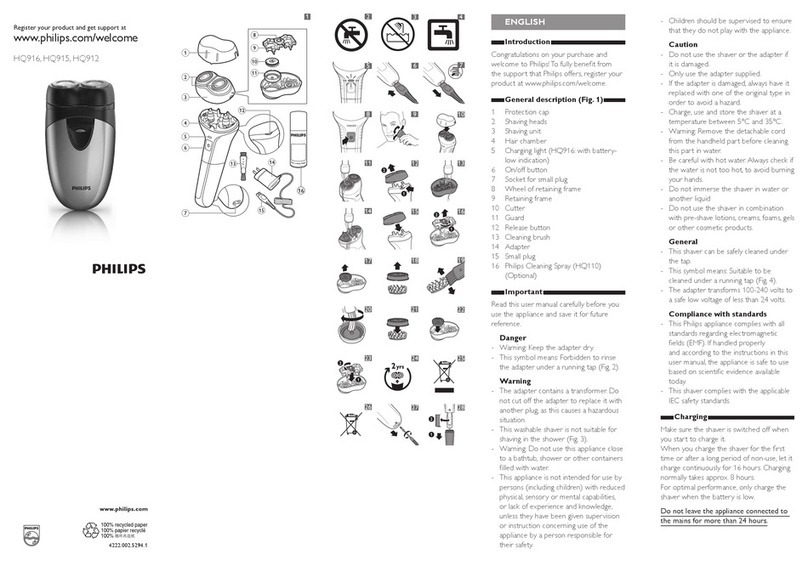
movements (Fig. 7).
Note: Shave on a dry face only. Do not use the
shaver in combination with gel, foam or water.
Note: Your skin may need 2 or 3 weeks to get
accustomed to the Philips shaving system.
4 Push the on/off slide downwards to
switch off the shaver.
5 Clean the shaver after every shave,
see chapter ‘Cleaning and maintenance’.
6 Put the protection cap on the shaver
after use to prevent damage and to
avoid dirt accumulation in the shaving
heads (Fig. 8).
Cleaning and maintenance
Never use scouring pads, abrasive cleaning
agents or aggressive liquids such as petrol
or acetone to clean the appliance.
Clean the shaver after every shave to
guarantee better shaving performance.
For the best cleaning result, we advise you
to use Philips Cleaning Spray (HQ110). Ask
your Philips dealer for information.
Note: Philips Shaving Head Cleaning Spray
(HQ110) may not be available in all countries.
Contact the Customer Care Centre in your
country about the availability of this accessory.
After every shave: shaving unit
and hair chamber
1 Switch off the shaver.
2 Clean the top of the appliance with
the cleaning brush supplied (Fig. 9).
3 Press the release button (1) and pull
the shaving unit a straight up off the
shaver (2) (Fig. 10).
4 Clean the inside of the shaving unit
with the cleaning brush (Fig. 11).
5 Clean the hair chamber with the
cleaning brush (Fig. 12).
6 Put the shaving unit back onto the
shaver (Fig. 13).
Every two months: shaving heads
Note: Do not use cleaning agents or alcohol
to clean the shaving heads. Only use Philips
Cleaning Spray (HQ110).
1 Switch off the shaver.
2 Press the release button (1) and pull
the shaving unit straight up off the
shaver (2) (Fig. 10).
3 To remove the retaining frame,
push the sides of the central spring
towards each other (1).Then lift the
retaining frame out of the shaving unit
(2) (Fig. 14).
4 Slide the shaving heads out of the
retaining frame. Remove and clean
one shaving head at a time. Each
shaving head consists of a cutter and a
guard (Fig. 15).
Note: Do not clean more than one cutter and
guard at a time, since they are all matching
sets. If you accidentally mix up the cutters
and guards, it may take several weeks before
optimal shaving performance is restored.
5 Remove the guard from the
cutter (Fig. 16).
6 Clean it with the short-bristled side of
the cleaning brush. Brush carefully in
the direction of the arrows (Fig. 17).
7 Clean the guard with the long-bristled
side of the cleaning brush (Fig. 18)
8 Put the cutter back into the guard
after cleaning (Fig. 19).
9 Slide the shaving heads back into the
retaining frame. (Fig. 20)
10 Put the retaining frame back into the
shaving unit (‘click’) (Fig. 21).
11 Put the shaving unit back onto the
shaver (Fig. 13).
Storage
Keep the appliance dry.
Use and store the appliance at a
temperature between 5°C and 35°C.
1 Switch off the shaver.
2 Put the protection cap on the shaver
after use to prevent damage and to
avoid dirt accumulation in the shaving
heads (Fig. 8).
Replacement
Replace the shaving heads every two years
for optimal shaving results.
Replace damaged or worn shaving heads
with Philips shaving heads only (HQ4+ for
China or HQ56 for the rest of the world).
For instructions on how to remove the
shaving heads, see chapter ‘Cleaning and
maintenance’, section ‘Every two months:
shaving heads’.
Accessories
To retain the top performance of your
shaver, make sure you clean it regularly
and replace its shaving heads at the
recommended time.
Shaving heads
- We advise you to replace your shaving
heads every two years. Always replace
them with Philips shaving heads only
(HQ4+ for China or HQ56 for the
rest of the world) (Fig. 22).
Cleaning
- Use Philips Cleaning Spray (HQ110) to
clean the shaving heads thoroughly.
Environment
- Do not throw away the appliance
with the normal household waste at
the end of its life, but hand it in at an
ofcial collection point for recycling.
By doing this, you help to preserve the
environment (Fig. 23).
- Batteries contain substances that
may pollute the environment. Do
not throw away batteries with the
normal household waste, but dispose
of them at an ofcial collection point
for batteries. Always remove the
batteries before you discard and hand
in the appliance at an ofcial collection
point (Fig. 24).
Guarantee and service
If you need service or information or if
you have a problem, please visit the Philips
website at www.philips.com/support or
contact the Philips Consumer Care Centre
in your country. You nd its phone number
in the worldwide guarantee leaet. If there
is no Consumer Care Centre in your
country, go to your local Philips dealer.
Guarantee restrictions
The shaving heads (cutters and guards)
are not covered by the terms of the
international guarantee because they are
subject to wear.
DANSK
Introduktion
Tillykke med dit køb og velkommen til
Philips! For at få fuldt udbytte af den
support, Philips tilbyder, skal du registrere dit
produkt på www.philips.com/welcome.
Generel beskrivelse (fig. 1)
1 Beskyttelseskappe
2 Skær
3 Skærhoved
4 Samleramme
5 Fjeder i midten af samlerammen
6 Udløserknap
7 Skægkammer
8 On/off-skydekontakt
9 Låg til batterirum
10 Philips Cleaning Spray (HQ 110)
(ekstraudstyr)
11 Skærenhed
12 Kappe
13 Rensebørste
Vigtigt
Læs denne brugervejledning omhyggeligt
igennem, inden apparatet tages i brug, og
gem den til eventuel senere brug.
Advarsel
- Hold apparatet tørt.
- Dette symbol betyder: Må ikke
rengøres under rindende vand (g. 2).
- Dette apparat er ikke beregnet til at
blive brugt af personer (herunder
børn) med nedsatte fysiske og mentale
evner, nedsat følesans eller manglende
erfaring og viden, medmindre de
er blevet vejledt eller instrueret i
apparatets anvendelse af en person, der
er ansvarlig for deres sikkerhed.
- Apparatet bør holdes uden for børns
rækkevidde for at sikre, at de ikke kan
komme til at lege med det.
Forsigtig
- Apparatet skal anvendes og opbevares
ved temperaturer mellem 5°C og
35°C.
- Tag batteriet ud, hvis du ikke skal bruge
apparatet i en måned eller mere.
- Brug Philips-batterier for at opnå den
optimale barberingsevne.
- Brug kun den medfølgende
rensebørste.
- Sørg for at holde rensebørsten ren.
Dette Philips-apparat overholder alle
standarder for elektromagnetiske
felter (EMF).Ved korrekt anvendelse i
overensstemmelse med instruktionerne i
denne brugervejledning er apparatet sikkert
at anvende ifølge den videnskabelige viden,
der er tilgængelig i dag.
Klargøring
Isætning af batterier
Apparatet strømforsynes af to R6 AA 1,5-
volt alkalinebatterier. Det anbefales at bruge
nye alkalinebatterier fra Philips for at opnå
den optimale barberingsevne.
Sørg for, at dine hænder er helt tørre, når
batterierne isættes.
1 Taglågetafbatterirummet(g.3)
2 Placer to batterier i
batterirummet(g.4).
Bemærk: Sørg for, at mærkerne + og -
på batterierne følger anvisningerne i
batterirummet.
Bemærk: Shaveren virker ikke, hvis batterierne
er sat forkert i.
3 Sæt låget på batterirummet igen.
Placer først den øverste del (1), og
tryk derefter den nederste del ned,
indtilduhøreretklik(2)(g.5).
Sådan undgås eventuel
beskadigelse pga. batterilækage
- Apparatet bør ikke udsættes for
temperaturer over 35°C.
- Tag batterierne ud, hvis apparatet ikke
skal bruges i en måned eller mere.
- Lad ikke opbrugte batterier blive
siddende i apparatet.
Barberingstid
To nye alkalinebatterier fra Philips giver 60
minutters barberingstid.
Sådan bruges apparatet
1 Fjern beskyttelseskappen.
2 Tryk på tænd/sluk-skydekontakten for
at låse den op, og skub opad for at
tændeforshaveren(g.6).
Tænd/sluk-skydekontakten har en integreret
låsemekanisme for at undgå, at shaveren
tændes ved et uheld.


