manuals.online logo
Brands
  1. Home
  2. •
  3. Brands
  4. •
  5. PIEPS
  6. •
  7. Security System
  8. •
  9. PIEPS DSP User manual

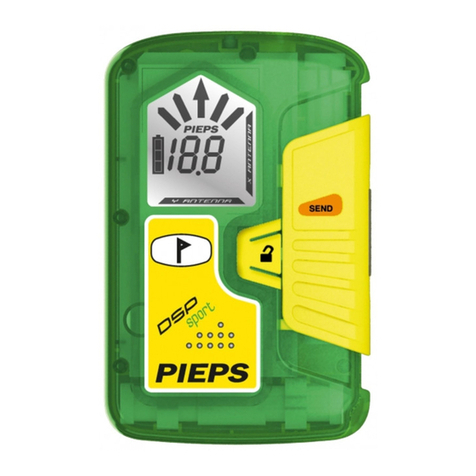
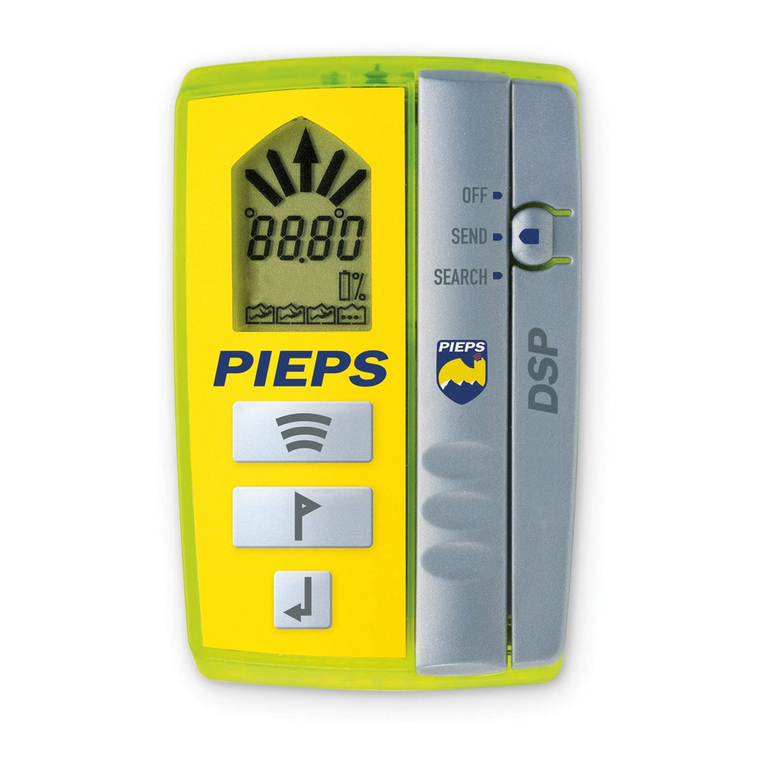
PIEPS DSP User manual

08/06
MANUAL
Nous vous félicitons d’avoir acheté un détecteur
de victimes d’avalanches PIEPS. Depuis plus de
30 ans, les détecteurs PIEPS ont acquis une bonne
réputation auprès de plus de 100.000 skieurs
dans le monde entier. Depuis, les détecteurs de
victimes d’avalanches PIEPS ont été sans cesse
améliorés. Vous avez acheté un détecteur doté de la
technologie la plus récente : la nouvelle technologie
PSN (traitement des signaux par un processeur de
signaux numériques) conjugué à un système à 3
antennes, la portée extraordinaire et la simplicité
d’utilisation du détecteur permettent de sauver
rapidement les victimes d’avalanches.
ATTENTION ! Le détecteur PIEPS-DSP ne peut pas
vous protéger contre les avalanches. L’information
détaillée de la prévention en matière d’avalanches
est aussi indispensable que l’entraînement régulier
à la recherche des victimes d’avalanches. Les
procédés et les instructions détaillés ci-après ne
s’appliquent qu’à l’emploi de détecteurs de victimes
d’avalanches PIEPS-DSP. En cas d’urgence, il est
vital de respecter les règles de conduite. Respecter
également les règles gurant dans les publications
techniques ou enseignées lors de cours de sauvetage
de victimes d’avalanches.
Congratulations on having purchased a PIEPS
avalanche beacon! 100,000 skiers world-wide
testify to the quality of this brand, which has
been on the market for nearly 30 years. During
this time, PIEPS beacons have undergone constant
improvement. The device you have chosen is a
state-of-the-art piece of equipment. Enhanced
by the latest DSP technology (= signal processing
with a digital signal processor) and a triple-antenna
system, it not only offers an exceptional range but
also greatly simplies the rescue procedure, even in
case of multiple burials.
IMPORTANT! Even the PIEPS-DSP beacon
cannot protect you against avalanches. A close
study of avalanche prevention techniques is
equally essential, as is regular practising for the
eventuality of an avalanche rescue. The procedures
and instructions described below refer solely to
specic application in connection with PIEPS-DSP
avalanche beacons. The basic rules of conduct in
case of emergency – as dended in the relevant
specialist publications and in training sessions
– must be observed without fail.
DEAR WINTER SPORTS ENTHUSIAST!
08/06
|
03
CHERS SKIEURS, CHERS ALPINISTES
1 Ecran CL (rétroéclairé)
2 Interrupteur principal OFF-SEND-SEARCH
(ARRET-EMISSION-DETECTAGE)
3 Verrouillage
4 Bouton OPTION
5 Bouton SCAN
6 Bouton MARK (MARQUAGE)
7 Indicateurs de direction
8 Indicateur numérique
9 Température
10 Nombre de victimes
11 Altimètre
12 Boussole
13 Indicateur piles
12
7
8
9
10
11
13
1
2
6
5
4
3
1 LCD-Display (backlight)
2 Main switch OFF-SEND-SEARCH
3 Lock
4 Button OPTION
5 Button SCAN
6 Button MARK
7 Direction indicator
8 Numeric information
9 Temperature
10 Number of burials
11 Altimeter
12 Compass
13 Battery level
Grâce aux bretelles livrées avec l’appareil, le
détecteur PIEPS DSP peut être porté à même le
corps. Pour le xer, passer l’agrafe de la lanière de
sécurité à travers la poche en la reliant à la boucle
sur le dos de la poche. Cette méthode étant la plus
sûre, nous vous la recommandons vivement. Vous
pouvez aussi xer le PIEPS DSP à la ceinture de
votre pantalon ou l’enfoncer avec ou sans poche
dans la poche de votre pantalon. La poche de votre
pantalon doit alors être fermée. Veillez alors à relier
la lanière de sécurité à un œillet de vos vêtements,
an de ne pas perdre le détecteur.
ATTENTION ! Porter le PIEPS DSP l’écran contre
le corps sous plusieurs couches de vêtement, et le
plus près possible du corps.
BRETELLES
The PIEPS DSP can be worn directly on your person
using the supplied carrying system. Pass the snap
hook of the safety cord through the carry pouch
and attach it to the loop on the rear of the pouch
(=safest option). Alternatively, the PIEPS DSP can
be attached to the belt of your ski trousers via the
belt loop, or can be carried in your trouser pocket
with or without the protective pouch. Always make
sure, however, that the safety cord is suitably
attached to an eyelet on your clothing to avoid
losing the detector.
IMPORTANT! The PIEPS DSP should be worn
as close as possible to the body with the display
towards it, and under as many layers of clothing
as possible!
CARRYING HARNESS
08/06
|
05
La case des piles se trouve au dos du boîtier.
Desserrer les vis à l’aide d’une pièce de monnaie
pour ouvrir et fermer la case.
ATTENTION ! N’utiliser que des piles du type
LR03/AAA. Ne pas utiliser des piles rechargeables.
Echanger toujours les 3 piles à la fois.
Appuyer sur le verrouillage de l’interrupteur
principal et mettre ce dernier en mode SEND
(EMISSION). Lors de la mise en marche, le PIEPS
DSP effectue un test automatique durant environ 5
secondes. Garder alors le détecteur à une distance
de 5 m minimum d’autres appareils. Après le test
automatique, l’écran afche le symbole d’émission
et le voltage résiduel des piles en %. La lampe
témoin clignote au rythme des signaux émis. En
cas de défaillance du détecteur, un signal d’alerte
retentit et l’écran afche « E » et un code d’erreur.
Cela signie que le détecteur ne fonctionne plus.
Veuillez alors vous adresser à notre service après-
vente. Sélectionner le mode SEND (EMISSION)
pendant toute la durée du séjour à l’air libre. Le
PIEPS DSP émet alors continuellement des signaux
pouvant être capturés par tout autre détecteur de
victimes d’avalanches.
ATTENTION ! Outre le test automatique du
détecteur PIEPS DSP, veillez à effectuer un test
avant chaque tour.
MODES BATTERY (PILES), SWITCHING ON
(MARCHE), SEND (EMISSION)
The battery compartment is located at the rear of
the housing. The safety screw connection can be
easily opened and closed using a coin.
IMPORTANT! Only use battery type LR03/AAA
and always replace all 3 batteries with new ones
of the same type. Never use rechargeable batteries
and always change all batteries at the same time!
Depress the main switch lock and push the main
switch to the “SEND“ position. When powered
on, the PIEPS DSP will carry out a self-test
lasting approx. 5 seconds. During this self-test a
minimum distance of 5 meters to other beacons
should be maintained. You will then see the send
symbol and the remaining % battery voltage in
the display. The LED will also ash synchronously
with the transmitter bit timing. In the event of a
device error, an alert signal sounds and the display
indicates “E” in combination with a error-code.
This means the device is not t for operation. In
this case, contact our customer service department.
When in the open, make sure the “SEND” mode
is selected throughout. The PIEPS DSP will then
transmit continuously any signal it picks up from
other beacons.
IMPORTANT! When switched on, a complex
self-testing is done by the beacon. Nevertheless
beacon-group-check is stongly recommended in
preparation to each tour.
BATTERY / SWITCHING ON / SEND MODE
08/06
|
07
1
2
3
1 Lampe témoin
2 Appuyer
3 Déplacer
1 Light
2 Press
3 Move
Dans le mode SEND (EMISSION), appuyer 3 fois sur
le bouton OPTION pour passer au mode OPTIONS.
En appuyant sur OPTION, vous basculez entre les
fonctions: Température: appuyer sur SCAN pour
passer de °C à °F et vice-versa. Boussole: lorsque
vous changer les piles, la boussole effectue un calibrage
automatique. Un calibrage est également nécessaire,
lorsque l’appareil détecte de fortes variations de
température. En appuyant sur SCAN vous déclenchez
le calibrage (CAL clignote). Tourner ensuite l’appareil
à 360° et appuyer sur OPTION. Compas de
repérage (boussole indiquant la direction, èches):
en appuyant sur SCAN, vous pouvez changer de
direction de repérage. En appuyant sur MARK (+) et
SCAN (-) vous pouvez régler la direction de repérage.
Conrmer en appuyant sur OPTION. Altimètre:
régler l’afchage de l’altimètre en fonction de la
pression atmosphérique. Appuyer sur SCAN. En
appuyant sur MARK (+) et SCAN (-) vous pouvez
adapter la hauteur afchée. Appuyer simultanément
sur MARK et SCAN pour passer à zéro. Conrmer en
appuyant sur OPTION.
En appuyant sur OPTION pendant 3 secondes
minimum, vous passez à nouveau au mode SEND
(EMISSION). Dans le mode OPTION le détecteur
n’émet pas de signal. C’est pourquoi après deux
minutes il passe automatiquement au mode SEND
(EMISSION). Si la charge des batteries est réduite,
le détecteur passe au mode SEND (EMISSION)
après 30 secondes.
ATTENTION ! Veillez à ce que le détecteur reste
toujours accroché aux bretelles ou au skieur par la
lanière de sécurité !
By pressing the OPTION button three times, you
can switch from the SEND mode to the OPTION
mode. This enables you to switch between the
relevant functions: Temperature display – Press
SCAN to switch between °C and °F. Compass
– When new batteries are inserted, the compass
has to undergo an internal calibration. This is also
necessary if the device detects strong temperature
variations. To start the calibration, press SCAN
(”CAL” ashes). Then rotate the device a full
360°. Finally, press OPTION. Bearing compass
(direction-nding compass with arrow display)
– You can change the bearing direction with SCAN.
Select the ashing bearing by pressing MARK (+)
and SCAN (-). To exit, press OPTION. Altimeter
– You can adapt the altimeter reading to the
prevailing air pressure by pressing SCAN. Adjust the
displayed altitude with MARK (+) and SCAN (-). To
set the adjustment to zero, press MARK and SCAN
simultaneously. To exit, press OPTION.
By holding down the OPTION key (min. 3
seconds), you can switch back to the SEND mode.
In the OPTION mode, the device does not transmit
any signals, and therefore switches back to the
SEND mode automatically after two minutes. If
the battery is low, it switches back after just 30
seconds.
IMPORTANT! Make sure the device stays
connected to the harness via the safety cord at
all times!
DEVICE WITH OPTION PACK
08/06
|
09
OPTIONS SUPPLÉMENTAIRES
(POUR LES DÉTECTEURS AVEC OPTIONS)
Appuyer 3 x
Altimétre /
Altimeter
Radiocompas /
Bearing Compass
Boussole / Compass
Température /
Temperature
FIN /
END
Degré +
Degree +
Degré -
Degree -
Métre +
Metre +
Métre -
Metre -
360°
FIN /
END
FIN /
END
OPTION PACK
En cas d’urgence, RESTEZ CALME, OBSERVEZ,
DONNEZ L’ALERTE !
Observez le cours pris par les avalanches. Retenez
bien les points où la victime a été saisie par
l’avalanche (point de saisie) et où elle a été vue
pour la dernière fois (point de disparition). La
ligne droite entre les deux points donne le sens
d’écoulement de l’avalanche. L’aire de recherche
principale se situe à gauche et à droite de cette
ligne. Lorsque l’avalanche s’immobilise, le plus
expérimenté de l’équipe oriente la recherche. Il
guide le marquage des deux points (au moyen
de bâtons par exemple) d´un côté ou de l´autre
de l´avalanche. Appuyer alors sur le verrouillage
de l’interrupteur principal et mettre ce dernier en
mode SEARCH (RECHERCHE). Commencer alors
la RECHERCHE PRIMAIRE. Le détecteur reçoit
tous les signaux des victimes ensevelies dans le
périmètre de portée du détecteur. Scruter l’aire
de recherche primaire selon le plan schématique à
gauche jusqu’à ce que vous receviez un signal.
ATTENTION ! Tous les participants (et observa-
teurs) mettent leurs détecteurs en mode réception
(mode SEARCH - RECHERCHE). Veiller à ce
qu’aucun appareil électrique (par exemple
téléphones portables, appareils radios) ni de pièce
métallique ne se trouve dans l’aire de l’avalanche.
Le détecteur n’émet pas de signaux en mode
SEARCH (RECHERCHE). Pour passer à nouveau
au mode SEND (EMISSION) en cas d’une nouvelle
avalanche, il suft d’appuyer sur la partie saillante
de l’interrupteur principal.
In case of an emergency, the key thing to remember
is KEEP CALM, OBSERVE, RAISE THE ALARM!
Observe the course of the avalanche and make
an exact mental note of where the victim was
hit by the avalanche (point of impact) and was
last seen (point of disappearance). The extension
of these points indicates the ow direction of the
avalanche! The primary search area is to the left
and right of this. When the avalanche stops, the
most experienced member of the group takes
control of the search, issuing instructions from the
edge of the avalanche so that another person can
mark the above points (with sticks, etc.). Depress
the main switch lock and push the main switch
to the SEARCH position. You can now begin the
PRIMARY SEARCH, in which the device will pick up
any signals from victims within its range. Now scan
the primary search area according to the plan on
the left until a steady signal is reported.
IMPORTANT! All participants (including
observers) must switch their devices to receiving
(SEARCH) mode. Always make sure there are no
electronic devices (e.g. mobiles, radios,) or solid
metal items in the direct vicinity of the search. Due
to the fact, that the beacon is not transmitting a
signal in SEARCH-mode anymore, the PIEPS DSP is
equiped with a rapid switch-back mechanism (just
push on the protruding top of the main-switch) in
the case of a following avalanche.
EMERGENCY / SEARCH MODE
08/06
|
11
CAS D’URGENCE, MODE SEARCH (RECHERCHE)
1
3
2
50m
5
25m
25m
50m
4
25m
25m
1 Point de saisie
2 Point de disparition
3 Direction d’écoulement
4 Sauveur seul
5 Equipe de sauvetage
1 Point of impact
2 Point of disappearence
3 Flow direction
4 Singel rescue person
5 Multiple rescue persons
(Phase entre les premiers signaux reçus et la
recherche plus ne.) Dès que le PIEPS DSP reçoit
les premiers signaux, la distance et la direction
approximatives s’afchent. Le nombre des victimes
ensevelies se trouvant à l’intérieur du périmètre
de portée du détecteur est symbolisé par des
bonhommes (1). En suivant la èche et la distance
décroissante rapprochez-vous du signal le plus
fort en longeant les lignes de champ. Avancez
ensuite dans la direction indiquée par le PIEPS DSP
(2). La distance doit alors diminuer. Si la distance
augmente, il faut changer la direction de 180°.
Retournez-vous et avancez dans le sens inverse.
ATTENTION ! Si vous travaillez en mode SEARCH
(RECHERCHE), soyez calme et concentré. Evitez les
mouvements hâtifs !
MODE SEARCH (RECHERCHE), ROUGH
SEARCH (RECHERCHE SOMMAIRE)
As soon as the PIEPS DSP picks up signals, the
approximate distance and direction appear in the
display. The number of burials within the range of
the device is represented by matchstick men (1).
Using the arrow and distance reading, follow the
strongest of the received signals along the eld
lines. Move in the direction indicated by the PIEPS
DSP (2). The distance reading should become
progressively smaller. If it gets larger, switch the
search direction by 180°, i.e. turn round and follow
the opposite direction.
IMPORTANT! When working in the SEARCH
mode, remain calm and concentrated, and avoid
hasty movements!
SEARCH MODE / ROUGH SEARCH
08/06
|
13
Continuez
TOUT DROIT
move
STRAIGHT AHEAD
Tournez à
DROITE
turn RIGHT
Tournez à
GAUCHE
turn LEFT
2
Nombre de victimes | Number of burials:
quatre ou plus
four or more
trois | threedeux | twoune | one
1
L
i
g
n
e
s
d
e
c
h
a
m
p
|
F
l
u
x
l
i
n
e
s
Après vous être rapproché de la victime en mode
ROUGH SEARCH (RECHERCHE GROSSIERE), le
PIEPS DSP a recours au système à 3 antennes.
A une distance de 5 m (1) de la victime, la
vitesse de recherche doit être réduite à un pas
par changement de la valeur afchée (0,5 – 1,3
secondes environ selon l’émetteur). An d’éviter
toute confusion lors du repérage de la victime, les
èches de recherche sont camouées dès que la
distance passe à moins de 2 m. Elles réapparaissent,
lorsque la distance passe à plus de 2 m en indiquant
la dernière distance prise (voir illustration à gauche).
Approchez-vous alors du point le plus proche de la
victime (2). Déterminez la distance minimale en
tournant l’appareil à 90° à plusieurs reprises. Si
lorsque vous vous tournez vers une des quatre
orientations possibles, la distance diminue encore
(3), avancez dans cette direction jusqu’à ce que la
valeur de la distance augmente à nouveau. Faites
d’autres croisements jusqu’à ce que la distance ne
diminue plus (4). Indépendamment de la position
de l’émetteur, le repérage par points avec le PIEPS
DSP à 3 antennes passe toujours par des minima.
ATTENTION ! Lors du repérage par points, évitez
les mouvements hâtifs (200 – 400 mm /sec). Tenir
l’appareil dans la même position horizontale
le plus près possible de la neige pendant toute
l’opération.
Once you have approached the victim quickly
with the rough search, the PIEPS DSP really comes
into its own thanks to its advanced triple-antenna
system. When you are closer then 5m (1) to the
burial, it`s strongly recommended to reduce your
moving speed to max. 1 footstep per reading
update (depends on the type of buried beacons,
approx. 0,5 - 1,3 sec.). To avoid confusion, the
direction indication is suppressed at distances less
than 2m. Following your last known direction,
move ahead until the distance reading starts
increasing again (see drawing). Return to the point
with the minimum distance reading (2). Starting at
this point, try to get the lowest distance reading,
using cross-like movements. On indication of
further reduced distance readings, tracking on
one of the four possible directions (3), follow this
direction until the distance reading starts increasing
again. At this point repeat the cross-like approache
as long as no increasing distance reading can be
determind (4).
IMPORTANT! It`s strongly recommended to
avoid hasty movements (move approx. 20-40 cm/
sec). Throughout this procedure, keep the device
horizontal in the same position without rotating
it, and keep it as close as possible to the surface
of the snow.
SEARCH MODE / CLOSE SEARCH
08/06
|
15
MODE SEARCH (RECHERCHE FINE)
2
3
4
1
La recherche multiple optimisée est le point fort
du PIEPS DSP. Elle est basée sur la séparation
des signaux par un processeur numérique (DSP).
L’ensevelissement de plusieurs personnes est
clairement symbolisé par des bonhommes. Le
PIEPS DSP détecte automatiquement le signal
le plus fort. Après avoir repéré la position de
la première victime, appuyer sans bouger sur
le bouton MARK pendant 3 secondes environ.
Le premier signal est alors masqué et l’appareil
cherche automatiquement le deuxième signal.
Dans des conditions défavorables (superposition
de signaux) répéter ceci plusieurs fois. Vous pouvez
aussi supprimer les masquages erronés grâce à la
fonction SCAN. Il peut également être utile de
s’approcher des victimes de plusieurs côtés en
utilisant la fonction SCAN. Le masquage réussi est
indiqué par le symbole d’un bonhomme encadré.
Continuer la recherche en suivant les instructions
ci-dessus et répéter la procédure jusqu’au repérage
de tous les émetteurs.
ATTENTION ! Si les victimes sont équipées
d’appareils analogiques, la séparation des signaux
numériques peut être perturbée. L’appareil afche
pendant une période courte plus de signaux qu’il
n’existe en réalité.
MODE SEARCH/ RECHERCHE MULTIPLE
The optimised multiple search, the absolute
highlight of the PIEPS DSP, is based on a separation
of signals via the digital signal processor (DSP). If
there are multiple burials, this is clearly indicated
by the number of matchstick men. By default,
the PIEPS DSP will automatically search for the
strongest signal. Once the position of the rst
burial has been located, press the MARK key for
approx. 3 seconds without moving away from this
point. This signal is now suppressed and the device
will automatically search for the second strongest
signal. In unfavourable circumstances (temporary
signal interference), you may have to repeat this
procedure several times. It may also be helpful to
approache the victims from several sites (in radial
formation) using the SCAN-function. Once a
signal has been successfully suppressed, an outline
appears around the matchstick man. Now continue
the search as described above and repeat the
procedures until all transmitters are located.
IMPORTANT! In case of multiple burials
involving older analogue devices, faults may at
worst occur which impair the efciency of the
digital signal separation. In such cases, you may
nd for a short time that more signals are displayed
than actually exist.
SEARCH MODE / MULTIPLE SEARCH
08/06
|
17
1
2
3
5
6
8
4
7
1 3 victimes
2 Repérage 1ère victime
3 Masquer le repérage en appuyant sur MARK
4 Afchage du nouveau signal le plus fort
5 Repérage 2e victime
6 Masquer le repérage en appuyant sur MARK
7 Afchage du nouveau signal le plus fort
8 Repérage 3e victime
1 reads three burials
2 locate rst burial
3 suppress with MARK
4 next strongest signal
5 locate second burial
6 suppress with MARK
7 next strongest signal
8 locate third burial
La fonction SCAN du PIEPS DSP permet de scanner
toute l’aire de réception : appuyer sur le bouton
SCAN dans le mode SEARCH (RECHERCHE).
Restez immobile pendant que l’appareil scanne le
périmètre. La fonction SCAN permet de détecter
tous les émetteurs ensevelis dans le périmètre de
portée de l’appareil :
Afchage 1 :
émetteurs dans un périmètre de 5 m environ ;
Afchage 2 :
émetteurs dans un périmètre de 20 m environ ;
Afchage 3 :
émetteurs dans un périmètre de 50 m environ.
Lors de ces afchages, les informations des signaux
masqués sont réinitialiées. Vous pouvez alors
recommencer le masquage (MARK).
ATTENTION ! Après avoir détecté toutes les
victimes, écartez-vous des points d’ensevelissement
et scannez à nouveau le périmètre en utilisant la
fonction SCAN, pour être sûr que votre PIEPS-DSP
a repéré toutes les victimes.
MODE SEARCH (RECHERCHE) /
FONCTION SCAN
Another highly useful feature of the PIEPS DSP
is the SCAN function. Press the SCAN key in the
SEARCH mode and the device will begin scanning
the entire receiving range. During the scan, stand
still and hold the device steady. This will give you
an overview of all the buried devices within the
detectable range, classied according to three
groups:
Reading 1: within a distance of approx. 5m
Reading 2: within a distance of approx. 20m
Reading 3: within a distance of approx. 50m
All information from previously suppressed signals
is now reset and you can start the suppression
again (MARK).
IMPORTANT! Once you have located all burials,
move away from their locations in a star shape and
use the SCAN function to check the scenario again.
That way you can make sure you haven’t missed
any other burials.
SEARCH MODE / SCAN FUNCTION
08/06
|
19
1
2
3
1
Afchage: 1 poste émet-
teur dans un rayon de 5 m
2
Afchage : 2 postes émet-
teurs dans un rayon de 20 m
3
Afchage: 4 (ou plus) postes
émetteurs dans un rayon
de 50 m
1 Reading: one beacon
within 5 m
2 Reading: two beacons
within 20 m
3 Reading: fore ore more
beacons within 50 m
R
a
d
i
u
s
5
0
m
R
a
d
i
u
s
2
0
m
R
a
d
i
u
s
5
m
08/06
|
21
Notre site met à votre disposition des informations
sur votre détecteur de victimes d’avalanches vous
permettant de l’utiliser correctement.
INFORMATIONS DONNÉES SUR LE SITE :
• INFORMATIONS TECHNIQUES
DÉTAILLÉES ;
• MISE À JOUR DU LOGICIEL ;
• ADRESSES DE NOS SERVICES
APRÈS-VENTE ;
• ACCÈS DIRECT AUX PUBLICATIONS
TECHNIQUES DE PIEPS ;
• INFORMATIONS RELATIVES À
D’AUTRES PRODUITS PIEPS ;
WWW.PIEPS.COM
This site provides further background information
for better understanding of how to handle your
Avalanche Beacon and how to use it correctly in
an emergency!
YOU‘LL FIND:
• ADVANCED BACKGROUND
INFORMATION
• HOW TO GET MY SOFTWARE UPDATE
• DIRECTORY OF SERVICE CENTERS
• DIRECT ACCESS TO PIEPS
RELATED PUBLICATIONS
• INFORMATIONS ABOUT NEW
PIEPS-PRODUCTS
WWW.PIEPS.COM
www.pieps.com
All information supplied without liability. Status august 2006.
Device designation: PIEPS DSP
Transmission frequency:
457 kHz
(intern. standard frequency)
Power supply: 3 batteries, alkaline (AAA),
IEC-LR03, 1.5V
Battery lifetime: Min. 200 h SEND-mode
Maximum range: 60 metres (digital evaluation)
Earphone socket: Stereo earphone 3.5 mm,
min. 32 ohms
Temperature range: -20°C to +45°C
Weight: 198 g (incl. batteries)
Dimensions: (L x W X H) 116 x 75 x 27 mm
Option pack
Temperature display -20°C to +50°C,
accuracy ± 3°C
Compass function Accuracy ± 8°
Altimeter Accuracy ± 10 m
TECHNICAL DATA
• The device is guaranteed by the manufacturer against
defects in material and workmanship for a period of
ve years from the date of purchase.
• This warranty does not apply to damage caused by
incorrect use, dropping or dismantling of the device
by unauthorised persons.
• Any further warranty or liability for consequential
damage is expressly excluded.
• Warranty claims should be addressed - enclosing the
receipt of purchase - to the relevant sales outlet or
directly to PIEPS.
WARRANTY CONDITIONS:
PIEPS GmbH
Frauentalerstraße 102, 8530 Deutschlandsberg, Austria
e-mail: of[email protected], www.pieps.com
MANUFACTURER, DISTRIBUTION & SERVICES
PIEPS GmbH declares hereby, that the product PIEPS DSP fulls
all requirements and regulations of directive 1999/5/EC!
The declaration of conformity can be downloaded at the
following source:
http://www.pieps.com/certication_pieps_dsp.pdf
CONFORMITY
Warning: Any changes or modications not expressly
approved by the manufacturer, responsible for compliance,
could void the user`s autority to operate this device.
Europe:
Manufacturer: PIEPS GmbH
Country of manufacture: Austria
Device type: PIEPS DSP; The device conforms
to the Standard ETS 300718
WEEE 2002/96/EC
Canada: IC: 4710A-DSP01
USA: FCC ID: REMDSP01
This device conforms to Paragraph 15
of the FCC regulations.
Operation is subject to the following two conditions:
1) This device may not cause hamful interference, and
2) this device must accept any interference received,
including interference thar may cause undesired operation.
CERTIFICATION
08/06
|
2322
|
08/06 Informations sous réserve d’erreur, dernière mise à jour : août 2006
Désignation de l’appareil : PIEPS DSP
Fréquence d’émission : 457 kHz
(fréquence normalisée internationale)
Alimentation : 3 piles alcalines (AAA),
IEC-LR03, 1,5 V
Durée de vie des piles : 200 h minimum en mode
d’émission
Portée maximale : 60 mètres (évaluation numérique)
Ecouteurs : stéréo, 3,5 mm, 32 ohms minimum
Plage de température : - 20°C à + 45°C
Poids : 198 g (piles inclues)
Dimensions : 116 x 75 x 27 mm
Pack avec options
Afchage température - 20°C à + 50°C
Précision : ± 3°C
Boussole Précision : ± 8°
Altimètre Précision : ± 10 m
DONNÉES TECHNIQUES
• L’appareil est garanti contre les défauts de fabrication et
de matière pendant une durée de 5 ans à partir de la
date d’achat.
• La garantie ne couvre pas les dégâts causés par une
mauvaise utilisation, une chute ou un démontage de
l’appareil par des personnes non autorisées.
• Toute extension de garantie et toute garantie pour
dommages ou pertes indirects sont exclues.
• Veuillez faire valoir vos droits de garantie au point de
vente de votre appareil ou directement auprès de PIEPS
en joignant le ticket de caisse à votre réclamation.
CONDITIONS DE GARANTIE
PIEPS GmbH déclare que l’appareil PIEPS DSP est conforme aux
exigences et dispositions de la directive 1999/5/CE.
La déclaration de conformité est disponible à l’adresse
suivante :
http://www.pieps.com/certication_pieps_dsp.pdf
CONFORMITE
Avertissement : Tout changement ou modication non
approuvés par le fabricant sont interdits. Vous ne devez alors
plus vous servir de l’appareil !
Europe:
Fabricant: PIEPS GmbH
Pays de fabrication: Autriche
Modèle: PIEPS DSP. L’appareil correspond
à la norme ETS 300718
WEEE 2002/96/EC
Canada: IC: 4710A-DSP01
USA: FCC ID: REMDSP01
L’appareil correspond au paragraphe 15
des règlementations FCC
Lors de l’utilisation, veuillez tenir compte des informations
suivantes :
1) Cet appareil ne cause pas de signaux parasites et
2) cet appareil n’est pas perturbé par des signaux
parasites, même s’il est momentanément victime d’un
dysfonctionnement.
HOMOLOGATION
PIEPS GmbH
Frauentalerstraße 102, 8530 Deutschlandsberg, Autriche
e-mail: of[email protected], www.pieps.com
FABRICATION, DISTRIBUTION, SERVICE

Other manuals for DSP

8

Other PIEPS Security System manuals

PIEPS DSP PRO User manual

PIEPS

PIEPS DSP PRO User manual

PIEPS DSP User manual

PIEPS

PIEPS DSP User manual

PIEPS DSP SPORT User manual

PIEPS

PIEPS DSP SPORT User manual

PIEPS DSP User manual

PIEPS

PIEPS DSP User manual

PIEPS PRO BT User manual

PIEPS

PIEPS PRO BT User manual

PIEPS Freeride User manual

PIEPS

PIEPS Freeride User manual

Popular Security System manuals by other brands

KERUI KR-K7 user manual

KERUI

KERUI KR-K7 user manual

Skil-Care ChairPro 909370 quick start guide

Skil-Care

Skil-Care ChairPro 909370 quick start guide

Lynteck LS5000 manual

Lynteck

Lynteck LS5000 manual

Honeywell Galaxy 2-44 user guide

Honeywell

Honeywell Galaxy 2-44 user guide

SecurityMan SECURITYBAR user manual

SecurityMan

SecurityMan SECURITYBAR user manual

Geutebruck G-ST Perimeter+ Instructions for use

Geutebruck

Geutebruck G-ST Perimeter+ Instructions for use

GardaWorld 2GIG-CP21-345E Quick setup guide

GardaWorld

GardaWorld 2GIG-CP21-345E Quick setup guide

Shield STEML-U9 installation manual

Shield

Shield STEML-U9 installation manual

Digital deep sea SmartSART S1000 user manual

Digital deep sea

Digital deep sea SmartSART S1000 user manual

Doberman SE-0201 quick start guide

Doberman

Doberman SE-0201 quick start guide

brena TWW02W user manual

brena

brena TWW02W user manual

OPTICOM SDVR-150 - DATASHEET 2 datasheet

OPTICOM

OPTICOM SDVR-150 - DATASHEET 2 datasheet

Hanwei VAN300 Series Operation manual

Hanwei

Hanwei VAN300 Series Operation manual

PROSER DA-712K installation manual

PROSER

PROSER DA-712K installation manual

FingerTec TA100C installation guide

FingerTec

FingerTec TA100C installation guide

Barnett Engineering B1277-HSPA Installation & operation manual

Barnett Engineering

Barnett Engineering B1277-HSPA Installation & operation manual

Federal Signal Corporation 2-120 Description, Specifications, Installation, Operation, and Service Manual

Federal Signal Corporation

Federal Signal Corporation 2-120 Description, Specifications, Installation, Operation, and Service Manual

Witura WT9002 instructions

Witura

Witura WT9002 instructions

manuals.online logo
manuals.online logoBrands
  • About & Mission
  • Contact us
  • Privacy Policy
  • Terms and Conditions

Copyright 2025 Manuals.Online. All Rights Reserved.