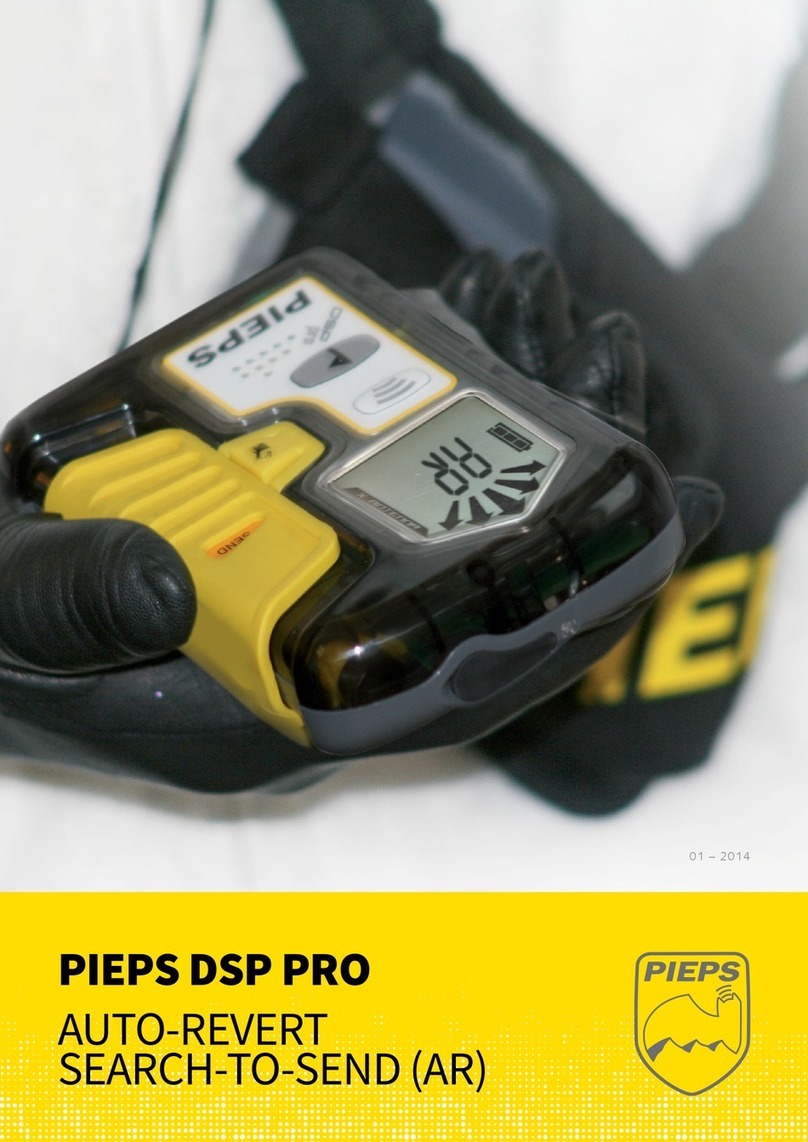
PIEPS DSP User manual

08/08
MANUAL

1
2
6
5
4
3
12
7
8
9
10
11
13
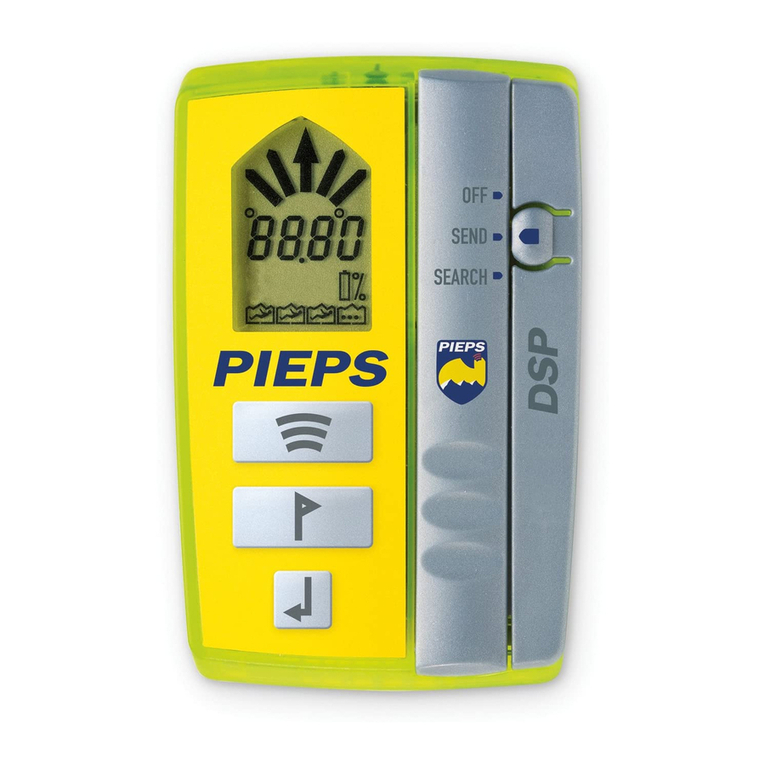
1LCD-Display (backlight)
2Main switch OFF-SEND-SEARCH
3Lock
4Button SCAN
5Button MARK
6Button OPTION
7Direction indicator
8Numeric information
9Temperature
10 Number of burials
11 Altimeter
12 Compass
13 Battery level
1Pantalla LCD (alumbrada)
2Interruptor principal APAGADO-EMITIR-RECIBIR
3bloqueo
4botón SCAN
5botón MARCAR
6botón OPCIÓN
7Indicador de dirección
8Indicador numérico
9Temperatura
10 Número de víctimas enterradas
11 altímetro
12 brújula
13 Nível de batería

08/08
|
03
¡Felicidades por haber comprado un detector de
avalanchas PIEPS! 100.000 esquiadores de todo
el mundo testifican la calidad de esta marca, que
lleva en el mercado casi 30 años. Durante este
tiempo, los detectores PIEPS han experimentado
una mejora constante. El dispositivo que ha elegido
corresponde al estado más actual de la técnica.
Equipado con la más moderna tecnología DSP
(=proceso de señal con procesador de señal digital)
y un sistema de triple antena, no sólo ofrece un
gran alcance extraordinario sino que simplifica
ampliamente el procedimiento de rescate, incluso
en caso de enterramiento múltiple.
iIMPORTANTE! Ni siquiera el detector DSP PIEPS
puede protegerle de las avalanchas. Un estudio
de las técnicas de prevención de avalanchas es
igualmente esencial, así como una práctica regular
en caso de un eventual rescate de avalancha.
Los procedimientos descritos a continuación
se refieren únicamente al empleo especial con
detectores de avalanchas PIEPS DSP. Hay que
observar en todo caso las reglas básicas de
emergencia según las publicaciones especializadas
sobre la materia y los cursillos sobre protección
contra avalanchas.
iQUERIDOS AFICIONADOS DE LOS
DEPORTES DE INVIERNO!
Congratulations on having purchased a PIEPS
avalanche beacon! 100,000 skiers world-wide
testify to the quality of this brand, which has been
on the market for nearly 30 years. During this
time, PIEPS beacons have undergone constant
improvement. The device you have chosen is a
state-of-the-art piece of equipment. Enhanced
by the latest DSP technology (= signal processing
with a digital signal processor) and a triple-antenna
system, it not only offers an exceptional range but
also greatly simplifies the rescue procedure, even in
case of multiple burials.
IMPORTANT! Even the PIEPS-DSP beacon
cannot protect you against avalanches. A close
study of avalanche prevention techniques is
equally essential, as is regular practising for the
eventuality of an avalanche rescue. The procedures
and instructions described below refer solely to
specific application in connection with PIEPS-DSP
avalanche beacons. The basic rules of conduct in
case of emergency – as definded in the relevant
specialist publications and in training sessions –
must be observed without fail.
For the practical use of your PIEPS DSP have a look
at the attached PIEPS-film „Slab avalanche –
what to do?“.
DEAR WINTER SPORTS ENTHUSIAST!


08/08
|
05
Empleando el sistema de transporte previsto, el
PIEPS DSP se puede colocar directamente en la
persona. Basta con pasar el gancho a través de la
bolsa de transporte y unirlo a la cinta en la parte
posterior de la bolsa (= la opción más segura).
Alternativamente, el PIEPS DSP se puede unir
al cinturón del pantalón de esquí a través de la
correa del cinturón, o se puede llevar en el bolsillo
del pantalón con o sin la bolsa protectora. Sin
embargo, asegúrese siempre, de que el cordón de
seguridad esté adecuadamente unido a algún ojal
de su ropa para evitar la pérdida del detector.
iIMPORTANTE! El PIEPS DSP se debe llevar lo
más cercano posible al cuerpo, con el lado de
mando hacia el mismo y bajo tantas capas de ropa
como sea posible.
ARNÉS PARA TRANSPORTE
Carry your PIEPS DSP using the supplied carrying
equipment, on your body and outside the
innermost layer of clothing. The clasp on the safety
line should be connected to the appropriate strap
(=recommended and safest option). There is also
the option to carry the PIEPS DSP in a securely
fastenable trouser pocket without a protective
case, though here it is important to fix the safety
line to the clothing in an appropriate way so as to
rule out losing the avalanche transceiver.
IMPORTANT! Always carry the PIEPS DSP with
the display towards your body and under as many
layers of clothing as possible, as near as possible
to your body.
CARRYING HARNESS

1
2
3
1Light
2Press
3Move
1Lámpara de control
2Apretar
3Mover

08/08
|
07
El compartimiento de las pilas está en la parte
posterior. El cierre de seguridad a rosca se puede
abrir y cerrar fácilmente utilizando una moneda.
iIMPORTANTE!
Sólo utilice pilas del tipo LR03/
AAA y siempre reemplazca las 3 pilas por nuevas
del mismo tipo. Nunca use pilas recargables y
cambie siempre todas las pilas a la vez.
Apriete el bloqueo del interruptor principal y
empújelo a la posición de emitir (SEND), el PIEPS
DSP realizará una autoprueba de unos 5 segundos
de duración aproximadamente. Mantenga una
distancia de al menos 5 metros de los demás
aparatos. Entonces se presentará en la pantalla el
símbolo emitir (SEND) y el porcentaje de la tensión
de la batería. El EMISOR DE LUZ se encenderá
sincronizadamente con el ritmo del transmisor. En
caso de un error del dispositivo, sonará una señal
de alerta y la pantalla indicará “E”. Esto significa
que el detector no está listo para funcionar. En este
caso, contacte nuestro departamento de servicio
al cliente. Mientras camine, asegúrese de que el
modo emitir ”SEND” esté seleccionado. El PIEPS
DSP emitirá continuamente una señal que será
recibida por los demás detectores.
iIMPORTANTE! Al encenderlo, el aparato realiza
una autoprueba completa. Sin embargo, hay que
comprobar todos los detectores del grupo antes de
iniciar la excursión.
PILAS / ENCENDIDO / MODO EMITIR
The battery compartment is located at the rear of
the housing. The safety screw connection can be
easily opened and closed using a coin.
IMPORTANT! Only use battery type LR03/AAA
and always replace all 3 batteries with new ones
of the same type. Never use rechargeable batteries
and always change all batteries at the same time!
Depress the main switch lock and push the main
switch to the “SEND“ position. When powered on,
the PIEPS DSP will carry out a self-test lasting approx.
5 seconds. During this self-test a minimum distance
of 5 meters to other beacons and other sources of
electro magnetic interference should be maintained.
You will then see the send symbol and the remaining
% battery voltage in the display. The LED will also
flash synchronously with the transmitter bit timing.
In the event of a device error, an alert signal sounds
and the display indicates “E” in combination with
a error-code. This means the device is not fit for
operation. In this case, contact our customer service
department. When in the open, make sure the
“SEND” mode is selected throughout. The PIEPS
DSP will then transmit continuously any signal it
picks up from other beacons.
IMPORTANT! When switched on, a complex
self-testing is done by the beacon. Nevertheless
beacon-group-check is stongly recommended in
preparation to each tour.
BATTERY / SWITCHING ON / SEND MODE

3 x PRESS
360°
Altimeter /
Altimetro
Bearing Compass/
brújula direccional
Compass / brújula
Temperature /
Temperatura
END /
FINE
Degree +
Grado +
Degree -
Grado +
Metre +
Metro +
Metre -
Metro +
END /
FINE
END /
FINE

08/08
|
09
Apretando el botón OPTION tres veces, puede
pasar del modo EMITIR (SEND) al modo OPCIÓN
(OPTION). Esto le permitirá cambiar entre las
funciones: Temperatura – Apriete SCAN para
cambiar entre ºC y ºF. Brújula – Cuando se
introduzcan pilas nuevas, la brújula tiene que
proceder a un calibrado interno. Esto también es
necesario si el dispositivo detecta fuertes variaciones
de temperaturas. Para iniciar el calibrado, apriete
SCAN (“CAL” parpadea). Dele al detector toda
una vuelta (por 360º). Finalmente, apriete el botón
OPCIÓN (OPTION). Brújula de marcación
(brújula localizadora de dirección con indicado de
flecha en la pantalla) – Puede cambiar la dirección
con SCAN. Seleccione la dirección de luz intermitente
apretando MARK (+) y SCAN (-). Para terminar
apriete OPTION. Altímetro – Puede adaptar el
altímetro a la presión del aire actual apretando
SCAN. Ajuste la altura que aparece en pantalla con
MARK (+) y SCAN (-). Para establecer el ajuste a
cero, apriete MARK y SCAN simultáneamente. Para
terminar, apriete OPTION.
Apretando el botón OPTION (mínimo 3 segundos),
puede volver al modo EMITIR. En el modo OPTION,
el detector no emite señales y por lo tanto vuelve
automáticamente al modo EMITIR después de dos
minutos. Si la batería tiene carga baja, vuelve al
modo EMITIR tras 30 segundos.
iIMPORTANTE! Asegúrese de que el detector
quede todo el tiempo conectado al arnés resp. al
alpinista por medio del cordón de seguridad.
DETECTOR
CON EQUIPAMIENTO OPCIONAL
By pressing the OPTION button three times, you
can switch from the SEND mode to the OPTION
mode. This enables you to switch between the
relevant functions: Temperature display – Press
SCAN to switch between °C and °F. Compass –
When new batteries are inserted, the compass
has to undergo an internal calibration. This is also
necessary if the device detects strong temperature
variations. To start the calibration, press SCAN
(”CAL” flashes). Then rotate the device a full
360°. Finally, press OPTION. Bearing compass
(direction-finding compass with arrow display) –
You can change the bearing direction with SCAN.
Select the flashing bearing by pressing MARK (+)
and SCAN (-). To exit, press OPTION. Altimeter
– You can adapt the altimeter reading to the
prevailing air pressure by pressing SCAN. Adjust the
displayed altitude with MARK (+) and SCAN (-). To
set the adjustment to zero, press MARK and SCAN
simultaneously. To exit, press OPTION.
By holding down the OPTION key (min. 3
seconds), you can switch back to the SEND mode.
In the OPTION mode, the device does not transmit
any signals, and therefore switches back to the
SEND mode automatically after two minutes. If
the battery is low, it switches back after just 30
seconds.
IMPORTANT! Make sure the device stays
connected to the harness via the safety cord at all
times!
DEVICE WITH OPTION PACK

1
3
2
50m
5
25m25m
50m
4
25m25m
1Point of impact
2Point of disappearence
3Flow direction
4Singel rescue person
5Multiple rescue persons
1punto de impacto
2punto de desaparición
3dirección de la corriente
4
rescate por una sola persona
5
rescate por varias personas

08/08
|
11
En caso de emergencia, lo importante es recordar:
MANTENER LA CALMA, OBSERVAR, LEVANTAR
LA ALARMA! Observe la dirección de la avalancha
y grábese en la mente con toda exactitud dónde
la víctima fue golpeada por la avalancha (punto
de impacto) y fue vista por última vez (punto de
desaparición). El alargamiento de estos puntos
indica la dirección de la avalancha. El área primaria
de búsqueda está a la izquierda y a la derecha de
la misma. Cuando la avalancha para, el miembro
más experimentado del grupo se en encarga de la
búsqueda, dando las instrucciones desde el borde
de la avalancha para que otra persona pueda
marcar los puntos superiores (con bastones de
esquí, etc.) Apriete el bloqueo del interruptor
principal y empujelo a la posición BUSQUEDA
(SEARCH). Ahora puede empezar la BUSQUEDA
PRIMARIA, en la que el detector recibirá todas las
señales perceptibles de víctimas. Explore ahora el
área de búsqueda primaria de acuerdo al plano de
la izquierda hasta recibir una señal continua.
iIMPORTANTE! Todos los participantes (incluso
los observadores) deben tener su dispositivo en
modo BUSQUEDA (SEARCH). Asegúrese siempre
que no haya aparatos electrónicos (por ejemplo,
móviles, radios,) o artículos de metal sólido en las
proximidades directas de la búsqueda. iEn el modo de
búsqueda (SEARCH) el detector no emite señales! Por
lo tanto el PIEPS DSP está equipado con un rápido
mecanismo de reinicio al modo SEND por si hubiera
otra posible avalancha. (Basta con pulsar o empujar la
parte sobresaliente del interruptor principal).
EMERGENCIA /MODO BÚSQUEDA
In case of an emergency, the key thing to remember is
KEEP CALM, OBSERVE, RAISE THE ALARM!
Observe the course of the avalanche and make an
exact mental note of where the victim was hit by the
avalanche (point of impact) and was last seen (point
of disappearance). The extension of these points
indicates the flow direction of the avalanche! The
primary search area is to the left and right of this.
When the avalanche stops, the most experienced
member of the group takes control of the search,
issuing instructions from the edge of the avalanche so
that another person can mark the above points (with
sticks, etc.).
Depress the main switch lock and push the main switch
to the SEARCH position. Begin with the SEARCH FOR
INITIAL DEDECTION. The device will pick up any
signals from victims within its range. Now scan the
primary search area according to the plan on the left
until a steady signal is reported.
IMPORTANT! All participants (including observers)
must switch their devices to receiving (SEARCH) mode.
Always make sure there are no electronic devices (e.g.
mobiles, radios,) or solid metal items in the direct
vicinity of the search. Due to the fact, that the beacon
is not transmitting a signal in SEARCH-mode anymore,
the PIEPS DSP is equiped with a rapid switch-back
mechanism (just push on the protruding top of the
main-switch) in the case of a following avalanche.
EMERGENCY
SEARCH-MODUS

F
l
u
x
l
i
n
e
s
|
l
í
n
e
a
s
d
e
c
a
m
p
o

As soon as the PIEPS DSP picks up signals, the
approximate distance and direction appear in the
display. The number of burials within the range of
the device is represented by matchstick men (1).
Using the arrow and distance reading, follow the
strongest of the received signals along the field
lines. Move in the direction indicated by the PIEPS
DSP (2). The distance reading should become
progressively smaller. If it gets larger, switch the
search direction by 180°, i.e. turn round and follow
the opposite direction.
IMPORTANT! When working in the SEARCH
mode, remain calm and concentrated, and avoid
hasty movements!
SEARCH MODE / ROUGH SEARCH
08/08
|
13
move
STRAIGHT AHEAD
siga RECTO
turn RIGHT
gire a la
DERECHA
turn LEFT
gire a la
IZQUIERDA
2
Number of burials / número de víctimas enterradas:
four or more
Cuatro o más
three | trestwo | dosone | una
1
F
l
u
x
l
i
n
e
s
|
l
í
n
e
a
s
d
e
c
a
m
p
o
Tan pronto como el PIEPS DSP reciba señales, la
distancia aproximada y la dirección aparecen en la
pantalla. El número de víctimas enterradas en el
alcance del detector es representado por cuerpos
acostados (1). Utilizando la flecha y la distancia
indicada, siga la más fuerte de las señales recibidas
a lo largo de las líneas del campo. Muévase en la
dirección indicada por el PIEPS DSP (2). La distancia
indicada debería reducirse progresivamente. En
caso de que cambie la dirección de búsqueda por
180º, dése la vuelta y siga en dirección opuesta.
iIMPORTANTE! Mientras trabaje en el modo
BUSQUEDA, permanezca tranquilo y concentrado,
y evite movimientos bruscos!
MODO BÚSQUEDA /
BÚSQUEDA APROXIMATIVA

2
3
4
1

08/08
|
15
Una vez que se ha acercado a la víctima rápidamente
con la búsqueda aproximativa, el PIEPS DSP
demuestra todos sus puntos fuertes gracias al
avanzado sistema de triple antena. Cuando esté
a menos de 5m
(1)
de la víctima enterrada, se
recomienda reducir la velocidad de movimiento a
un máximo de un paso por cambio de la distancia
indicada (dependiendo del tipo del detector de las
víctimas, aproximadamente 0,5 – 1.3 segundos).
Para evitar cualquier confusión, la indicación de
dirección se suprime en distancias de menos de
2 metros. Siguiendo la última dirección conocida,
siga recto hasta que la distancia indicada empiese
a incrementar de nuevo (mire el dibujo). Vuelva
al punto donde se indicó la mínima distancia
(2)
.
Comenzando en este punto, intente conseguir la
menor distancia indicada en la pantalla, tomando
una de las cuatro posibles direcciones
(3)
, siga
esta dirección hasta que la distancia indicada en la
pantalla comience a incrementar de nuevo. En este
punto repita el acercamiento en cruz hasta que
la distancia indicada no incremente más
(4)
. No
importa en que posición se encuentre el detector
emitente de la víctima, el PIEPS DSP con su sistema
de tres antenas siempre suministrará un solo mínimo
como resultado de la localización puntual.
iIMPORTANTE! Evite los movimientos bruscos
(aprox. 20 a 40 cm/seg). Durante todo este
proceso, mantenga el detector en inalterada
posición horizontal y lo más cerca posible de la
superficie de la nieve.
MODO BÚSQUEDA / BÚSQUEDA
CERCANA (LOCALIZACIÓN PUNTUAL)
Once you have approached the victim quickly
with your search, the PIEPS DSP really comes
into its own thanks to its advanced triple-
antenna system. When you are closer then 5m
(1) to the burial, it`s strongly recommended to
reduce your moving speed to max. 1 footstep
per reading update (depends on the type of
buried beacons, approx. 0,5 - 1,3 sec.). To avoid
confusion, the direction indication is suppressed
at distances less than 2m. Following your last
known direction, move ahead until the distance
reading starts increasing again (see drawing).
Return to the point with the minimum distance
reading (2). Starting at this point, try to get
the lowest distance reading, using cross-like
movements. On indication of further reduced
distance readings, tracking on one of the four
possible directions (3), follow this direction until
the distance reading starts increasing again. At
this point repeat the cross-like approache as
long as no increasing distance reading can be
determind (4).
IMPORTANT! It`s strongly recommended to
avoid hasty movements (move approx. 20-40 cm/
sec). Throughout this procedure, keep the device
horizontal in the same position without rotating it,
and keep it as close as possible to the surface of
the snow.
SEARCH MODE / CLOSE SEARCH

1
2
3
5
6
8
4
7
1 reads three burials
2 locate first burial
3 suppress with MARK
4 next strongest signal
5 locate second burial
6 suppress with MARK
7 next strongest signal
8 locate third burial
1 Indica 3 víctimas enterradas
2 localizar la primera víctima enterrada
3 sumprimir con MARK
4 la nueva señal más fuerte aparece en pantalla
5 localizar la segunda víctima enterrada
6 suprimir con MARK
7 la nueva señal más fuerte aparece en pantalla
8 localizar la tercera víctima enterrada

08/08
|
17
La búsqueda múltiple optimizada, lo más destacable
del PIEPS DSP, se basa en una separación de señales
mediante el procesador de señal digital (DSP). Si
hay enterramiento múltiple, esto queda claramente
indicado por las figuras de los cuerpos. El PIEPS DSP
buscará automáticamente la señal más fuerte. Una
vez que la posición de la primera víctima enterrada
ha sido localizada, apriete el botón MARK durante
aproximadamente 3 segundos sin moverse de este
punto. Esta señal se suprime y el detector buscará
automáticamente la segunda señal más fuerte.
En circunstancias desfavorables (interferencia
temporal de la señal), es posible que tenga que
repetir este procedimiento varias veces, resp.
tiene Vd. la posibilidad de eliminar supresiones
defectuosas con la funcion SCAN descrita en la
página siguiente. Además es favorable acercarse a
las víctimas en forma de estrella (de varios lados)
usando la función SCAN. Una vez que una señal
haya sido suprimida satisfactoriamente, aparece
una línea rodeando a la figura del cuerpo (dibujo).
Ahora continúe la búsqueda tal como se describe
arriba y repita el procedimiento hasta que todos los
detectores emisores hayan sido localizados.
iIMPORTANTE! En caso de enterramiento
múltiple con dispositivos análogos más antiguos,
en el peor de los casos, pueden ocurrir fallos que
afectarán la eficacia de la separación de señales
digitales. En estos casos, podrá encontrar durante
un corto período de tiempo, que en la pantalla
aparezcan más señales de las que actualmente
existen.
MODO BÚSQUEDA / BÚSQUEDA MULTIPLE
The optimised multiple burial search, the absolute
highlight of the PIEPS DSP, is based on a separation
of signals via the digital signal processor (DSP). If
there are multiple burials, this is clearly indicated
by the number of matchstick men. By default,
the PIEPS DSP will automatically search for the
strongest signal. Once the position of the first
burial has been located, press the MARK key for
approx. 3 seconds without moving away from this
point. This signal is now suppressed and the device
will automatically search for the second strongest
signal. In unfavourable circumstances (temporary
signal interference), you may have to repeat this
procedure several times. It may also be helpful to
approache the victims from several sites (in radial
formation) using the SCAN-function. Once a
signal has been successfully suppressed, an outline
appears around the matchstick man. Now continue
the search as described above and repeat the
procedures until all transmitters are located.
IMPORTANT! In case of multiple burials involving
older analogue devices, faults may at worst occur
which impair the efficiency of the digital signal
separation. In such cases, you may find for a short
time that more signals are displayed than actually
exist.
SEARCH MODE / MULTIPLE BURIAL

1
2
3
1 Reading: one beacon
within 5 m
2 Reading: two beacons
within 20 m
3 Reading: fore ore more
beacons within 50 m
1 Indicación: un detector
dentro de un radio de 5 m
2 Indicación: un detector
dentro de un radio de 20 m
3 Indicación: un detector
dentro de un radio de
50 m

08/08
|
19
Otra característica muy útil del PIEPS DSP es la función
SCAN. Apriete el botón SCAN en el modo búsqueda
(SEARCH) y el detector empezará a escanear todo el
campo de recepción. Durante esta función hay que
permanecer parado y mantener el detector en la
misma posición. Esto le dará una descripción de todos
los detectores enterrados en su campo detectable,
clasificados de acuerdo a tres grupos:
Primera indicación: en una distancia de aprox. 5m
Segunda indicación: en una distancia de aprox. 20m
Tercera indicación: en una distancia de aprox. 50m
Toda la información de señales previamente
suprimidas se reajusta y puede empezar de nuevo
la supresión (MARK).
iIMPORTANTE! Una vez que haya localizado
todos los enterramientos, muévase de sus
localizaciones en forma de estrella y use la función
SCAN para comprobar de nuevo el escenario.
De esta forma puede asegurarse de que no haya
dejado ninguna víctima enterrada.
MODO BÚSQUEDA / FUNCIÓN SCAN
Another highly useful feature of the PIEPS DSP
is the SCAN function. Press the SCAN key in the
SEARCH mode and the device will begin scanning
the entire receiving range. During the scan, stand
still and hold the device steady. This will give you
an overview of all the buried devices within the
detectable range, classified according to three
groups:
Reading 1: within a distance of approx. 5m
Reading 2: within a distance of approx. 20m
Reading 3: within a distance of approx. 50m
All information from previously suppressed signals
is now reset and you can start the suppression
again (MARK).
IMPORTANT! Once you have located all burials,
move away from their locations in a star shape and
use the SCAN function to check the scenario again.
That way you can make sure you haven’t missed
any other burials.
SEARCH MODE / SCAN FUNCTION

www.pieps.com
Other manuals for DSP
8
Table of contents
Other PIEPS Security System manuals