manuals.online logo
Brands
  1. Home
  2. •
  3. Brands
  4. •
  5. PIEPS
  6. •
  7. Security System
  8. •
  9. PIEPS DSP User manual

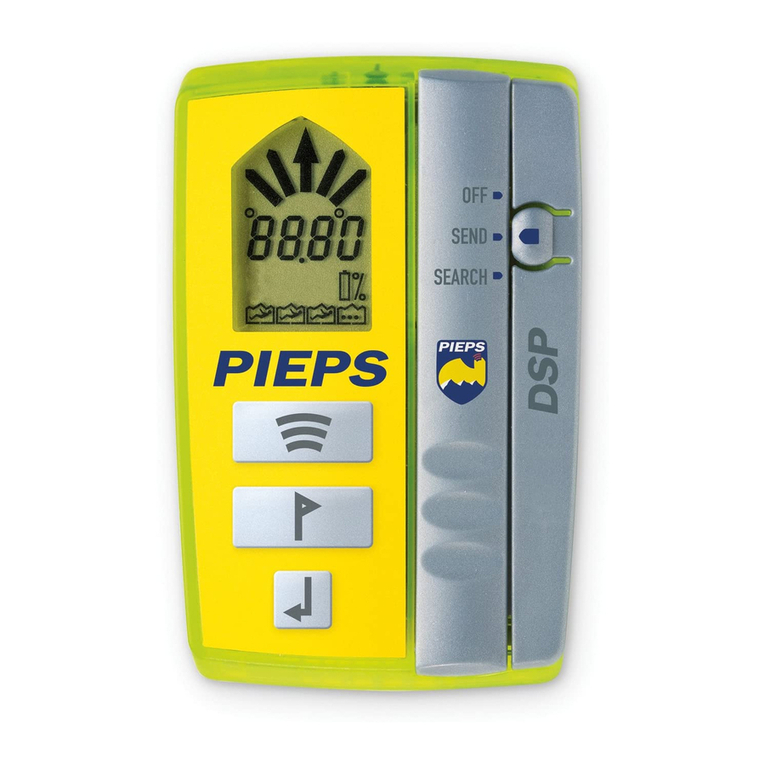
PIEPS DSP User manual

08/06
MANUAL
Complimenti per la scelta dell’apparecchio per
la ricerca in valanga PIEPS. Da quasi 30 anni, gli
apparecchi di questa marca hanno conquistato
un’ottima fama tra oltre 100.000 sciatori in
tutto il mondo. Gli apparecchi PIEPS VS sono
stati continuamente sviluppati e aggiornati.
L’apparecchio scelto è costruito con le tecnologie più
moderne. Dotato di tecnologia DSP (=elaborazione
dei segnali tramite un processore di segnali digitale)
ed un sistema di 3 antenne, esso offre oltre alla
portata eccezionale anche una semplicità d’uso
ottimale per il soccorso di compagni anche in caso
di sepolture multiple.
IMPORTANTE! L`apparecchio è utile nella ricerca
persone, ma NON PREVIENE le valanghe! È quindi
fondamentale curare l’informazione preventiva,
l’aggiornamento tecnico in tema di valanghe
e l’allenamento regolare delle situazioni di
emergenza e della ricerca persone. I procedimenti
e le indicazioni menzionati di seguito fanno
riferimento esclusivamente all’applicazione
specica con apparecchi di ricerca di sepolti PIEPS-
DSP. Le norme di comportamento fondamentali
da tenere in casi di emergenza, in linea con
le istruzioni fornite dalla relativa letteratura
specializzata come anche dai contenuti didattici
dei corsi sulle valanghe, vanno rigorosamente
osservate.
PER GLI AMANTI DELLO SCIALPINISMO!
Congratulations on having purchased a PIEPS
avalanche beacon! 100,000 skiers world-wide
testify to the quality of this brand, which has
been on the market for nearly 30 years. During
this time, PIEPS beacons have undergone constant
improvement. The device you have chosen is a
state-of-the-art piece of equipment. Enhanced
by the latest DSP technology (= signal processing
with a digital signal processor) and a triple-antenna
system, it not only offers an exceptional range but
also greatly simplies the rescue procedure, even in
case of multiple burials.
IMPORTANT! Even the PIEPS-DSP beacon
cannot protect you against avalanches. A close
study of avalanche prevention techniques is
equally essential, as is regular practising for the
eventuality of an avalanche rescue. The procedures
and instructions described below refer solely to
specic application in connection with PIEPS-DSP
avalanche beacons. The basic rules of conduct in
case of emergency – as dended in the relevant
specialist publications and in training sessions
– must be observed without fail.
DEAR WINTER SPORTS ENTHUSIAST!
08/06
|
03
1
2
6
5
4
3
1 Display LCD (illuminato)
2 Interruttore principale OFF-SEND-SEARCH
3 Bloccaggio
4 Tasto OPZIONI
5 Tasto SCAN
6 Tasto MARK
7 Visualizzazione della direzione
8 Visualizzazione numerica
9 Temperatura
10 Numero dei dispersi
11 Altimetro
12 Bussola
13 Visualizzazione batteria
12
7
8
9
10
11
13
1 LCD-Display (backlight)
2 Main switch OFF-SEND-SEARCH
3 Lock
4 Button OPTION
5 Button SCAN
6 Button MARK
7 Direction indicator
8 Numeric information
9 Temperature
10 Number of burials
11 Altimeter
12 Compass
13 Battery level
Il PIEPS DSP può essere portato direttamente
indossato grazie al sistema portante che viene
fornito insieme all’apparecchio. È necessario
fare attenzione a guidare il gancio della corda di
sicurezza attraverso la borsa, collegandola con il
passante presente sul lato posteriore della borsa
(=variante consigliata e la più sicura). Esiste, inoltre,
la possibilità di ssare il PIEPS DSP sulla cintura dei
pantaloni con la bbia della cintura oppure portarlo
con o senza la borsa di protezione nella tasca del
pantalone. Va fatta assolutamente attenzione
che la corda di sicurezza venga ssata in modo
appropriato presso un occhiello degli indumenti,
per escludere di poter perdere l’ARVA.
IMPORTANTE! Portate l’apparecchio quanto più
possibile a contatto del corpo, al di sotto degli
indumenti.
STRUTTURA PORTANTE
The PIEPS DSP can be worn directly on your person
using the supplied carrying system. Pass the snap
hook of the safety cord through the carry pouch
and attach it to the loop on the rear of the pouch
(=safest option). Alternatively, the PIEPS DSP can
be attached to the belt of your ski trousers via the
belt loop, or can be carried in your trouser pocket
with or without the protective pouch. Always make
sure, however, that the safety cord is suitably
attached to an eyelet on your clothing to avoid
losing the detector.
IMPORTANT! The PIEPS DSP should be worn
as close as possible to the body with the display
towards it, and under as many layers of clothing
as possible!
CARRYING HARNESS
08/06
|
05
Lo scomparto portabatterie si trova sul lato
posteriore dell’involucro. È possibile aprire e chiudere
la chiusura a vite facilmente con una moneta.
IMPORTANTE!
utilizzare esclusivamente batterie
del tipo LR03/AAA ed inserire solo batterie
dello stesso tipo. Non utilizzare mai batterie
ricaricabili e sostituire tutte e tre le batterie sempre
contemporaneamente!
Premere il bloccaggio dell’interruttore principale
e spingere l’interruttore principale sulla posizione
“SEND”. All’accensione il PIEPS DSP esegue
un’autodiagnostica che dura circa 5 secondi.
Durante tale operazione va rispettata una distanza
minima di 5 metri da altre apparecchiature. In
seguito sarà visibile sul display il simbolo di invio,
come anche la tensione restante della batteria in
%. In aggiunta la spia luminosa lampeggia secondo
la cadenza di trasmissione. Qualora si producesse
un guasto all’apparecchio, viene emesso un
segnale di allarme e sul display viene indicato “E”
in combinazione con un codice di errore. In tal
caso l’apparecchio non è funzionante. Rivolgersi
in tal caso al servizio assistenza. La modalità di
funzionamento “SEND” va selezionata durante
l’intero soggiorno all’aperto. In questa modalità,
il PIEPS DSP invia continuamente un segnale
ricevibile anche da altri ARVA.
IMPORTANTE! Nonostante la complessa auto-
diagnostica, prima di ogni escursione va eseguito
un controllo dell’ARVA!
BATTERIA / ACCENSIONE / MODALITÀ DI INVIO
The battery compartment is located at the rear of
the housing. The safety screw connection can be
easily opened and closed using a coin.
IMPORTANT! Only use battery type LR03/AAA
and always replace all 3 batteries with new ones
of the same type. Never use rechargeable batteries
and always change all batteries at the same time!
Depress the main switch lock and push the main
switch to the “SEND“ position. When powered
on, the PIEPS DSP will carry out a self-test
lasting approx. 5 seconds. During this self-test a
minimum distance of 5 meters to other beacons
should be maintained. You will then see the send
symbol and the remaining % battery voltage in
the display. The LED will also ash synchronously
with the transmitter bit timing. In the event of a
device error, an alert signal sounds and the display
indicates “E” in combination with a error-code.
This means the device is not t for operation. In
this case, contact our customer service department.
When in the open, make sure the “SEND” mode
is selected throughout. The PIEPS DSP will then
transmit continuously any signal it picks up from
other beacons.
IMPORTANT! When switched on, a complex
self-testing is done by the beacon. Nevertheless
beacon-group-check is stongly recommended in
preparation to each tour.
BATTERY / SWITCHING ON / SEND MODE
08/06
|
07
1
2
3
1 Spia luminosa
2 Premere
3 Spostare
1 Light
2 Press
3 Move
Dalla modalità SEND si passa alla modalità OPTION
premendo tre volte il tasto OPTION. Con OPTION
si cambia la rispettiva funzione: Indicazione della
temperatura – Con SCAN è possibile commutare tra
°C e °F. Bussola – Dopo aver inserito delle batterie
nuove, la bussola necessita di una nuova taratura
interna. Ciò è necessario anche quando l’apparecchio
sia soggetto a forti sbalzi di temperatura. Con SCAN si
dà avvio alla taratura (”CAL” lampeggia). Di seguito
si gira l’apparecchio una volta completamente di 360°.
Premere inne OPTION. Radiobussola (bussola con
rotta preimpostata e indicazione a freccia) – Con
SCAN è possibile modicare la rotta. È possibile
regolare l’indicazione lampeggiante della rotta con
MARK (+) come anche con SCAN (-). Terminare
quindi con OPTION. Altimetro – È possibile
adeguare il display dell’altimetro alla pressione
atmosferica presente.A tal ne premere SCAN. Con
MARK (+) e SCAN (-) è possibile adeguare l’altezza
indicata. Premendo contemporaneamente MARK
e SCAN, l’adeguamento è regolato su zero. Inne,
terminare con OPTION.
Premendo a lungo il tasto OPTION (min. 3 secondi),
si commuta nuovamente su modalità SEND. Nella
modalità OPTION l’apparecchio non invia alcun
segnale. Di conseguenza l’apparecchio commuta
automaticamente sulla modalità SEND dopo due
minuti. Con un livello basso della batteria, tale
commutazione avviene dopo soli 30 secondi.
IMPORTANTE! Fare attenzione che l’apparecchio
rimanga costantemente collegato con la struttura
portante attraverso la corda di sicurezza!
APPARECCHIO CON PACK OPZIONALE
(OPTION)
By pressing the OPTION button three times, you
can switch from the SEND mode to the OPTION
mode. This enables you to switch between the
relevant functions: Temperature display – Press
SCAN to switch between °C and °F. Compass
– When new batteries are inserted, the compass
has to undergo an internal calibration. This is also
necessary if the device detects strong temperature
variations. To start the calibration, press SCAN
(”CAL” ashes). Then rotate the device a full
360°. Finally, press OPTION. Bearing compass
(direction-nding compass with arrow display)
– You can change the bearing direction with SCAN.
Select the ashing bearing by pressing MARK (+)
and SCAN (-). To exit, press OPTION. Altimeter
– You can adapt the altimeter reading to the
prevailing air pressure by pressing SCAN. Adjust the
displayed altitude with MARK (+) and SCAN (-). To
set the adjustment to zero, press MARK and SCAN
simultaneously. To exit, press OPTION.
By holding down the OPTION key (min. 3
seconds), you can switch back to the SEND mode.
In the OPTION mode, the device does not transmit
any signals, and therefore switches back to the
SEND mode automatically after two minutes. If
the battery is low, it switches back after just 30
seconds.
IMPORTANT! Make sure the device stays
connected to the harness via the safety cord at
all times!
DEVICE WITH OPTION PACK
08/06
|
09
3 x PRESS
Altimetro /
Altimeter
Bussola a freccia /
Bearing Compass
Bussola / Compass
Temperatura /
Temperature
FINE /
END
Grado +
Degree +
Grado -
Degree -
Metro +
Metre +
Metro -
Metre -
360°
FINE /
END
FINE /
END
OPTION PACK
Qualora si vericasse il caso di emergenza, è
soprattutto importante: MANTENERE LA CALMA,
OSSERVARE E DARE L’ALLARME!
Osservate l’evolversi della valanga e memorizzare
accuratamente in che luogo il sepolto è stato travolto
dalla valanga (punto di travolgimento) è stato visto per
l’ultima volta (punto di scomparsa). Dal prolungamento
di tali punti risulta la direzione di scorrimento della
valanga! L’area a sinistra e a destra di tale linea
costituisce l’area principale di ricerca. A valanga ferma
la persona più esperta del gruppo assume la guida
della ricerca e, dal bordo della valanga, dà istruzioni
a qualcuno afnché segnali i punti summenzionati
(con dei bastoni o simili). Premere il bloccaggio
dell’interruttore principale e spingere l’interruttore
principale sulla posizione SEARCH. Si inizia quindi la
RICERCA PRIMARIA e l’apparecchio riceve ora tutti
i segnali dei sepolti localizzati all’interno della portata
dell’apparecchio. Ricercare quindi l’area principale di
ricerca in modo corrispondente allo schema rafgurato
a sinistra, nché non si ottenga la segnalazione stabile
di un segnale.
IMPORTANTE! Tutti i partecipanti (inclusi gli
osservatori) tengono i loro apparecchi in ricezione
(modalità SEARCH). Evitare rigorosamente che, durante
la ricerca, ci siano apparecchi elettronici (ad esempio
telefoni cellulari, radiotrasmettitori) o parti massicce
in metallo nelle immediate vicinanze. Nella modalità
SEARCH non viene emesso alcun segnale! Per riattivare
nuovamente la modalità SEND in caso di inattese
valanghe successive, premere semplicemente sulla
parte sporgente in alto dell’interruttore principale!
IL CASO DI EMERGENZA /
MODALITÀ SEARCH
In case of an emergency, the key thing to remember
is KEEP CALM, OBSERVE, RAISE THE ALARM!
Observe the course of the avalanche and make
an exact mental note of where the victim was
hit by the avalanche (point of impact) and was
last seen (point of disappearance). The extension
of these points indicates the ow direction of the
avalanche! The primary search area is to the left
and right of this. When the avalanche stops, the
most experienced member of the group takes
control of the search, issuing instructions from the
edge of the avalanche so that another person can
mark the above points (with sticks, etc.). Depress
the main switch lock and push the main switch
to the SEARCH position. You can now begin the
PRIMARY SEARCH, in which the device will pick up
any signals from victims within its range. Now scan
the primary search area according to the plan on
the left until a steady signal is reported.
IMPORTANT! All participants (including
observers) must switch their devices to receiving
(SEARCH) mode. Always make sure there are no
electronic devices (e.g. mobiles, radios,) or solid
metal items in the direct vicinity of the search. Due
to the fact, that the beacon is not transmitting a
signal in SEARCH-mode anymore, the PIEPS DSP is
equiped with a rapid switch-back mechanism (just
push on the protruding top of the main-switch) in
the case of a following avalanche.
EMERGENCY / SEARCH MODE
08/06
|
11
1
3
2
50m
5
25m
25m
50m
4
25m
25m
1 Punto di travolgimento
2 Punto di scomparsa
3 Direzione di scorrimento
4 Soccorritore singolo
5 Vari soccorritori
1 Point of impact
2 Point of disappearence
3 Flow direction
4 Singel rescue person
5 Multiple rescue persons
Non appena il PIEPS DSP riceve segnali,
vengono visualizzate la distanza e la direzione
approssimative. Il numero dei sepolti che si trovano
all’interno della portata dell’apparecchio viene
rappresentato con il numero degli “uomini” (1).
Con la visualizzazione della direzione indicata
dalla freccia e la visualizzazione della distanza ci
si avvicina, lungo le linee di campo, al segnale
ricevuto con più forza. Muoversi nella direzione
visualizzata dal PIEPS DSP (2). Allo stesso tempo
la visualizzazione della distanza deve costituire un
valore in diminuzione. Qualora il valore andasse
aumentando, la direzione di ricerca va modicata di
180°. Girarsi e camminare in direzione opposta.
IMPORTANTE! In modalità SEARCH, operare in
modo silenzioso e concentrati. Evitare movimenti
veloci!
MODALITÀ SEARCH / RICERCA DI MASSIMA
As soon as the PIEPS DSP picks up signals, the
approximate distance and direction appear in the
display. The number of burials within the range of
the device is represented by matchstick men (1).
Using the arrow and distance reading, follow the
strongest of the received signals along the eld
lines. Move in the direction indicated by the PIEPS
DSP (2). The distance reading should become
progressively smaller. If it gets larger, switch the
search direction by 180°, i.e. turn round and follow
the opposite direction.
IMPORTANT! When working in the SEARCH
mode, remain calm and concentrated, and avoid
hasty movements!
SEARCH MODE / ROUGH SEARCH
08/06
|
13
andare
DIRITTO
move
STRAIGHT AHEAD
andare a
DESTRA
turn RIGHT
andare a
SINISTRA
turn LEFT
2
Numero dei sepolti | Number of burials:
quattro o più
four or more
tre | threedue | twouno | one
1
L
i
n
e
e
d
i
c
a
m
p
o
|
F
l
u
x
l
i
n
e
s
Dopo esservi avvicinati velocemente al sepolto,
grazie ad una iniziale ricerca di massima, il PIEPS DSP
dispiega ora tutto il suo potenziale con l’aiuto del
futuristico sistema a 3 antenne. Con un avvicinamento
di 5m
(1)
la velocità di ricerca dovrebbe venire
assolutamente ridotta ad un massimo di un passo
per ogni cambio di visualizzazione (a seconda del
trasmettitore ca. 0,5 – 1,3 secondi). Per prevenire
confusioni nella localizzazione del punto, le frecce
di ricerca vengono “interrotte” con distanze inferiori
ai 2m. Muoversi nella direzione percorsa per l’ultima
volta no a quando la distanza inizia di nuovo ad
aumentare (schema rafgurato a sinistra). Ridirigersi
nuovamente verso il punto con la visualizzazione
della distanza minimale
(2)
. Cercate, presso questo
punto, di determinare la distanza più piccola,
percorrendo l’area a croce varie volte, spostandosi
ogni volta di 90 gradi. Qualora percorrendo l’area
a croce in una delle quattro direzioni possibili la
distanza dovesse diminuire ulteriormente
(3)
, allora
continuare a muoversi in quella direzione, nché la
distanza inizi nuovamente ad aumentare, e iniziare
ancora una volta l’operazione del percorso a croce
descritto prima. Tale procedimento è da ripetere
no a quando si rilevi un arresto di ogni ulteriore
diminuzione della distanza
(4)
.
IMPORTANTE! Non effettuare movimenti veloci
durante la localizzazione del punto (20-40 cm/
sec). Durante l’intero processo di localizzazione del
punto, tenere l’apparecchio in senso orizzontale
nella stessa posizione, senza girarlo e il più vicino
possibile alla supercie nevosa!
MODALITÀ SEARCH /
LOCALIZZAZIONE DEL PUNTO
Once you have approached the victim quickly
with the rough search, the PIEPS DSP really comes
into its own thanks to its advanced triple-antenna
system. When you are closer then 5m (1) to the
burial, it`s strongly recommended to reduce your
moving speed to max. 1 footstep per reading
update (depends on the type of buried beacons,
approx. 0,5 - 1,3 sec.). To avoid confusion, the
direction indication is suppressed at distances less
than 2m. Following your last known direction,
move ahead until the distance reading starts
increasing again (see drawing). Return to the point
with the minimum distance reading (2). Starting at
this point, try to get the lowest distance reading,
using cross-like movements. On indication of
further reduced distance readings, tracking on
one of the four possible directions (3), follow this
direction until the distance reading starts increasing
again. At this point repeat the cross-like approache
as long as no increasing distance reading can be
determind (4).
IMPORTANT! It`s strongly recommended to
avoid hasty movements (move approx. 20-40 cm/
sec). Throughout this procedure, keep the device
horizontal in the same position without rotating
it, and keep it as close as possible to the surface
of the snow.
SEARCH MODE / CLOSE SEARCH
08/06
|
15
2
3
4
1
La ricerca multipla, l’assoluta punta di diamante del
PIEPS DSP, si basa su di una separazione del segnale
tramite un processore di segnali digitale (DSP).
Una sepoltura multipla viene visualizzata in modo
inequivocabile con il numero degli “ometti”. Come
standard, il PIEPS DSP ricerca automaticamente il
segnale più forte. Dopo aver localizzato la posizione
del primo sepolto, premere per ca. 3 secondi il tasto
MARK senza allontanarsi da quel punto. Questo
segnale viene ora “interrotto” e l’apparecchio
ricerca ora automaticamente il secondo segnale più
forte. In circostanze sfavorevoli (sovrapposizione
temporanea di segnali), è necessario ripetere tale
procedimento varie volte, oppure si ha la possibilità,
con la funzione SCAN descritta di seguito, di
cancellare interruzioni erronee. In aggiunta può
essere di aiuto, in combinazione con la funzione
SCAN, avvicinarsi ai sepolti partendo da diversi lati
(a stella). Il successo del procedimento del percorso
a croce viene segnalato da una cornice intorno
all’”ometto”. Riprendere ora la ricerca come
prima e ripetere le sequenze nché non siano stati
localizzati tutti i trasmettitori.
IMPORTANTE! In caso di sepolture multiple
in combinazione con apparecchi analogici più
vecchi e in presenza di circostanze sfavorevoli,
possono prodursi dei disturbi che comportano una
limitazione della separazione digitale dei segnali.
In casi simili può vericarsi che per brevi lassi di
tempo vengano visualizzati più segnali di quanti
ce ne siano effettivamente.
MODALITÀ SEARCH / RICERCA MULTIPLA
The optimised multiple search, the absolute
highlight of the PIEPS DSP, is based on a separation
of signals via the digital signal processor (DSP). If
there are multiple burials, this is clearly indicated
by the number of matchstick men. By default,
the PIEPS DSP will automatically search for the
strongest signal. Once the position of the rst
burial has been located, press the MARK key for
approx. 3 seconds without moving away from this
point. This signal is now suppressed and the device
will automatically search for the second strongest
signal. In unfavourable circumstances (temporary
signal interference), you may have to repeat this
procedure several times. It may also be helpful to
approache the victims from several sites (in radial
formation) using the SCAN-function. Once a
signal has been successfully suppressed, an outline
appears around the matchstick man. Now continue
the search as described above and repeat the
procedures until all transmitters are located.
IMPORTANT! In case of multiple burials
involving older analogue devices, faults may at
worst occur which impair the efciency of the
digital signal separation. In such cases, you may
nd for a short time that more signals are displayed
than actually exist.
SEARCH MODE / MULTIPLE SEARCH
08/06
|
17
1
2
3
5
6
8
4
7
1 Visualizzazione 3 sepolti
2 Localizzare 1. sepolto
3 Interrompere con MARK
4 Nuovo segnale, più forte, su display
5 Localizzare 2. sepolto
6 Interrompere con MARK
7 Nuovo segnale, più forte, su display
8 Localizzare 3. sepolto
1 reads three burials
2 locate rst burial
3 suppress with MARK
4 next strongest signal
5 locate second burial
6 suppress with MARK
7 next strongest signal
8 locate third burial
Una ulteriore caratteristica molto utile del PIEPS
DSP viene offerta dalla funzione SCAN. Premere il
tasto SCAN nella modalità SEARCH e l’apparecchio
inizia a ispezionare l’intera area di ricezione. Restare
fermi in silenzio durante la sequenza SCAN e tenere
l’apparecchio senza muoverlo. In tal modo si ottiene
una visione d’insieme sul totale degli apparecchi
sepolti all’interno della portata dell’apparecchio,
suddiviso in tre gruppi:
Visualizzazione 1: entro una distanza di ca. 5m
Visualizzazione 2: entro una distanza di ca. 20m
Visualizzazione 3: entro una distanza di ca. 50m
Tutte le informazioni di segnali precedentemente
“interrotti” vengono qui azzerate, ed è
possibile iniziare nuovamente con il processo di
“interruzioni” (MARK).
IMPORTANTE! Dopo aver localizzato tutti i
sepolti, muoversi allontanandosi a stella dai
punti di sepoltura e controllare nuovamente lo
“scenario” con la funzione SCAN. In tal modo
è possibile accertarsi di non essersi “lasciati
scappare” alcun sepolto.
MODALITÀ SEARCH / FUNZIONE SCAN
Another highly useful feature of the PIEPS DSP
is the SCAN function. Press the SCAN key in the
SEARCH mode and the device will begin scanning
the entire receiving range. During the scan, stand
still and hold the device steady. This will give you
an overview of all the buried devices within the
detectable range, classied according to three
groups:
Reading 1: within a distance of approx. 5m
Reading 2: within a distance of approx. 20m
Reading 3: within a distance of approx. 50m
All information from previously suppressed signals
is now reset and you can start the suppression
again (MARK).
IMPORTANT! Once you have located all burials,
move away from their locations in a star shape and
use the SCAN function to check the scenario again.
That way you can make sure you haven’t missed
any other burials.
SEARCH MODE / SCAN FUNCTION
08/06
|
19
1
2
3
1
Visualizzazione:
1 trasmettitore entro 5m
2 Visualizzazione:
2 trasmettitori entro 20m
3 Visualizzazione: 4 o più
trasmettitori entro 50m
1 Reading: one beacon
within 5 m
2 Reading: two beacons
within 20 m
3 Reading: fore ore more
beacons within 50 m
R
a
d
i
u
s
5
0
m
R
a
d
i
u
s
2
0
m
R
a
d
i
u
s
5
m
08/06
|
21
Qui potete trovare informazioni dettagliate ed
aggiornate sull’uso dell’apparecchio, per essere
preparare ad ogni caso di emergenza.
TROVERETE:
• INFORMAZIONI TECNICHE
DETTAGLIATE
• INFORMAZIONI PER FARE UN
UP-DATE DEL SOFTWARE
• ELENCO DEI PUNTI DI ASSISTENZA
• ACCESSO DIRETTO A PUBBLICAZIONI
SPECIALIZZATE PIEPS
• INFORMAZIONI SU ALTRI
PRODOTTI PIEPS
WWW.PIEPS.COM
In allega trova informazioni dettagliati sull‘ uso del
suo apparecchio per la ricerca di sepolti in valanghe.
Per l‘ uso giusto in caso di emergenza.
TROVA:
• INFORMAZIONI TECNICHE
DETAGLIATI
• COME RICEVO IL MIO
SOFTWARE UPDATE?
• LISTA DEI PUNTI DI SERVIZIO
• ACCESSO DIRETTO SU
PUBBLICAZIONI PIEPS
• INFORMAZIONI SU ALTRI
PRODOTTI PIEPS
WWW.PIEPS.COM
www.pieps.com
All information supplied without liability. Status august 2006.
Device designation: PIEPS DSP
Transmission frequency:
457 kHz (intern. standard frequency)
Power supply: 3 batteries, alkaline (AAA),
IEC-LR03, 1.5V
Battery lifetime: Min. 200 h SEND-mode
Maximum range: 60 metres (digital evaluation)
Earphone socket: Stereo earphone 3.5 mm,
min. 32 ohms
Temperature range: -20°C to +45°C
Weight: 198 g (incl. batteries)
Dimensions (L x W X H) 116 x 75 x 27 mm
Option pack
Temperature display -20°C to +50°C,
accuracy ± 3°C
Compass function Accuracy ± 8°
Altimeter Accuracy ± 10 m
TECHNICAL DATA
• The device is guaranteed by the manufacturer against
defects in material and workmanship for a period of
ve years from the date of purchase.
• This warranty does not apply to damage caused by
incorrect use, dropping or dismantling of the device
by unauthorised persons.
• Any further warranty or liability for consequential
damage is expressly excluded.
• Warranty claims should be addressed - enclosing the
receipt of purchase - to the relevant sales outlet or
directly to PIEPS.
WARRANTY CONDITIONS:
PIEPS GmbH
Frauentalerstraße 102, 8530 Deutschlandsberg, Austria
e-mail: of[email protected], www.pieps.com
MANUFACTURER, DISTRIBUTION & SERVICES
PIEPS GmbH declares hereby, that the product PIEPS DSP fulls
all requirements and regulations of directive 1999/5/EC!
The declaration of conformity can be downloaded at the
following source:
http://www.pieps.com/certication_pieps_dsp.pdf
CONFORMITY
Warning: Any changes or modications not expressly
approved by the manufacturer, responsible for compliance,
could void the user`s autority to operate this device.
Europe:
Manufacturer: PIEPS GmbH
Country of manufacture: Austria
Device type: PIEPS DSP; The device conforms
to the Standard ETS 300718
WEEE 2002/96/EC
Canada: IC: 4710A-DSP01
USA: FCC ID: REMDSP01
This device conforms to Paragraph 15
of the FCC regulations.
Operation is subject to the following two conditions:
1) This device may not cause hamful interference, and
2) this device must accept any interference received,
including interference thar may cause undesired operation.
CERTIFICATION
08/06
|
2322
|
08/06 Tutti i dati forniti senza garanzia, stato agosto 2006
Denominazione apparecchio: PIEPS DSP
Frequenza di trasmissione: 457 kHz (frequenza standard
internazionale)
Alimentazione: 3 batterie, alcalina (AAA),
IEC-LR03, 1,5V
Durata batterie: min. 200 ore funzionamento
in trasmissione
Portata massima: 60 metri (restituzione digitale)
Connettore auricolari: Auricolari stereo 3,5 mm,
min. 32 ohm
Variazione temperatura: -20°C – +45°C
Peso: 198 g (batterie incluse)
Dimensioni (L x L x A) 116 x 75 x 27 mm
Pack opzionale (option)
Visualizzazione temperatura:
-20°C a +50°C, Precisione ± 3°C
Funzione bussola Precisione
± 8°
Altimetro Precisione ± 10 m
DATI TECNICI
• Il produttore fornisce una garanzia di cinque anni
dalla data di acquisto su guasti di lavorazione e difetti
del materiale.
• La garanzia non copre danni derivanti da un utilizzo non
regolamentare, cadute o smontaggio dell’apparecchio
ad opera di persone non autorizzate.
• È espressamente esclusa qualsiasi ulteriore garanzia e
responsabilità per danni indiretti.
• Per far valere la garanzia, allegare alla richiesta una
prova d’acquisto e spedirla al corrispondente punto di
vendita o direttamente a PIEPS.
DICHIARAZIONE DI GARANZIA
La PIEPS conferma la conformità dell’apparecchio alle
disposizioni della direttiva 1999/5/EC. La certicazione di
conformità è visionabile al sito
www.pieps.com/certication_pieps_dsp.pdf.
CONFORMITÀ
Avviso: qualsiasi modica non espressamente autorizzata dal
produttore comporta il divieto di utilizzo dell’apparecchio
stesso!
Europa:
Produttore: PIEPS GmbH
Paese di fabbricazione: Austria
Tipo di apparecchio: PIEPS DSP; L’apparecchio
corrisponde alla norma ETS 300718
direttiva WEEE 2002/96/EC
Canada: IC: 4710A-DSP01
USA: FCC ID: REMDSP01
Tale apparecchio è conforme alla
parte 15 delle norme FCC.
Il funzionamento è soggetto alle seguenti due condizioni:
1) che il presente apparecchio non causi interferenze
dannose e 2) che esso accetti in ricezione interferenze
esterne, comprese quelle che possono provocare un
temporaneo funzionamento anomalo.
OMOLOGAZIONE
PIEPS GmbH
Frauentalerstraße 102, 8530 Deutschlandsberg, Austria
e-mail: of[email protected], www.pieps.com
PRODUTTORE, DISTRIBUZIONE & SERVIZIO

Other manuals for DSP

8

Other PIEPS Security System manuals

PIEPS PRO BT User manual

PIEPS

PIEPS PRO BT User manual

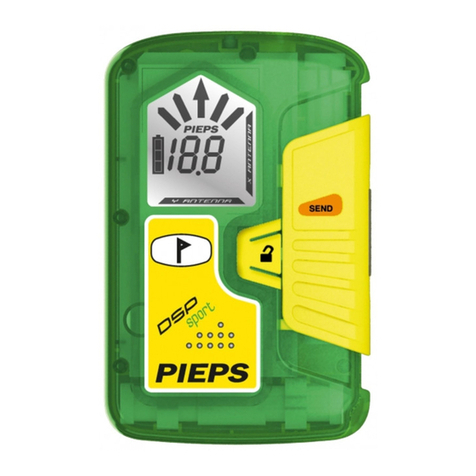
PIEPS DSP SPORT User manual

PIEPS

PIEPS DSP SPORT User manual

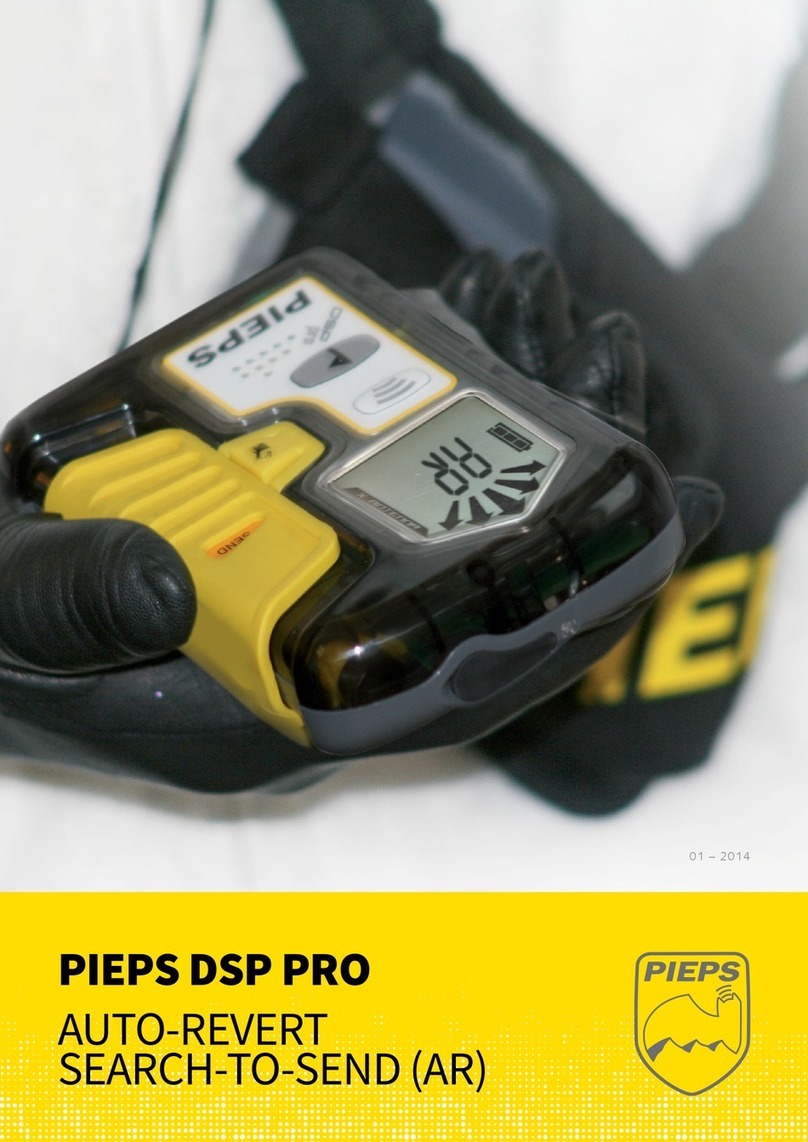
PIEPS DSP PRO User manual

PIEPS

PIEPS DSP PRO User manual

PIEPS DSP User manual

PIEPS

PIEPS DSP User manual

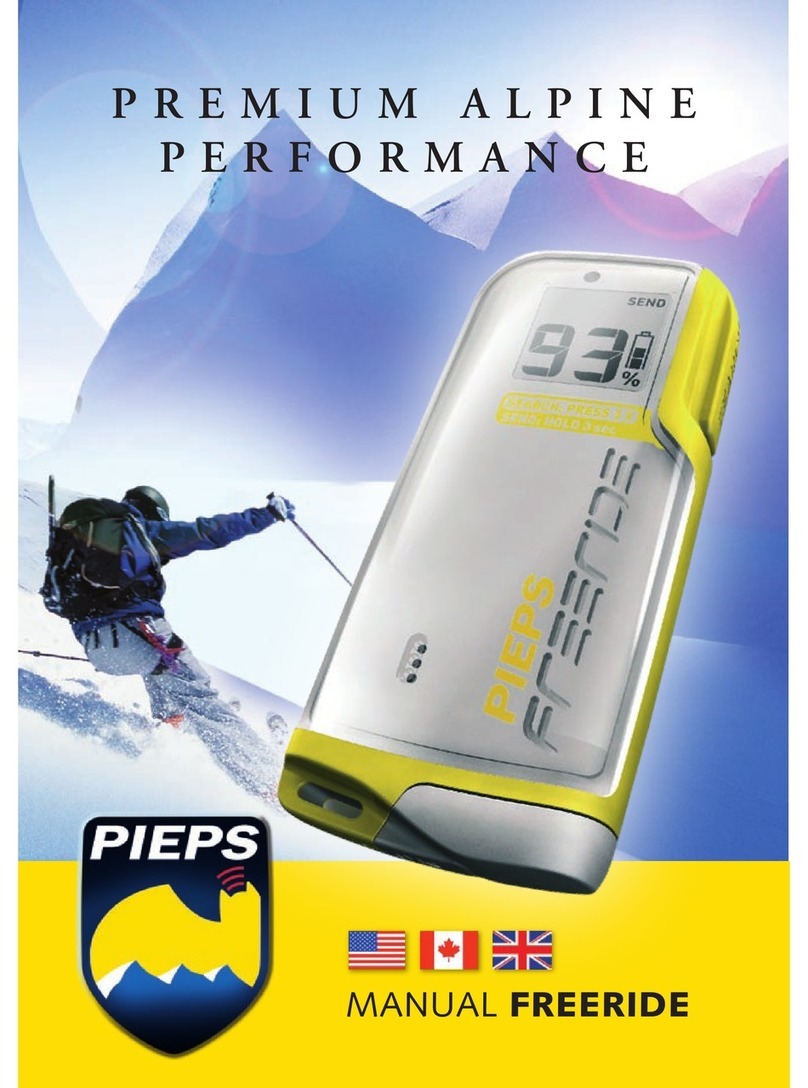
PIEPS Freeride User manual

PIEPS

PIEPS Freeride User manual

PIEPS DSP User manual

PIEPS

PIEPS DSP User manual

Popular Security System manuals by other brands

Mercury SR-10K user guide

Mercury

Mercury SR-10K user guide

DSC LC-171 Installation instructions & user manual

DSC

DSC LC-171 Installation instructions & user manual

Gorilla GCA-8007 Installation & operation instructions

Gorilla

Gorilla GCA-8007 Installation & operation instructions

Sonin 700 reference guide

Sonin

Sonin 700 reference guide

Beyond CX901 user manual

Beyond

Beyond CX901 user manual

VisionStat Plus MA-BCKS-5.6 Installation & user manual

VisionStat Plus

VisionStat Plus MA-BCKS-5.6 Installation & user manual

DSC PC4936 instruction manual

DSC

DSC PC4936 instruction manual

Honeywell L5200 Series Installation and setup guide

Honeywell

Honeywell L5200 Series Installation and setup guide

K-Byte Fingerprint Security Specifications

K-Byte

K-Byte Fingerprint Security Specifications

SFA SANIALARM Installation instruction

SFA

SFA SANIALARM Installation instruction

Takex OMS-12FE instruction manual

Takex

Takex OMS-12FE instruction manual

Qvis LED-HDMI1906-PA user manual

Qvis

Qvis LED-HDMI1906-PA user manual

Alarm Lock TRILOGY DL2700 parts list

Alarm Lock

Alarm Lock TRILOGY DL2700 parts list

Taiden VIDEO SERIES Installation and operating manual

Taiden

Taiden VIDEO SERIES Installation and operating manual

Bosch Security System user guide

Bosch

Bosch Security System user guide

Eminent EM8670 Quick install

Eminent

Eminent EM8670 Quick install

Konig VID-TRANS300 manual

Konig

Konig VID-TRANS300 manual

teko astra-10 Operation manuals

teko

teko astra-10 Operation manuals

manuals.online logo
manuals.online logoBrands
  • About & Mission
  • Contact us
  • Privacy Policy
  • Terms and Conditions

Copyright 2025 Manuals.Online. All Rights Reserved.