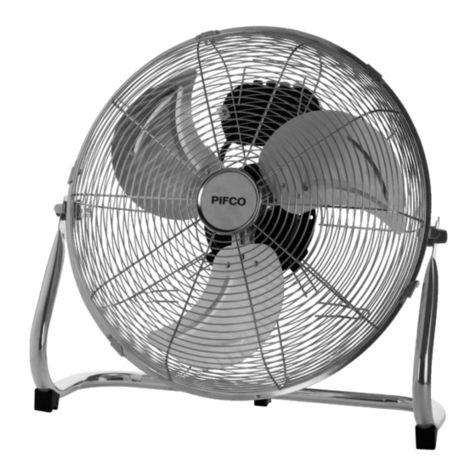
Pifco BHFP52004 User manual

MODEL BHFP52004
www.pifco.co
9 Inch
Desk Fan
YOUR SAFETY & INSTRUCTION MANUAL
PLEASE READ CAREFULLY
Need help?
For advice, spares & returns.
Call: +44 (0)333 220 6054
8:30am to 6:00pm Monday - Friday
Visit: www.pifco.co

2
Customer support team: +44 (0) 333 220 6054
Technical data
Description: 9” Desk Fan
Model: BHFP52004
Rated Voltage: 220 - 240V ~
Frequency: 50Hz
Power consumption: 20W
Documentation
We declare that this product conforms to the following product legislation in accordance with the
following directive(s):
2014/30/EU Electromagnetic Compatibility Directive.
2014/35/EU Low Voltage Directive.
2011/65/EU Restriction of Hazardous Substances Directive.
2009/125/EC Eco-Design of Energy Related Products.
RK Wholesale LTD Quality Assurance, United Kingdom
Warranty
This product is guaranteed for 12 months from the date of original purchase. If any defect arises
due to faulty materials of workmanship, the faulty products must be returned to the place of
purchase. Refund or replacement is at the discretion of the retailer.
The following conditions apply:
• The product must be returned to the retailer with proof of purchase.
• The product must be installed and used in accordance with the instructions contained in this
instruction guide.
• It must be used only for domestic purposes.
• It does not cover wear and tear, damage, misuse or consumable parts.
• RK Wholesale LTD has limited liability for incidental or consequential loss or damage.
• This guarantee is only Valid in the UK and Eire Only.
An extended warranty is available for this appliance.
See back page for details.

3
www.pifco.co
WARNING:
This appliance is double insulated.
Do not connect any wire to the earth terminal.
WIRING SAFETY FOR UK USE ONLY
IMPORTANT
As the colours in the mains lead of this
appliance may not correspond with the
coloured markings identifying the terminals in
your plug, please proceed as follows:
The wires in the mains lead are coloured in
accordance with the following code:
Blue neutral [N] Brown live [L]
Plug Fing Details (Where Applicable).
The wire coloured blue is the neutral and must
be connected to the terminal marked [N] or
coloured black.
The wire coloured brown is the live wire and
must be connected to the terminal marked [L]
or coloured red.
On no account must either the brown or
the blue wire be connected to the [EARTH]
terminal .
Always ensure that the cord grip is fastened
correctly.
The plug must be fitted with a fuse of the
same rating already fitted and conforming to
BS 1362 and be ASTA approved.
If in doubt consult a qualified electrician who
will be pleased to do this for you.
Non-Rewireable Mains Plug
If your appliance is supplied with a non-
rewireable plug fitted to the mains lead and
should the fuse need replacing, you must use
an ASTA approved one (conforming to BS
1362 of the same rating).
If in doubt, consult a qualified electrician who
will be pleased to do this for you.
If you need to remove the plug – disconnect
it from the mains – and then cut it off of the
mains lead and immediately dispose of it in a
safe manner. Never attempt to reuse the plug
or insert it into a socket outlet as there is a
danger of an electric shock.
Fuse
Neutral
(Blue)
Live
(Brown)

4
Customer support team: +44 (0) 333 220 6054
• Check that the voltage of the
main circuit corresponds with
the rating of the appliance
before operating.
• Please ensure that the
appliance is used on a stable,
level, and heat resistant
surface.
• DO NOT immerse cords,
plugs or any part of the
appliance in water or any
other liquid.
• DO NOT leave the appliance
unattended while it is
operating.
• Close supervision is
necessary when any
appliance is used by or near
children or pets.
• This appliance can be used
by children aged from 8 years
and above and persons with
reduced physical, sensory
or mental capabilities or
lack of experience and
knowledge if they have
been given supervision or
instruction concerning use of
the appliance in a safe way
and understand the hazards
involved.
• Children shall not play with
the appliance.
• Cleaning and user
maintenance shall not be
made by children without
supervision.
• Switch off at the wall socket
then remove the plug from
the socket when not in use or
before cleaning.
• If the supply cord or
appliance is damaged,
stop using the appliance
immediately and seek advice
from the manufacturer or its
service agent or a similarly
qualified person.
• DO NOT let the cord hang
over the edge of a table
or counter or let it come
into contact with any hot
surfaces.
• The use of accessory
attachments is not
recommended by the
appliance manufacturer apart
from those supplied with
this product. DO NOT use
extension cords with the
appliance.
• DO NOT pull the plug out by
the cord as this may damage
the plug and/or the cable.
• DO NOT use this product
for anything other than its
intended use.
PRODUCT SAFETY
When using any electrical appliance, basic safety precautions should
always be followed including the following:

5
www.pifco.co
• This appliance is for
household use only.
• DO NOT carry the appliance
by the power cord.
• DO NOT use the appliance
outdoors.
• DO NOT run cord under
carpeting. DO NOT cover
cord with throw rugs, runners
or the like. Arrange cord away
from traffic area to avoid
anyone from tripping over.
• DO NOT insert or allow
foreign objects to enter
any ventilation opening as
this may cause an electric
shock, fire, or damage to an
individual or a property.
• To prevent overload and
blown fuses, be sure that
no other appliance is
plugged into the same outlet
(receptacle) or into another
outlet (receptacle) wired into
the same circuit.
• We DO NOT recommend use
of an extension cord as it may
overheat and cause a risk of
fire. However, if you have to
use an extension cord, the
cord should be No: 14 AWG
minimum size and rated not
less than 1875 watts, and has
to be used only for supplying
power to this fan.
• Never insert your fingers,
pencils or other objects
through the cage during
operation.
• The fan should be set up on
a stable and level surface to
avoid it being knocked over.
• DO NOT expose the fan to
excessive heat or humidity as
this can cause damage to the
electrical components.
• The fan should be kept out of
the reach of children.
• In the unlikely event the
appliance develops a fault,
stop using it immediately
and seek advice from the
Customer Support Team.
HIGH VOLTAGE ROTATING PARTS

6
Customer support team: +44 (0) 333 220 6054
What’s in the box & details:
Instruction Manual
9” Desk Fan
Guard fastening screw
1. Guard securing clip
2. Guards
3. Oscillation knob (back of unit)
4. Blade
5. Shaft
6. Speed control buttons
7. Base
Before your first use:
1. Remove the parts from the packaging.
2. Assemble as instructed.
3. Your appliance is now ready for normal use.
Dispose of the packaging in a responsible manner.
1
2
3
4
5
6
7

7
www.pifco.co
Installing the Back Guard:
1. Remove the nut at the back of the motor
housing and put it to one side.
2. Once this part has been removed, affix
the back guard to the motor housing. To
do this, align the three pins on the left
side, right side and bottom of the motor
housing with the three corresponding
notches on the back guard, so that the
handle on the guard is at the top of the
fan, above the blades.
3. With the back guard in position, replace
the nut onto its slot at the base of the
blade shaft, and turn it clockwise to
tighten.
Note: Take care to secure the back guard into
place when re-tightening the nut, to prevent it
from slipping out of position.
4. The back guard should now be secured
into place.
Installing the Fan Blades:
1. Once the back guard has been installed,
slot the fan blades into the shaft and
push them into place.
Note: Ensure the blades rotate unimpeded
and do not graze against the back guard. If the
fan blades become stuck or graze against the
guard mesh, they will need to be re-installed.
Repeat the steps above as necessary until the
blades move freely and naturally inside the
guard mesh.
Installing the Front Guard:
1. When the blades have been installed,
connect the front guard to the back
guard to complete fan assembly. To do
this, align the edges of the two guards,
ensuring the fixing bracket on the front
guard is at the top of the fan, directly
above the blades.
2. When the front guard is in place, locate
the locking clips around the rim of the
front guard and push each of these down
to secure the front guard into place.
3. Use a screwdriver to fix the screw and
locking nut through the hole at the
bottom of the grilles.
4. Your fan is now ready for normal use.
Using your appliance:
1. Press any of the 2 speed buttons on the
fan’s control panel to turn the unit on.
The fan will automatically start operating
at the desired speed.
2. Press the 0 button on the fan’s control
panel while it is in operation to turn the
unit off.
Speed Selection:
1. This fan is equipped with a choice of 2
speed settings: Low (1) or High (2). Press
the corresponding button on the unit’s
control panel to select the desired speed.
CAUTION! Press only one of the speed
control buttons at a time. Permanent
damage to the switch housing may result
if two or more of the buttons are pressed
simultaneously.
2. Press the other speed button while the
unit is in operation to change wind speed.
The fan will automatically adjust to the
new setting within a few seconds.
3. Press the 0 button on the fan’s control
panel while it is in operation to turn the
unit off. Wind will stop emitting from
the fan grille and the fan blades will stop
rotating after a few seconds to show the
unit has been turned off.
8
Customer support team: +44 (0) 333 220 6054
Oscillation:
1. This fan is equipped with an oscillation
function, for more even heat distribution
across a room or area.
2. Push the oscillation knob at the back
of the motor housing down to turn the
oscillation function on. The fan will
automatically begin pivoting from side to
side in a fixed pattern.
3. Pull the oscillation knob up while the fan
is oscillating to turn this function off. The
fan will automatically remain locked at its
current angle, and the wind flow will be
directed that way. To select a different
angle or direction for the wind, turn the
oscillation function back on, as described
above, wait until the fan is facing in
the required direction, then pull the
oscillation knob up to stop the oscillation
function and lock the fan into place.
Adjusting the Air Flow:
This unit is equipped with a vertical tilt
function, which can be manually adjusted to
better direct the air flow.
1. To adjust the vertical tilt angle of the
fan, firmly grip the top half of the motor
housing and push it gently upwards or
downwards as required. The fan will give
off a clicking noise to indicate the tilt
mechanism is working.
2. Once the fan has been tilted, it will
automatically remain at the selected
angle until manually adjusted again.
Cleaning and care:
1. Before cleaning always switch off the
appliance and remove the plug from the
electrical socket.
2. To clean the outside of the fan, wipe the
exterior with a soft, damp cloth.
3. Never use an abrasive cleaner.
4. When not in use, store the fan (preferably
in its original box) in a cool, clean and dry
location.
Cleaning the fan blades:
1. Remove the front guard by unclipping
the locking clips located around the
circumference of the guard. The top lock
does not unclip.
2. Use a small spanner to unscrew the nut
and bolt that holds the bottom of the
front guard to the back guard.
3. With both hands, pull the front guard
downwards and away.
4. Clean the fan blades with a soft, damp
cloth.
5. Slide the front guard back into place, so it
fits into the top lock clip. Clip all the locks
back into place and screw the nut and
bolt back in.
CAUTION:
Do not use the fan when the front guard
is not locked into place.
Note:
Make sure that the fan is on a level
surface and away from any liquids.
Oscillating the fan will create a more
uniform cooling effect in the room.
Note:
The fan’s horizontal angle cannot be
manually adjusted. To change the
horizontal angle of the fan, activate the
oscillation function as detailed above,
wait until the fan is at the desired angle,
then pull the oscillation knob up to stop
the oscillation function and lock the fan
into place.

9
www.pifco.co
WARNING:
DO NOT immerse any electrical part of the appliance in water such as motor units or plugs.
Please see cleaning secon for further instrucons.
DISPOSAL OF THE UNIT
Appliances bearing the symbol shown here may not be disposed of in domestic rubbish. You are
required to dispose of old electrical and electronic appliances like this separately.
Please visit www.recycle-more.co.uk or www.recyclenow.co.uk
for access to information about the recycling of electrical items.
Please visit www.weeeireland.ie for access to information about the recycling of electrical items
purchased in Ireland.
The WEEE directive, introduced in August 2006, states that all electrical items must be recycled,
rather than taken to landfill.
Please arrange to take this appliance to your local Civic Amenity site for recycling,
once it has reached the end of its life.
Model Idener(s): BHFP52004
Item Symbol Value Unit
Maximum fan ow rate F10.58 m3/min
Fan power input P 18.23 W
Service value SV 0.58 (m3/min)/W
Standby power
consumpon PSB 0.00 W
Seasonal electricity
consumpon Q5.83 kWh/a
Fan sound power level LWA 51.20 dB(A)
Maximum air velocity c 2.25 m/sec
Contact Details: Imported by RK Wholesale LTD, Berryhill Road,
Stoke-on-Trent ST4 2NL

10
Customer support team: +44 (0) 333 220 6054
Notes

11
www.pifco.co
Notes

1219.V3
We hope you enjoy your appliance for many years.
As a thank you for purchasing one of our fantasc products,
we are oering you an extra 1 year peace of mind.
*To receive your extra 1 years guarantee, register your appliance online
within 28 days of purchase by vising:
www.pifco.co
Make sure to retain your original receipt.
Should you have a problem
with your appliance or need any spare parts please call our
Customer Support Team on:
+44 (0) 333 220 6054
Distributed throughout the UK by RK Wholesale LTD
Table of contents
Other Pifco Fan manuals

Pifco
Pifco P40010 Mounting instructions

Pifco
Pifco P40005C User manual

Pifco
Pifco JTFP53002 Mounting instructions

Pifco
Pifco P50001 Mounting instructions

Pifco
Pifco P51001 User manual

Pifco
Pifco P40002 User manual

Pifco
Pifco P51006 Mounting instructions

Pifco
Pifco BHFP51001 User manual

Pifco
Pifco P50003 Mounting instructions

Pifco
Pifco P40007 User manual
Popular Fan manuals by other brands

Makita
Makita CF001G instruction manual

Fanco
Fanco Horizon DC CFFCHZ23BLSMR installation manual

Hunter
Hunter Protos manual

Honeywell
Honeywell QUIETSET HY-254 Series owner's manual

Pasco Scientific
Pasco Scientific ME-6977 instruction manual

Vent-Axia
Vent-Axia SOLO Plus 427477A Installation and wiring instructions