Pioneer Eclipse CS2700R User manual

©2003
Amano Pioneer Eclipse Corporation
P.O. Box 909
Sparta, NC 28675
1-336-372-8080
1-800-367-3550
www.pioneer-eclipse.com
Article #:
Serial #:
DOM:
Built in NC, USA
Operator’s Manual
Failure to read and understand this manual
before operating this machine or performing service on
this machine may result in injury to the operator or
nearby personnel or result in damage to the machine
or nearby property. Each operator must be trained in
the operation of this machine before being allowed to
use it. Contact Amano Pioneer Eclipse Customer
Service at 1-800-367-3550 or 1-336-372-8080 or an
authorized Amano Pioneer Eclipse Distributor to
inquire about training or to request a replacement
manual.
La falta de leer y de entender este manual antes de
usar esta máquina o de realizar servicio en esta
máquina puede dar lugar a lesión al operador o al
personal próximo o a resultado en daño a la máquina
o propiedad próxima. Cada operador debe ser
entrenado en la operación de esta máquina antes de
ser permitido utilizarla. Ponerse en contacto con el
servicio de Amano Pioneer Eclipse 1-800-367-3550 o
1-336-372-8080 o un distribuidor autorizado por
Amano Pioneer Eclipse para investigar sobre el
entrenamiento o para solicitar un manual.
Manquer de lire et de comprendre ce manuel
d'utilisation avant l'utilisation de cette machine ou
avant faire de maintenance sur la machine peut être
résulter en blessure à l'opérateur ou au personnel
proche ou peut endommagé la machine ou la propriété
proche. Chaque utilisateur doit être entraîné dans
l'opération de cette polisseuse avant l'utilisation.
Veuillez contacter le service àpres-vente de Amano
Pioneer Eclipse à 1-800-367-3550 ou 1-336-372-8080
et/ou un distributeur de Amano Pioneer Eclipse pour
vous renseigner concernant l'entraînement ou pour
obtenir un autre manuel d'utilisation.
Ride-On Autoscrubber
For Model: CS2700R
Machine Directive 98/37/EC as amended by Directive 89/392/EEC,
Directive 91/368/EEC, Directive 93/44/EEC, and by Directive 93/68/EEC.
EMC Directive 89/336/EEC, rectificated by 389LO336R(01) and amended by
91/263/EEC, 92/31/EEC and 93/68/EEC. Low Voltage Directive 73/23/EEC
amended by 93/68/EEC.

Machine Description
Features . . . . . . . . . . . . . . . . . . . . . . . . . . . . . . . . . . . . . . . . . . . . . . . . . . . . . . . . . . . . . . 2
Specifications . . . . . . . . . . . . . . . . . . . . . . . . . . . . . . . . . . . . . . . . . . . . . . . . . . . . . . . . . . 2
General Instructions . . . . . . . . . . . . . . . . . . . . . . . . . . . . . . . . . . . . . . . . . . . . . . . . . . . . . 3
Preparing and Operating the CleanStar 27R
Safety System . . . . . . . . . . . . . . . . . . . . . . . . . . . . . . . . . . . . . . . . . . . . . . . . . . . . . . . . . .8
Installing the Batteries and Battery Charger . . . . . . . . . . . . . . . . . . . . . . . . . . . . . . . . . . . . 8
Choosing the Cleaner Solution . . . . . . . . . . . . . . . . . . . . . . . . . . . . . . . . . . . . . . . . . . . . . 9
Starting and Preparing the Machine . . . . . . . . . . . . . . . . . . . . . . . . . . . . . . . . . . . . . . . . . . 9
Scrubbing . . . . . . . . . . . . . . . . . . . . . . . . . . . . . . . . . . . . . . . . . . . . . . . . . . . . . . . . . . . . . 9
Water Filling and Discharge, Tank Cleaning . . . . . . . . . . . . . . . . . . . . . . . . . . . . . . . . . . . . 9
Squeegee Adjustment . . . . . . . . . . . . . . . . . . . . . . . . . . . . . . . . . . . . . . . . . . . . . . . . . . . 10
Brush Replacement . . . . . . . . . . . . . . . . . . . . . . . . . . . . . . . . . . . . . . . . . . . . . . . . . . . . . 10
Machine Care
Maintenance Schedule . . . . . . . . . . . . . . . . . . . . . . . . . . . . . . . . . . . . . . . . . . . . . . . . . . 11
Squeegee Blade Replacement . . . . . . . . . . . . . . . . . . . . . . . . . . . . . . . . . . . . . . . . . . . . . 11
Vacuum Motor Maintenance . . . . . . . . . . . . . . . . . . . . . . . . . . . . . . . . . . . . . . . . . . . . . . . 11
Diagnostic Messages . . . . . . . . . . . . . . . . . . . . . . . . . . . . . . . . . . . . . . . . . . . . . . . . . . . .11
Machine Diagram and Parts List
Dash Panel Layout . . . . . . . . . . . . . . . . . . . . . . . . . . . . . . . . . . . . . . . . . . . . . . . . . . . . . .12
Wiring Schematic Parts List . . . . . . . . . . . . . . . . . . . . . . . . . . . . . . . . . . . . . . . . . . . . . . .13
Wiring Schematic . . . . . . . . . . . . . . . . . . . . . . . . . . . . . . . . . . . . . . . . . . . . . . . . . . . . . . .14
Tanks & Cover Group . . . . . . . . . . . . . . . . . . . . . . . . . . . . . . . . . . . . . . . . . . . . . . . . . . . 16
Frame Group . . . . . . . . . . . . . . . . . . . . . . . . . . . . . . . . . . . . . . . . . . . . . . . . . . . . . . . . . . 18
Brush Housing Group . . . . . . . . . . . . . . . . . . . . . . . . . . . . . . . . . . . . . . . . . . . . . . . . . . . 20
Steering Group . . . . . . . . . . . . . . . . . . . . . . . . . . . . . . . . . . . . . . . . . . . . . . . . . . . . . . . . 22
Wheel Group . . . . . . . . . . . . . . . . . . . . . . . . . . . . . . . . . . . . . . . . . . . . . . . . . . . . . . . . . . 24
Squeegee Lift Group . . . . . . . . . . . . . . . . . . . . . . . . . . . . . . . . . . . . . . . . . . . . . . . . . . . . 26
Vacuum Group . . . . . . . . . . . . . . . . . . . . . . . . . . . . . . . . . . . . . . . . . . . . . . . . . . . . . . . . .28
Solution Flow Group . . . . . . . . . . . . . . . . . . . . . . . . . . . . . . . . . . . . . . . . . . . . . . . . . . . . .30
Squeegee Assembly Group . . . . . . . . . . . . . . . . . . . . . . . . . . . . . . . . . . . . . . . . . . . . . . .32
Welcome
Congratulations on purchasing the CleanStar 27R Ride-On Autoscrubber from Amano Pioneer Eclipse.
Please read this manual carefully. It will acquaint you with the care, safe handling and operation of the
CleanStar 27R.
Table of Contents
1

Machine Description
Features
• Large Capacity Tank requires less frequent filling and emptying.
• 6 - 8 hour easy access batteries
• User-friendly instrument panel
• Variable speed
• Machine stops when accelerator is released.
• Brushes and water flow stop automatically when accelerator is released.
• Four position rear squeegee and two position front squeegee offer extended life.
• Horn and back-up light for safety.
• Squeegee raises automatically when machine goes into reverse.
Specifications
Length: 53.9" (137 cm)
Brush Cover Width: 31.1" (79 cm)
Height: 53.2" (135 cm)
Number of Pads or Brushes: 2
Pad or Brush Size: 14" (35.6 cm)
Optional Brushes: 16” (41 cm)
Work Width: 27" (70 cm)
Optional Extended Deck: 31” (80 cm)
Squeegee Width: 42" (107 cm)
Optional Squeegee: 34.5” (87,6 cm)
Solution Tank in Polyethylene: 27 US gal. (102 L)
Recovery Tank in Polyethylene: 31.5 US gal. (119 L)
Front Wheel Diameter: 9.8" (25 cm)
Rear Wheel Diameter: 12.2" (31 cm)
Traction: Electric
Weight with Batteries: 926 lbs. (435 kg)
Weight without Batteries: 555.6 lbs. (252 kg)
Battery Compartment: 15.35" x 20.5" x 11.4"
(39 cm x 52 cm x 29 cm)
Power Source: Battery, 6V (6)
Voltage: 36 V
Brush Motor: 1000 watt, 32 A, 2200 rpm
Traction Motor: 600 watt, 21 A, 130 rpm
Vacuum Motor: 850 watt, 23 A, 16000 rpm
Steering Wheel Revolution: 37.4" (95 cm)
Brush Lift Control: electric
Emergency Brake: Mechanical pedal
Parking Brake: Mechanical pedal
Forward Running Speed: 0-3.7 mph (6 km/h)
Reverse Running Speed: 0-2.5 mph (4 km/h)
Maximum Slope: 10%
Scrubbing Performance: 43,060 sq ft/hr (4000 m2/h)
Noise at Driver's Ear: 66 dBA
Vibrations on Operator Site: Lower than 2.5 m/sec2
2

General Instructions
Proper use of the CleanStar 27R
As soon as the machine arrives, please inspect the exterior and all moving parts to verify that no damage
has occurred during transport. In case of missing or damaged parts, contact the Manufacturer or Authorized
Distributor immediately.
Use the scrubber to clean floors with any covering. Maximum performance can be achieved with proper use
and maintenance.
It is improper to use the CleanStar 27R scrubber:
• as a tractor to tow or push.
• on ramps with slopes higher than 5%.
• to transport people.
The machine has not been designed to work in environments in which explosive gases, powders or steams
can be generated.
Handling of Packed Machine
The machine is supplied packed on a pallet, closed in a box made of plywood or paperboard. Please see
the Features and Specifications section for information on weight and size. A black arrow on the box
indicates the barycenter position. The forks of the lift truck or of the transpallet should be placed so that the
black arrow indicated on the packing is about in the center of the forks. The palletized box should be
handled with extreme caution; avoid impacts or lifting it to extreme heights without reason.
Do not stack the boxes.
Unpacking the Machine
Unpack the machine with caution.
• Cut the straps with the proper cutting tool, being careful of
spring back.
• Remove the clips on the paperboard base which bind the
paperboard to the pallet by using a screwdriver or a proper
tool, and lift the paperboard.
• In case of package made of plywood, remove the clips on
the sides and on the base of each panel as well.
• Remove the other clips fastening the machine in the same
manner.
• Bring the machine to ground level by means of a metallic or
wooden ramp.
Handling of the Unpacked Machine
Check the unpacked machine and mount the batteries. If the machine must be handled for a short transport
after being used, detach the battery cables and remove brushes and squeegee. For a longer transport, it is
recommended to pack the machine again in its original box. The machine can be thrust-moved for short
distances.
3

General Instructions
Before using the machine, Amano Pioneer Eclipse strongly recommends that all operators read the General
Safety Standards in this manual.
Manufacturer Responsibilities
Amano Pioneer Eclipse is not responsible for any inconveniences, failures, accidents, etc. due to the non-
acquaintance (or non-fulfillment) of the instructions in this manual. The same applies to changes,
modifications, and/or installation of unapproved accessories.
In particular, Amano Pioneer Eclipse is not responsible for any damages caused by:
• Natural calamity
• Erroneous operations
• Lack of maintenance
• Repair by unauthorized personnel
Spare Parts
Use only original spare parts, supplied and/or checked and authorized by Amano Pioneer Eclipse.
Service Requests
Service requests should be made after an accurate analysis of the problem and its causes. When contacting
Amano Pioneer Eclipse customer service or a PE authorized service center, report the following:
• Model of the machine
• Serial number
• Details of the problem
• The checks executed
• The performed adjustments and their results
• Any other pertinent information
General Safety Standards
The machine described in this manual is in compliance with the stipulations of the 89/392/EEC Machine
Directive and its subsequent modifications/standards.
The person responsible for the machine must adhere to regulatory norms and local standards regarding the
work environment for Operator Safety and Health. Before starting the machine, always perform the
preliminary checks. Safety standards in the manual which involve any dangers can be recognized by the
following:
CAUTION!
The person responsible for the machine must instruct the operators on:
• Safety and accident prevention standards
• Specific standards regarding the machines
• Emergency Stop
The fixed or movable protections (carters) should always remain in their position, correctly fixed with perfect
integrity during all procedures of normal operation. If, for any reason, the carters are removed (protections
switched off or short-circuited), their efficiency should be restored before restarting the machine. Use the
machine only under normal conditions and in compliance with its purpose, and observe the safety and
4

prevention standards in this manual. Immediately address any failures which could compromise safety.
This machine is exclusively designated for use as a scrubber; any other use does not comply with its
purpose. Amano Pioneer Eclipse takes no responsibility for any consequent damage. The use according to
the purpose also includes compliance with the Use and Maintenance Instructions and with the inspection and
maintenance conditions as well.
Caution! Danger
It is absolutely forbidden to vacuum inflammable and/or toxic liquids and powders.
Caution! Danger
It is dangerous and absolutely forbidden to touch the lower part of the machine with the hands when any
parts are moving. Should it be absolutely necessary, remove the key from the dashboard.
Caution!
When the operator is seated, the rotating beacon light should always be turned on.
Instructions for use
Only an authorized operator can use the machine. To prevent the machine from being used by unauthorized
personnel, it is important to remove the ignition key when not in operation. When the machine is not working,
it should be protected from any accidental movements by pressing the emergency push button or detaching
the plug from the battery. While the machine is working, pay attention to strangers and in particular to
children.
Caution!
This machine uses the drive motor to brake. When the Emergency Stop is activated, the machine loses
power, and the brake will no longer function.
Always keep the Operator’s Manual at the work place of the machine. Beyond the use and maintenance
instructions, observe and follow the binding general legislative rules regarding Accident Prevention and
Environment Protection. This can also concern the handling of harmful materials, the availability and
mounting of customized protection equipment and compliance with the rules of the road. In case of machine
modifications, which can compromise its safety or its operation, stop the machine immediately and inform the
responsible body or person. Do not make any change or variation to the machine that can compromise its
safety, without prior written authorization by Amano Pioneer Eclipse.
Never perform any unsafe operations. Before starting to work, become familiar with the environment of the
working place. The working environment includes, for instance, any potential obstacles present in the
working and transition area and knowledge of the ground capacity in a public traffic area.
Comply with the instructions contained in the Operator’s Manual regarding “on” and “off” operation. Before
starting the machine, check that the operation does not endanger anyone. Transportation of people and
things is not allowed.
Caution!
Keep in mind the following standards. Failure to adhere to these rules can endanger the life of the operator
or of other people. Always keep sufficient distance from sidewalk edges and from large differences in the
height of the floor where the machine can fall. Never adopt a work technique that can compromise the
stability of the machine.
When on a slope, keep the machine directed in an uphill or downhill direction. Never travel across a slope
5

with one side of the machine higher than the other. When going downhill, always adjust the speed to
environmental conditions. Do not turn the machine at excessive speeds, particularly if the floor is not flat.
Caution! Danger
Never operate the machine when stopped for special operations (setting up, maintenance, etc.). Before
starting the machine, check for any possible visible defects on the safety devices, and check the correct
operation of the emergency stop push button or of the equivalent mechanism. Never operate the machine
when the control panel indicates defective tools, warning lights, etc.
Make Sure That:
• No strangers are present near the machine. Strangers are never allowed to approach the machine.
• No strange objects (appliances, cloths, etc.) are on the machine.
• The machine does not emit strange noises after start-up; if so, stop immediately and identify the
cause.
• Use, maintenance and repair of the machine are allowed only by authorized operators who have
reviewed the manual. These operators should be persons physically and intellectually fit for this
work.
Maintenance Instructions
It is necessary to extract the ignition key during the maintenance of the machine and the replacement of
parts.
Note: For any maintenance, revision or repair, engage qualified personnel or call an authorized workshop.
Use only original fuses with the prescribed current intensity.
Caution!
Clean the machine with detergent solutions with special care only when necessary . Adhere to all
instructions of the detergent manufacturer. Wear protective clothes (overalls, gloves, protective glasses, etc.).
Maintenance of the Electric Installation
Maintenance of the electric installation can be performed only by qualified electricians.
Note: In case of a power failure, disconnect the machine from the battery charger immediately. The electric
installation should be periodically inspected and serviced. Any possible failure, such as detached
connections and burned cables, should be attended to immediately.
Checks
A technician, who checks the safe operation of the machine and any possible damages or defects visible
from outside, must inspect the machine:
• Before setting the machine at work
• After appropriate time intervals
• After any changes or repairs
Safety Device Control
Every six months the efficiency of the safety devices should be verified. This inspection should be performed
by qualified personnel authorized by Pioneer Eclipse. To increase the efficiency of the safety devices, a
Pioneer Eclipse technician or authorized service center should perform a complete service of the machine
after every 800 hours of use, or every six months.
Annual Check
6

The responsible person should perform an annual check to determine if the machine complies with the
technical safety standards. After this check, the responsible person should apply a test plate on the machine.
Caution! Danger
To drain liquids used for floor scrubbing, follow local waste disposal standards.
Information concerning Machine Demolition
In case of machine demolition, it is important to subdivide the different types of materials composing the
machine and dispose of the batteries in accordance with local legislation.
7

Preparing and Operating the CleanStar 27R
Safety System
Before using the machine the operator must be familiarized with the safety system.
An Anderson Connector, located near the operator’s right leg when seated, connects the batteries to the
machine. In case of emergency, remove this plug by its handle. This same connection is used to charge the
batteries.
The machine is equipped with a sensor under the seat that, without the operators weight, will not allow the
machine to operate. If the operator leaves the machine without switching it off, the machine will shut down. In
order to restart the machine, sit in the seat, switch off the main switch, wait a few seconds, and restart the
machine.
The recovery tank is equipped with a float that stops the recovery system when the tank is full. To restart the
machine, empty the recovery tank.
The electronic circuit that controls the machine is equipped with a safety system that stops all machine
functions (except traction) when the batteries reach 20% capacity. This system is in place to protect and
lengthen the overall life of the batteries.
The machine is equipped with a combination parking/service brake. The service brake is operated by the
large pedal on the left side of the steering column. The parking brake is activated when the service brake
pedal is completely depressed. To release the parking brake, press down on both the service brake pedal and
the small parking brake release at the top of the service brake pedal at the same time, then release.
Installing the Batteries and Battery Charger
Install the batteries by lifting the recovery tank to
access the battery compartment. Inspect
batteries carefully before installing, thus making
sure that there are no cracks in the cases.
Never add distilled water after recharging the
batteries. For proper battery connections,
contact surfaces should be clean. Apply a film of
grease or vaseline to terminal clamps or
connections. During transit, the batteries may
lose some charge. If so, give a freshening
charge before operating the machine.
Note: Connections to + are RED;
connections to - are BLUE.
Battery Instructions:
When charging the batteries, leave the battery
cover open.
Keep away from open flames.
Caution! Battery liquids are corrosive.
Do not cause sparks near the batteries.
Battery gases are explosive.
Do not cause any short-circuits.
Do not invert polarities.
8

Install the battery charger in a ventilated and dry place, far
from heat sources and corrosive environments. Make sure
that the voltages are correct (see the data plate located on the
battery charger). Protect the mains with a delayed switch or
with a load fuse higher than the maximum power consumption
of the battery charger. Observe the polarity of the battery
socket (cables are identified by symbols + red and - black).
Choosing the cleaner solution
For a proper cleaning of the floor, it is important to choose the appropriate cleaner solution. Your Amano
Pioneer Eclipse Authorized Distributor can recommend the appropriate Amano Pioneer Eclipse cleaner for
your particular needs. It is recommended to use a low-sudsing detergent solution, or an anti-foaming
additive, in order not to damage the vacuum motor.
Starting and Preparing the Machine
After charging, detach the battery charger plug coming from the machine socket. Then, connect the plug of
the machine to the socket. Close the battery cover. Turn the master key switch to operate the machine.
Scrubbing
To begin scrubbing, select the proper scrubbing pressure and switch ON the Solution Flow Switch and the
Vacuum Switch. The pads or brushes and vacuum motor will begin to operate as soon as the accelerator is
depressed. The pads and vacuum will automatically stop five seconds after the accelerator is released.
Adjust pad or brush pressure with the knob on the dashboard by selecting CLEAN, SCRUB, STRIP, or
HEAVY STRIP. The solution flow is adjusted by a handle on the dash.
When the scrubbing operation is completed, turn OFF the Solution Flow Switch and Brush Switch before
switching the vacuum OFF so that the recovery system can retrieve all solution from the floor.
If the floor is very dirty or for a deep scrub prior to recoating, a double scrubbing operation is recommended.
On the first pass, scrub the floor with the brushes ON and the solution flow ON but with the vacuum OFF.
Start the brushes and pass the machine over the floor surface, leaving the cleaner solution on the floor to
dissolve the dirt. On the second pass, bring the squeegee in contact with the floor and turn the vacuum
motor ON to rescrub the floor and retrieve the solution.
Water filling and discharge, tank cleaning
Before every scrubbing operation, open the solution tank and fill it with the proper quantity of water and
cleaner.
The machine is equipped with two discharge hoses, one for the solution tank on the right side of the back of
the machine, and one for the recovery tank on the left side of the back of the machine. At the end of the
scrubbing operation, discharge excess solution from the solution tank and dirty liquid from the recovery tank
by means of the hoses. Rinse both tanks after each use, and thoroughly clean the tanks and membrane at
least once each week.
9
PROPOSITION 65 WARNING
Battery posts, terminals, and related accessories
contain lead and lead compounds, chemicals known
to the State of California to cause cancer and
reproductive harm. Wash hands after handling.
Squeegee adjustment
The squeegee must be adjusted to get a perfectly dry floor. The machine is equipped with a parabolic-
shaped squeegee. This type of squeegee performs very well in collecting water from the floor to the suction
hose, but is particularly sensitive to the levelness to the floor.
Therefore, adjust first the angle of contact with the knob at the center of the squeegee assembly. The best
pressure is achieved when the edge of the rear blade touches the floor at an angle of approximately 60° -
45° to the floor.
To adjust the squeegee pressure, adjust the position of the wheels, raising them to increase the pressure or
lowering to decrease. If the pressure is too high, the rear blade will touch the floor with its side surface, and
not with its edge. If the pressure is too low, the edge doesn’t work well and leaves water on the floor,
particularly on an uneven floor.
Drying may be negatively affected by a faulty suction operation. If the suction hose doesn’t work well, drying
will continue to be bad, even with all adjustment attempts. In this case:
a) Thoroughly clean the suction hoses, inlets and filters and the squeegee itself.
b) Check vacuum motor operation.
c) Confirm that all inspection openings of the tank are closed.
Pad or Brush replacement
Before replacing the pads or brushes, remove the key from the control dashboard to avoid any accidental
starting of the motors that could cause damage or injury.
Remove the brush cover by loosening the knob and rotating the brush cover out and back.
Release the RIGHT pad driver or brush by rotating it COUNTER-CLOCKWISE.
Release the LEFT pad driver or brush by rotating it CLOCKWISE.
To attach new pads or brushes, reverse the above procedure.
10

Machine Care
11
Maintenance Schedule
Caution!
Only qualified personnel authorized by Amano Pioneer Eclipse should perform each maintenance and repair
operation not described here as ordinary maintenance.
After Each Use
Clean the recovery tank.
Clean the filter of the vacuum motors.
Check the filter of the clean water tank.
Check the condition of the suction pipes and of the squeegee; clean if necessary.
Weekly
Check the condition of brushes.
Check the condition of the rubber squeegee blades.
Monthly
Check the condition of the scrubbing solution delivery valve.
Every six months, check the condition of the brushes.
Squeegee Blade Replacement
The squeegee blades should be replaced when the contact edge becomes worn, since the perfection of the
edge is essential for perfect drying. To replace the blades, the squeegee should be removed from the
machine. With the squeegee support in the UP position, remove the suction pipe from the squeegee and
partially unscrew the screws. Remove the squeegee from the machine. Remove the screws on the front part
and on the rear part of the squeegee, the steel straps, and the worn rubber blades. Perform the inverse
procedure to change the blades, and reassemble the squeegee. Replace the squeegee on the machine and
adjust.
Vacuum Motor Maintenance
The vacuum motors must be checked and cleaned. The brushes should be checked every six months and
replaced, if necessary.
After removing the key from the dashboard, remove the vacuum motor by loosening the knobs and removing
the connection plug. Release the sponge filter under the motors so that it can be cleaned and replaced.
Check the suction fan from the hole located in the front part of the vacuum motor. By a visual check, the fan
should appear undamaged and well cleaned. To check the brushes, first remove the plastic cap, then
unscrew the screws and remove the two plastic brush supports. Once checked and replaced (if necessary),
the brushes can be easily remounted by reassembling all elements.
Diagnostic Messages
The machine is equipped with a system of flashing light bars to alert the operator of system faults or other
problems. Use the key below to diagnose system faults.
10 bars: High Battery Voltage
9 bars: Solenoid Brake Fault
8 bars: Control System Fault
7 bars: Throttle Fault
6 bars: Inhibit Active
5 bars: Vacuum Motor Fault
4 bars: Freewheel Active
3 bars: Brush Motor Fault
2 bars: Traction Motor Fault
1 bar: Low Battery Voltage

Machine Diagram and Parts List
12
Dash Panel: CleanStar 27R
Scrubbing
Pressure
Vacuum
On/Off
Solution
Flow
On/Off
Drive
Forward/
Reverse
Horn Hour
Meter Charge
Indicator
Solution
Flow
Adjustment
Key
Switch
Diagnostic
Interface

13
Ref# Part # Qty Description
1 PY625 1 SWITCH
2 IN005 4 SNAP SWITCH
3 PY592 1 SETTING CABLE
4 PY591 1 BATTERY INDICATOR
5 IN053 1 PRESS SWITCH
6 IN064 1 KEY SWITCH
7 PY526 1 CONNECTOR
8 PY527 1 CONNECTOR
9 PY473 1 CONNECTOR
10 PY474 1 CONNECTOR
11 PY472 2 CONNECTOR
12 PY482 2 CONNECTOR
13 MI015 1 SEAT
14 MO227 1 36V 600W ELECTROMOTOR WHEEL
16 PY032 2 BATTERY CHARGE PLUG
17 PY299 6 2-POLE CONNECTOR
18 PY300 6 2-POLE CONNECTOR
20 PY275 2 PLUG
21 PY276 2 PLUG
22 PY498 1 REVERSE MOTION BUZZER
24 PY585SMP 1 CONTROL CARD
25 MA032 1 SQUEEGEE JACK
26 PY507 1 COIL
27 RB020 1 SOLENOID VALVE
28 MO231 1 36V MOTOR
29 PY072 2 PLUG 175 A
31 CW082 1 ELECTRIC CABLE
32 CW083 1 ELECTRIC CABLE
33 BT065 6 6V 240A BATTERY
34 PY001 5 BATTERY CONNECTION CABLE
35 IN5005 2 MICRO
36 PY249 3 DIODE
37 MO234 1 36V GEAR MOTOR
38 GL018 1 FLOAT
39 MO181 1 36V VACUUM MOTOR
40 PY587 2 FLASHING LIGHT 12V
41 PY590 1 ADVANCEMENT PEDAL
42 PY301 1 3-POLE CONNECTOR
43 PY302 1 3-POLE CONNECTOR
44 MI068 1 HORN
45 PY598 1 CAPACITOR
46 CW087 1 NEGATIVE CABLE
47 CW086 1 POSITIVE CABLE
48 PY608 2 CONNECTION
49 PY609 2 CONNECTION
50 PY606 1 HOUR COUNTER
51 CW091 1 NEGATIVE CABLE
52 PY506 1 PRESS SWITCH
53 KIT635 1 2-POLE CONNECTOR
54 KIT636 1 2-POLE CONNECTOR
55 KIT629 1 6-POLE CONNECTOR
56 KIT630 1 6-POLE CONNECTOR
Wiring Schematic: CleanStar 27R
Drawing appears on next pages

Wiring Schematic: CleanStar 27R
14

15

Tanks & Cover Group: CleanStar 27R
16

Ref# Part # Qty Description
1 PY587 2 FLASHING LIGHT 12V
2 CO170 1 VAC MOTOR COVER
3 VV412 6 SCREW
4 MV035 2 BLACK PLASTIC HINGE
5 DD451 6 SELF-LOCKING NUT
6 SB149 1 RECOVERY TANK
7 RO403 8 INOX WASHER
8 VE443 8 SCREW
9 PT141 2 RECOVERY TANK PLATE
10 VA415 6 SELF-THREADING SCREW
11 MI015 1 SEAT
12 VE460 4 SCREW
13 VT001 2 SCREW
14 VE441 2 SCREW
15 RO403 2 INOX WASHER
16 ST090 1 REAR CARTER BRACKET
17 MI137 1 CATCH
18 CC014 1 BELT
19 PT184 1 PLATE
20 GR134 1 GASKET
21 CA130 1 LIFT SQUEEGEE MOTOR
CARTER
22 VA424 4 SCREW
23 DT154 4 TANK SPACER
24 SB148 1 SOLUTION TANK
25 PT188 1 PLATE
26 PY072 1 PLUG
28 VC426 2 SCREW
29 RO403 2 INOX WASHER
30 TA036 1 SOLUTION TANK PLUG
31 FT043 1 FILTER
32 VE465 4 SCREW
33 RO502 4 INOX WASHER
35 RT048 4 WHEEL
Ref# Part # Qty Description
36 BO014 4 SH.ABS.WH.BUSH D=13
37 VP5007 2 KNOB
38 CA131 1 RIGHT BRUSH COVER
39 PA198 1 RIGHT PROTECTION
40 LM408 1 RIGHT BUMPER SHEET
41 BP223 1 RT BRUSH COVER BUMPER
42 ML002 4 GALVANIZED SPRING
43 ST088 1 RIGHT BRACKET
44 VA401 4 SCREW
45 TG103 1 DASH BOARD PLATE
46 LM432 1 SUPPORT PLATE
47 SB150 1 DASH BOARD SUPPORT
48 VS423 2 SCREW
49 ST089 1 LEFT BRACKET
50 PA199 1 LEFT PROTECTION
52 VT001 6 SCREW
53 CA154 1 LEFT BRUSH COVER
54 LM407 1 LEFT BUMPER SHEET
55 BP222 1 LFT BRUSH COVER BUMPER
56 MI180 1 BELT TIE-ROD
57 DD405 1 INOX NUT
58 DT153 2 SPACER
59 RO403 4 INOX WASHER
60 VE444 4 SCREW
61 DD453 4 INOX SELF-LOCKING NUT
62 KIT593 1 RIGHT BRUSH
COVER (CS27R)
KIT594 1 COVER, RH SIDE BRUSH,
VERSION (CS3100R)
63 KIT623 1 LEFT BRUSH COVER
64 VA401 4 SCREW
65 CA153 1 PLASTIC COVER
66 PA207 1 PLASTIC COVER
67 VE460 2 SCREW
68 RO404 2 INOX WASHER
69 IS013 1 VAC MOTOR SILENCER
17
Tanks & Cover Group: CleanStar 27R

Frame Group: CleanStar 27R
18

Ref# Part # Qty Description
1 SC003 2 BEARING SUPPORT
2 AL063 1 BRUSH LIFT SHAFT
3 LV270 2 BRUSH LEVER
4 BO147 2 BUSH
5 VE481 2 SCREW
6 DD454 4 INOX SELF-LOCKING NUT
7 VE483 1 SCREW
8 DD455 1 INOX SELF-LOCKING NUT
9 SN004 1 JOINT
10 MV084 1 SCREW-JACK REDUCTION
11 SP020 1 TENSION PIN
12 MA032 1 SCREW JACK
13 VE448 1 SCREW
14 DD453 1 INOX SELF-LOCKING NUT
15 TP111 1 FRAME
16 ST091 1 RIGHT BRACKET
17 VV441 4 SCREW
18 DD455 4 INOX SELF-LOCKING NUT
19 RO510 2 WASHER
20 DD454 4 INOX SELF-LOCKING NUT
21 RO404 4 INOX WASHER
22 ST091 1 RIGHT BRACKET
23 VV466 4 SCREW
24 BO147 4 BUSH
25 ST086 1 RIGHT BRACKET
26 DD455 4 INOX SELF-LOCKING NUT
27 LV273 2 BRUSH SUPPORT LEVER
28 BO147 6 BUSH
Ref# Part # Qty Description
29 VE483 4 SCREW
30 ST087 1 LEFT BRACKET
31 DD405 4 INOX NUT
32 TB010 1 HOSE
33 TA007 2 PLUG
34 RO402 2 INOX WASHER
35 DD452 2 INOX SELF-LOCKING NUT
36 TB170 1 SOLUTION DISTRIBUTOR
37 TB010 1 HOSE
38 TB138 1 HOSE
39 VB411 2 SCREW
40 RO453 2 INOX WASHER
41 FS024 1 14/24 INOX CLAMP
42 VE492 2 SCREW
44 RO510 2 WASHER
45 LV271 2 BRUSH LEVER
46 VE465 2 SCREW
47 RO455 2 INOX WASHER
48 RO502 2 INOX WASHER
49 VB410 2 SCREW
50 PT140 1 DISTRIBUTOR PLATE
51 CV004 2 PLATE
52 RO402 4 INOX WASHER
53 RO453 4 INOX WASHER
54 VC412 4 SCREW
55 MV086 1 BRUSH SUPPORT WEIGHT
56 VE492 4 SCREW
19
Frame Group: CleanStar 27R
Table of contents
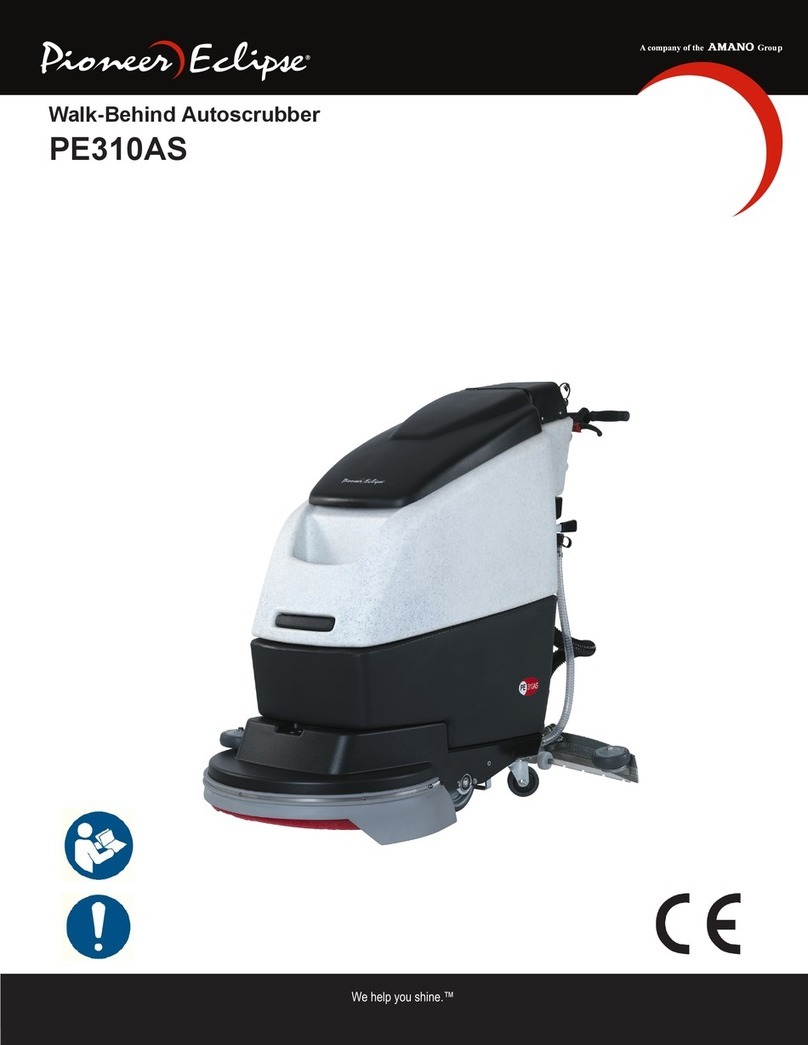
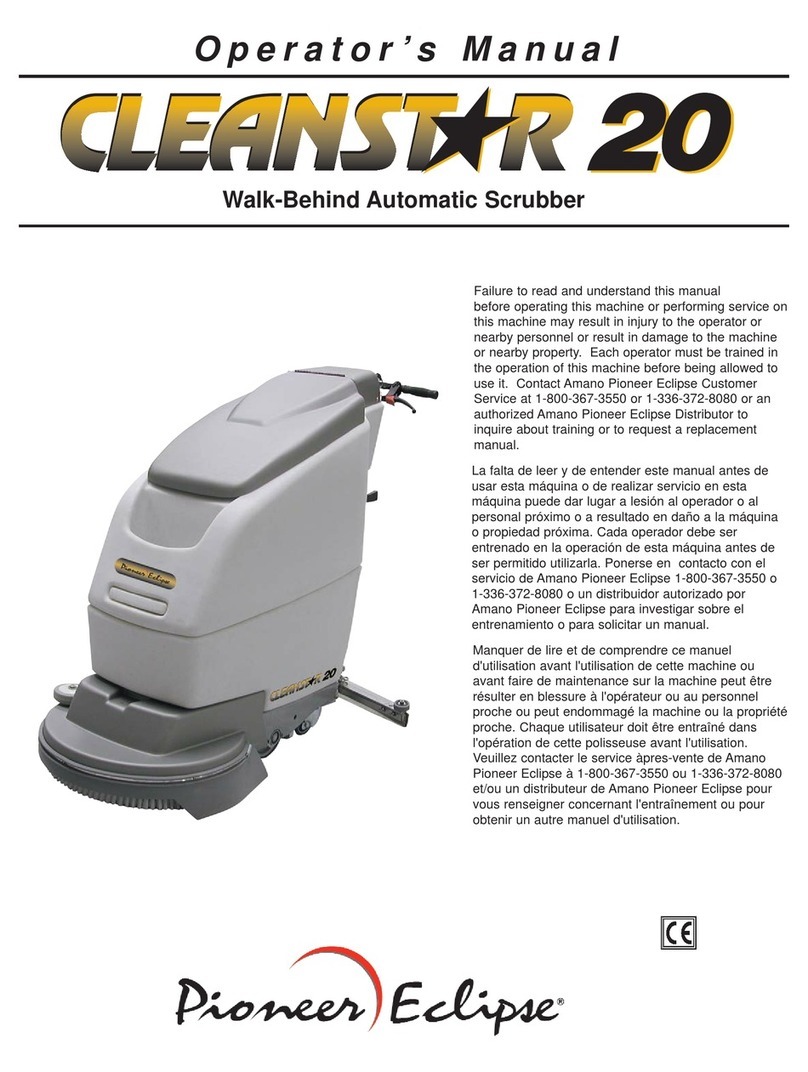
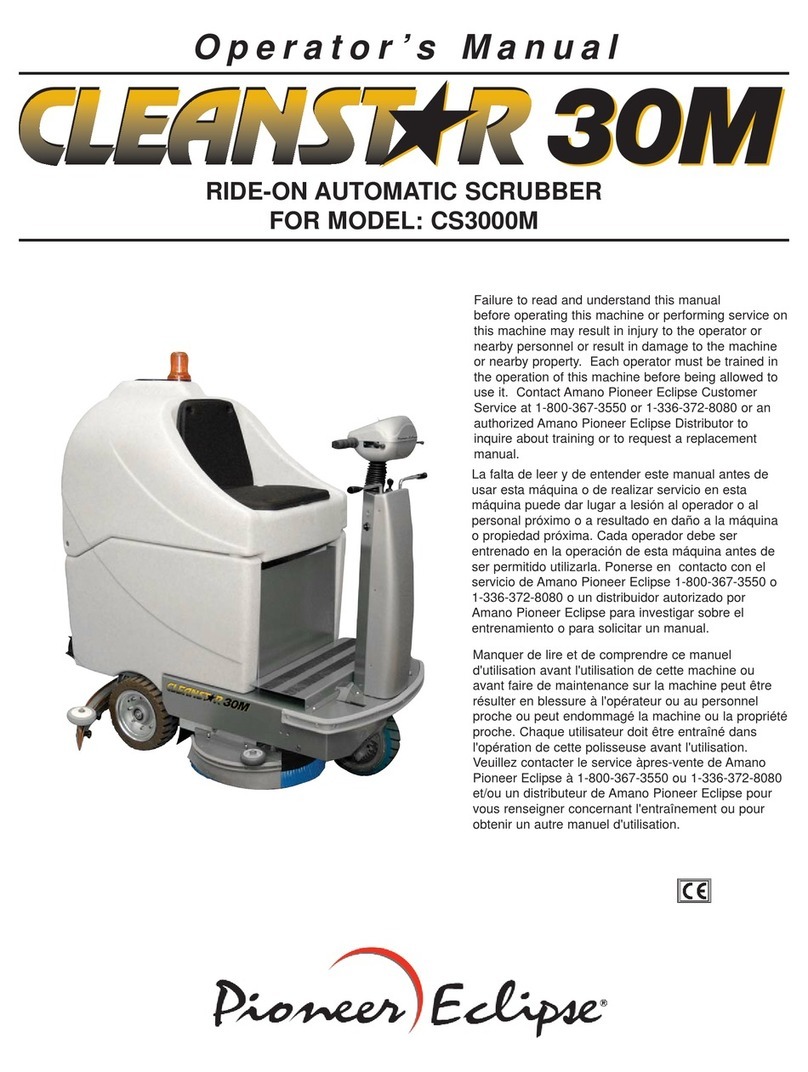
Other Pioneer Eclipse Scrubber manuals
Popular Scrubber manuals by other brands

Nilfisk-Advance
Nilfisk-Advance ROS1300 Service manual

Truvox
Truvox Multiwash MW 340 Instruction guide

Axminster Trade
Axminster Trade AT154CEH Original instructions

Wetrok
Wetrok Duomatic Esprit operating instructions

Guangzhou Baiyun Cleaning Tools
Guangzhou Baiyun Cleaning Tools A508 product manual

Nilfisk-Advance
Nilfisk-Advance CA 340 ET Use and maintenance manual