manuals.online logo
Brands
  1. Home
  2. •
  3. Brands
  4. •
  5. Pioneer
  6. •
  7. Car Receiver
  8. •
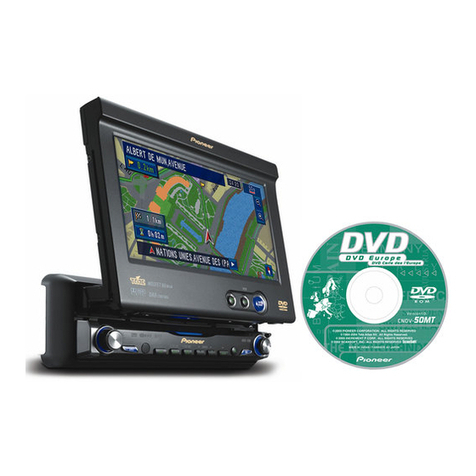
  9. Pioneer AVH-P7500DVD User manual

Pioneer AVH-P7500DVD User manual

Operation Manual
7 inch Wide Fully Motorized LCD Color Display with 5-
Channel High-Power DVD/VCD/CD eceiver
AVH-P7500DVD
English
Thank you for buying this Pioneer product.
Please read through these operating instructions so you will know how to operate
your model properly. After you have finished reading the instructions, put them away
in a safe place for future reference.
Be sure to read this
!Playable discs 8
!DVD video disc region numbers 8
!When an operation is prohibited 12
Precautions
IMPORTANT SAFE UARDS 7
To ensure safe driving 7
To avoid battery exhaustion 7
Before You Start
Information to User 8
For Canadian model 8
About this unit 8
About this manual 9
After-sales service for Pioneer products 9
Product registration 10
Precautions 10
Features 10
To protect the LCD screen 11
For viewing LCD comfortably 11
Condition memory 11
What the marks on DVDs indicate 12
Resetting the microprocessor 12
Use and care of the remote control 13
About the XM READY mark 13
Feature demo 14
Whats What
Head unit 15
Remote control 17
Basic Operations
Turning the unit on and selecting a
source 20
Loading a disc 21
Adjusting the volume 21
Turning the unit off 21
Using the rear display 21
Displaying the navigation video 22
Touch panel key basic operation 23
Opening and closing the LCD panel 24
Changing the wide screen mode 25
Adjusting the picture adjustment 26
Protecting your unit from theft 27
Tuner
Listening to the radio 28
Introduction of advanced tuner
operation 29
Storing and recalling broadcast
frequencies 29
Tuning in strong signals 29
Storing the strongest broadcast
frequencies 30
P aying DVD audio discs
Listening a DVD audio 31
Operating the DVD menu 32
Skipping back or forward to another
group 32
Stopping playback 32
Introduction of advanced DVD audio
operation 33
Repeating play 33
Playing tracks in a random order 33
Scanning tracks 33
Pausing DVD audio playback 34
Browsing still pictures 34
Frame-by-frame playback 34
Slow motion playback 35
Searching for a desired track or group 35
Changing audio language during playback
(Multi-audio) 36
Changing the subtitle language during
playback (Multi-subtitle) 36
Contents
En
2
Changing the viewing angle during playback
(Multi-angle) 36
Using the dynamic range control 37
P aying DVD video discs
Watching a DVD video 38
Operating the DVD menu 39
Skipping back or forward to another title 39
Stopping playback 39
Introduction of advanced DVD video
operation 40
Repeating play 40
Pausing DVD video playback 40
Frame-by-frame playback 40
Slow motion playback 41
Searching for a desired scene, starting
playback from a specified time 41
Changing audio language during playback
(Multi-audio) 42
Changing the subtitle language during
playback (Multi-subtitle) 42
Changing the viewing angle during playback
(Multi-angle) 43
Using the dynamic range control 43
P aying Video CDs
Watching a Video CD 44
Operating the menu 45
Stopping playback 45
Introduction of advanced Video CD
operation 46
Repeating play 46
Pausing Video CD playback 46
Frame-by-frame playback 47
Slow motion playback 47
Searching for a desired scene, starting
playback from a specified time 47
Selecting audio output 48
P aying CDs
Listening a CD 49
Stopping playback 49
Introduction of advanced CD operation 50
Repeating play 50
Playing tracks in a random order 50
Scanning tracks of a CD 50
Pausing CD playback 51
Entering disc titles 51
Using CD TEXT functions 52
P aying MP3
Listening MP3 53
Stopping playback 54
Introduction of advanced MP3 operation 54
Repeating play 55
Playing tracks in a random order 55
Scanning folders and tracks 55
Pausing MP3 playback 55
Displaying text information on MP3
discs 56
Scrolling text information in the display 56
Selecting tracks from the file name list 56
TV tuner
Watching the TV tuner 57
Introduction of advanced TV tuner
operation 58
Storing and recalling broadcast stations 58
Storing the strongest broadcast stations
sequentially 58
Confirming current channel and other
settings 59
Mu ti-CD P ayer
Listening a CD 60
50-disc multi-CD player 60
Introduction of advanced multi-CD player
operation 61
En 3
Contents
Repeating play 61
Playing tracks in a random order 61
Scanning CDs and tracks 62
Pausing CD playback 62
Using ITS playlists 62
Using disc title functions 63
Using CD TEXT functions 65
Using compression and bass emphasis 65
XM tuner
Listening to the XM 66
Introduction of advanced XM tuner
operation 67
Switching the XM display 67
Storing and recalling broadcast stations 67
Swiching the XM channel select setting 67
Selecting the XM channel directly 68
Display the ID code 68
DVD P ayer
Playing a disc 69
Turning the DVD player on or off 70
Selecting a disc 70
Introduction of advanced DVD player
operation 70
Repeating play 70
Pausing disc playback 71
Playing tracks in a random order 71
Scanning tracks of a CD 71
Using ITS playlists 71
Using disc title functions 71
Audio Adjustments
Introduction of audio adjustments 72
Using the equalizer 73
Using the auto-equalizer 74
Using the position selector 75
Using balance adjustment 75
Adjusting source levels 75
Using the direct control 76
Using the Dolby Pro Logic B76
Setting the speaker setting 77
Selecting a cut-off frequency 78
Adjusting the speaker output levels 78
Adjusting the speaker output levels using a
test tone 78
Using the time alignment 79
Auto TA and EQ (auto-time alignment and
auto-equalizing) 80
Setting up the DVD p ayer
Introduction of DVD setup adjustments 83
Setting the subtitle language 83
Setting the audio language 84
Setting the menu language 84
Setting assist subtitles on or off 84
Setting angle icon display 85
Setting the aspect ratio 85
Setting the parental lock 85
To play back bonus groups 86
Setting remote control code type 86
Initia Settings
Adjusting initial settings 88
Switching the warning tone 88
Switching the auxiliary setting 88
Correcting distorted sound 88
Switching the sound muting/attenuation 89
Switching the automatic disc playback 89
Switching the dimmer setting for sub-
display 89
Resetting the audio functions 89
Mixing navigation voice/beep and audio
sound 90
Other Functions
Introduction of setup adjustments 91
Setting the video input 91
Contents
En
4
Setting for back-up camera 91
Setting the clock 92
Setting the automatic open function 92
Adjusting the LCD panel slide position 93
Setting the video of rear display 93
Displaying the navigation video on rear
display 93
Using the AUX source 93
Switching the background display 94
Using the P M button 95
Additiona Information
Troubleshooting 96
Error messages 98
Understanding auto TA and EQ error
messages 99
DVD player and care 100
DVD discs 100
CD-R/CD-RW discs 100
MP3 files 101
Using the display correctly 102
Language code chart for DVD 104
Terms 105
Specifications 108
Index 110
En 5
Contents
Selecting fine audio equipment such as the unit you’ve just purchased is only the start of your
musical enjoyment. Now it’s time to consider how you can maximize the fun and excitement your
equipment offers. This manufacturer and the Electronic Industries Association’s Consumer
Electronics Group want you to get the most out of your equipment by playing it at a safe level. One
that lets the sound come through loud and clear without annoying blaring or distortion—and, most
importantly, without affecting your sensitive hearing.
Sound can be deceiving. Over time your hearing “comfort level” adapts to higher volumes of
sound. So what sounds “normal” can actually be loud and harmful to your hearing. Guard against
this by setting your equipment at a safe level BEFORE your hearing adapts.
To establish a safe level:
•Start your volume control at a low setting.
•Slowly increase the sound until you can hear it comfortably and clearly, and without distortion.
Once you have established a comfortable sound level:
•Set the dial and leave it there.
Taking a minute to do this now will help to prevent hearing damage or loss in the future. After
all, we want you listening for a lifetime.
We Want You Listening For A Lifetime
Used wisely, your new sound equipment will provide a lifetime of fun and enjoyment. Since
hearing damage from loud noise is often undetectable until it is too late, this manufacturer and the
Electronic Industries Association’s Consumer Electronics Group recommend you avoid prolonged
ex
p
osure to excessive noise. This
l
ist of sound
l
eve
l
s is inc
l
uded for
y
our
p
rotection
.
D
ec
i
bel
Leve
l Exampl
e
30
Quiet
l
i
b
rar
y
, soft whis
p
er
s
4
0
L
ivin
g
room, refri
g
erator,
b
edroom awa
y
from traffi
c
50
L
i
g
ht traffic, norma
l
conversation,
q
uiet office
60 Air conditioner at 20 feet, sewing machine
70 Vacuum cleaner, hair dryer, noisy restaurant
80 Average city traffic, garbage disposals, alarm clock at two feet
THE FOLLOWING NOISES CAN BE DANGEROUS UNDER CONSTANT EXPOSURE
90 Subway, motorcycle, truck traffic, lawn mower
100 Garbage truck, chain saw, pneumatic drill
120 Rock band concert in front of speakers, thunderclap
140 Gunshot blast, jet plane
180 Rocket launching pad
Information courtesy of the Deafness Research Foundation.
En
6
IMPORTANT SAFEGUARDS
Please read all of these instructions regarding
your display and retain them for future refer-
ence.
1Read this manual fully and carefully before
operating your display.
2Keep this manual handy for future refer-
ence.
3Pay close attention to all warnings in this
manual and follow the instructions care-
fully.
4Do not allow other persons to use this sys-
tem until they have read and understood
the operating instructions.
5Do not install the display where it may (i)
obstruct the drivers vision, (ii) impair the
performance of any of the vehicles operat-
ing systems or safety features, including
air bags, or (iii) impair the drivers ability to
safely operate the vehicle.
6As with any accessory in your vehiclesin-
terior, the display should not divert your
attention from the safe operation of your
vehicle. f you experience difficulty in oper-
ating the system or reading the display,
please park safely before making adjust-
ments.
7Do not attempt to install or service your
display by yourself. nstallation or servi-
cing of the display by persons without
training and experience in electronic
equipment and automotive accessories
may be dangerous and could expose you
to the risk of electric shock or other ha-
zards.
8Please remember to wear your seat belt at
all times while operating your vehicle. f
you are ever in an accident, your injuries
can be considerably more severe if your
seat belt is not properly buckled.
To ensure safe driving
WARNING
!To avoid the risk of accident and the potential
violation of applicable laws, this unit is not for
use with a video screen that is visible to the
driver.
!In some countries or states the viewing of
images on a display inside a vehicle even by
persons other than the driver may be illegal.
Where such regulations apply, they must be
obeyed.
This unit detects whether your cars parking
brake is engaged or not, and prevents you
from watching a DVD or TV on this display
while driving. When you attempt to watch a
DVD or TV, the warning V DEO V EW NG S
NOT AVA LABLE WH LE DR V NG will appear
on the screen.
To watch a DVD or TV on this display, park
your car in a safe place and apply the parking
brake.
When using a disp ay connected
to REAR MON TOR OUT
This unitsREAR MON TOR OUT is for con-
nection of a display to enable passengers in
the rear seats to watch the DVD or TV.
WARNING
NEVER install the display in a location that en-
ables the driver to watch the DVD or TV while
driving.
To avoid battery exhaustion
Be sure to run the vehicle engine while using
this unit. Using this unit without running the
engine can result in battery drainage.
WARNING
Do not use with vehicles that do not feature an
ACC position.
Precautions
En 7
Section
01
Precautions
Information to User
Alteration or modifications carried out without
appropriate authorization may invalidate the
users right to operate the equipment.
For Canadian mode
This Class B digital apparatus complies with
Canadian ICES-003.
About this unit
The tuner frequencies on this unit are allo-
cated for use in North America. Use in other
areas may result in improper reception.
Important (Seria number)
The serial number is located on the bottom of
this unit. For your own security and convenience,
be sure to record this number on the enclosed
warranty card.
P ayab e discs
DVD, Video CD and CD discs that display the
logos shown below can be played back on this
player.
DVD audio
DVD video
Video CD
CD
Note
This player can only playback discs bearing the
marks shown above.
DVD video disc region numbers
DVD video discs that have incompatible region
numbers cannot be played on this player. The
region number of the player can be found on
the bottom of this unit.
The illustration below shows the regions and
corresponding region numbers.
Before You Start
En
8
Section
02
When combined with a Pioneer
navigation unit
When you use this unit with the Pioneer DVD
navigation unit, make sure that you use the
map disc CNDV-21. This manual explains the
operations with the combination use of them.
If you do not use the map disc CNDV-21 but
use an older version one with the navigation
unit, this unit may have some failures or in-
conveniences as follows:
!ENTERTA NMENT button and W DE button
cannot function as NAV MENU button
and NAV button.
!NAV (navigation unit), such as DVD video
from the combined Pioneer navigation unit
with DVD video playback, cannot be se-
lected as a source.
!In NAV M X NG, the other settings be-
sides ALL cannot be selected.
!Voice-recognition control system of the
combined Pioneer navigation unit cannot
function properly. On the one hand the
voice operation for navigation can be used,
but on the other, the voice operation related
to AV equipment cannot be used.
!Route guidance of the combined Pioneer
navigation unit cannot be function properly
when some other source image is dis-
played. On the one hand the guidance by
voice can be informed, but on the other, the
guidance by display (e.g. switching to an
enlarged map of an intersection) cannot be
informed.
!NAV BG P CT (navigation unit wall paper)
cannot be selected as a background dis-
play.
About this manua
This unit features a number of sophisticated
functions ensuring superior reception and op-
eration. All the functions have been designed
for the easiest possible use, but many are not
self-explanatory. This operation manual will
help you benefit fully from this units potential
and to maximize your listening enjoyment.
We recommend that you familiarize yourself
with the functions and their operation by read-
ing through the manual before you begin
using this unit. It is especially important that
you read and observe precautions on the next
page and in other sections.
After-sa es service for
Pioneer products
Please contact the dealer or distributor from
where you purchased this unit for after-sales
service (including warranty conditions) or any
other information. In case the necessary infor-
mation is not available, please contact the
companies listed below:
Please do not ship your unit to the companies
at the addresses listed below for repair without
advance contact.
U.S.A.
Pioneer Electronics (USA) Inc.
CUSTOMER SUPPORT DIVISION
P.O. Box 1760
Long Beach, CA 90801-1760
800-421-1404
CANADA
Pioneer Electronics of Canada, Inc.
CUSTOMER SATISFACTION DEPARTMENT
300 Allstate Parkway
Markham, Ontario L3R OP2
(905) 479-4411
1-877-283-5901
For warranty information please see the Lim-
ited Warranty sheet included with this unit.
Before You Start
En 9
Section
02
Before You Start
Product registration
Visit us at the following site:
1 Register your product. We will keep the details
of your purchase on file to help you refer to
this information in the event of an insurance
claim such as loss or theft.
2 Receive updates on the latest products and
technologies.
3 Download owners manuals, order product
catalogues, research new products, and
much more.
Precautions
CAUTION:
USE OF CONT OL O ADJUSTMENT O
PE FO MANCE OF P OCEDU ES
OTHE THAN THOSE SPECIFIED HE EIN
MAY ESULT IN HAZA DOUS ADIATION
EXPOSU E.
CAUTION:
THE USE OF OPTICAL INST UMENTS
WITH THIS P ODUCT WILL INC EASE
EYE HAZA D.
!Keep this manual handy as a reference for
operating procedures and precautions.
!Always keep the volume low enough so you
can hear sounds outside of the car.
!Protect this unit from moisture.
!If the battery is disconnected or dis-
charged, the preset memory will be erased
and must be reprogrammed.
Features
Touch pane key operation
It is possible to operate this unit by using
touch panel key.
DVD audio p ayback
It is possible to play back DVD audio.
DVD video p ayback
It is possible to play back DVD video, DVD-R
(video mode) and DVD-RW (video mode).
Video CDs featuring PBC compatibi ity
It is possible to play back Video CDs featuring
PBC (playback control).
CD p ayback
Music CD/CD-R/CD-RW playback is possible.
MP3 fi e p ayback
It is possible to play back MP3 files recorded
on CD-ROM/CD-R/CD-RW (ISO9660 Level 1/
Level 2 standard recordings).
!Supply of this product only conveys a li-
cense for private, non-commercial use and
does not convey a license nor imply any
right to use this product in any commercial
(i.e. revenue-generating) real time broad-
casting (terrestrial, satellite, cable and/or
any other media), broadcasting/streaming
via internet, intranets and/or other net-
works or in other electronic content distri-
bution systems, such as pay-audio or
audio-on-demand applications. An inde-
pendent license for such use is required.
For details, please visit
http://www.mp3licensing.com.
NTSC compatibi ity
This unit is NTSC system compatible. When
connecting other components to this unit, be
sure components are compatible with the
same video system or else images will not be
correctly reproduced.
Before You Start
En
10
Section
02
Do by Digita /DTS compatibi ity
You can enjoy the atmosphere and excitement
provided by DVD movie and music software
featuring 5.1 channel recordings.
!Manufactured under license from Dolby La-
boratories. Dolby,Pro Logic, and the
double-D symbol are trademarks of Dolby
Laboratories.
!DTSand DTS Digital Surroundare regis-
tered trademarks of Digital Theater Sys-
tems, Inc.
Mu ti-aspect
Switching between wide screen, letter box and
panscan display is possible.
Mu ti-audio
You can switch between multiple audio sys-
tems recorded on a DVD as desired.
Mu ti-subtit e
You can switch between multiple subtitle lan-
guages recorded on a DVD as desired.
Mu ti-ang e
You can switch between multiple viewing an-
gles of a scene recorded on a DVD as desired.
Note
This product incorporates copyright protection
technology that is protected by method claims of
certain U.S. patents and other intellectual prop-
erty rights owned by Macrovision Corporation
and other rights owners. Use of this copyright
protection technology must be authorized by
Macrovision Corporation, and is intended for
home and other limited viewing uses only unless
otherwise authorized by Macrovision Corporation.
Reverse engineering or disassembly is
prohibited.
To protect the LCD screen
!Do not allow direct sunlight to fall on the
display when this unit is not being used.
Extended exposure to direct sunlight can
result in LCD screen malfunction due to
the resulting high temperatures.
!When using a portable phone, keep the an-
tenna of the portable phone away from the
display to prevent disruption of the video by
the appearance of spots, colored stripes,
etc.
For viewing LCD comfortab y
Due to its construction, the view angle of the
LCD screen is limited. The viewing angle (verti-
cal and horizontal) can be increased, however,
by using BR GHT to adjust the black density of
the video. When using for the first time, adjust
the black density in accordance with the view-
ing angle (vertical and horizontal) to adjust for
clear viewing. D MMER can also be used to
adjust the brightness of the LCD screen itself
to suit your personal preference.
Condition memory
This function memorizes audio language, sub-
title language, angle number and aspect ratio
made during disc playback for up to 30 discs.
Without any special operations, the final set-
ting details during playback of a disc are mem-
orized. The next time a disc is played, the
previous settings are automatically applied.
!With some discs, audio language and sub-
title language are automatically specified,
in which case condition memory does not
function.
!When the number of discs exceeds 30, set-
tings for the latest disc replace those for
the least recent disc.
Before You Start
En 11
Section
02
Before You Start
What the marks on DVDs
indicate
The marks below may be found on DVD disc
labels and packages. They indicate the type of
images and audio recorded on the disc, and
the functions you can use.
Mark Meaning
2Indicates the number of audio sys-
tems.
2Indicates the number of subtitle lan-
guages.
3Indicates the number of viewing an-
gles.
16 : 9 LB Indicates the picture size (aspect ratio:
screen width-to-height ratio) type.
1
ALL
Indicates the number of the region
where playback is possible.
When an operation is prohibited
When you are watching a DVD and attempt to
perform an operation, it may not be performed
by the programming on the disc. When this
happens, this unit indicates the icon on the
screen.
!The icon may not appear in certain dis-
cs.
Resetting the microprocessor
Pressing RESET lets you reset the micropro-
cessor to its initial settings without changing
the condition memory.
The microprocessor must be reset under the
following conditions:
!Prior to using this unit for the first time
after installation
!If the unit fails to operate properly
!When strange or incorrect messages ap-
pear on the display
1 Turn the ignition switch OFF.
2 Press RESET with a pen tip or other
pointed instrument.
RESET button
Notes
!When using with a Pioneer navigation unit, if
you press RESET, be sure ACC OFF is se-
lected. If ACC ON is selected, correct opera-
tion may not be possible even if you press
RESET.
!After completing connections or when you
want to erase all memorized settings or return
the unit to its initial (factory) settings, switch
your engine ON or set the ignition switch to
ACC ON before pressing RESET.
Before You Start
En
12
Section
02
Use and care of the remote
contro
Insta ing the battery
Slide the tray out on the back of the remote
control and insert the battery with the plus (+)
and minus () poles pointing in the proper di-
rection.
!When using for the first time, pull out the
film protruding from the tray.
WARNING
Keep the battery out of the reach of children.
Should the battery be swallowed, immediately
consult a doctor.
CAUTION
!Use only one CR2025 (3 V) lithium battery.
!Remove the battery if the remote control is not
used for a month or longer.
!Do not recharge, disassemble, heat or dispose
of the battery in fire.
!Do not handle the battery with metallic tools.
!Do not store the battery with metallic materi-
als.
!In the event of battery leakage, wipe the re-
mote control completely clean and install a
new battery.
!When disposing of used batteries, please
comply with governmental regulations or en-
vironmental public institutions rules that
apply in your country/area.
Using the remote contro
Point the remote control in the direction of the
front panel to operate.
!The remote control may not function prop-
erly in direct sunlight.
Important
!Do not store the remote control in high tem-
peratures or direct sunlight.
!Do not let the remote control fall onto the
floor, where it may become jammed under the
brake or accelerator pedal.
About the XM READY mark
The XM READY mark printed on the front
panel indicates that the Pioneer XM tuner
(sold separately) can be controlled by this unit.
Please inquire to your dealer or nearest
authorized Pioneer service station regarding
the XM tuner that can be connected to this
unit. For XM tuner operation, please refer to
the XM tuner owners manual.
Notes
!XM Satellite Radio is developing a new band
of radio in the U.S.A.
The system will use direct satellite-to-receiver
broadcasting technology to provide listeners
in their cars and at home with crystal-clear
sound seamlessly from coast to coast. XM will
create and package up to 100 channels of di-
gital-quality music, news, sports, talk and chil-
drens programming.
!The XM name and related logos are trade-
marks of XM Satellite Radio Inc.
Before You Start
En 13
Section
02
Before You Start
Feature demo
Important
The red lead (ACC) of this unit should be con-
nected to a terminal coupled with ignition switch
on/off operations. If this is not done, the vehicle
battery may be drained.
The feature demo automatically starts when
power to this unit is turned off while the igni-
tion switch is set to ACC or ON. Pressing and
holding ATT during feature demo operation
cancels the feature demo mode. Press and
hold ATT again to start the feature demo
mode. Remember that if the feature demo
continues operating when the car engine is
turned off, it may drain battery power.
Before You Start
En
14
Section
02
Head unit
1D SPLAY button
Press to select different displays.
2PGM button
Press to operate the preprogrammed func-
tions for each source. (Refer to Using the
PGM button on page 95.)
3Ambient light sensor
Senses ambient light. This system automati-
cally adjusts the brightness of the display to
compensate for ambient light.
4FL P DOWN/CLOCK button
Press to turn the LCD panel horizontal tem-
porarily when the LCD panel is upright.
Press to display the clock for eight seconds
when the LCD panel is closed.
5OPEN/CLOSE button
Press to open or close the LCD panel.
6ENTERTA NMENT button
Press to switch between the background
displays.
7W DE button
Press to select a desired mode for enlarging
a 4:3 picture to a 16:9 one.
8MENU button
Press and hold to display the picture adjust-
ment menu.
9RESET button
Press to return to the factory settings (initial
settings).
aDETACH button
Press to remove the front panel from the
head unit.
bEJECT button
Press to eject a disc from this unit.
1
2
4
5
3
6
7
a
c
d
e
f
g
h
i
l
k
9
j
8
b
Whats What
En 15
Section
03
Whats What
cJoystick
Move to do manual seek tuning, fast for-
ward, reverse and track search controls.
Also used for controlling functions.
dEQ button
Press to select various equalizer curves.
eBAND/ESC button
Press to select among three FM and one
AM bands and cancel the control mode of
functions.
fANGLE (+/) button
Press to change the LCD panel angle.
gATT button
Press to quickly lower the volume level, by
about 90%. Press once more to return to the
original volume level.
hBACK button
Press to return to the previous display.
iREAR ON button
Press to switch between the video sources
(such as DVD or AV) on rear display.
jDisc loading slot
Insert a disc to play.
kSOURCE button
This unit is turned on by selecting a source.
Press to cycle through all of the available
sources.
lVOLUME
Rotate to increase or decrease the
volume.
Whats What
En
16
Section
03
Remote contro
1Remote control selection switch
Switch to change the setting of the remote
control. For details, refer to etting remote
control code type on page 86.
2VOLUME button
Press to increase or decrease the volume.
3REAR.S button
Press to switch between the video sources
(such as DVD or AV) on rear display.
4SOURCE button
This unit is turned on by selecting a source.
Press to cycle through all of the available
sources.
5Joystick
Move to do manual seek tuning, fast for-
ward, reverse and track search controls.
Also used for controlling functions.
6D RECT button
Press to do direct channel select when
using an XM tuner.
7Remote control operation mode switch
Switch the operation mode between AVH,
DVD and TV modes. Normally, set to AVH.
!AVH For common operation of this
unit
!DVD Only for DVD player operation
!TV Only for TV tuner operation
For details, refer to witching the remote
control operation mode switch on the next
page.
8PGM button
Press to operate the preprogrammed func-
tions for each source. (Refer to Using the
PGM button on page 95.)
9BACK button
Press to return to the previous display.
5
2
3
4
7
9
a
b
c
d
f
g
e
h
i
k
m
o
q
r
j
8
6
1
Whats What
En 17
Section
03
Whats What
aBAND/ESC button
Press to select among three FM and one
AM bands and cancel the control mode of
functions.
bENTERTA NMENT button
Press to switch between the background
displays.
cFORWARD (n) button
Press to perform fast forward playback.
dSTOP (g) button
Press to stop playback.
eNEXT (p) button
Press to go to the next track (chapter).
fCLEAR button
Press to cancel the input number while
010 are used.
g010 buttons
Press to directly select the desired track,
preset tuning and disc. 16buttons can op-
erate the preset tuning for the tuner or disc
number search for the multi-CD player.
hPREV OUS (o) button
Press to return to the previous track (chap-
ter).
iREVERSE (m) button
Press to perform fast reverse playback.
jPLAY/PAUSE (f) button
Press to switch sequentially between play-
back and pause play.
kANGLE button
Press to change the viewing angle during
DVD playback.
lSTEP (r/q) button
Press to move ahead one frame at a time
during DVD/VideoCD playback. Press and
hold for one second to activate slow play-
back.
mSUBT TLE (SUB.T) button
Press to change the subtitle language dur-
ing DVD playback.
nD SPLAY button
Press to select different displays.
oAUD O button
Press to change the audio language during
DVD playback.
pRETURN button
Press to display the PBC (playback control)
menu during PBC playback.
qMENU button
Press to display the DVD menu during DVD
playback.
rTOP MENU (TOP.M) button
Press to return to the top menu during DVD
playback.
Switching the remote contro
operation mode switch
There are three remote control operation
modes on the remote control.
AVH mode operation
When operating this unit by remote control,
normally switch the mode to AVH.
!The joystick on the remote control can per-
form the same operations as it on the head
unit. Furthermore, the joystick can perform
the same operations as the touch panel
keys a,b,cand d.
Whats What
En
18
Section
03
!16can perform the same operations as
the preset tuning keys P1P6and the
disc selection keys 0106.
If you want to select a disc located at 7
to 12 by using 16, press and hold the
corresponding numbers such as 1for
disc 7, until the disc number appears in
the display.
DVD mode operation
If you switch the mode to DVD, the joystick
and 010 operations are changed for DVD
player.
%When you want to operate the follow-
ing functions, switch the mode to DVD:
!When browsing still pictures by using the
joystick. (Refer to Browsing still pictures on
page 34.)
!When operating the DVD menu by using
the joystick. (Refer to Operating the DVD
menu on page 39.)
!When operating the PBC menu by using
010. (Refer to Watching a Video CD on
page 44.)
!When specifying group, title or track by
using 010. (Refer to pecifying group on
page 35, pecifying title on page 42 and pe-
cifying track on page 48.)
Note
When switching the mode to DVD, you cannot
use these buttons; BACK,ENTERTA NMENT,
D SPLAY,PGM and D RECT.
TV mode operation
If you use REAR MON TOR OUT, you can
watch the TV picture on the rear display inde-
pendently. To operate the TV on the rear dis-
play independently, switch the mode to TV.In
this case, the joystick operation is changed for
TV.
%When you want to operate the follow-
ing functions only on the rear display,
switch the mode to TV:
!When performing manual or seek tuning by
moving the joystick left or right. (Refer to
Watching the TV tuner on page 57.)
!When recalling preset stations by moving
the joystick up or down. (Refer to toring
and recalling broadcast stations on page
58.)
!When confirming current channel and
other settings by pressing D RECT. (Refer to
Confirming current channel and other set-
tings on page 59.)
Note
When switching the mode to TV, you cannot use
except the joystick, D RECT,SOURCE and
VOLUME.
Whats What
En 19
Section
03
Whats What
Turning the unit on and
se ecting a source
1
1Source icon
Shows what the source has been selected.
You can select a source you want to listen to. If
DVD AUTO PLAY is turned on, load a disc in
this unit to switch to DVD (refer to witching
the automatic disc playback on page 89).
%When using the touch panel keys,
touch the source icon and then touch the
desired source name.
The source names are displayed and select-
able ones are highlighted.
!DVD Built-in DVD player
!S-DVD DVD player/multi-DVD player
!M-CD Multi-CD player
!TUNER Tuner
!TV Television
!AV Video input
!EXT1 External unit 1
!EXT2 External unit 2
!AUX AUX
!XM XM tuner
!NAV Navigation unit
!OFF Turn the unit off
#When the source icon is not displayed, you
can display it by touching the screen.
#Even if you touch the source icon while oper-
ating the menu, you cannot select a source.
#To return to the playback display, touch ESC.
%When using the button, press SOURCE
to select a source.
Press SOURCE repeatedly to switch between
the following sources:
XM (XM tuner)TUNER (tuner)TV (televi-
sion)AV (video input)DVD (built-in DVD
player)S-DVD (DVD player/multi-DVD
player)M-CD (multi-CD player)EXT1 (ex-
ternal unit 1)EXT2 (external unit 2)AUX
(AUX)NAV (navigation unit)
Notes
!In the following cases, the sound source will
not change:
When a unit corresponding to each source
is not connected to this unit.
When no disc is set in this unit.
When no disc is set in the DVD player.
When no magazine is set in the multi-CD
player.
When no magazine is set in the multi-DVD
player.
When the AUX (auxiliary input) is set to off
(refer to page 88).
When the AV (video input) is not set to
V DEO (refer to page 91).
!External unit refers to a Pioneer product (such
as one available in the future) that, although
incompatible as a source, enables control of
basic functions by this unit. Two external units
can be controlled by this unit. When two exter-
nal units are connected, the allocation of
them to external unit 1 or external unit 2 is
automatically set by this unit.
!When this units blue lead is connected to the
cars auto-antenna relay control terminal, the
cars antenna extends when this units se-
lected source is the tuner. To retract the anten-
na, switch to a source other than tuner.
Basic Operations
En
20
Section
04

Other manuals for AVH-P7500DVD

5

Other Pioneer Car Receiver manuals

Pioneer DEH-1900UB User manual

Pioneer

Pioneer DEH-1900UB User manual

Pioneer FX-M2017ZSA X1B User manual

Pioneer

Pioneer FX-M2017ZSA X1B User manual

Pioneer DEH-P4100SD User manual

Pioneer

Pioneer DEH-P4100SD User manual

Pioneer DVH-P5050MP User manual

Pioneer

Pioneer DVH-P5050MP User manual

Pioneer DEH-X8600BT/XNEW5 User manual

Pioneer

Pioneer DEH-X8600BT/XNEW5 User manual

Pioneer XV-DV360 User instructions

Pioneer

Pioneer XV-DV360 User instructions

Pioneer DEH-X8700DAB User manual

Pioneer

Pioneer DEH-X8700DAB User manual

Pioneer KEH-1900R User manual

Pioneer

Pioneer KEH-1900R User manual

Pioneer SUPER TUNERIII D DEH-P7950UB User manual

Pioneer

Pioneer SUPER TUNERIII D DEH-P7950UB User manual

Pioneer DEH-1700 User manual

Pioneer

Pioneer DEH-1700 User manual

Pioneer AVX-P7000CD UC User manual

Pioneer

Pioneer AVX-P7000CD UC User manual

Pioneer P1280 - CDX CD Changer User manual

Pioneer

Pioneer P1280 - CDX CD Changer User manual

Pioneer DEH-4400BT User manual

Pioneer

Pioneer DEH-4400BT User manual

Pioneer AVH-P4400BH User manual

Pioneer

Pioneer AVH-P4400BH User manual

Pioneer Premier DEH-P760MP User manual

Pioneer

Pioneer Premier DEH-P760MP User manual

Pioneer DEH-4300UB/XNUC User manual

Pioneer

Pioneer DEH-4300UB/XNUC User manual

Pioneer DEH-600BT User manual

Pioneer

Pioneer DEH-600BT User manual

Pioneer DEH-P7000BT XN User manual

Pioneer

Pioneer DEH-P7000BT XN User manual

Pioneer DEH-2750 User manual

Pioneer

Pioneer DEH-2750 User manual

Pioneer DEH-P6000UB - Radio / CD User manual

Pioneer

Pioneer DEH-P6000UB - Radio / CD User manual

Pioneer Super Tuner III D DEH-P4800MP User manual

Pioneer

Pioneer Super Tuner III D DEH-P4800MP User manual

Pioneer DEH-P390MP - Premier Radio / CD User manual

Pioneer

Pioneer DEH-P390MP - Premier Radio / CD User manual

Pioneer DEH-P3000IB User manual

Pioneer

Pioneer DEH-P3000IB User manual

Pioneer DEH-P5100UB - Radio / CD User manual

Pioneer

Pioneer DEH-P5100UB - Radio / CD User manual

Popular Car Receiver manuals by other brands

Soundstream VR-450 owner's manual

Soundstream

Soundstream VR-450 owner's manual

JVC KD-R921BT instructions

JVC

JVC KD-R921BT instructions

Kenwood KRC-603C instruction manual

Kenwood

Kenwood KRC-603C instruction manual

Voxx Electronics SB10MD1 owner's manual

Voxx Electronics

Voxx Electronics SB10MD1 owner's manual

Kenwood KDC-8024 Service manual

Kenwood

Kenwood KDC-8024 Service manual

Belva BDMRS5 owner's manual

Belva

Belva BDMRS5 owner's manual

Sony XR-1800R Installation/connections

Sony

Sony XR-1800R Installation/connections

Alpine DVA-9965 owner's manual

Alpine

Alpine DVA-9965 owner's manual

poly-planar MR45 owner's manual

poly-planar

poly-planar MR45 owner's manual

Sony MDX-400 operating instructions

Sony

Sony MDX-400 operating instructions

Boss Audio Systems 637UA user manual

Boss Audio Systems

Boss Audio Systems 637UA user manual

Kenwood KDC-MP828 Service manual

Kenwood

Kenwood KDC-MP828 Service manual

Sony CDX-GS500R operating instructions

Sony

Sony CDX-GS500R operating instructions

Philips CED320X/78 user manual

Philips

Philips CED320X/78 user manual

JVC KS-FX321S Service manual

JVC

JVC KS-FX321S Service manual

JVC KD-R606 Installation & connection manual

JVC

JVC KD-R606 Installation & connection manual

Blaupunkt Montreux RCM 45 operating instructions

Blaupunkt

Blaupunkt Montreux RCM 45 operating instructions

Clas Ohlson SM-8366UBR manual

Clas Ohlson

Clas Ohlson SM-8366UBR manual

manuals.online logo
manuals.online logoBrands
  • About & Mission
  • Contact us
  • Privacy Policy
  • Terms and Conditions

Copyright 2025 Manuals.Online. All Rights Reserved.