manuals.online logo
Brands
  1. Home
  2. •
  3. Brands
  4. •
  5. Pioneer
  6. •
  7. Car Receiver
  8. •
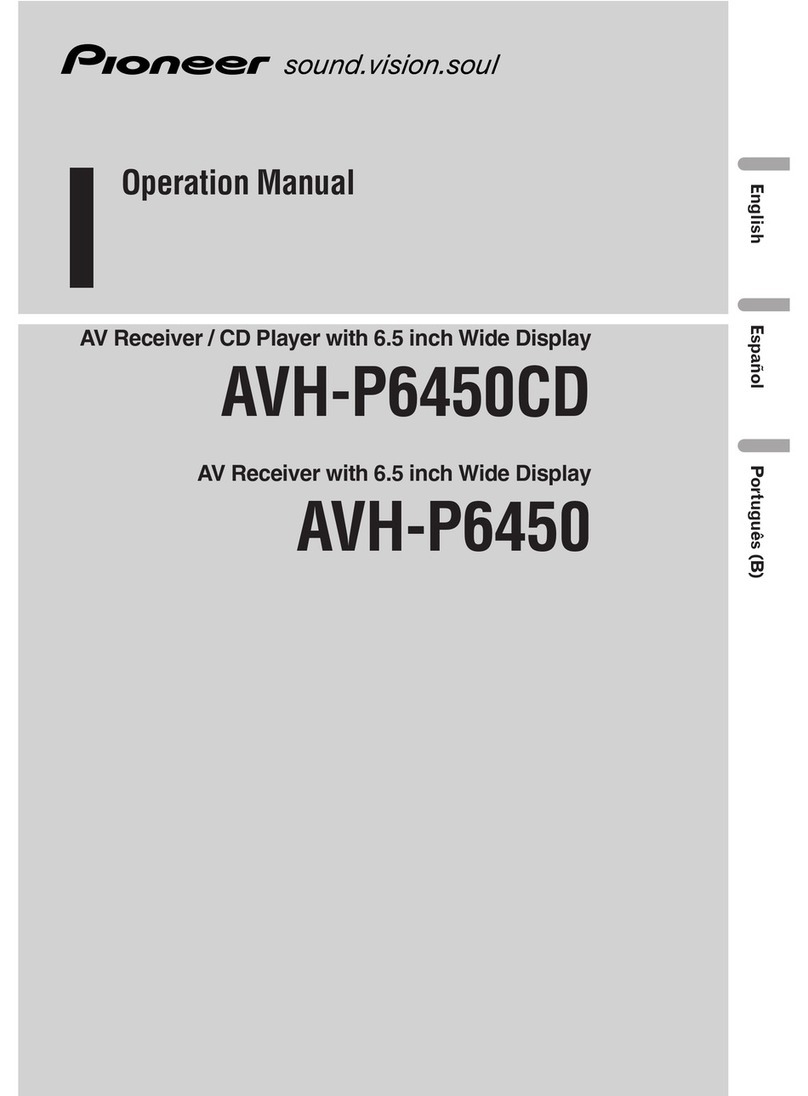
  9. Pioneer DEH-P9400MP User manual

Pioneer DEH-P9400MP User manual

nssmssssusnnas
Features..............................................................
5
Aboutthis product
..............................................5
Aboutthis manual
..............................................5
Important ..........................................................
5
Precaution
..........................................................
5
After-salesservicefor Pioneerproducts............6
AboutWMA........................................................
6
SwitchingtheDSPsetting
mode........................
7
AbouttheXMREADY[mark
................................
7
Resettingthemicroprocessor
............................7
Aboutthedemomodes......................................
8
Aboutbasicdisplays..........................................
8
Remotecontrollerandcare................................
9
Usingthesteeringremotecontroller................
IO
Detachingandreplacingthefrontpanel ..........
11
~s~8880~~~~~~~~nsns~~~~~~”
Turningasourceonoroff ................................
12
SOFTKEYoperation ........................................12
Keyguidanceindicator ....................................
14
s~*D~s~n~s~~*l*~~s~s~~~~*~~~~~~~~~~~~*
layandindicators.......................................
Basicoperation
..................................................
15
Storingandrecalling
broadcaststations
...........
.I5
Tunerfunctionmenu
..........................................
16
Storingthestrongeslbroadcaststations..
.........
.I6
Selectingstationsfromthepresetchannel
list .............................................................(16
Tuninginstrongsignals
....................................16
c ~~DD~*~~Pnss~~*~~s~=~~
Displayandindicators
......................................
17
Basicoperation................................................17
Switchingandscrollingthetitle ......................
18
Built-inCDplayerfunctionmenu
......................18
Repeatingplay..................................................
18
Playingtracksin randomorder ........................19
ScanningtracksofaCD ..................................
19
Selectingtracksfromthetracktitlelist ............
‘19
PausingCDplayback
........................................
20
Enteringdisctitles ............................................20
~~~~~~~ooDB~~oB~~“oD~~~~*~ 1
Displayandindicators
......................................
21
Basicoperation................................................
21
Switchingandscrollingthetitle ......................22
MP3~MA functionmenu................................23
Repeatingplay..................................................
23
Playingtracksin randomorder ........................23
Scanningfoldersandtracks ............................24
PausingMP3/WMAplayback ..........................24
r s”s~~DR~BYB~~Ys”~YB~~~~~~~
icators ......................................
50-discmulti-CDplayer
....................................
25
Basicoperation................................................
25
Selectingadiscdirectly
....................................
25
Switchingandscrollingthetitle ......................26
Multi-CDplayerfunctionmenu ........................26
Repeatingplay..................................................
26
Playingtracksin randomorder ........................27
ScanningCDsandtracks ................................27
Selectingtracksfromthetracktitle list ............27
Selectingdiscsfromthedisctitlelist ..............28
PausingCDplayback
........................................
28
Enteringdisctitles ............................................
28
Usingcompressionanddynamicbass
emphasis..................................................
29
UsingITSmemory ..........................................
29
r ss~*J*sOB~sas”~~ss~~~“~~~~~~~~~~
Displayandindicators
......................................31
Basicoperation................................................
31
Storingandrecallingservices..........................32
Changingband ................................................
32
Switchingthedisplay ......................................32
Switchingtheroadtrafficflashandtransport
flashonor off ............................................
32
Dynamiclabelfunction ....................................
33
DABtunerfunctionmenu ................................33
Settingtheannouncementsupport
interruption ..............................................
34
Selectingservicesfromthepreset
servicelist ................................................
34
Selectingservicesfromtheavailable
servicelist ................................................
34
SearchingtheavailablePTY ............................34
c ds~naRI”““ns*lU*UYnY”~~~~~~~~~~~
ayandindicators
......................................
Basicoperation................................................
35
Storingandrecallingchannels ........................35
Changingband ................................................
36
Switcliingthedisplay ......................................36
XMtunerfunctionmenu ..................................
36
Switchingthechannelinthechannel
category....................................................36
DisplayingtheIDcode(RADIOID) ..................36
LT
II I ~~B~U~“UU”YB”B~~~~~Y~~~~~~~~~~~~~~
andindicators......................................
Basicoperation................................................37
Storingandrecallingbroadcaststations..........37
Changingband ................................................38
TVtunerfunctionmenu
....................................
38
Selectingchannelsfromthepreset
channellist ................................................
38
“~a~lu~ansoon~~“l~BB~~
Operationrnodes..............................................39
3,waynetworkmode........................................39
Standardmode ................................................
39
Extrafunctions ................................................40
Audiomenu......................................................40
Usingpositionselector ....................................40
Usingtimealignment ......................................41
Usingbalanceadjustment................................41
Adjuslingtimealignment..................................41
Aboutthenetworkfunction ..............................42
Usingsubwooferoutput ..................................
45
Usingthehighpassfilter..................................45
Usingtheauto-equalizer..................................46
Recallingequalizercurves................................46
Adjustingequalizercurves
................................
46
Adjusting.I3-bandgraphicequalizer
................
47
UsingoctaverandBBEsound..........................47
Usingloudness................................................48
Usingsoundfieldcontrol,octaverand
BBEsound ................................................
48
Usingautomaticsoundlevelizer......................49
Adjustingsourcelevels....................................49
Switchingthedigitalattenuator........................49
Creatingtheauto-equalizercurve ....................50
mgsmenu ........................................
Usingreversemode ........................................52
Usingthefeaturedemo....................................52
Switchingtheauxiliarysetting..........................52
Switchingthetelephonemuting/attenuation
setting ......................................................53
Settingthewarningtone ..................................53
Settingtheautomaticopeningfunction............53
e ..........................................
Displayingandsettingtheclock ......................54
Changingthedisplayform ..............................55
Adjustingthebrightness..................................55
Switchingthedimmersetting ..........................55
Selectingthewallpaperpattern ......................55
Settingtheentertainmentdisplay ....................55
UsingtheAUXsource......................................
57
Usingthetelephonemuting/attenuation..........57
sasaaaasaasanass
CDplayerandcare ..........................................58
MP3andWMAfiles ..........................................59
Understandingbuilt-inCDplayererror
messages..................................................61
Understandingauto-equalizingerror
messages..................................................61
Terms ..............................................................62
Specifications..................................................63
DSPadjustmentvaluerecordsheet..................64
Selecting fine audio equipment such asthe unit you’ve just purchased is only the start of yam
musical enjoyment. Now it’s time to consider how YOLIcan maximize the fun andexcitement you]
equipment olfers. This manufacturer and the Electronic Industries Association’s Consumer
Electronics Group want you to get the most out of your equipment by playing it at a safelevel.
One that lets the sound come through loud and clear without annoying blaring or distortion-and.
most importantly, without affecting
YOLK
sensitive hearing.
Sound can be deceiving. Over time your hearing “comfort level” adapts to higher volumes of
sound. So what sounds“normal” can actually be loud and harmful to your hearing. Guard against
this by setting your equipment at a safe level BEFORE your hearing adapts.
To @S~~~~~§~a safelevel:
e Startyour volume control at 2low setting.
CJSlowly increasethe sound until you can hear it comfortably andclearly, and without distor-
tion.
Taking aminute to do this now will help to preventhearingdamageor loss in thefuture. After all,
Used wisely, your new sound uipment will provide a lil’etime of fun and enjoyment. Since
hearing damagefrom loud noise is often undetectable until it is too late, this manufacturer and the
Electronic Industries Association’s Consumer Electronics Group recommend you avoid pro-
exposure to excessive noise. This list of sound levels is included for your protection.
I ~~a~~~~e
30 Quiet library, soft whispers
40 Living room, refrigerator, bedroomaway from traffic
SO Light traffic, normal conversation,quiet office
60 Air conditioner at20 feet, sewing machine
70 Vacuum cleaner,hair dryer, noisy restmrant
80 sals.alarmclock at two feet‘
90 Subway,motorcycle, truck traKic, lawn mower
100 Garbagetruck, chain saw,pneumaticdrill
120 Rock baudconcertin front of speakers,thundercl;lp
140 Gunshotblast.jet plane
180 Rocket launchingpad
VOLUiVlE
EJECTbutton
RESETbutton
I buttons
SOURCEbutton Multi-function buttons BANDbutton
BACKbutton NEXTbutton
A steering remote controller that enables remote operation of the head unit is supplied. Operation is
the same as when using buttons on the head unit.
ATT button
This lets you quickly
lower volume level (by
about 90%). Press
once more to return to
the original volume
EMNUbullanEMNUbullan -
a/v lluttollsa/v lluttolls -
FUNCTIONbutton --- +Q@+FUNCTIONbutton ---
level.level.
SOURCEbutton
AUDIObutton
VOLUME --
Raiseor
lower the
volume.
ible to play back music stored on
CD/CD-R/CD-RW formats.
It is possible to play back ~P3/W~A files
recorded on CD-ROiViICD-R/CD-RW discs
(recordings complying with 1809660 Level
l/Level 2 standards). (See page 62.)
The tuner frequencies on this product are allo-
cated for use in North America. Use in other
areas may result in improper reception.
nit in Standard mode when a
speaker system for 3-way network mode is
connected to this unit. This may cause dam-
age to the speakers.
This product features a number of sophisticated
functions ensuring superior reception and oper-
ation. All are designed for the easiest possible
use, but many are not self-explanatory. This
operation manual is intended to help you bene-
fit fully from their potential and to maximize your
listening enjoyment.
We recommend that you familiarize yourself
with the functions and their operation by read-
ing through the manual before you use this
product. It is especially important that you read
and observe the “Precaution” on this page and
in other sections.
This manual explains head unit operation. You
can perform the same operations with the steer-
ing remote controller.
The serial number of this device is located on
the bottom of this product. For your own securi-
ty and convenience, be sure to record this num-
ber on the enclosed warranty card.
-
0 Keep this manual handy as a reference for
operating procedures and precautions.
* Always keep the volume low enough for out-
side sounds to be audible.
* Protect the product from moisture.
* If the battery is disconnected, the preset
memory will be erased and must be repro-
grammed.
Please contact the dealer or distributor from
where you purchased the product for its after-
sales service (including warranty conditions) or
any other information. In case the necessary
information is not available, please contact the
companies listed below:
Please do not ship your product to the compa-
nies at the addresses listed below for repair
without advance contact.
Pioneer Electronics (USA) Inc.
CUSTOMER SUPPORT UIVISIOI\I
P.O. Box 1760
Long Beach, CA 90001-l 760
600-421-I 404
Pioneer Electronics of Canada, Inc.
CUSTOMER SATISFACTION DEPARTMENT
300 Allstate Parkway
Markham, Ontario L3R OP2
(905) 4794411
I-877-283-5901
For warranty information please see the Limited
Warranty sheet included with your product.
The Windows MediaTM logo printed on the box
indicates that this product can playback the
WMA data.
WMA is short for Windows Media Audio and
refers to an audio compression technology that
is developed by Microsoft Corporation. WMA
data
can be encoded by using Windows Media
Player version 7, 7.1 or Windows Media Player
for Windows XP.
Microsoft, Windows Nledia, and the Windows
logo are trademarks, or registered trademarks
of fviicrosoft Corporation in the United States
and/or other countries.
Mote:
e Dependingon the application which has performed
the encoding of the WMA files, the operation may
not be normal.
a Dependingon the application which has performed
the encoding of the WMA files, the display of the
album nameand other character information may
not he normal.
This product features two operation modes: the
3-way network mode (NW) and the standard
mode (STD). You can switch between modes
as desired. Initially. the DSP setting is set to the
standard mode (STD).
0 After switching, reset the microprocessor.
s ~$~~~~i~
READY
The “XM READY” mark printed on the front
panel of this product indicates that the Pioneer
Xfvl tuner (sold separately) can be controlled
using this product.
Please inquire of your dealer or nearest autho-
rized Pioneer service station regarding the XM
tuner that can be connected to this product.
For operation of the XM tuner, refer to the XM
tuner owner’s manual.
0 TheXM Satellite Radio is developing a new bandof
radio in the U.S.A.
Thesystem will usedirect satellite-to-receiver
broadcasting technology to provide listeners in their
cars and at home with crystal-clear sound seam-
lessly from coast to coast. XM will createand pack-
age up to 100 channels of digital-quality music,
news. sports, talk and children’s programming.
0 TheXM nameand relatedlogos are trademarks of
XM Satellite Radio Inc.
The microprocessor must be reset under the
following conditions:
When using this product for the first time after
installation.
When the machine fails to operate properly.
When strange (incorrect) messages appear on
the display.
This product features two demonstration
modes. Otne is the reverse mode and the other
is the feature demo mode.
If you do not carry out an operation within about
30 seconds. screen indicalions will start to
reverse, and then continue reversing every 10
seconds. Pressing the button 5 when power to
this product is switched off while the ignition
switch is se’cto ACC or ON cancels the reverse
mode. Press the button 5 again to start the
reverse mode.
The feature demo automatically starts when
power to this product is switched off while the
ignition switch is set to ACC or ON. Pressing
the button 6 during feature demo operation can-
cels the feature demo mode. Press the button 6
again to start the feature demo mode.
Remember that if the feature demo continues
operating when the car engine is switched OFF,
it may drain battery power.
0 The red lead(KC) of this product sl~ouldbe con-
nectedto aterminal coupled with ignition switch ON
or OFFoperations. If this is ijot done, the vehicle
battery [nay bedrained.
QWhen the source is off, you can checkthe location
of “5” and “F;’ by turning on the feature demo.
This product is equipped with two forms of
basic display. You can select the desired dis-
play.
- Fordetails, refer to “Changing the display form” on
page55.
0 Keep the lithium battery oul of the reach of
children. Should Ihe battery be swallowed,
immediately consult a doctor.
* Do not recharge, disassemble. heat or dis-
pose of the battery in a fire.
* Use a CR2032 (3 V) lithium battery only.
Never use other types of battery with this unit.
* Do not handle the battery with metallic tools.
* Do not store the lithium battery with metallic
materials.
0 When disposing of used batteries, please
comply with governmental regulations or
environmental public institution’s rules that
apply in your country/area.
0 Always check carefully that you are loading
the battery with its (+) and (-) poles facing in
the proper directions.
e Replacethe battery with a CR2032lithium battery.
e Replace
thebattery
in the unit using a non lnetallic
tapered instrument.
* Donot operatethis unit while manipulating the
steering wheel asthis might result in a traffic acci-
dent
0 ITyou haveto operatethis unil unavoidably when
driving, paycareful attention to the road aheadto
avoid the risk of being involved in atraffic accident.
0 If any of the following problems occur, immediately
slop usiny this unit and
corwlt
with thedealer
from whom you purchased it:
-the unit is smoking.
-the unit is emitting an abnormal odor.
-a foreign object has enteredthe unit.
- liquid has beenspilled
011
or into the unit.
If you continue to usethis unit without rectifying
the problem, the unit inay bedamagedbadly,
resulting in a serious accident or fire.
0 Do not leavethis unit free (unattached) inside the
car. When the car stops or turns a curve, the unit
might drop on the floor. If the unit rolls underthe
brakepedal, it might prevent the driver from brak-
ing properly, causing serious trouble. Besure to fix
this unit to the steering wheel.
0 Do not disassemble or modify this unit. To do so
may causea malfunction.
0 If you pressthe FUNCTIONbutton
011
the remote
controller while pressing the BAfQDbutton on it, the
remote controller will not function properly. To can-
cel this setting, press the AUDIObutton on the
remote controller while pressing the BANDbutton
on it to return to the previous setting.
F n
Operation of the FUNCTION button and the
AUDIO button on the remote controller oiffers
from the operation of the FUNC button and the
AUDIO button on the head unit. When operat-
ing the head unit, use the FUND button and the
AUDIO button to select the appropriate menu,
then use the multi-function buttons to select the
mode. When operating the remote controller,
however, switch through the modes as
described below to select ihe mode.
between the following modes:
RPT -$ RDM -+ SCAN -* T.LIST -* PAUSE
--isTTLin
Note:
a Referto “Built-in CDplayerfunction menu” on page
18.
Press AUDIO repeatedly to switch between
he following modes:
5AL - NW -+ POSI -+ T.AL -+ EQI
-+ EQ2 -+ EFFECT -+ LOUD - ASL
- SLA + D.ATT
F/5 + LOUD -+ SFC -+ EQI -+ EQ2
-+ ASL 4 POSI + T.ALl -+ T.AL2 + SW1
+SW2+l-+PFF-+HPFR-+SLA
+ A.EQ + D.ATT
Nota:
QReferto “Audio menu” on page40
The front panel of the head unit is detachable to
discourage theft.
e Rleveruseforce or grip the display tightly when
removing or replacingthe front panel.
e Avoid subjecting the front panelto excessive
shocks.
* Keepthe front panelout of direct sunlight and high
temperatures.
* A few seconds after turning the ignition switch to
ONor OFF,the front panelautomatically moves.
Whenthis happens,your fingers may becaught, so
keepyour handsaway from the panel.
e When removing the front panel, besure to press the
corrugated releasesection on the rear of the front
panelwhile pulling.
I
Take care not to grip the front panel tightly
or drop it.
If the front panel is not detached within five sec-
onds after the ignition is turned off, the warning
tone will sound to remind you to detach the
front panel.
#ok
e You can cancelthe warning tone function. (Referto
page53.)
If the front panel is not detached within five sec-
onds after the ignition is turned off, this function
will open the panel to remind you to detach it.
* You can cancelthe automatic opening function.
(Referto page53.)
Releasesection
You can select the source you want to listen to.
To switch to built-in CD player, load a CD in this
product. (Refer to “Basic operation” on page
‘I7
1.
2.
3.
4.
Press SOURCE repeatedly to switch
between the following sources:
Built-in CD player (MPBIWMA) -+ TV tuner
---BTuner -+ DAB tuner -+ XM tuner ---8‘Multi-
CD player + External unit 1 - External unit
2-+AUX
0 When you press VOLUME. it extends out-
ward so that it becomes easier to turn. To
retract VOLUME, press it again.
Turn v
0 Externalunit refers to a Pioneerproduct (such as
oneavailable in the future) that, although incompat-
ible asa source. enablescontrol of basicfunctions
by this product. Two external units can becon-
trolled bythis product, although “External” is dis-
playedwhether you select external unit 1 or external
unit 2. When two external units are connected, the
allocation of them to external unit 1 or external unit
2 is automatically set by this product.
* In the following cases,the sotrnd source will not
change:
* When no product corresponding to the source is
connected to this product.
* Nodisc is set in this product.
* No magazineis set in the multi-CD player.
* AUX (auxiliary setting) is setto off. (Referto page
52.)
QWhen this product’s blue/white leadis connected to
the car’s auto-antenna relaycontrol terminal, the
car’s auto-antennaextends when this products
source is switched on. To retract the antenna,
switch the source off.
SOFT KEY operation means that the function of
a button changes as indicated on the display.
The multi-function buttons provide SOFT KEY
operation; the functions performed by the but-
tons change according to the function or setting
that has been selected.
Function names
Multi-function buttons
The explanations given in this manual are
based on FORM 1 display. If you have selected
FORM 2, the functions of some of the multi-
function buttons may be different from those
indicated in the manual.
urn 2mt
In this manual, for operations using the multi-
function buttons the function displayed is used
as the name of the function button.
” indicator shows that the multi-function
ly displayed. When this indicator is visible,
press NEXT to switch through the functions of
the multi-function buttons.
B
y to switch between
Note:
e The number of functions or displays switched
through will differ according to tile source or menu
selected.
e When nofunction is indicated for a button, that but-
ton is not currently active.
Here the “random play” function of the built-in
CD player is used as an example to illustrate
operation of the multi-function buttons.
3. Pr XTI:
Press NEXT repeatedly until “FUNC”
appears.
With the switch to the function menu. the
functions of the multi-function bultons also
change simultaneously.
The light illuminates.
* Press RDQl again to turn random play off.
The light goes off.
E?ss to exit me ~~~~~~~~
When the function menu is exited, the lunc-
tions of the multi-function buttons also
change simultaneously.
lltf?:
a You can also turn random play on or off by pressing
in the rarrdom mode.
* If you do not operatethe function within about 30
seconds the display is automatically returned.
Pressing the BAND button immediately cancels
the current menu or mode, and returns to the
basic displays.
0 When the source is the Tuner, IV luner or DAB
tuner and no menu or mode is selected pressing
the BANDbutton hasthe effect of switching bands.
Pressing the BACK button cancels tho current
menu or mode and returns to the previously
selected menu or mode.
B
This product’s display features key guidance
indicators. These light to indicate which of the
uttons you can use).When you’re in
menu; audio menu or the other
they also make it easy to see which
uttons you can use to switch func-
tions on/off, switch repeat selections and per-
form other operations.
Keyguidance indicators
0 In this manual, operation for eachmode is given
mainly in terms of the multi-function buttons.
However,in eachmode, when the key guidance
indicators arelit it is also possible to use r/r/
to operatethe mode.
@Band
BLOC indicator
~@Preset number
@Frequency
@Stereo indicator
ress to s~~e~tahe~~~e~.
Press SOURCE until “Tuner” appears.
0When you press VOLUME, it extends out
ward so that it becomes easier to turn. To
retract VOLUME, press it again.
to a~~~st the v~~~~e.
$0s~te~~me~es~r~~
Press BAND repeatedly to switch between
the following bands:
FM-1 --PIFM-2 + FM-3 --seAM
to tme in to a s~a~~~~”
The frequencies move up or down step by
step.
a If you press and hold 4 or % for about one
second and release, you can perform seek
tuning. Seek tuning lets you skip broad-
casting stations until a broadcast strong
enough for good reception is found.
* If you press and hold Q or b-, you can skip
broadcasting stations. Seek tuning starts
as soon as you release the button.
* Thestereo indicator “CY lights when a stereo sta-
tion is selected.
If you press any of the buttons 1 - 6, you can
easily store up to six broadcast stations for later
recall.
Press Tto lay “‘3II_ ‘ye
Press NEXT until “1” - “6” appears.
a want to
Y9
6
The station is stored in memory under the
selected button.
e Upto 18 FMstations, six for each of the three FM
bands, and six AM stations can bestored in memo-
ry.
1. PressNEXTto
Press NEXT unt
0 You can also uss to recall broadcast sta-
tions memorized in the buttons 1 - 6.
The tuner function menu has the following func-
tions:
0 If you do not operatethe function within about 30
seconds, the display is automatically returned.
BSfvl (best stations memory) lets you automati-
cally store the six strongest broadcast stations
under the buttons 1 - 6.
‘Searching” appears. The six strongest
broadcast stations will be stored under the
buttons 4 - 6 and in order of their signal
strength.
When finished, “Searching” disappears and
the display switches to the preset channel
list mode.
0To cancel the storage process before it is
completed, press BSM again while
“Searching” appears.
The preset channel list lets you see the list of
preset stations and select one of them to
receive.
~QtU:
e You can also use
the desired station. to select and recall
Local seek tuning lets you tune in only those
broadcast stations with sufficiently strong sig-
nals for good reception.
1. Press
Press LOC repeatedly to switch between the
following settings:
FM: Local OFF - Level 1 -+ Level 2
-+ Level 3 + Level 4
AM: Local OFF + Level 1 -+ Level 2
0 When the local mode is exited except for
“Local OFF” is selected, “LOC” appears on
the basic display.
0 The “Level 4” setting allows reception of only the
strongest stations, while lower settings let you
receiveprogressively weakerstations.
@Source narne
aTrack number
@IDisc title
@Play time
[@Track title
The built-in CD player plays one standard 12
cm or 8 cm (single) CD at a time. Do not use an
adapter when playing an 8 cm CD.
When a CD is inserted, the front panel clos-
es automatically.
* When
you
press VOLUME, it extends out-
ward so that it becomes easier to turn. To
retract VOLUME, press it again.
Turn v
Pressing ti skips io the start of the next
track.
Pressing 4 once skips to the start of the cur-
rent track. Pressing again will skip to the
previous track.
* If you press and hold -a;ior B, you can per--
form fast forward or reverse.
The front panel opens and the CD is ejected.
+ Be sure to close the front panel by press-
ing EJECT after removing the CD.
the front panel left open. If the
front panel is left open, it may resull in injury
in the event of an acciden-i.
ok?:
* You can select CDas the source by pressing
SOURCEwhen a disc is loadedin this product.
a When the front panelis open, multi-function but-
tons are not available.
e Do not insert anything other than a CDinto the CD
loading slot.
* A CDleft partially inserted afler ejection may incur
damageor fall 01.11.
* If a CDcannot be inserted fully or playbackfails,
[makesure the recorded side is down. Pressthe
EJECTand check the disc for damagebefore rein-
serting it.
0 If the built-in CDplayer cannot operate properly, an
error message(such as “ERROR-12”) appearson
the display. Referto “Understanding built-in CD
player error messages” on page61.
QYou can eject ihe CDby pressing and holding
EJECTwith opening the front panelwhen the CD
loading or ejecting cannot operateproperly.
When playing a CD TEXT disc, you can switch
text display such as artist name and track title.
With text longer than 32 letters, you can scroll
to see the rest of the text.
less ~~~~~~~to ~W~~~~Ihe tstse
D.TTL Displays disc title.
DART Disolavs disc artist name.
-f-.-n-L
Displays track title.
TART oisplavs track artist name.
_
Tl-lNDR
Displays thrrnderbolt
animation.
SCROLL Scrolls the displayed title.
TTLt Displays disc title and track
title.
TTL.2 Displays disc title and disc
artist name.
TTL3 Displays track title and track
artist nama. * If you perform track search or fast forvvard/reversc,
repeatplay is automatically canceled.
SCROLL Scrolls the displayed title.
0 If you do not operatethe function within about eight
seconds, the display is automatically returned.
0 You cannot use -4 or rr-to select a track in title
mode.
QWhenyou select the display foml 2, the titles are
displayed upto 24 letters long.
QA CDTEXTdisc is a Cfl featuring recordedtext
information such as disc title, artist nameand track
litle.
c If certain text information is not recorded on a CD
TEXTdisc, “No _” (e.g., “No title”) is displayed.
0 If you havenot input disc titles, “No title” is dis-
played.
The built-in CD player function menu has the
0 If you do not operatethe function within about 30
seconds, the display is automatically returned.
@/hen you select the disc title input mode (TTLin),
the display is not returned automatically.)
0 “T.LIST” is displayed only when playing a CfI TEXT
disc.
Repeat play lets you hear the same track over
again.
1.
2. The light illuminates. The track currently
playing will play and then repeat.
* Press RPT again to turn repeat play off.
* When the repeat mode is exited while
repeat play is on, “T.RPT“ appears on the
basic display.
NO&X
lay lets you play back tracks on the
CD in random order. The track title list lets you see the list of track
titles on a CD TEXT disc and select one of
them for playback.
2. Press
dom order.
* Press RDM again to turn ralndom play off.
0When the random mode is exited while
random play is on, “RDM” appears on the
basic display.
each track on the CD.
I. en AMISS to
de.
2.
each track are played.
0 When the scan mode is exited while scan
play is on, “SCAN” appears on the basic
display.
3.
The light goes off. The track will continue to
play.
e If the scan mode is automatically canceled,
select the scan mode again.
a After scanning of a CDis finished, normal playback
of the tracks will begin again.
Press NEXT until the desired
track
title
appears.
That selection will begin to play.
a YOUcan also use 4, F* and A to select and play
the desiredtrack title.
e Only when playing a CDTEXTdisc, you can switch
to this mode.

Other manuals for DEH-P9400MP

5

Other Pioneer Car Receiver manuals

Pioneer KE-81ZBM-02 User manual

Pioneer

Pioneer KE-81ZBM-02 User manual

Pioneer DEH-P6880MP User manual

Pioneer

Pioneer DEH-P6880MP User manual

Pioneer MEH-P5150 User manual

Pioneer

Pioneer MEH-P5150 User manual

Pioneer DEH-1430R User manual

Pioneer

Pioneer DEH-1430R User manual

Pioneer KEH-P4010RX1M/EW User manual

Pioneer

Pioneer KEH-P4010RX1M/EW User manual

Pioneer DEH-S5000BT User manual

Pioneer

Pioneer DEH-S5000BT User manual

Pioneer DEH-X5900BT User manual

Pioneer

Pioneer DEH-X5900BT User manual

Pioneer DEH-P645R User manual

Pioneer

Pioneer DEH-P645R User manual

Pioneer DEH-2200UB User manual

Pioneer

Pioneer DEH-2200UB User manual

Pioneer DEH-P4700MP User manual

Pioneer

Pioneer DEH-P4700MP User manual

Pioneer DEH-S6120BS User manual

Pioneer

Pioneer DEH-S6120BS User manual

Pioneer DEH-M6067ZH User manual

Pioneer

Pioneer DEH-M6067ZH User manual

Pioneer DIVX AVH-A210BT User manual

Pioneer

Pioneer DIVX AVH-A210BT User manual

Pioneer KPX-9500 User manual

Pioneer

Pioneer KPX-9500 User manual

Pioneer AVH-P8400BH User manual

Pioneer

Pioneer AVH-P8400BH User manual

Pioneer AVH-P3150DVD User manual

Pioneer

Pioneer AVH-P3150DVD User manual

Pioneer KEH-P5950 User manual

Pioneer

Pioneer KEH-P5950 User manual

Pioneer AVIC-X3II User manual

Pioneer

Pioneer AVIC-X3II User manual

Pioneer KEH-P2030R User manual

Pioneer

Pioneer KEH-P2030R User manual

Pioneer FH-X360UB User manual

Pioneer

Pioneer FH-X360UB User manual

Pioneer DEH-P400 User manual

Pioneer

Pioneer DEH-P400 User manual

Pioneer KEH-P6010R User manual

Pioneer

Pioneer KEH-P6010R User manual

Pioneer DEX-P90RS User manual

Pioneer

Pioneer DEX-P90RS User manual

Pioneer DEH-2300 User manual

Pioneer

Pioneer DEH-2300 User manual

Popular Car Receiver manuals by other brands

BOSSCO BV9757B user manual

BOSSCO

BOSSCO BV9757B user manual

Silvercrest BLUETOOTH KH 2376 operating instructions

Silvercrest

Silvercrest BLUETOOTH KH 2376 operating instructions

BOSSCO BV7348B user manual

BOSSCO

BOSSCO BV7348B user manual

Sound Storm SD743TS user guide

Sound Storm

Sound Storm SD743TS user guide

BOSSCO 870DBI user manual

BOSSCO

BOSSCO 870DBI user manual

DPVIDEO DZP914 user manual

DPVIDEO

DPVIDEO DZP914 user manual

Sound Storm M330USA user manual

Sound Storm

Sound Storm M330USA user manual

Silvercrest KH 2375 operating instructions

Silvercrest

Silvercrest KH 2375 operating instructions

Sound Storm SCD-750R user manual

Sound Storm

Sound Storm SCD-750R user manual

Sound Storm SDVD100 user manual

Sound Storm

Sound Storm SDVD100 user manual

Silvercrest SAR 28 A1 operating instructions

Silvercrest

Silvercrest SAR 28 A1 operating instructions

RVMedia AUC2000 instruction manual

RVMedia

RVMedia AUC2000 instruction manual

Sound Storm SD320 user manual

Sound Storm

Sound Storm SD320 user manual

Sound Storm SD720MI user manual

Sound Storm

Sound Storm SD720MI user manual

PowerAcoustik PTID-3200 owner's manual

PowerAcoustik

PowerAcoustik PTID-3200 owner's manual

Qdis LVTX-1CH Manual Installation

Qdis

Qdis LVTX-1CH Manual Installation

Silvercrest SAB 160 A1 operating instructions

Silvercrest

Silvercrest SAB 160 A1 operating instructions

Silvercrest SAB 160 A1 operating instructions

Silvercrest

Silvercrest SAB 160 A1 operating instructions

manuals.online logo
manuals.online logoBrands
  • About & Mission
  • Contact us
  • Privacy Policy
  • Terms and Conditions

Copyright 2025 Manuals.Online. All Rights Reserved.