3
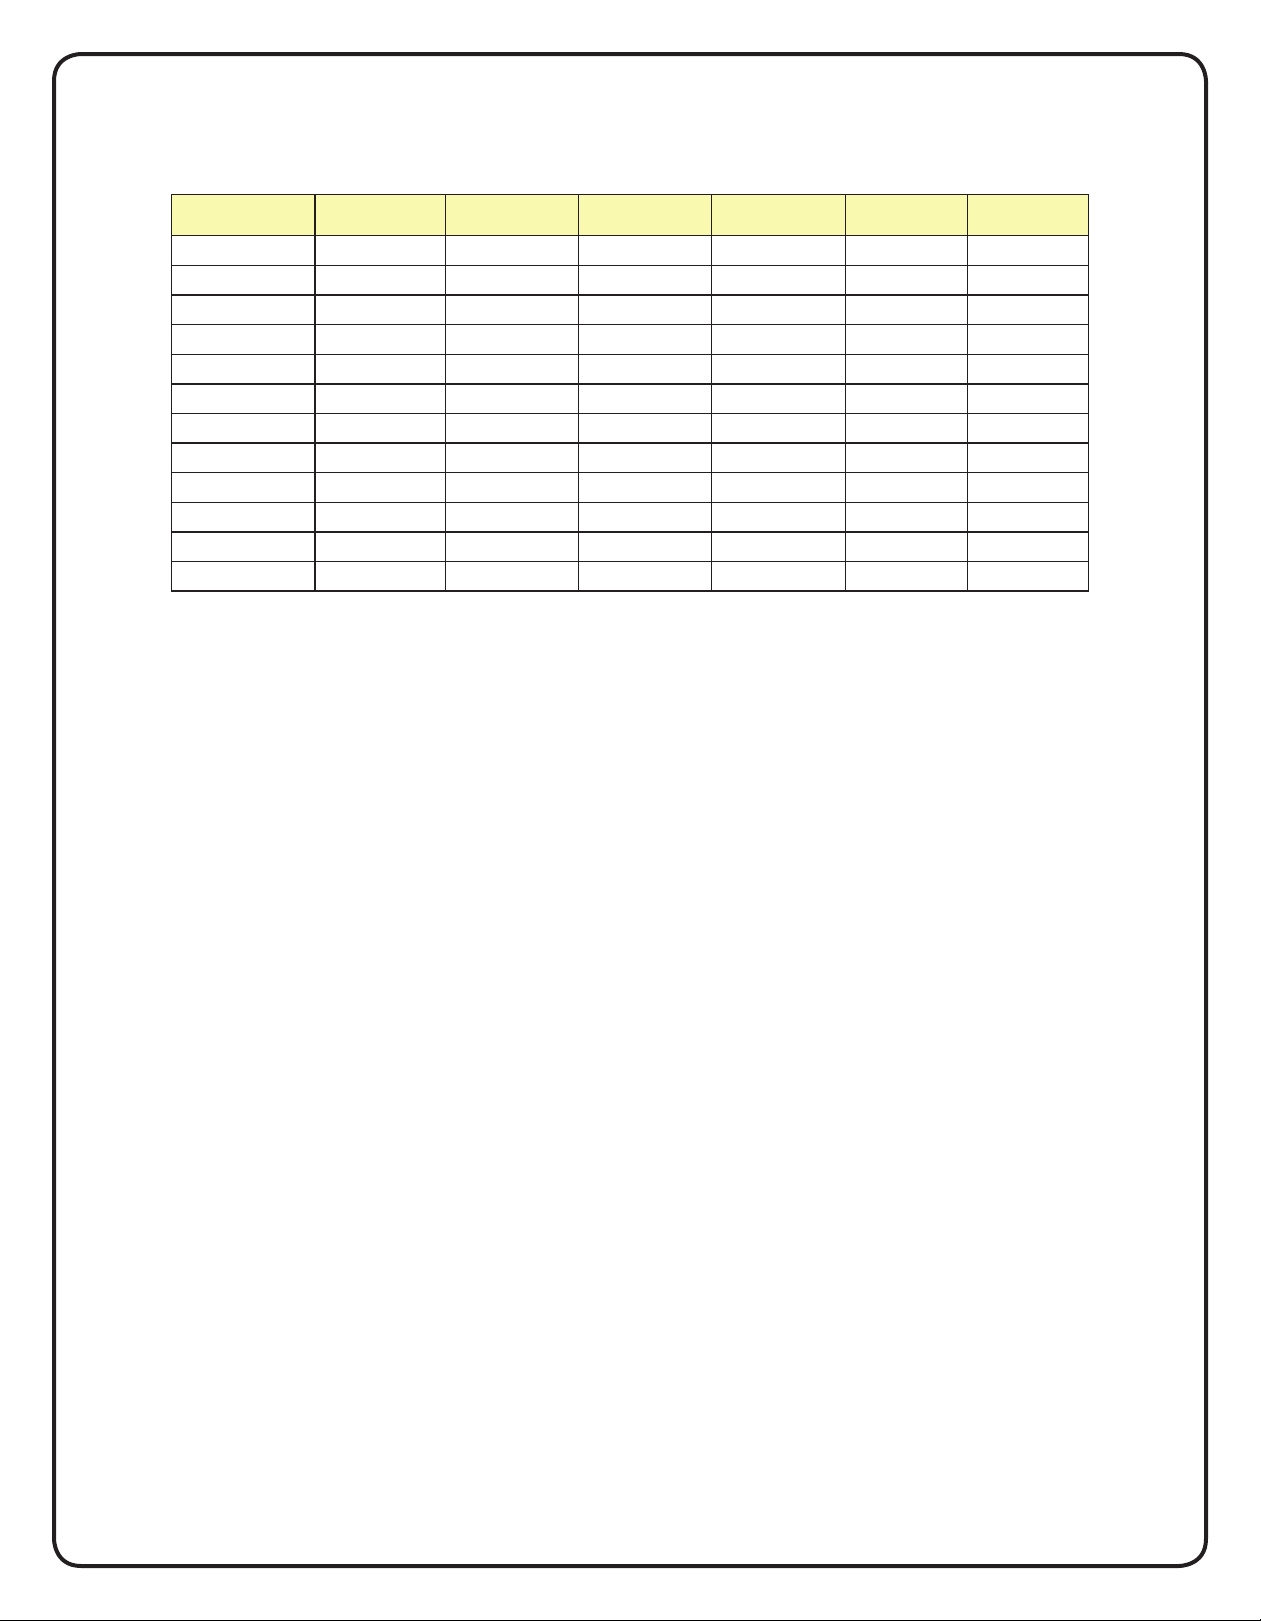
MODEL NUMBER DESIGNATION
MODEL
NUMBER VOLTAGE WATTAGE AMPS WELL SIZE
QUARTS
BASIC
MODEL
BASIC
WITH DRAIN
7QT-D-T-R-120 120 300 2.5 7 X
7QT-OD-T-R-120 120 300 2.5 7 X
7QT-D-T-R-208 208 300 1.4 7 X
7QT-OD-T-R-208 208 300 1.4 7 X
7QT-D-T-R-240 240 300 1.3 7 X
7QT-OD-T-R-240 240 300 1.3 7 X
11QT-D-T-R-120 120 300 2.5 11 X
11QT-OD-T-R-120 120 300 2.5 11 X
11QT-D-T-R-208 208 300 1.4 11 X
11QT-OD-T-R-208 208 300 1.4 11 X
11QT-D-T-R-240 240 300 1.3 11 X
11QT-OD-T-R-240 240 300 1.3 11 X
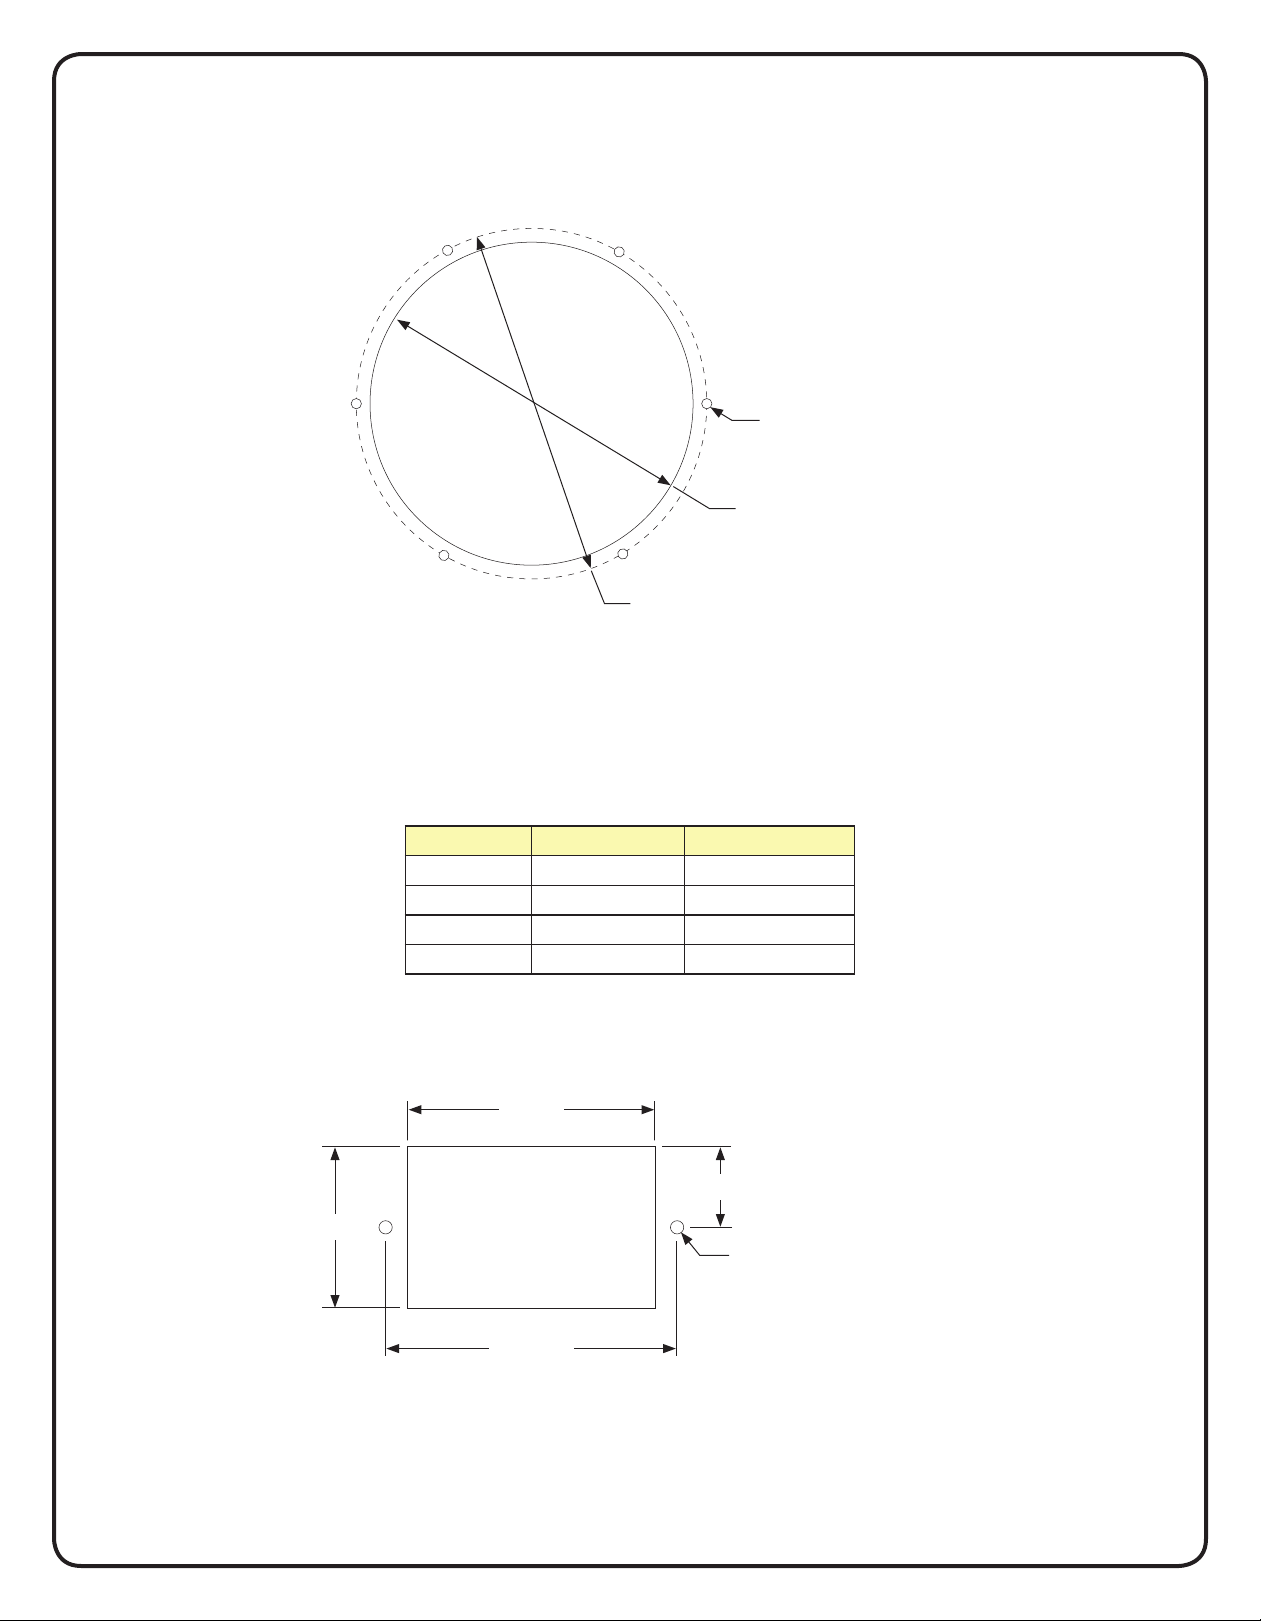
ENGINEERING CONSIDERATIONS
The round hot food wells are for use only in commercial cooking appliances where
Underwriters Laboratoris Inc determines the combination acceptable.
CONDITIONS OF ACCEPTABILITY
When installed in the end-use commercial cooking appliance, following are among the
considerations to be made”
1. The units may be mounted in a wood enclosure provided acceptable electrical
enclosures are provided in accordance with Item 3 below and the clearances to
combustible as outlined in Item 2 below.
2. There must be a minimum clearance of 2 inches between the unit and the rear and
side walls of the enclosure, 2-1/2 inches between the unit and the bottom of the
enclosure, and 3-1/2 inches between the unit and the front of the enclosure panel
containing the controls. There is no minimum clearance between adjacent units.
3. A metal enclosure, a minimum 0.026 inches thick, or listed flexible conduit must be
provided to enclose wiring between the unit and the controls.
4. Quick-Connect terminals on the controls are not intended for field wiring.
5. The maximum temperature on the body of the pilot light shall not exceed 125°C in the
end-use appliance.
6. These units are not provided with a grounding conductor to bond the kettle to
the infinite switch cover. The final construction shall be such that an acceptable
bonding path exists from both the kettle and the infinite switch cover to the equipment
grounding terminal or lead of the final appliance.