Pivot SURFACE PRO X User manual
21.
Better Connection. Better Protection.
[ Issued 11.15.2021 Version R01 ]
USER GUIDE
SURFACE PRO X
For Microsoft Surface Pro 4 / 5 / 5 LTE / 6
PIVOT spX

2.
SURFACE PRO X | User Guide
For Microsoft Surface Pro 4 / 5 / 5 LTE / 6
Your PIVOT case is designed to provide superior device protection while combining
functionality and aesthetics. Following the recommendations in this guide will ensure
maximum performance with proper use of the case.
WARNING: Before removing your device from your PIVOT case, refer to the instructions
in this guide or on pivotcase.com to avoid damaging your device or case.
NOTE: Your PIVOT case will hold your device firmly on all sides in order to protect it from
accelerated impacts and other hazards. Once installed, your device is not intended to be
easily removed.
Read Before Use
Thermal Control
Tough Protection
Air Cushion Lightweight
Easy Setup Stylus Support
3.
The PIVOT Surface Pro X model (SPX) is compatible with multiple generations of the Microsoft
Surface Pro tablet. Before attempting to install your device, refer to the information below to
confirm compatibility. The PIVOT SPX supports the following devices:
Supported Devices:
Surface Pro 4
Surface Pro 5
Surface Pro 5 LTE
Surface Pro 6
Note:
Not compatible with the Microsoft Surface Pro X device,
which is a dierent device type released after the PIVOT SPX case model.
Device Compatibility
DEVICE INSTALLATION
Did You Know?
Not all SPX compatible devices share the same
features or locations of buttons, speakers and
cameras. For this reason, the access openings in
the SPX case are designed to accommodate the
features of all compatible device types.

4.
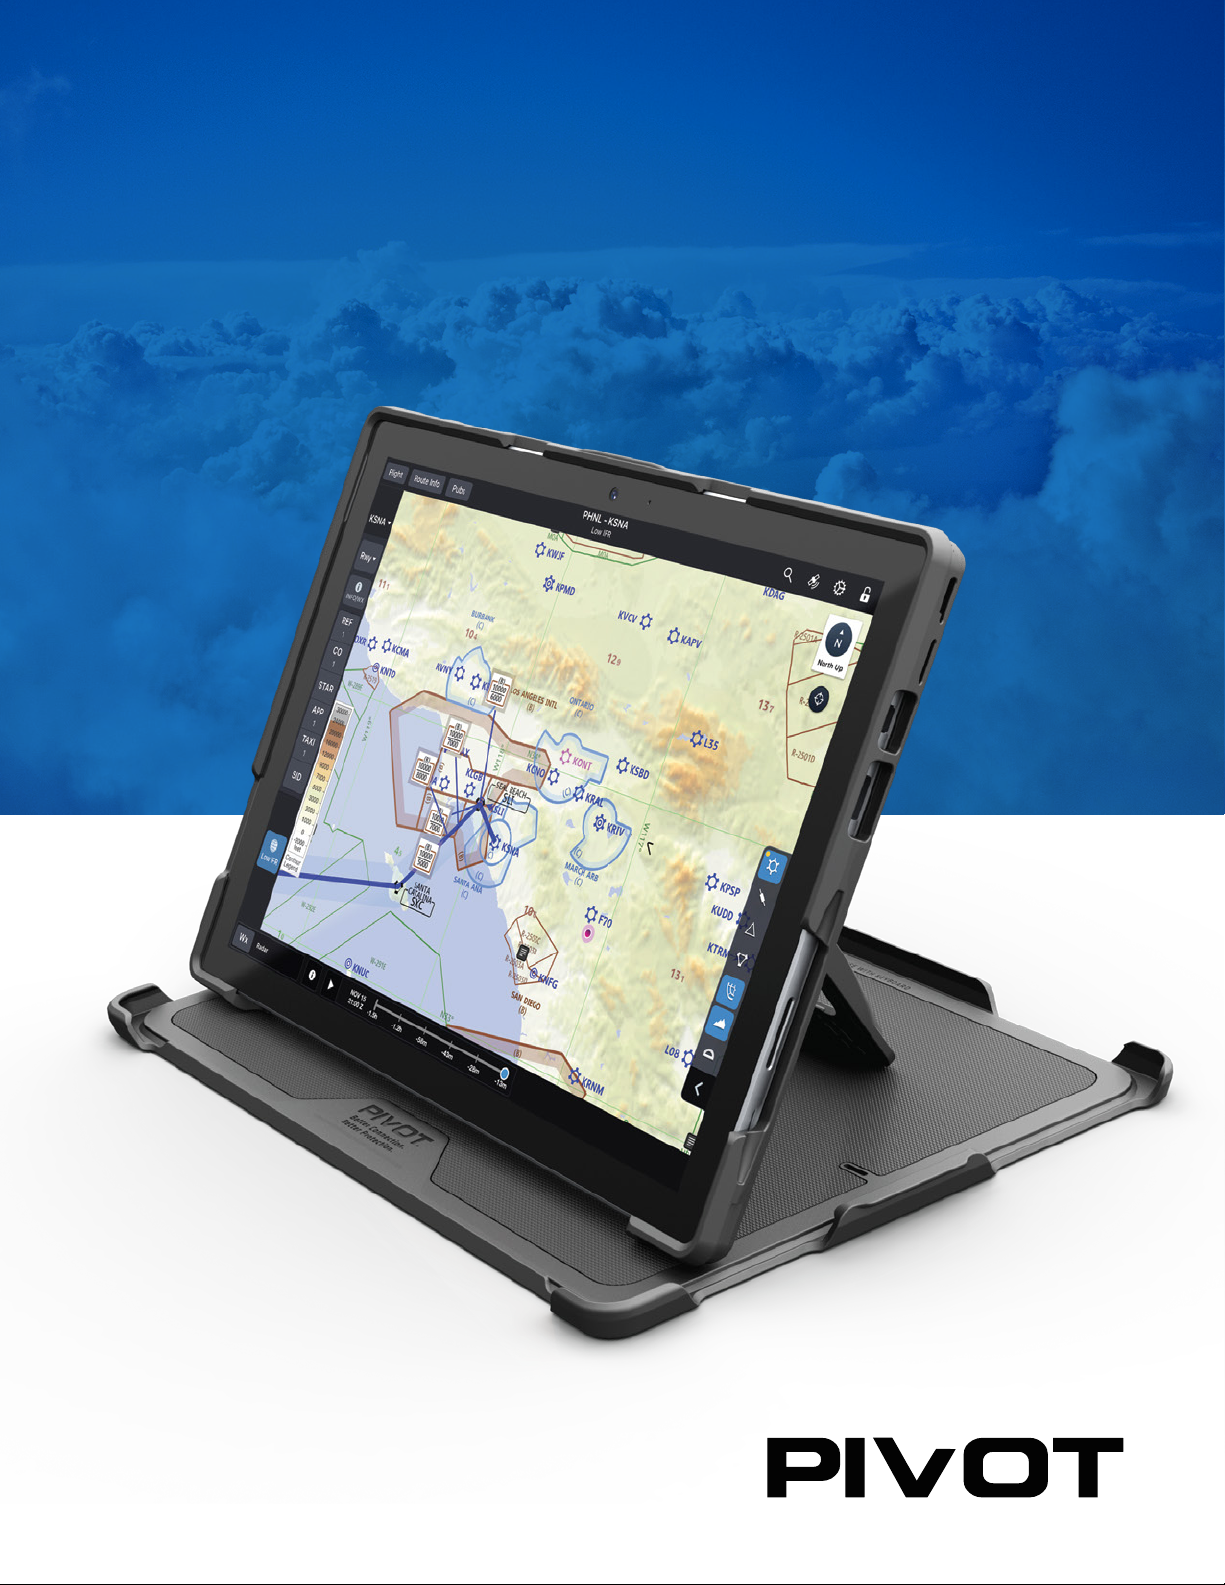
Align the device camera and buttons with the
corresponding access points in the case body and press
the corners of the device into the case beginning with
the camera and button area. The device will snap
securely into the case’s perimeter seal.
Installing Device
Beginning with the bottom edge near the
charging port, press firmly using your thumbs to
disengage the case seal. Continue carefully
pressing around the edges of the case to release
the device in the order shown. Do not attempt to
pry or force the device from the case.
1. Start at the bottom and move left.
2. Continue around the top edge.
3. Release the right edge to remove device.
!WARNING!
Do not use excessive force or
tools of any kind during install or
removal of device. Doing so may
cause damage or personal injury.
!Pro Tip!
If the cases does not snap easily onto
the device, double check the alignment
of the camera and buttons.
Removing Device
Bottom
Right
Left
Top
5.
PIVOT SCREEN COVER
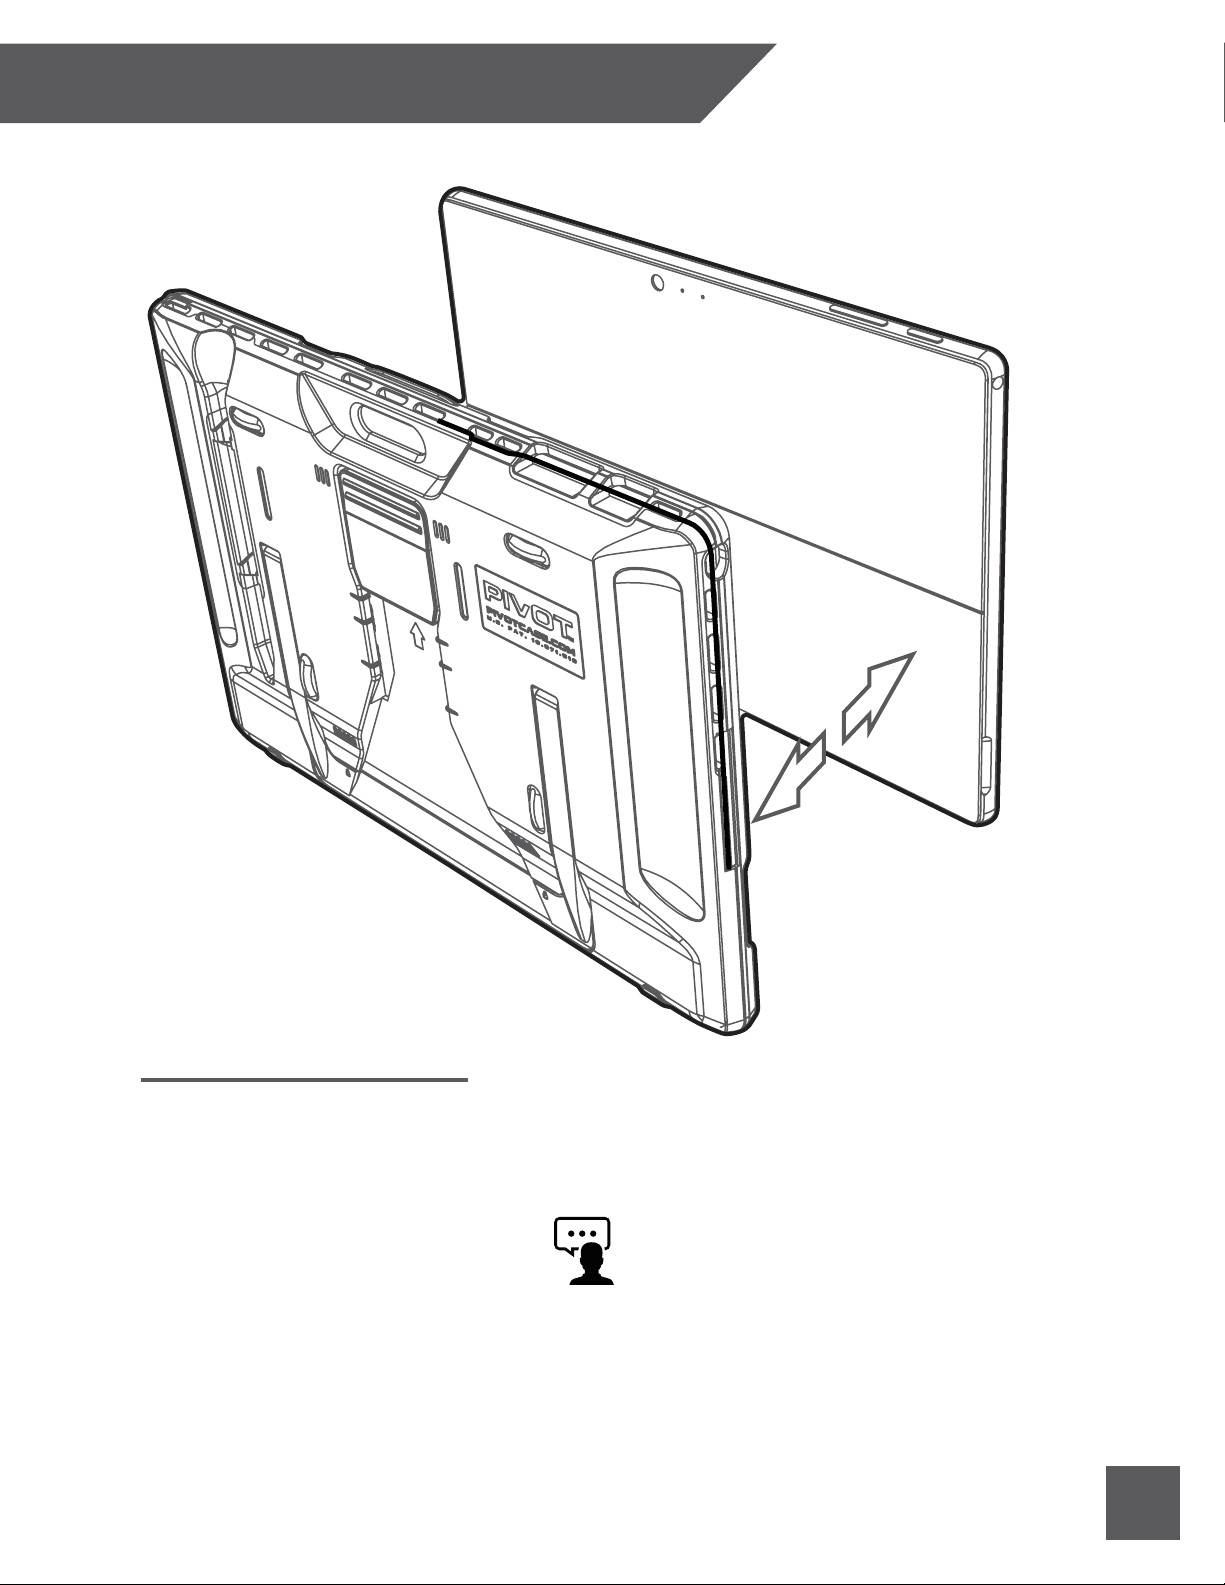
Installing The Screen Cover
To install the PIVOT Screen Cover, position the case and cover in landscape orientation, with the volume
and power buttons of the device in the upper left corner, as illustrated above with the device screen facing
you. Align the corners of the PIVOT case and Screen Cover and press to fit.
!Pro Tip!
Place the PIVOT case on a flat
and level surface when
aligning and installing the
Screen Cover until you are
comfortable and familiar
with the installation process.
6.
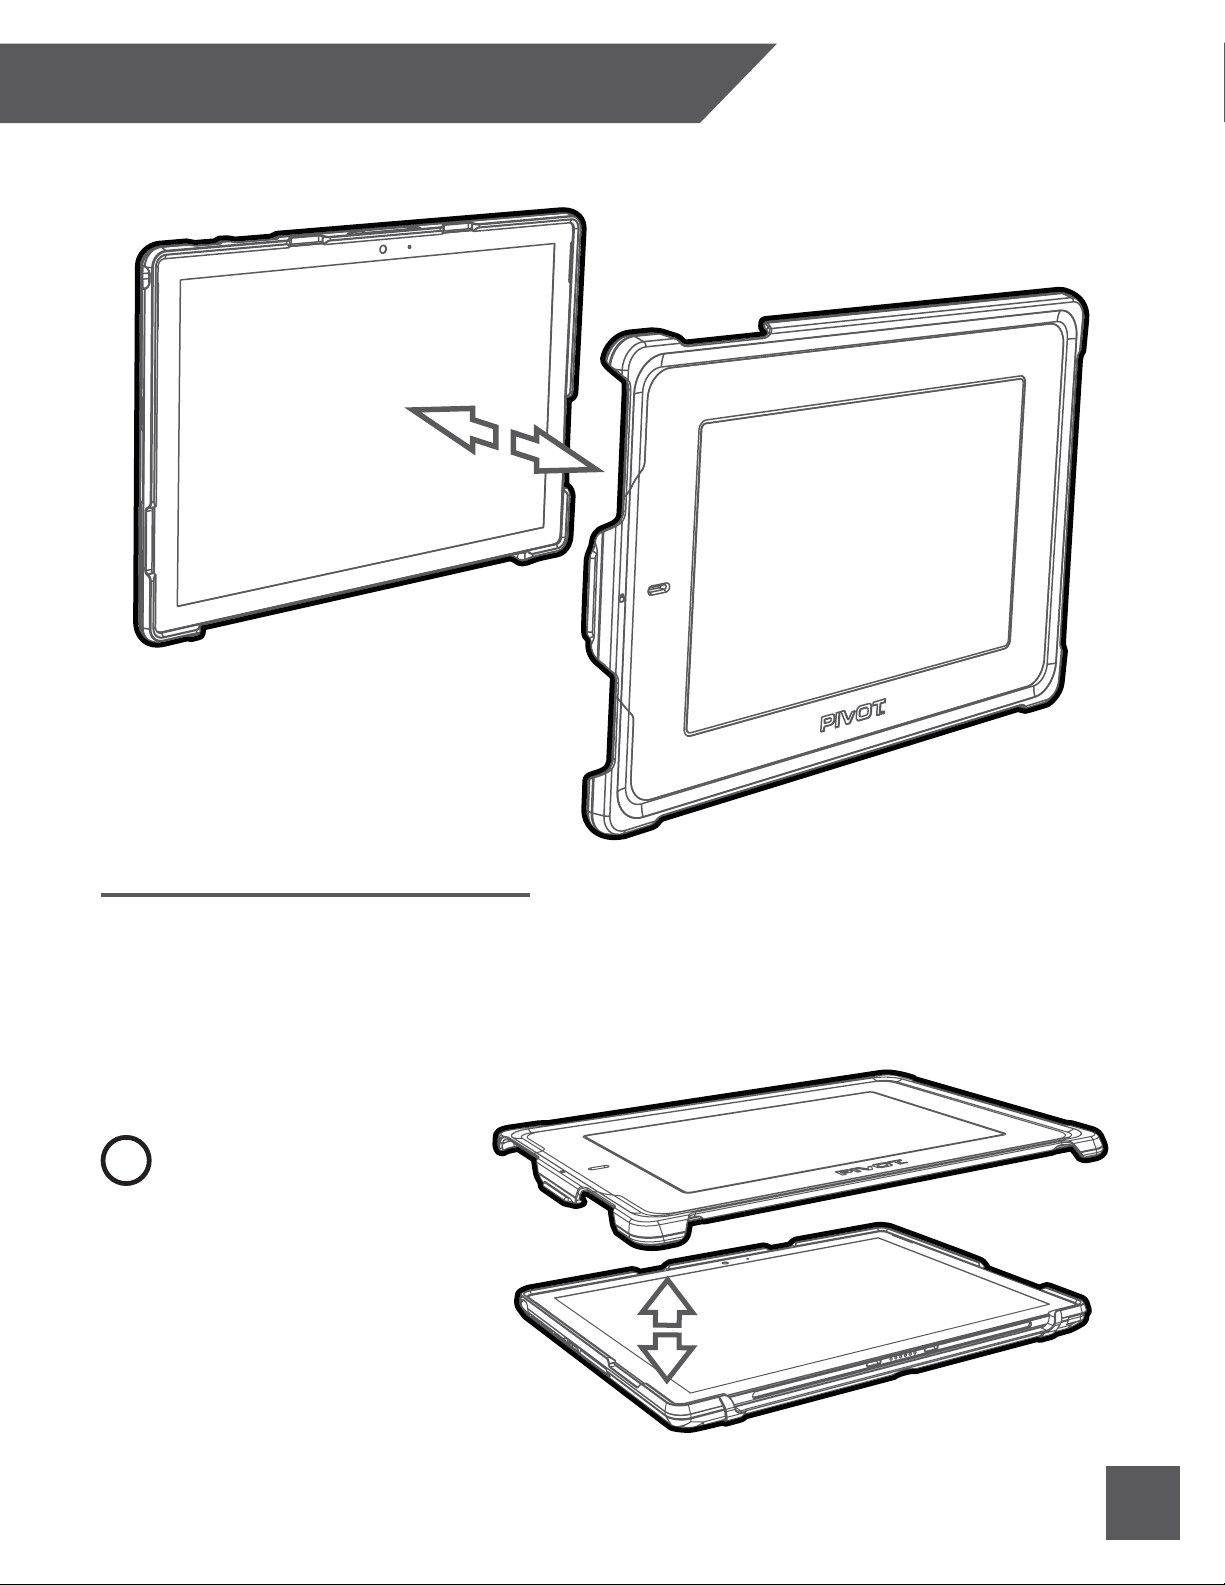
Once the PIVOT Screen Cover and case body are properly aligned, with the corresponding access
points in the case body and cover aligned with the buttons of the device, press the corners of the
Screen Cover down onto the case body. The Screen Cover engages with the case body to hold firmly
in place by gripping the three locations illustrated above, as follows:
1. Upper-Right Corner
2. Lower-Right Corner
3. Left-Center Locking Tab
Note: You may secure the engagement
points in any order.
Installing The Screen Cover
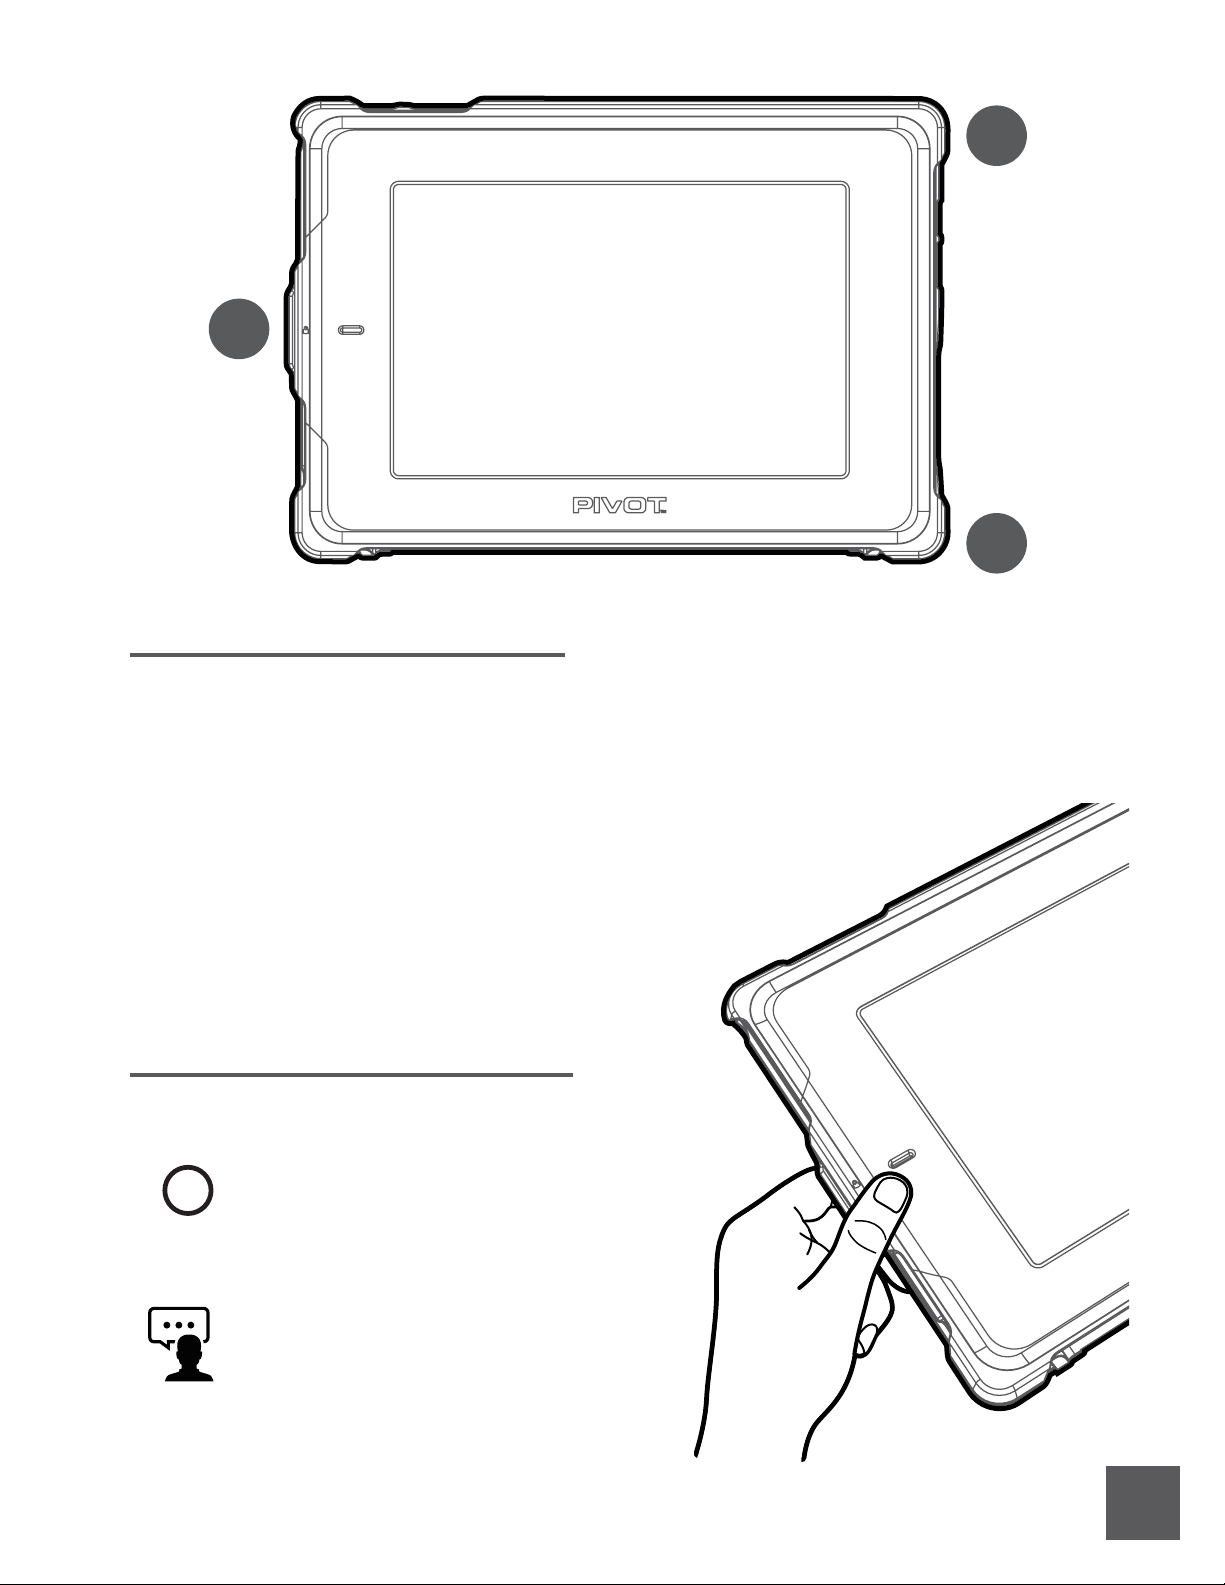
Release the Left-Center Locking Tab to quickly and
easily remove the Screen Cover with one hand.
Removing The Screen Cover
!Pro Tip!
Store your Screen Cover in a safe and
memorable location when not in use to
avoid damage or loss.
Did You Know?
A small window slot near the locking tab
allows you to confirm the device screen is
powered on or o at a glance.
3
1
2

7.
PIVOT KICKSTAND
!Pro Tip!
Once open, adjust the angle of the PIVOT
Kickstand evenly on both sides to prevent
unnecessary wear. Do not bend or adjust
the left and right sides independently.
The PIVOT Kickstand is built into the
back of the case body. Please take
time to identify and become familiar
with the key features of the PIVOT
Kickstand before use:
1.) Hinge(x2)
2.) Leg (x2)
3.) Snap-Closure (x2)
4.) Center Finger Tab
Kickstand Key Features
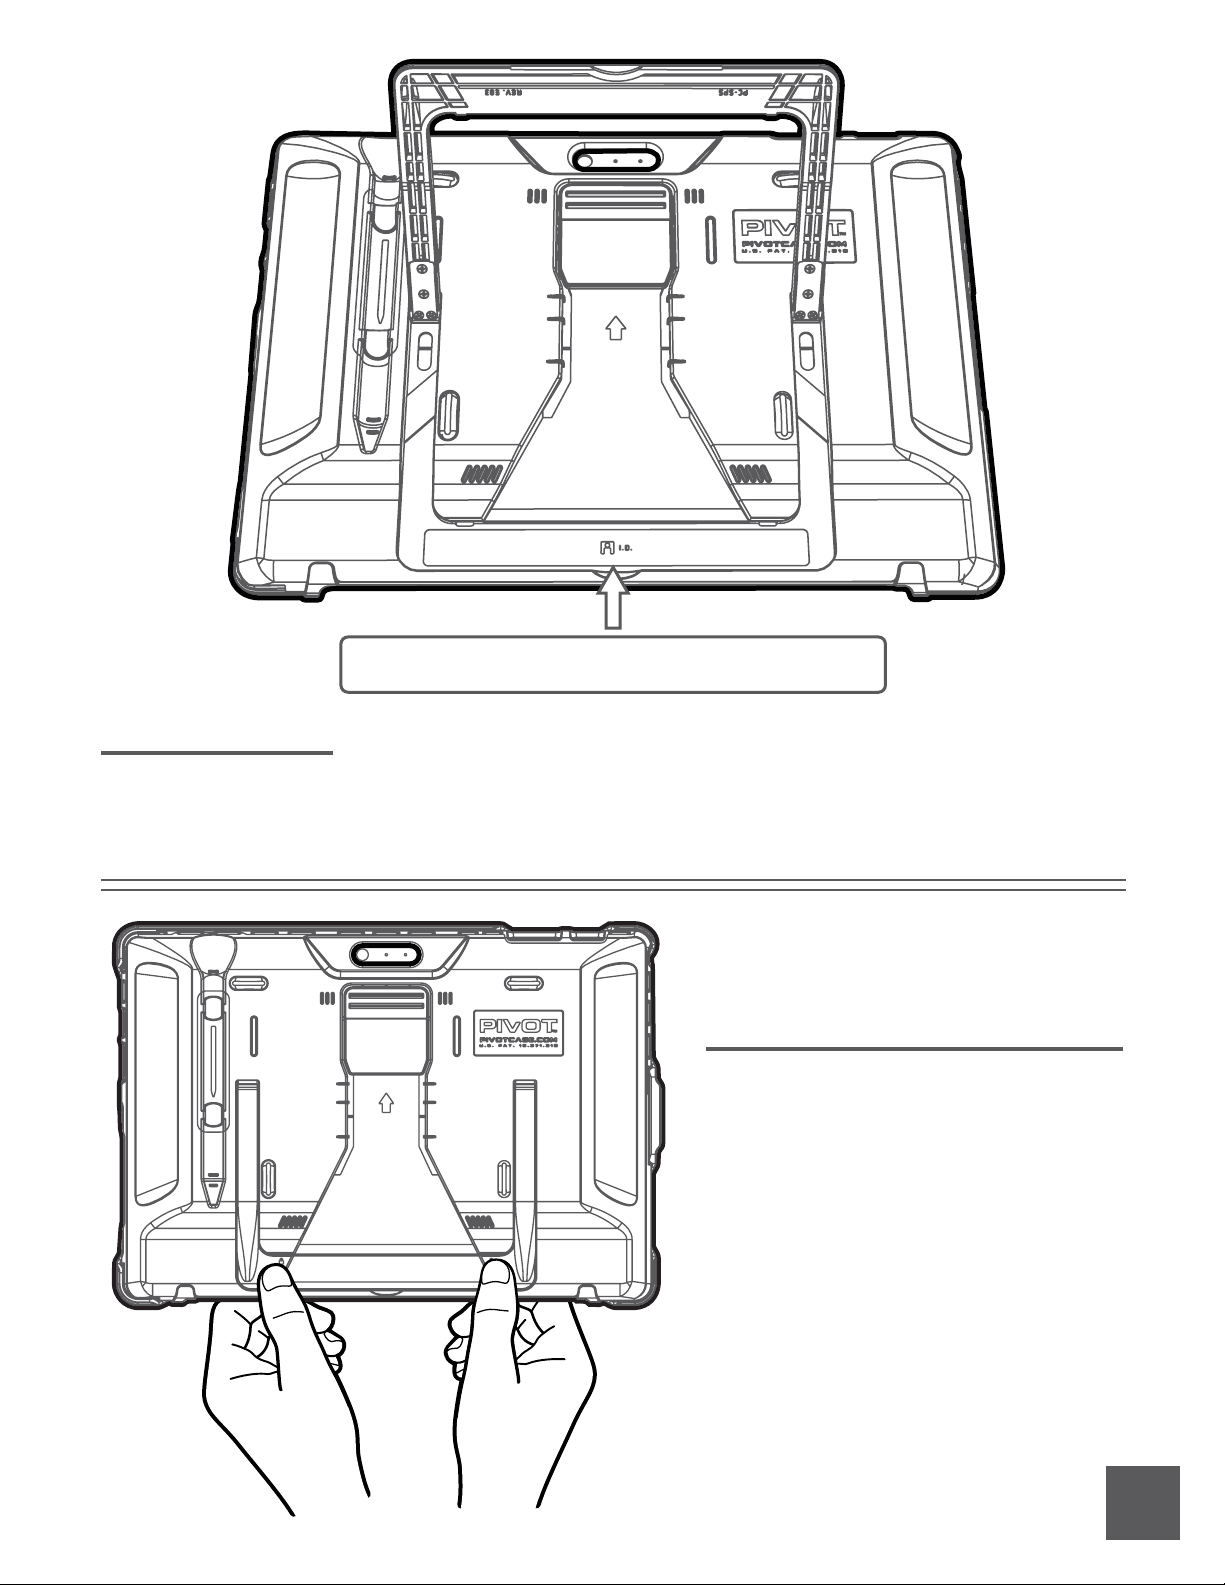
Locate the Center Finger Tab and lift gently. Apply
constant force while lifting to disengage the two
Snap-Closures, which are located to the left and
right of the Center Finger Tab. An audible “Click”
may be heard as the closures release.
Opening The Kickstand
1.)
2.)
4.) Center Finger Tab
1.) Hinge
2.) Leg
3.) Snap-Closure 3.)

8.
Adjust the viewing angle of the PIVOT
Kickstand by rotating the left and right
Legs of the kickstand evenly to the desired
position.
The PIVOT Kickstand Hinges provide a
preset resistance force, which supports a
range of viewing angles up to 120-degrees.
Do not force the kickstand beyond this
point to avoid damage.
Adjusting Viewing Angle
To use your device in portrait orientation,
simply open and rotate the kickstand
approximately 90-degrees until both legs of
the kickstand are even and perpendicular to
the case body, and place on a flat, stable
surface. Only one viewing angle is available
in portrait mode.
Portrait Viewing Mode
!Pro Tip!
Use the Screen Cover when in portrait viewing
mode to improve stability. The non-slip
interior surface of the Screen Cover is designed
to provide additional grip in both portrait and
landscape viewing modes.
Did You Know?
The Screen Cover serves as a
flat, non-slip surface for the
case when in viewing mode. Screen Cover
9.
To close the PIVOT Kickstand, rotate it from
any open angle until it is nearly in the
closed position, or at a 0-degree angle,
parallel to the case body.
Press or squeeze the Snap-Closures on both
the left and right side of the kickstand. The
closures are identified by the padlock icons.
You may hear an audible “click” when the
closures engage with the case body.
Closing Kickstand
The I.D. Label Area is located on the case back behind the Kickstand.
Recommended Label Template: Avery 5167.
I.D. Label Area
Label Area
5.9-inch x 0.6-inch
10.
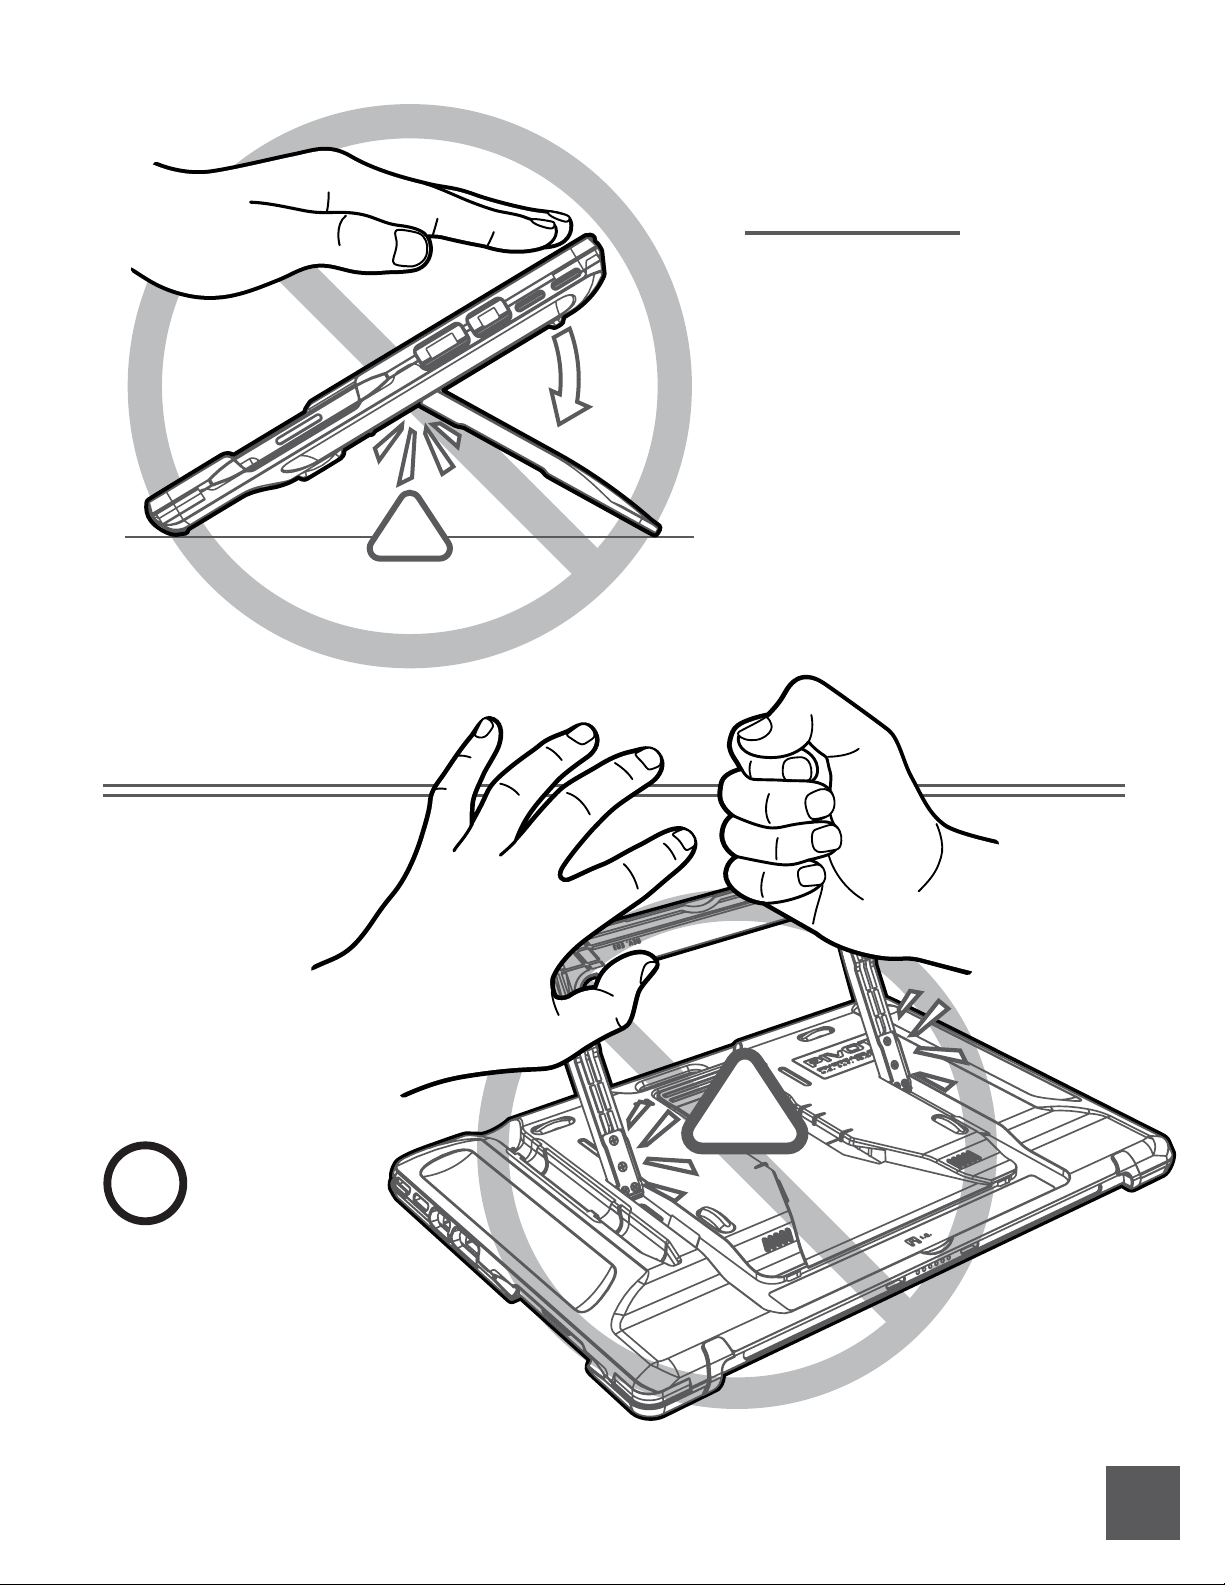
The PIVOT Kickstand is durable if used
as intended. However, it can be
damaged if misused and put under
repeated stress.
Do not attempt to force the PIVOT
Kickstand beyond the maximum
120-degrees of rotation or adjust the
Legs independently. Doing so may
result in damage to the Kickstand,
hinges, and case body.
Incorrect Use
!
WARNING!
Do not use excessive force
when opening, closing, or
adjusting the kickstand, or
attempt to force the kickstand
beyond its intended range of
motion. Damage resulting from such
misuse is not covered under warranty.
!
!
Table of contents
Other Pivot Tablet Accessories manuals


