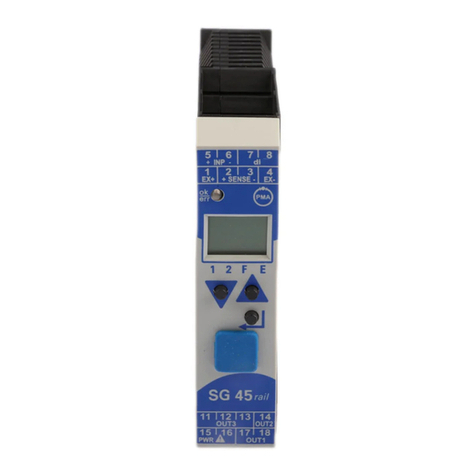
PMA rail line UNIFLEX CI 45 User manual

PMA Prozeß- und Maschinen-Automation GmbH
UNIFLEX CI 45
universal transmitter
UNIFLEX
UNIFLEX
CI 45
CI 45
Operating manual
English
9499-040-71711
Valid from: 06/2009
rail line

© 2004 PMA Prozeß- und Maschinen-Automation GmbH ·Printed in Germany
All rights reserved. No part of this document may be reproduced or published in any form
or by any means without prior written permission from the copyright owner.
A publication of PMA Prozeß- und Maschinen Automation
P.O.Box 310229
D-34058 Kassel
Germany
ûBlueControlÒ
More efficiency in engineering,
more overview in operating:
The projecting environment for the BluePortâcontrollers, indicators
rail line and measuring converter, controller, temperature limiter
Description of symbols:
gGeneral information
aGeneral warning
lAttention: ESD sensitive devices
Caution: read the operating instructions
Read the operating instructions
+Hint
ATTENTION!
Mini Version and Updates on
or on PMA-CD
www.pma-online.de

UNIFLEX CI 45 3
Table of content
1. General ............................................5
2. Safety hints ..........................................6
2.1 Maintenance, repair, modification ...........................6
2.2 Cleaning .........................................7
2.3 Spare parts .......................................7
3. Mounting ...........................................8
3.1 Connectors........................................9
4. Electrical connections ..................................10
4.1 Connecting diagram ..................................10
4.2 Terminal connections .................................10
4.3 Connecting diagram ..................................12
4.4 Connection examples .................................12
4.5 Hints for installation ..................................13
4.5.1 cULus approval ..............................13
5. Operation ..........................................14
5.1 Front view .......................................14
5.2 Operating structure ..................................15
5.3 Behaviour after supply voltage switch-on.......................15
5.4 Operating level .....................................15
5.4.1 Display line1................................15
5.4.2 Display line 2 ...............................16
5.4.3 Switching over by means of the Enter key ................16
5.4.4 Slave pointer function...........................17
5.4.5 Selecting the units ............................17
5.4.6 Extended operating level .........................18
6. Functions ..........................................19
6.1 Linearization ......................................19
6.2 Input scaling ......................................20
6.2.1 Input fail detection ............................21
6.2.2 Two-wire measurement..........................21
6.2.3 Scaling with potentiometer measurement ................21
6.3 Temperature compensation, measured via INP2 (optional)..............22
6.4 Filter ..........................................23
6.5 Substitue value for inputs ...............................23
6.6 Input forcing ......................................23
6.7 O2measurement (optional) ..............................23
6.8 Counter (optional) ...................................25
6.9 Frequency input (optional) ...............................26
6.10 Arithmetic functions ..................................27
6.11 Tare function (optional) ................................28
6.12 Sample&hold amplifier (optional) ...........................28
6.13 Integrator function ...................................29
6.14 Limit value processing .................................29
6.14.1 Measured value monitoring........................30
6.14.2 Monitoring the number of operating hours and switching cycles ....32

4 UNIFLEX CI 45
6.15 Analog output configuration ..............................33
6.15.1 Analog output ...............................33
6.15.2 Logic output ................................34
6.15.3 Transmitter power supply.........................34
6.15.4 Frequency output (optional) ........................35
6.15.5 Analog output forcing ...........................35
6.16 Maintenance manager / error list ...........................36
6.17 Reset to factory setting ................................37
7. Configuration level.....................................38
7.1 Configuration survey ..................................38
7.2 Configurations .....................................39
8. Parameter setting level ..................................47
8.1 Parameter survey....................................47
8.2 Adjustment .......................................47
8.3 Parameters .......................................48
9. Calibrating level ......................................49
9.1 Offset correction ....................................50
9.2 2-point correction ...................................51
10.BlueControl Òengineering tool ..............................52
11.Versions ...........................................53
12.Technical Data .......................................54
13.Index ...........................................59

.1General
Thank you very much for buying a Universal Transmitter UNIFLEX CI 45.
UNIFLEX CI 45 transmitters are suitable for precise, cost-efficient signal detection and processing. Every CI 45 is
equipped with at least one universal input, one universal output and a relay. Optionally, the transmitter can be fitted
with an additional relay.
Galvanic isolation is provided between inputs and outputs as well as from the supply voltage and the communication
interfaces.
Applications
CI 45 is used for measurement, scaling and separation of electrical signals, e.g. for
wHeat treatment plants
wDrying equipment
wFurnace builders
wMetallurgy
wKilns
wGeneral machine building
wResearch and development
wEnergy measurement
wSignal conversion
...
At-a-glance survey of advantages
Compact construction, only 22,5 mm wide
Clips onto top-hat DIN rail
Plug-in screw terminals or spring clamp connectors
Dual-line LC display with additional display elements
Process values always in view
Convenient 3-key operation
Direct communication between rail-mounted transmitters
Universal input with high signal resolution (>15 bits) reduces stock keeping
Universal output with high resolution (14 bits) as combined current / voltage output
Quick response, only 100 ms cycle time, i.e. also suitable for fast signals
One or two relay outputs
Customer-specific linearization
Measurement value correction (offset or 2-point)
Min/max indicator ('slave pointer')
Logical linking of digital outputs, e.g. for common alarms
Preset of output value
*This documentation includes already several options which will be available only with
operating version 2 instruments.
Further documentation for universal transmitter CI 45:
–Data sheet CI 45 9498 737 48313
–Operating note CI 45 9499 040 71441
–Interface description 9499 040 72011
- preliminary - General
UNIFLEX CI 45 5

.2Safety hints
This instrument was built and tested in accordance with VDE 0411-1 / EN 61010-1 and was shipped in safe condition.
The unit complies with European guideline 89/336/EEC (EMC) and is provided with the CE-marking.
The instrument was tested before delivery and has passed the tests required in the test plan. In order to maintain this
condition and to ensure safe operation, the user must follow the hints and warnings given in these operating
instructions and operate this instrument in compliance with the instructions given in this manual.
aThe unit is intended exclusively for use as a measuring and control instrument in technical installations.
aWarning
If the instrument is so heavily damaged that safe operation seems impossible, the instrument must not be taken into
operation.
ELECTRICAL CONNECTIONS
The electrical connections must conform to local standards (e.g. VDE 0100). The input leads must be kept separate
from signal and mains leads.
A circuit breaker or a power switch must be provided for the instrument and marked accordingly in the installation. The
circuit breaker or power switch must be installed near the instrument and easily accessible for the operator.
COMMISSIONING
Before instrument switch-on, ensure that the rules given below were followed:
wEnsure that the supply voltage corresponds to the specification on the type label.
wAll covers required for contact safety must be fitted.
wBefore instrument switch-on, check, if other equipment and/or facilities connected in the same signal loop is / are
not affected. If necessary, appropriate protective measures must be taken.
wThe instrument may be operated only when mounted in its enclosure.
wThe temperature limits specifed for operation of the unit must be met before and during operation.
aWarning
During operation, the ventilation slots of the housing must not be covered.
aThe measurement inputs are designed for measurement of circuits which are not connected directly with
the mains supply (CAT I). The measurement inputs are designed for transient voltage peaks up to 800V
against PE.
SHUT-DOWN
For permanent shut-down, disconnect the instrument from all voltage sources and protect it against accidental
operation.
Before instrument switch-off, check that other equipment and / or facilities connected in the same signal loop is / are
not affected. If necessary, appropriate measures must be taken.
2.1 Maintenance, repair, modification
The instruments need no particular maintenance.
No operable controls are mounted inside the instrument, i.e. the operator must not open the unit.
Modification, maintenance and repair may be carried out only by trained, authorized persons. For this purpose, the user
is invited to contact the PMA service.
Safety hints
6 Maintenance, repair, modification UNIFLEX CI 45

aWarning
When opening the instruments, or when removing covers and components, live parts or terminals can be exposed.
lCaution
When opening the instruments, electrostatically sensitive components can be exposed.
gThe PMA service can be contacted as follows:
PMA Prozeß- und Maschinen-Automation GmbH
Miramstraße 87
D-34123 Kassel
Tel. +49 (0)561 / 505-1257
Fax +49 (0)561 / 505-1357
e-mail: [email protected]
2.2 Cleaning
gHousing and front panel of the instrument can be cleansed using a dry, lintfree cloth.
2.3 Spare parts
The following accessories are permitted as spare parts for the transmitter:
Description Order no.
Connector set with screw terminals 9407-998-07101
Connector set with spring clamp terminals 9407-998-07111
Bus connector for fitting in top-hat rail 9407-998-07121
Safety hints
UNIFLEX CI 45 Cleaning 7

.3Mounting
The unit is provided for vertical mounting on 35 mm top-hat rails to EN 50022.
If possible, the place of installation should be exempt of vibration, aggressive media (e.g. acid, lye), liquid, dust or
aerosol.
The instruments of the rail line series can be mounted directly side by side. For mounting and dismounting, min. 8 cm
free space above and below the units should be provided.
For mounting, simply clip the unit onto the top-hat rail from top and click it in position.
To dismount the unit, pull the bottom catch down using a screwdriver and remove the unit upwards.
gTransmitter CI 45 does not contain any maintenance parts, i.e. the unit need not be opened by the
customer.
aThe unit may be operated only in environments for which it is suitable due to its protection type.
aThe housing ventilation slots must not be covered.
aIn plants where transient voltage peaks are susceptible to occur, the instruments must be equipped with
additional protective filters or voltage limiters!
lCaution! The instrument contains electrostatically sensitive components .
aPlease, follow the instructions given in the safety hints.
aTo maintain contamination degree 2 acc. to EN 61010-1, the instrument must not be installed below
contactors or similar units from which conducting dust or particles might trickle down.
- preliminary - Mounting
UNIFLEX CI 45 8
%
max.
95% rel.
max. 55°C
-10°Cmin.
22.5
(0,87”) 117.5 (4,63”)
99 (3,90”)
2.3
111 (4,37”)
5.5
(0,08”)
(0,20”)
click
Montage / mounting
A
bmessungen / dimensions
Demontage / dismantling
1
Klemme /
terminal
5678
1234
1516 17 18
11 12 13 14
Klemme /
terminal

3.1 Connectors
The four instrument connectors are of the plug-in type. They plug into the housing from top or bottom and click in
position. Releasing the connectors should be done by means of a screwdriver.
Two connector types are available:
•Screw terminals for max. 2,5 mm2conductors
•Spring-clamp terminals for max. 2,5 mm2conductors
gBefore handling the connectors, the unit must be disconnected from the
supply voltage.
Tighten the screw terminals with a torque of 0,5 - 0,6 Nm.
With spring-clamp terminals, stiff and flexible wires with end crimp can be
introduced into the clamping hole directly. For releasing, actuate the (orange)
opening lever.
aContact protection: Terminal blocks which are not connected should remain in the socket.
Mounting
UNIFLEX CI 45 Connectors 9

.4Electrical connections
4.1 Connecting diagram
4.2 Terminal connections
aFaulty connection might cause destruction of the instrument !
1Connecting the supply voltage
Dependend on order
w90 … 260 V AC terminal: 15, 16
w24 V AC / DC terminal: 15, 16
For further information, see section "Technical data"
gInstruments with optional system interface:
Energization is via the bus connector of field bus coupler or power supply module. Terminals 15, 16 must
not be used.
Electrical connections - preliminary -
10 Connecting diagram UNIFLEX CI 45
Data A
Data A
Data B
Data B
V
14
13
12
16
15
11
mV
17 18
INP2
INP1
OUT3
PWR
LNOUT1
OUT2
90...260V AC
24V AC/DC
di1
8
76
3
2
1
5
34
(mV)
RGND
RGND
RS 485
1
2a
3
4
5
6
7
b
c
d
e
f
g
a
b
c
da
b
Logic
V
h
i
j
k
e
11 12 13 14
11 12 13 14
15 16 17 18
15 16 17 18
1234
1234
top

2Connecting input INP1
Input for the measurement value
aresistance thermometer (Pt100/ Pt1000/ KTY/ ...), 3-wire connection terminal: 1, 2, 3
bresistance thermometer (Pt100/ Pt1000/ KTY/ ...), 4-wire connection terminal: 2, 3, 5, 6
cpotentiometer terminal: 1, 2, 3
dcurrent (0/4...20mA) terminal: 2, 3
evoltage (-2,5...115/-25...1150/-25...90/ -500...500mV) terminal: 1, 2
fvoltage (0/2...10V/ -5...5V) terminal: 2, 4
gthermocouple terminal: 1, 3
3Connecting input di1
Digital input,
acontrol input (as a contact) terminal: 7, 8
bcontrol input (as an opto-coupler)(optional) terminal: 7, 8
ccounter input (optional) terminal: 7, 8
dfrequency input (optional) terminal: 7, 8
4Connecting outputs OUT1 / OUT2 (optional)
Relay outputs max. 250V/2A NO contacts with a common terminal.
wOUT1 terminal: 17, 18
wOUT2 terminal: 17, 14
5Connecting output OUT3
Universal output
hlogic (0..20mA / 0..11,5V) terminal: 11, 12
icurrent (0...20mA) terminal: 11, 12
jvoltage (-10/0...10V)) terminal: 12, 13
ktransmitter power supply terminal: 11, 12
lfrequency output terminal: 12, 13
6Connecting the bus interface (optional)
RS 485 interface with MODBUS RTU protocol
*see interface description MODBUS RTU: (9499-040-72011)
7Connecting input INP2 (optional)
Input for the second variable INP2.
athermocouple terminal: 5, 6
bresistance thermometer (Pt100/ Pt1000/ KTY/ ...), 3-wire connection terminal: 2, 5, 6
cpotentiometer terminal: 2, 5 6
dcurrent (0/4...20mA) terminal: 2, 6
evoltage (-2,5...115/-25...1150/-25...90/ -500...500mV) terminal: 5, 6
Electrical connections
UNIFLEX CI 45 Terminal connections 11

4.3 Connecting diagram
The instrument terminals used for the engineering can be displayed and printed out via BlueControl Ò( menu File \ Print
preview - Connection diagram).
Example
4.4 Connection examples
Electrical connections
12 Connecting diagram UNIFLEX CI 45
Connecting diagram
Connector 1
Connector 2
Name
Name
Description
Process value x1
Measurement
Frequency
Frequency measurement
Limit value 2 signalling, INP2 error signalling
Limit value 1 signalling, INP1 error signalling
Description
INP2
INP1
PWR OUT1
OUT2
di1
L
N
14
13
12
17
16
15
11
18
PWR
8
7
6
3
2
1
5
4
+
Example: Signal converter with output on indicator and alarm signal

4.5 Hints for installation
wMeasurement and data lines should be kept separate from control and power supply cables.
wSensor measuring cables should be twisted and screened, with the screening connected to earth.
wExternal contactors, relays, motors, etc. must be fitted with RC snubber circuits to manufacturer specifications.
wThe unit must not be installed near strong electric and magnetic fields.
wThe temperature resistance of connecting cables should be selected in accordance with the local conditions.
aThe unit is not suitable for installation in explosion-hazarded areas.
aFaulty connection can lead to the destruction of the instrument.
aThe measurement inputs are designed for measurement of circuits which are not connected directly with
the mains supply (CAT I). The measurement inputs are designed for transient voltage peaks up to 800V
against PE.
aPlease, follow the instructions given in the safety hints.
4.5.1 cULus approval
For compliance with cULus regulations, the following points must be taken into account:
qUse only copper (Cu) wires for 60 / 75 °C ambient temperature.
qThe connecting terminals are designed for 0,5 – 2,5 mm2Cu conductors.
qThe screw terminals must be tightened using a torque of 0,5 – 0,6 Nm.
qThe instrument must be used exclusively for indoor applications.
qFor max. ambient temperature: see technical data.
qMaximum operating voltage: see technical data.
Electrical connections
UNIFLEX CI 45 Hints for installation 13
Master z.B. / e.g.
Converter RS 232-RS 485
(ADAM-4520-D)
DATA+ 1
DATA-
TX+
TX-
RX+
RX-
(R)+Vs
(B)GND 10
Data A
Data A
Data B
Data B
RGND
(RS-485) (RS-422)
LT 1
LT 1
2
3
Example: RS 485 interface with RS 485-RS 232 converter
See documentation 9499-040-72011

.5Operation
5.1 Front view
1Line 1: process value display
2Line 2: display of unit / extended operating level / error list /
Conf and PArA level values
3Tare / sample & hold activated
4Error list (2 x ô), e.g.
·Fbf.xsensor fault INP. X
·sht.xshort circuit INP. X
·Pol.xwrong polarity INP. X
·Lim.xlimit value alarm
·...
5Increment key / slave pointer, maximum value
6Enter key to select extended operating level or error list
7LED indication of instrument status
·green: OK
·green blinking: no data exchange with bus coupler
(only on instruments with optional
system interface)
·red: limit value I triggered
·red blinking: instrument fault
8Display elements, active as bars
9Status of switching output OUT1 / INP1 active
0Status of switching output OUT2 / INP2 active
!Decrement key / slave pointer, minimum value
§PC connection for the BlueControlÒengineering tool
gThe measurement value is displayed in LCD line 1. In the second line, the selected unit is displayed as
standard. When changing over to the parameter setting, configuration or calibration level and at the
extended operating level, the parameter name and value are displayed alternately.
+§: To facilitate withdrawal of the PC connector from the instrument, please, press the cable left.
Operation
14 Front view UNIFLEX CI 45

5.2 Operating structure
The instrument operation is divided into four levels:
The access to the parameter, configuration and calibrating level can be disabled using the following two methods:
wLevel disabling by adjustment in the engineering tool (IPar, ICnf, ICal). Display of disabled levels is suppressed.
wThe access to a level can be disabled by entry of a pass number (0 … 9999). After entry of the adjusted pass
number, all values of the level are available.
With faulty input, the unit returns to the operating level.
Adjusting the pass number is done via BlueControlÒ.
Individual parameters which must be accessible without pass number, or from a disabled
parameter level, must be copied into the extended operating level.
Factory-setting: all levels are accessible without restrictions,
pass number PASS =OFF
5.3 Behaviour after supply voltage switch-on
After switching on the supply voltage, the instrument starts with the operating level.
The operating status is as before power-off.
5.4 Operating level
5.4.1 Display line1
The display value is the value resulting from function.1, function.2, function.3 handling.
It is also called process value (see also section/page 6-19.)
Operation
UNIFLEX CI 45 Operating structure 15
3s
PASS
ô
12FE
450.3
ûC
äüüü
12FE
450.3
PARA
äüüü
12FE
450.3
CONF
äüüü
12FE
450.3
CAL
äüüü
12FE
450.3
END
äüüü
ô
PASS
ô
PASS
ô
ô
Operating level
Parameter level
Configuration level
Calibrating level
PASS

5.4.2 Display line 2
The value to be displayed continuously in the second LCD line can be selected via the BlueControlÒengineering
tool.
As default, the adjusted engineering unit is displayed.
1Engineering unit as default setting
2Display of output OUT3 in % (with
corresponding scaling)
gThe values in display line 2 can only be displayed, but not changed.
gReset to display of the engineering unit is possible by deleting the entry for line 2..
gWith faulty input values, signals dependent on the inputs (e.g. Inp1, Inp2, display value, Out3) also
indicate FAIL.
5.4.3 Switching over by means of the Enter key
By pressing key Enter, various values can be indicated on display line 2.
w1Display of the defined display line 2 value
(via BlueControl®);
Limit value LC is set by default
w2Display of the error list, if it includes entries.
With several inputs, the following value is
displayed when pressing the Enter key.
w3Display of the extended operating level, if
entries were made. With several inputs, the
following value is displayed when pressing the
enter key.
w4Return to the initial display
Unless a key is pressed during 30 s, the
instrument returns to the initial display.
Operation
16 Operating level UNIFLEX CI 45
12FE
450.3
ûC
äüüü
12FE
450.3
55.0
äüüü
12
12FE
278.3
°C
äüüä
1
2
12FE
278.3
FbF.1
äüüä
3
ô
ô
ô
12FE
278.3
L.1
äüüäü
4
ô
12FE
278.3
°C
äüüä
ô

5.4.4 Slave pointer function
The minimum and maximum input values are stored in the unit.
The minimum input value is displayed as long as key Ìis
pressed.
The maximum input value is displayed as long as key È
is pressed.
Deleting the minimum value
The minimum value is deleted by pressing key Èwhilst key Ìis kept pressed.
Whether the minimum value should be deleted also by the digital input (rES.L) can be determined during
configuration.
Deleting the maximum value
To delete the maximum value, press key Ìwhilst keeping key Èpressed.
Whether the maximum value should be deleted also by the digital input (rES.H) can be determined during
configuration.
Deleting the minimum and maximum values is possible also via interface.
gWhen de-energizing UNIFLEX CI 45, the minimum and maximum values are deleted.
gIn case of error of the display value (e.g. input fail behaviour), the minimum and maximum values are also
set to FAIL. When a valid value is displayed again, the minimum and maximum value are deleted.
5.4.5 Selecting the units
The unit to be displayed is determined via configuration D.Unt.
With selection “1 = temperature unit” , the displayed unit is determined by configuration Unit with the relevant
conversions for Fahrenheit and Kelvin.
By selecting D.Unt =22, display of any max. 5-digit unit or text can be determined.
1Unit (example): kilowatt hour
2Text (example): TAG no.
Operation
UNIFLEX CI 45 Operating level 17
12FE
450.3
26.7
äüüü
12FE
450.3
ûC
äüüü
min
12FE
450.3
502.4
äüüü
12FE
450.3
ûC
äüüü
max
12FE
4.5
kWh
äüüü
12FE
450.3
TI451
äüüü
1
2

5.4.6 Extended operating level
The operation of important or frequently used parameters and signals can be allocated to the extended operating level.
This facilitates the access, e.g. travelling through long menu trees is omitted, or only selected values are operable, the
other data of the parameter level are e.g. disabled.
Display of the max. 8 available values of the extended operating level is in the second LCD line.
The content of the extended operating level is determined by means of the BlueControlÒengineering tool. For this,
select entry "Operation level" in the "Mode" selection menu. Further information is given in the on-line help of the
engineering tool.
Press key ôto display the first value of the extended
operating level (after display of error list, if necessary).
The selected parameters can be changed by
pressing keys Ìand È.
ôpress to display the next parameter
ôreturn to normal display after the last parameter
Unless a key is pressed within a defined time (timeout = 30 s), the operating level is displayed again.
Operation
18 Operating level UNIFLEX CI 45
12FE
450.3
ûC
äüüü
12FE
450.3
H.I
äüüü
12FE
450.3
500.0
äüüü
12FE
450.3
L.I
äüüü
12FE
450.3
100.0
äüüü
ô
ô
ô

.6Functions
The signal data flow of transmitter CI 45 is shown in the following diagram:
6.1 Linearization
The input values of input INP1 or INP2 can be linearized via a table.
By means of tables, e.g. special linearizations for thermocouples or other non-linear input signals, e.g. a container
filling curve, are possible.
Table “ Lin” is always used with sensor type S.TYP= 18: "Special thermocouple" in INP1 or INP2, or if linearization
S.Lin = 1: “Special linearization” are adjusted.
wThe input signals must be specified in mV, V, mA, % or Ohm dependent on input type.
wFor special thermocouples (S.tYP = 18), specify the input values in mV, and the output values in the temperature
unit adjusted in U.LinT .
wFor special resistance thermometer (KTY 11-6) (S.tYP = 23), specify the input values in Ohm, and the output values
in the temperature unit adjusted in U.LinT.
Non-linear signals can be linearized using up to 32 segment points. Each segment point comprises an input (In.1
…In.32) and an output (Ou.1 …Ou.32). These segment points are interconnected automatically by straight
lines. The straight line between the first two segment points is extended downwards and the straight line between the
two highest segment points is extended upwards, i.e. a defined output value for each input value is provided.
With an In.x value switched to OFF, all further segments are switched off.
+Condition for the input values is an ascending order.
In.1 <In.2 < ...< In.32.
gFor linearization of special thermocouples, the ambient temperature range should be defined exactly,
becauseit is used to derive the internal temperature compensation.
See also page 46.
Functions
UNIFLEX CI 45 Linearization 19

gThe same linearization table is used for input 1 and input 2.
6.2 Input scaling
Scaling of input values is possible. After any linearization, measurement value correction is according to the offset or
two-point method.
gWhen using current or voltage signals as input variables for InP.x, the input and display values should
be scaled at the parameter level. Specification of the input value of the lower and upper scaling point is in
units of the relevant physical quantity.
gParameters InL,OuL,InH and OuH are visible only with ConF /InP /Corr =3selected.
Parameters InL and InH determine the input range.
Example with mA:
InL= 4 and InH = 20 means that measuring from 4 to 20 mA is required (life zero setting).
Functions
20 Input scaling UNIFLEX CI 45
mA/V
phys.
size
mA / V phys. size
OuH.x
OuL.x
InH.x
InL.x
Example for mA/V
Ou.32
Ou.1
.
.
.
.
.
.
In.1In.32
This manual suits for next models
1
Table of contents
Other PMA Transmitter manuals