Pneusej Venga 600 User manual


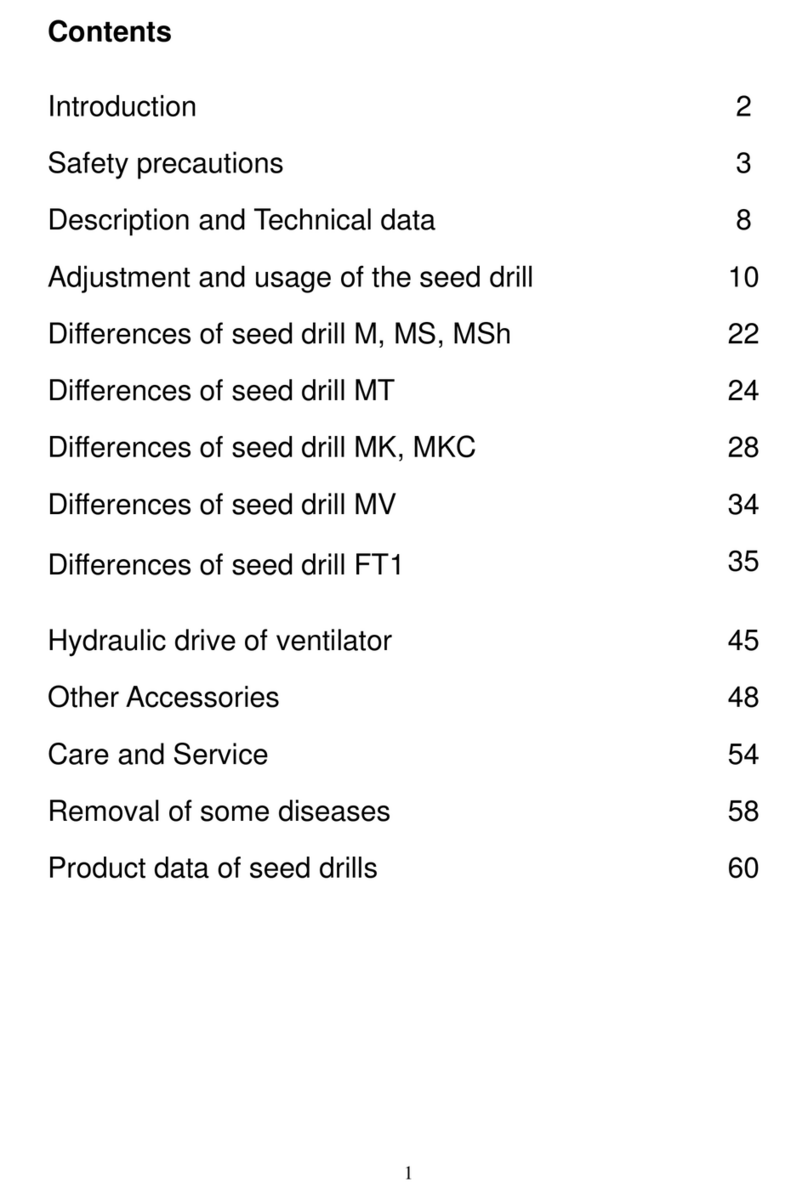
Introduction............................................................................................................................................. 4
SAFETY ..................................................................................................................................................... 5
MACHINE DESCRIPTION AND TECHNICAL DATA –VENGA.................................................................... 13
Machine description.......................................................................................................................... 13
Technical parameters ........................................................................................................................ 15
MOUNTING............................................................................................................................................ 17
Tractor connection (mounted version) ............................................................................................. 17
Tractor connection (trailed version).................................................................................................. 18
Hydraulic system ................................................................................................................................... 19
Hydraulic fan drive ............................................................................................................................ 20
Operating the markers ...................................................................................................................... 22
Electronic control .................................................................................................................................. 24
Preparation for seeding......................................................................................................................... 24
Dosing unit......................................................................................................................................... 24
Hopper filling..................................................................................................................................... 28
Calibration of seeding rate ................................................................................................................ 28
Ride on road .......................................................................................................................................... 30
Safety................................................................................................................................................. 30
Field preparation ................................................................................................................................... 32
Filling the seed hopper...................................................................................................................... 32
Setting seeding depth........................................................................................................................ 32
Setting pressure of seeding coulters................................................................................................. 33
Setting the S-harrow springs ............................................................................................................. 33
Setting the marker............................................................................................................................. 35
Setting pre-emergent markers for tramlines .................................................................................... 38
Electromagnetic tramline valves ....................................................................................................... 38
Disconnection / deactivation of half working width [+].................................................................... 39
Disconnecting sowing coulters.......................................................................................................... 40
Check before work ............................................................................................................................ 41
Control ride........................................................................................................................................ 41
Machine’s operation ............................................................................................................................. 42
Working position and work ............................................................................................................... 43
Maintenance after seeding ................................................................................................................... 44

Disconnecting and storage .................................................................................................................... 47
Maintenance ......................................................................................................................................... 47
Maintenance intervals....................................................................................................................... 49
Lubrication......................................................................................................................................... 52
Wheels............................................................................................................................................... 53
Dosing unit......................................................................................................................................... 53
Sensors .............................................................................................................................................. 53
Hydraulic hoses ................................................................................................................................. 55
Replacement of S-harrow springs ..................................................................................................... 55
Replacement of DXD RC II disc .......................................................................................................... 55
Replacement of distributor cover ..................................................................................................... 56
Marker............................................................................................................................................... 57
Track tiller.......................................................................................................................................... 58
Troubleshooting .................................................................................................................................... 58
Electronics ......................................................................................................................................... 58
Hydraulics .......................................................................................................................................... 59
Dosing unit......................................................................................................................................... 59
Seeding coulters ................................................................................................................................ 60

Introduction
This manual is assigned to trained farmers and persons with appropriate qualification for
agricultural work and who have been instructed about manipulating the machine.
Safety
Before operating the machine or before installing it, please familiarize yourself with the
contents of this manual. In any case, read the safety instructions in the “Safety” chapter and
follow the warnings in each chapter. You will achieve optimal work results and work safety.
Employer
Before starting the machine for the first-time workers have to be instructed on how to
handle it.
Training includes:
- checking the conditions for safe machine handling
- handing manual and relevant documents or intensive training which mainly involves the
safe handling of the machine
Regular instruction
Regularly, or at least once a year, learn workers about basic behavior rules to make the
machine as safe as possible.
Training
Seller will teach you about operating the machine and about basic service of the machine. It
is prohibited to putting the machine into operation without training!
Symbols
To make the text clearer, various symbols are used, such as:
➢Triangle is in front of actions, which are necessary to do.
→The arrow is a reference to another location in the text.
The plus sign indicates that this is a special accessory that is not part of standard
version.
Pictograms
Beside standard symbols, there are also pictograms in the text, that can help you search for
places in text or otherwise specify text.

The warning triangle draws attention to safety instructions, the non-compliance
of which may have serious consequences, as there is a real risk of moderate or
fatal injury. In the security chapter, there are also safety instructions that
cannot be assigned to any other activity but which in, in various situations,
promote safety and conscience.
This symbol contains machine instructions the failure of which may cause
serious difficulties or damage to the machine.
This symbol indicates tips and warnings for the operator.
This symbol indicates tips for assembly or service work.
Basic equipment for operating and setting up the machine
The basic equipment of the seed drill includes:
- weighing scale
- seed bag,
- electronic device,
- spare parts catalog,
- manual for electrical equipment.
SAFETY
For your safety
In this chapter, you will find general instructions for your safety. Other chapters include
special safety instructions that are not described in this chapter. Follow the safety
instructions in order to:
- your safety,
- safety of the other people,
- machine safety.

In case of wrong machinery usage, many dangerous situations can be encountered.
Therefore, when operating the machine, work maximally consciously and never work under
time pressure.
As an employer, regularly inform workers who work with machine about safety instructions
in accordance with legal regulations.
Warning stickers
Stickers for your safety are located on the machine. Stickers have to not be removed. If
stickers become unreadable or they will be damaged, you can order new stickers and place
them on required locations.
Read the manual and follow it
Putting into operation is only permitted when manual have been read. This
applies mostly to safety instructions.
Do not stay between tractor and machine
It is forbidden to stay between tractor and machine especially while connecting
and disconnecting.
It is prohibited to carry persons in the machine
It is forbidden to transport persons and objects in the machine. Carriage on the
machine is life-threatening and strictly forbidden.
Do not remove protecting device
Never use the machine without the protecting devices. Do not open protecting
devices.
Do not drive the road with full hopper
It is not permitted to drive the road with full hopper. This ride can cause
accidents.
Beware of leaking hydraulic fluid
Follow safety instructions in the manual.

Danger of grip
Gaps between machine components can reduce. Avoid moving near the folding
parts of the machine.
Tighten the screws
All screw connections have to be checked and tightened after first operating
hours. Vibrations may release the links.
Danger of overturning
The machine and its components may overturn. Always use protective
equipment. The machine can only be parked on a solid ground and secured by
safety struts.
Do not stay within range of machine parts
Pay special attention when folding and unfolding the machine. There is a risk of
injury by machine.

Who can operate the machine?
Only qualified persons.
Service and repair the machine can only be done by qualifies persons, who were taught
about the danger of handling the machine. As a rule, these persons have an agricultural
education or have been instructed at the same intensity.
Connection
Increased risk of injury
When connecting the machine, there is an increased risk of injury. For this reason, it is
necessary to:
- secure the tractor against unexpected movement,
- checked category of the machine and the tractor,
- be sure, there are not any persons between tractor and the machine,
- control the three-point hitch carefully and slowly.
Failure to do so may result in severe to fatal injuries.
Electrical connections connect after assembly
When installing the lights, a power to the tractor have to be unconnected.There could be
short circuit and damage the electronics.
Connect hydraulic system only if it is not under pressure
Do not connect the hydraulic hoses to the tractor hydraulic system of the tractor if the
system is under pressure. Failure to observe this warning may cause unpredictable machine
movements.
High pressure in the hydraulic system
The hydraulic system is under high pressure. Always check all pipes, hoses and connections
for leaks and damages. Only use suitable aids when searching for leakage. Remove the
damage immediately. Splashing oil can cause fire and has adverse environmental effects. In
case of injury, seek medical attention immediately.
Color marking of hydraulic hoses
Hydraulic hoses are color marked, to avoid the change of them. Wrongly connected hoses
can cause unpredictable machine movements.

Distance of center of gravity
Observe admissible weight, axle load, tire load and minimum balance
The front or rear extensions of the machine have to not exceed the maximum permissible
weight, the permissible axle load and the load on the tractor tires. The front axle shall be
loaded to at least 20% of the unladen weight of the tractor to maintain its operability.
Ride on the road
Ensure adherence to the prescribed technical condition
If the machine is used on public roads, it have to comply with applicable regulations such as:
- installing the lights, warning and protection devices,
- maximum permissible dimension and weights.
Failure to comply with road traffic rules - it is the responsibility of the driver and the vehicle
owner.
Closure of ball valves
If the hydraulic system is equipped with safety ball valves, they have to be closed while
driving. Failure to observe this warning could result in the risk of injury and spontaneous
movement of the machine or its parts.
Carriage of persons on the machine is prohibited
No persons or objects may be transported on the machine. Carriage on the machine is life-
threatening and strictly forbidden.
Changing properties while driving and breaking
Due to the connection of the machine, the properties for driving and braking are changed.
The high center of gravity and the inertia force of the machine have to be considered
especially in turns. Inappropriate driving can lead to accidents.
Drive at reasonable speed
Always regulate speed to the road conditions. While driving too fast on an unsuitable road
high forces can arise and thus overload the machine. Not regulating speed can cause
machine damage and accidents.

Putting into operation
First putting into operation after training
Machine can be putted into operation only after proper training by sellers, service support
or persons from the manufacturer. Putting into operation without training can cause
damage to the machine or accidents.
Take care of perfect technical condition
Only operate the machine if it is in a faultless technical condition. Before use, check all
important parts and replace the wrong parts that can cause injury and damage.
Do not remove protective devices
Protective devices cannot be removed. Before using, check all protective devices.
Unprotected parts can cause serious or fatal injuries.
Checking tire pressure
Regularly check tire pressure. Too high or low pressure reduces tire life. It can also lead to
unwanted work results and can cause accidents while driving.
Transportation of persons is prohibited
No persons or object can be carried on the machine. Carriage on the machine is life-
threatening and strictly forbidden.
Machine height and street electric line
If height 4,00m while folding and unfolding is exceeded, do not fold the machine under
electric line. It can cause contact between line and machine, in that case:
- do not leave the tractor cab,
- do not touch metal parts of the tractor,
- do not create conductive connections with ground,
- warn people not to go near tractor and machine,
- wait for professional rescue team.
Also, never run onto the machine under the electric line. Voltage can also skip without direct
contact.

Checking the ambient
Check the nearest machine surroundings before starting, pivoting and operating. Always
care about good view. Drive with machine only when there are no objects and persons in the
area. Using the machine without checking nearest area can lead to accidents.
Tightening screws and nuts
Regularly check tightening of screws and nuts. By using the machine, individual screws can
deallocate. Tighten screws and nuts as required.
Procedure for breakdowns
When parts of machine are damaged, immediately stop the machine and secure it. Remove
the fault immediately or call the service. Continued use of the machine can cause its damage
or accidents.
Disconnect the machine
Increased risk of injury
When disconnecting the machine there is an increased risk of injury.
To prevent risk situations:
- secure tractor against unexpected movement,
- never stay between tractor and machine while disconnecting,
- operate the three-point hitch slowly and carefully,
- care about straight and safe machine location,
- disconnect hydraulic hoses only when hydraulic system is without pressure.
Failure to follow these rules can result in serious or fatal injuries.
Caring and maintenance
Observe the care and maintenance periods
Observe the prescribed inspection times in the manual. Failure to do so may result in
damage to the machine, poor quality of work or accident.
Use only original spare parts
Many components have special features that are critical to the machine`s stability and
function. Only spare parts and accessories supplied by manufacturer are tested and
approved. Other products can have effect on function of the machine or affect its safety.

When using other than original spare parts, the warranty and liability of the manufacturer
for the product is void.
For all maintenance work:
- switch off the tractor PTO,
- depressurize the hydraulic system,
- if it is possible, disconnect tractor,
- keep the machine in safe location,
- do not step on the machine, use safe steps,
- secure the machine against movement,
- do not touch the running V-belt in any way.
Interruption of electric current
Before working on an electronic device, it is necessary to disconnect from the power supply.
Work on a device under the current can cause injury and damage to the machine.
Changing hydraulic hoses
It is necessary to change hydraulic hoses every three years because they are aging without
visible external damage. Damaged hoses can lead to severe or fatal injuries.
Cleaning with high-pressure cleaner
The machine can be cleaned with water or steam. Clean bearings, fans, signal distributors,
plastic parts and hydraulic hoses only with little pressure to avoid damage.
Remove the accumulator and alternator before welding
Before electric welding, remove accumulator and alternator. This prevents the possibility of
damage to the electronic device.
Tighten screw connection
After the care and maintenance work tight the loosened screws again. Unattached screw
connections can cause injuries and material damage.
Other regulations
Compliance
Beside these safety instructions, also follow:
- safety regulations,

- general rules of safety health at work and road traffic,
- instructions in this manual,
- instructions for operating, maintenance and repair.
MACHINE DESCRIPTION AND TECHNICAL DATA –VENGA
In this chapter, there are information about operating mode, use and technical data.
Machine description
Seeding machine Venga is primarily intended for sowing cereal seeds. The sowing device
allows sowing of all seeds with a seed size of up to 10 mm, such as:
- wheat, barley, rye, oats, corn, beans, peas, rape, grass.
Venga is equipped with DXD RC II sowings counters, which allows sowing in conditions with
more crop residues.
Venga 600 Trailed
The entire 1800 liter hopper is destined for seed. Accurate dosing is provided by one dosing
unit, the seed is further being transported to the distributor. The folding frame with sowing
coulters has a width of 6,00 m.
The machine can only be used for works described in this manual. Other use is considered as
inappropriate, such as:
- transport of persons and objects,
- transferring power to other objects,
- installing other technology than is described in this manual.
Manufacturer or seller are not responsible for damages caused by wrong use of the
machine. The risk is bear only by the user.

Machine description –Venga

Function of seeding machine
The drive of the dosing unit can be designed either by a drive wheel or by electric motors.
Depending on the dose setting on the dosing unit, a certain amount of seed is dispensed
from the hopper into the diffuser. The air-flowing fan transmits the seed further into the
distributor down to the coulters.
Venga seeding machine can be used in connection with all standard tractors of power class
from 54 kW. Tractor have to be equipped with a lower linkage and at least 3 hydraulic
circuits, and with a 540 RPM rear power take-off shaft. The working speed should be in the
range of 5-12 km/h depending on the surface, type of soil and required sowing accuracy.
Technical parameters
Technical parameters of the machine
400
450
500
600
Height (m) *T/M
2,75/2,08
2,50/2,08
2,75/2,14
3,25/2,61
Width (m)
3,00
Length (m) *T/M
5,38/3,47
5,25/3,33
5,25/3,41
Working width (m)
4,00
4,50
5,00
6,00
Total weight without seed
(kg) *T/M
2565/2040
2640/2110
2800/2280
2980/2460
Filling height of hopper (m)
2,07
Dimension of the hopper
filling hole (cm)
1,87 x 0,90

Volume of hopper (l), seed
1800
Number of rows (pc)
32
36
40
48
Row spacing (cm)
12,5
Tires
31x15,5-
15 10PR
T6
Tire pressure (bar)
4,2
*T/M –Trailed / Mounted
Hydraulic and electric system
Fan oil flow (l/min)
43
Fan operating pressure(bar)
150
Supply voltage (V)
12
This chapter lists the operating mode, use and technical data.
Use in accordance with specifications
Other use, or use beyond a defined frame, such as transport, handling or power transfer to
other machines, is not in accordance with intension of the machine. The risk is bear only by
the user.
Characteristic signs
Thanks to robust material with optimized, flexible modular construction and favorable
center of gravity, the efficient and accurate machine is a reliable working tool.
Sowing coulters
The machine is equipped with efficient DXD RC II sowing coulters.
Precise depth control
Depth control on Venga is set on the axles of the machine.

MOUNTING
Tractor connection (mounted version)
Increased risk of injury
When connecting, there is high risk of injury, so never stay between tractor and
machine. Check categories of connected devices of machine and tractor,
categories have to be the same.
➢On the lower arms of the linkage, fit the appropriate balls of the lower arm and secure
them with fuses.
➢Set the lower arms to the same height.
Ensure, that fuses of lower arm click. If they don’t click, the machine could be
released from the lower arms.
➢Connect machine to the tractor, ensure, that fuses of lower arms are clicked.
➢Adjust the lower arms to keep the machine slightly free to left and right.

Tractor connection (trailed version)
While connecting, there is high risk of injury, so never stay between tractor and
machine. Check categories of connected devices of machine and tractor,
categories have to be the same.
➢Lock-off the pin on tractor`s lower linkage.
➢Connect the seeder to the tractor.
➢Lock the pin on tractor`s lower linkage.
Fan drive
Fan on the Venga seeding machine is driven by a pulley, which is through V-belt driven by
tractors power shaft or by hydraulics directly from the tractor.
➢Connect PTO shaft –if the machine is equipped with mechanic drive –on power take-
off of the tractor.
PTO shaft - connect only when tractor engine is off.
➢Power take-off speed set to 540 RPM. At this speed, fan should reach optimal speed.
By increasing or decreasing power take-off speed, you will change fan sped.
➢If the machine is equipped with hydraulic fan drive, connect it to hydraulic circuit; oil
overflow has to be connected directly to the tank- free fall. If tractor isn’t equipped

with Load sensing system, it is recommended to connect fan drive to preferred
circuit. Then, set fan speed by control valve from 3500 to 4500 RPM.
Connections
Electrical system
➢Connect the machine light connector.
➢Connect the connector for additional electrical equipments.
Hydraulic system
➢Connect hydraulic hoses to the tractor.
→chapter Hydraulic system
Hydraulic system
Before connection check all hydraulic hoses and their fixed connection in
couplers. Connect hydraulic only when it is not under pressure. Hydraulic
system under pressure can cause machine movements.
Don’t mix oil types. Machine use with different tractors can cause mixing two
types of oils. This mix can damage tractors devices. Use only permitted type of
oil.
Fan speed can`t be over 5000 RPM. Fan can be damaged by higher speed.
Connectors of hydraulic hoses or color coded. To one hydraulic circuit always connect only
hoses with the same color code. Hydraulic circuits are equipped with ball valve, which are
necessary to open.
Hoses color coding:
- White –control of lifting an axle
- Blue –disc markers
- Yellow –folding / unfolding
- Red –hydraulic fan drive

Hydraulic fan drive
Hydraulic fan drive should connect to tractors pre-fitted control valve. This
minimize fan speed fluctuation when lifting and putting down the machine or
other hydraulic loan.
The oil flow leads to a three-way valve for flow regulation and is regulates the hydraulic
motor speed. Fan speed have to be controlled by tractor’s terminal.
Fan’s technical parameters
Parameters
Capacity of hydromotor (ccm)
8
Working pressure (bar)
150
Maximum pressure on return flow (bar)
5
Oil flow (l/min)
43
Maximum fan speed (RPM)
5000
No-pressure return
No-pressure return reduces the risk of hydromotor’s damage. It is important to choose the
right position of connecting the hydromotor to hydraulic system, because:
- returning oil have to flow through the hydraulic filter,
- returning oil can’t flow through control valves, because pressure in return will be
too high.
This manual suits for next models
3
Table of contents
Other Pneusej Farm Equipment manuals
Popular Farm Equipment manuals by other brands

CropCare
CropCare A116K Assembly & instruction manual

Rabe
Rabe KORMORAN SF 180 operating instructions

Alice's Garden
Alice's Garden CHABO CKC912BN manual

LELY WELGER
LELY WELGER RP 405 operating manual

MacDon
MacDon 1000 Operator's & parts manual

Agria
Agria Cyclone 5900 Translation of the original operating instructions