8
EN
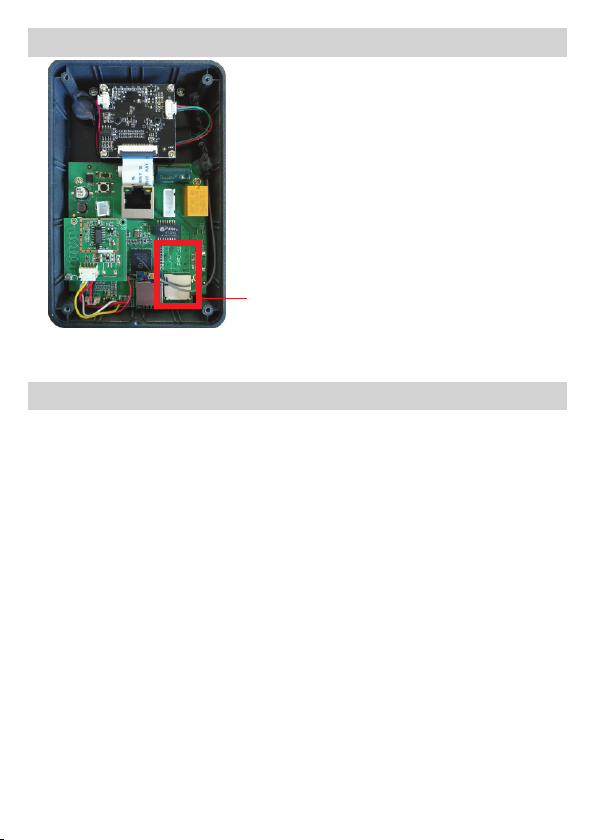
label of the device.
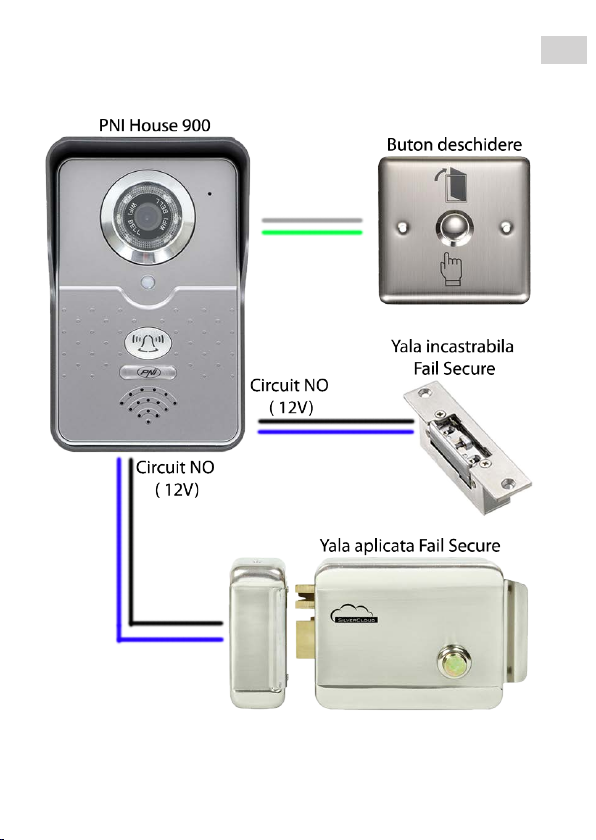
ŸPower the outdoor unit
ŸConnect the outdoor unit to the local LAN network (trough a router or
switch) using an ethernet cable
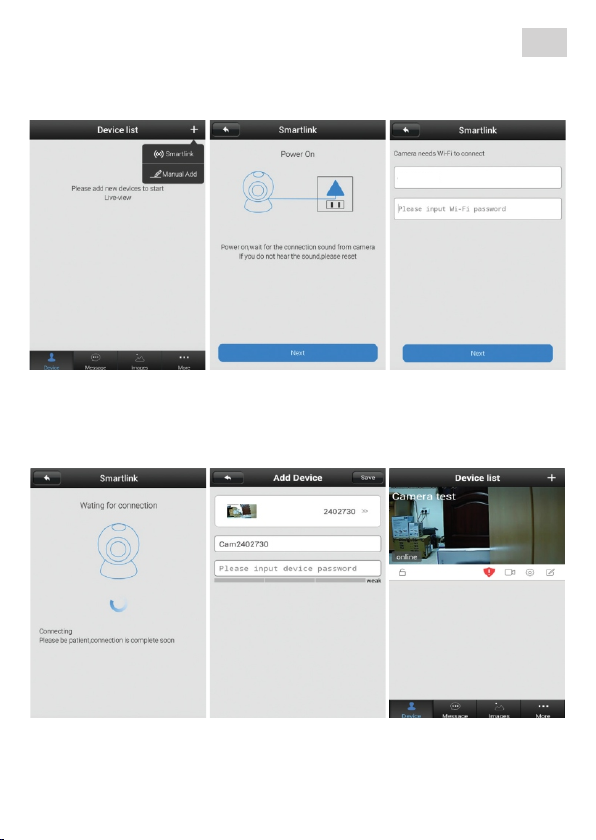
ŸMake sure the phone is connected to the same network as the outdoor unit
(wireless router). Open App on phone
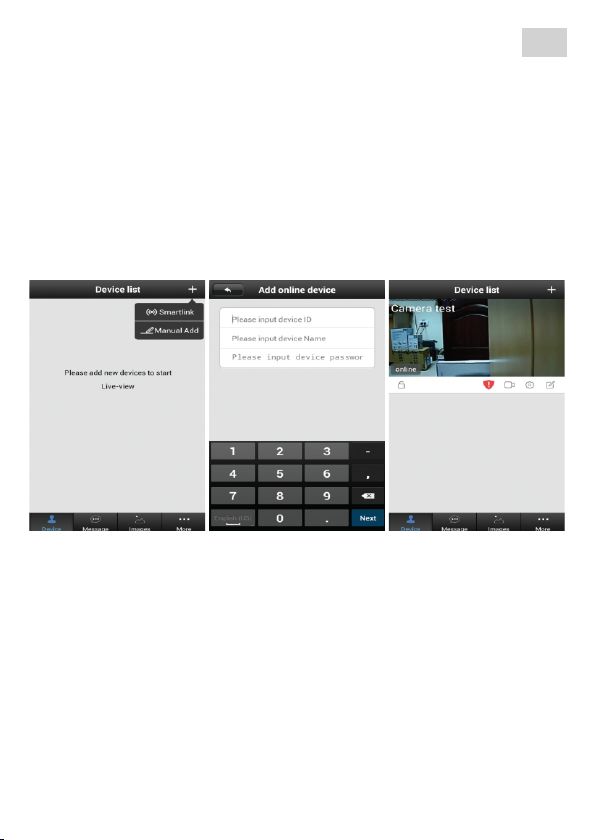
ŸPress + button then select “Manual Add” option.
ŸInsert the ID found on the back of the unit, desired name and access
password (default password is 123123). The ID and password of the
product are on label on the back of the outdoor unit.
ŸIf the procedure was successful you will be able to see the image from the
device on the screen and the Online status.
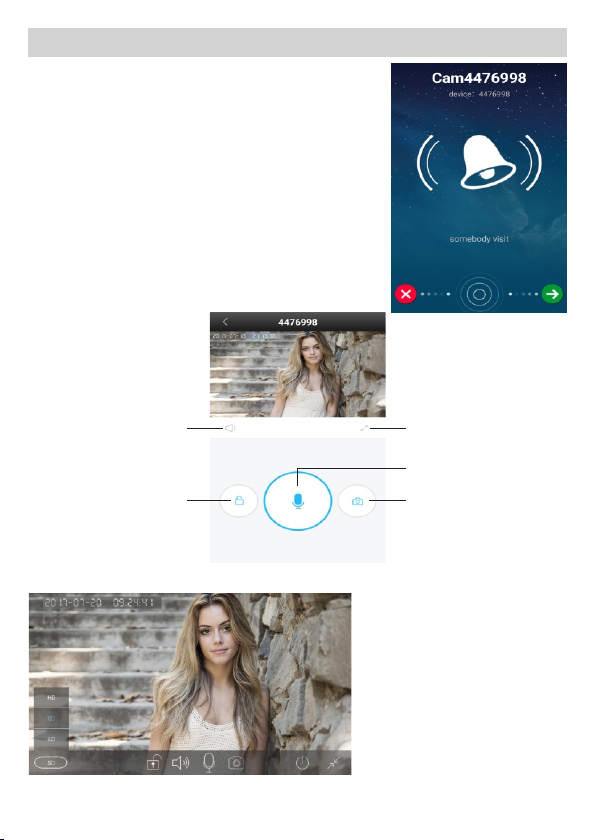
Available option in the preview window: 1 - arm/disarm system; 2 - change
password alert; 3 - view recordings (on the memory card); 4 - camera settings;
5 - edit camera; 6 - device list; 7 - event log; 8 - view captured photos (stored on
phone); 9 - general settings;
Camera access password: After a few times the app will ask you to change
the camera access password for security reasons. To do this access the
camera settings. White the new password on a piece of paper in case you
forget it. To reset the password, in case you forgot it, you have to reset the
device then redo the configuration in the app from the beginning.
Delete device: long press on the image of the device then select “Delete”
option.
When using LAN connection you can also use “Manual Add”
option to add the device in the app using the information on the back
1 2 3 4 5
6789