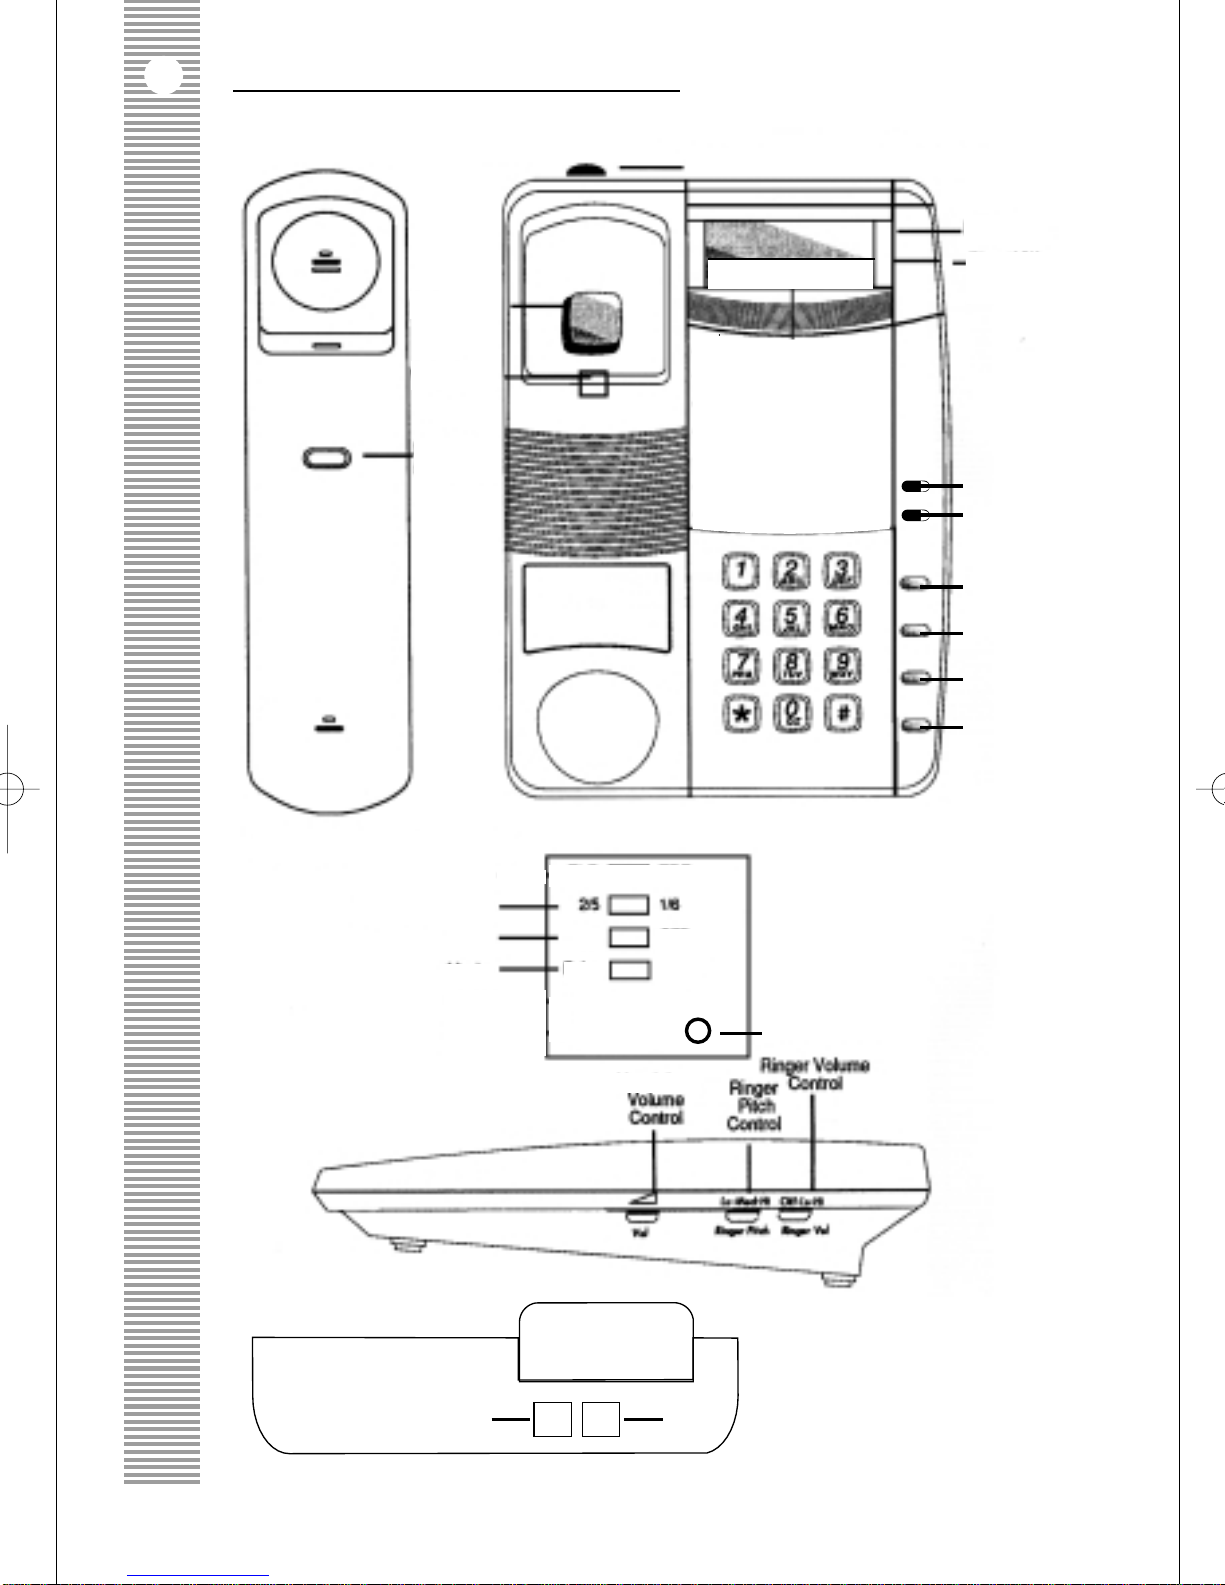
5. UTILISATION OF CONTROL
The button functions are as follows:
0 - 9 - Dialling digits
✽ - # - Dialling codes for MF Signalling
Recall - For use on a PBX or for star services
Save - Used to store the last number redial into a memory
Tone - Switches from Loop Disconnect to DTMF during dialling
Redial - Last number redial
Pause Insert a pause in the dial sequence
View - Used to view last number dialled
Mute - To prevent the other party from hearing you (ie. push
(on handset) down to mute) or, alternatively, on specially adapted
models this can be amended to push-to-speak. In this
instance, the phone will be clearly marked as such.
Latchable Mute - To prevent the other party from hearing you (i.e. push
(on base) to mute). LED will illuminate when in use.
Push button again to continue normal (two-way)
conversation.
Set - Use to set clock “Minute & Hour Digit”
Headset - To enable headset operation. LED will illuminate when
in use.
The switch functions are as follows:
Ring Vol - Allows you to set the level of the ringer loudness
Ring Pitch - Allows you to set the pitch of the ringer
ELR/TBR - Sets the Recall to Earth (ELR) or Timed Break (TBR) Recall
Pulse/Tone - Sets signalling (dialling) to Loop Disconnect (LD)
or DTMF(MF)
Message Waiting - Sets the message waiting to 4 or 6 line configuration
Headset Volume Control
- Allows you to set the headset volume.
Visual Indicators: Ring - This indicates an incoming call by lighting up.
Message Waiting - Operates where PABX message waiting is operational
Headset Socket - Used to connect the headset (not supplied)
6. INSTALLATION
The telephone must be sited close to one of the new modular telephone sockets.
There is no limit to the number of sockets you can have installed in your home which
means you can, if you wish, move your telephone from room to room. Unlike
sockets, however, there is a limit to the number of telephones you can operate on
your exchange line. Installing too many telephones will overload the line which could
inhibit some or all of the telephones from ringing.To avoid overloading your exchange
line there is a method of calculating the number of telephones you can use. Add all
the Ringer Equivalence Numbers (REN) together, which are marked on the base of
each telephone. Numbers differ so do check. The numbers when added together
must be 4 or less. Sometimes BT telephones are unmarked but they can generally be
assumed to have a REN of 1.0. If in doubt, please check with your BT Sales Office.
The REN value of your NR201HPUK Headsetphone is 1.0.
-4-