ZONEMASTER AIRTOUCH ZONE CONTROL SYSTEM - User Manual
8
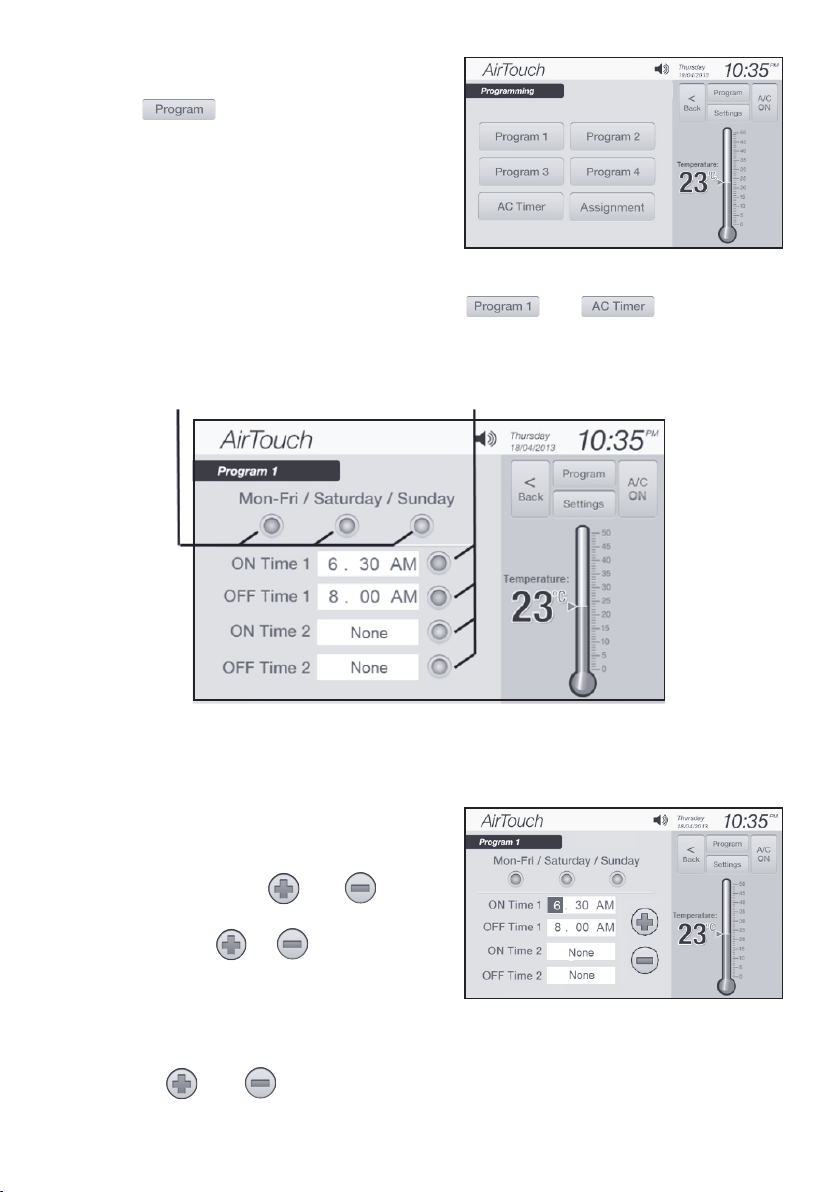
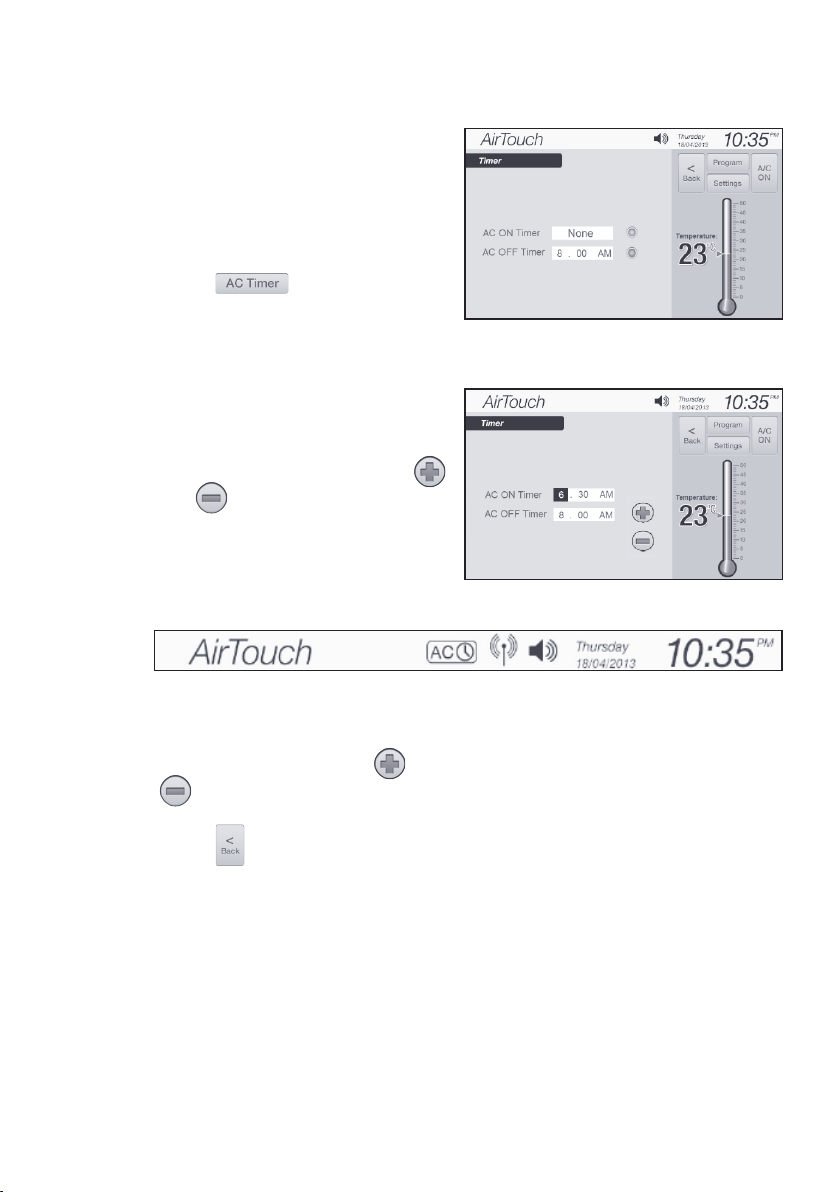
4.3 AC Timer
ACtimerfunctionisuseful for
automaticallyswitchingtheACuniton
oroatgiventimeifACissetupin
AirTouch.YoucanuseOFFTimerand
OnTimerincombinationorseparately.
a) Touchon‘Program’
screen(Figure4)toenter‘ACTimer’
setupscreen(Figure11).
b) Touchthe radio button to enable
ordisabletherelevanttimer,
touchingthehour,minuteorAM/
PMeldwillbringuptheplusand
minusbuttons(Figure12),touch
and button to change the
time of the corresponding timer.
TheACtimericonwillbeonthe
statusbariftheACtimerisset
(Figure13).
Afteranediteldishighlighted,
touchthatareaagainwillquitfrom
the editable status and the and
willdisappear.
c) Touchbuttontosavethetimer
andbacktoProgrampage.
NOTE: If AC is not set up, AC timer
will not be available. AC timer
functionisdierentfromthe
program function, the enabled timer
will act once and will not repeat. If
you want the action repeated at the
same time, you may look at programs.
Figure 11.
Figure 12.
Figure 13.