ADDITIONAL FEATURES
29082023
LAST NUMBER REDIAL
1. Press ** or ## to dial the last number dialed.
Note: The phone will not display the number it’s calling
until after the call is placed.
CALL PICK UP
If a Call Pick Up Group has been configured for your site
you can pick up another user’s ringing line.
Pick up a ringing line:
1. Pick up the handset of any phone in the call group.
2. Dial *76.
DIRECTED CALL PICK UP
Dial *85 and then the extension of the ringing party to
pick up a call directed to another user in your enterprise.
If the Busy Lamp Field has been configured, you can pick
up the call by selecting the flashing party’s name in the
lines view.
CALL ME ANYWHERE
1. From the Settings Menu, press Features > IBC Call
Settings > Call Me Anywhere.
2. Add a new location, delete, or modify an existing
location.
3. Disable or enable locations that will extend
incoming calls to any other fixed or mobile device.
RECORDING CALLS
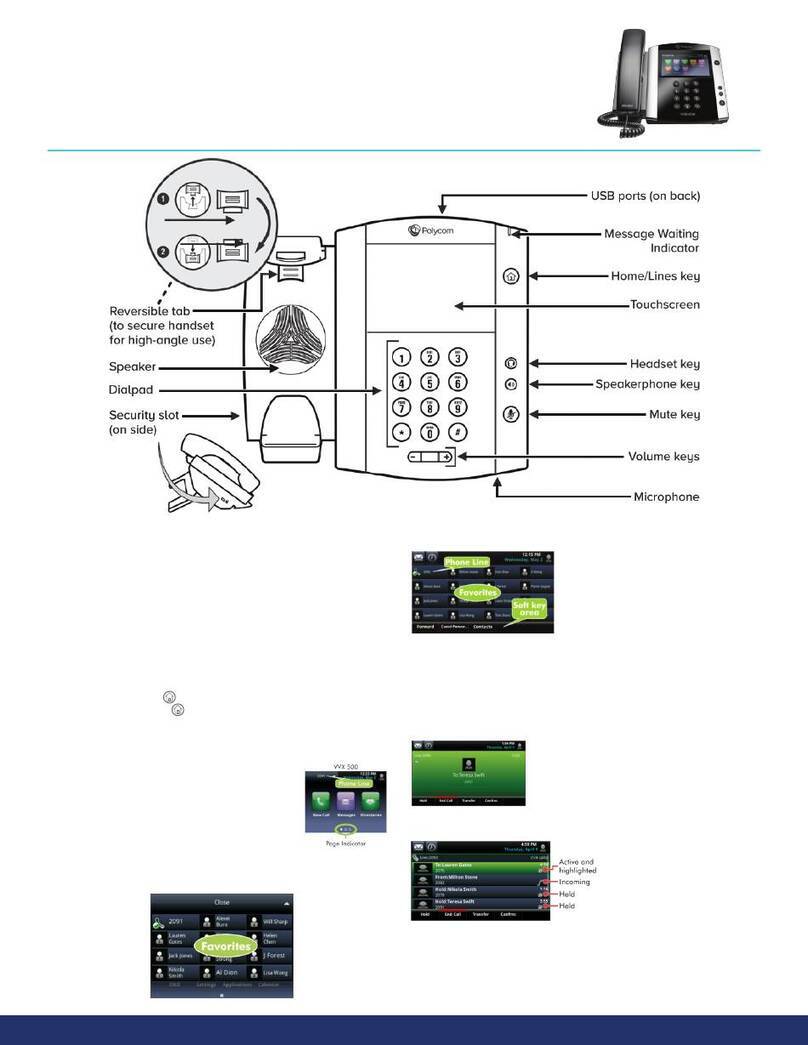
1. Connect a USB flash drive to the back of your
phone. USB icon will display in the status bar
and lines view with available recording time.
2. From the Lines, Calls, or Active Call view, press
Start, Pause, Resume, and Stop to control the
recording.
To rename or delete a recording:
1. From the Browse Recordings view, press the
recording you want to rename or delete.
2. To rename the file, press Rename, update the
filename, and press OK.
3. To delete the file, press Delete
To play a recorded call:
1. From the Browse Recordings view, press the
recording you want to rename or delete.
2. To rename the file, press Rename, update the
filename, and press OK.
DO NOT DISTURB
You can enable Do Not Disturb when you do not want
to receive calls. This will forward the call to your call
forward busy location.
To enable or disable Do Not Disturb:
• Select the DND soft key, or from the main menu,
select DND.
SET RINGTONES
You can set ringtones for all incoming calls or for
individual lines on your busy lamp fields.
To set a ringtone for incoming calls:
1. Select Settings > Basic > Preferences.
2. Select Ring Type and choose a ring tone.
Note: Distinctive ringtones can be applied to individual
contacts in the contact settings.
CONTACT DIRECTORY
To view the Contact Directory:
You can view and add contacts in the Contact directory.
• Select Directories > Contact Directory.
To add a contact to the Contact Directory:
1. In the Contact Directory, select Add.
2. Enter the contact’s information and select Save.
You can enter a number in the Favourite Index field to
make a contact a favourite.
FAVOURITES
Add people you call a lot, or commonly used features,
to your Favourites for faster access. This creates an
autodial on a line key.You can view and add contacts in
the Contact directory.
1. Press and hold an unused line key for
approximately 3 seconds.
2. The Add Contact view will appear.
3. Using the dial pad, enter the contact’s first name,
last name, and phone number. Enter the phone
number in the Contact field.
4. Press Save.
5. You will now see the contact assigned to a line key.
Press the associated line key to place a call to that
contact.
Tip: You can also use these steps to program commonly
used features to your line keys using the feature access
codes. For example, you could program Call Pull as a
contact with a phone number of *11.
ENTERPRISE DIRECTORY
To search the Enterprise Directory:
1. Select the Directory soft key, and select Enterprise
Directory from the list.
2. Use your dialpad to enter search criteria.
3. Select Submit to search.
To perform an advanced search in the Enterprise
Directory:
You can perform an advanced contact search in the
corporate directory.
1. Select the Directory soft key, and select Enterprise
Directory from the list.
2. Select AdvFind.
3. Enter your search criteria and select Submit.
PUSH TO TALK
Prior to using this feature, the acceptance list must be
configured in the User Portal.
Users must have you on their acceptance list for you to
use this feature.
To allow users to reach you, you have to have them on
your acceptance list.
Dial *53 and enter the phone number you want to dial to
use the Push to Talk feature.
BUSY LAMP FIELD
Must be configured in the user portal. Allows you to see
if a user is idle, on the phone, or if their phone is ringing.
Busy Lamp Field contacts will be displayed in your lines
view first.
If a user is ringing, their button will flash green. If a user
is busy, their button will appear red. If a user is idle, there
is no indication.
*Depending on your subscription package, some of the
features listed in this guide may not be available for all
users.
