manuals.online logo
Brands
  1. Home
  2. •
  3. Brands
  4. •
  5. Polygroup
  6. •
  7. Artificial Pine Tree
  8. •
  9. Polygroup TG80M4C25C00 User manual

Polygroup TG80M4C25C00 User manual

MODEL #: TG80M4C25C00
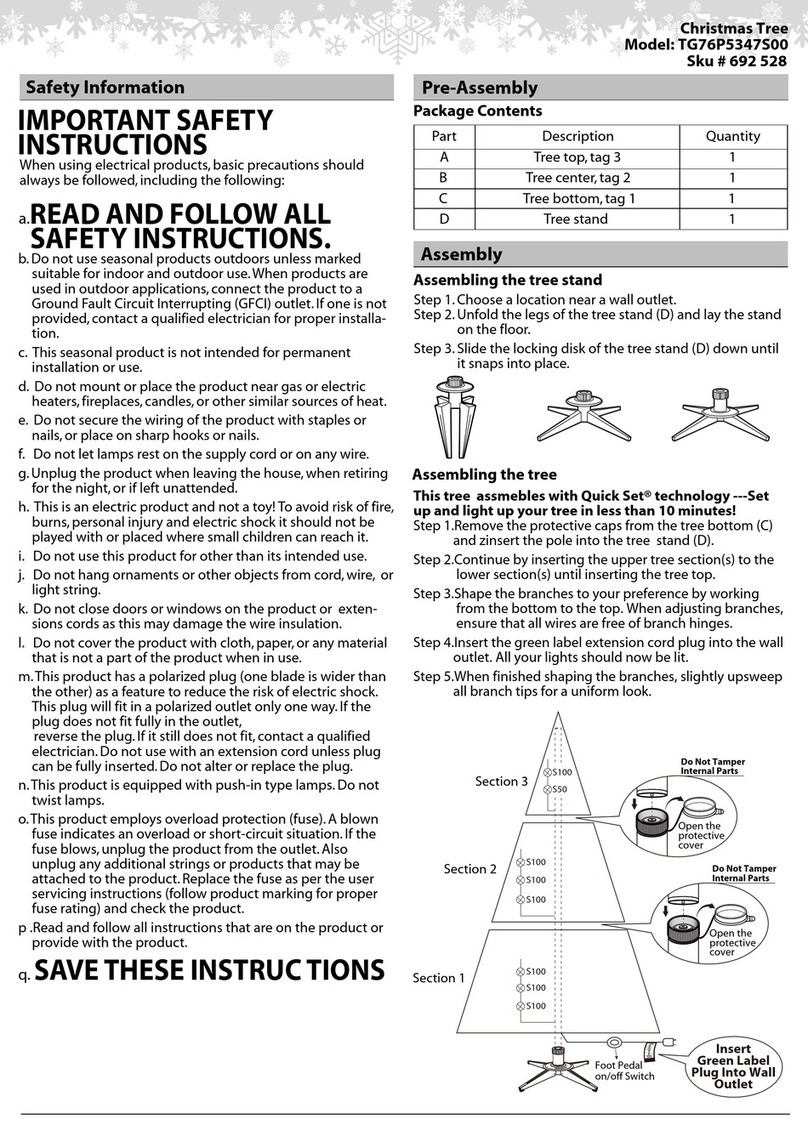
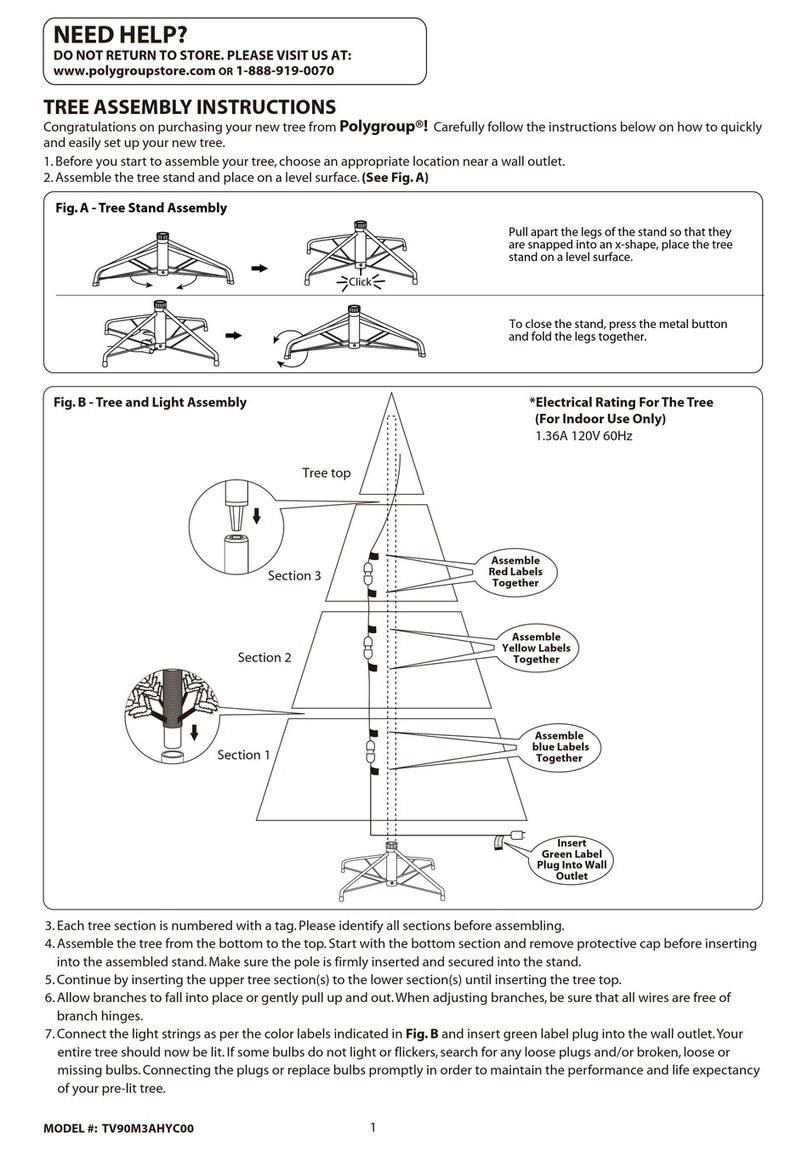
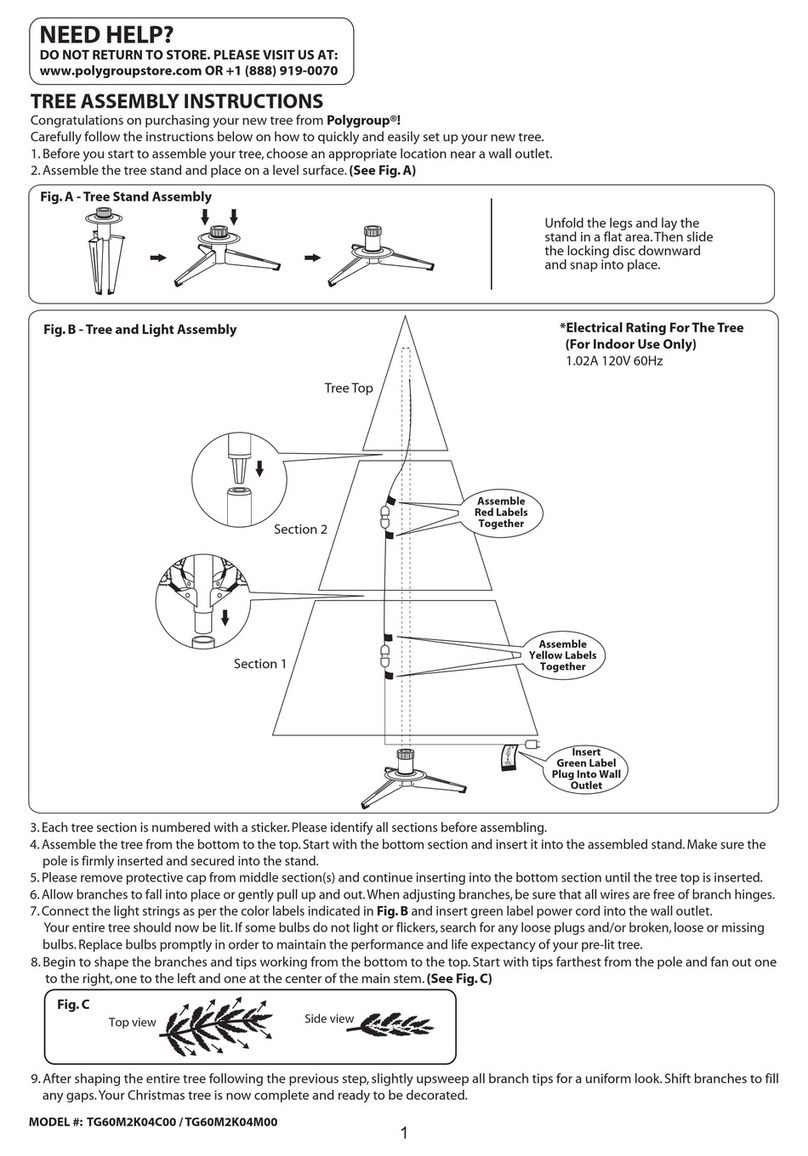
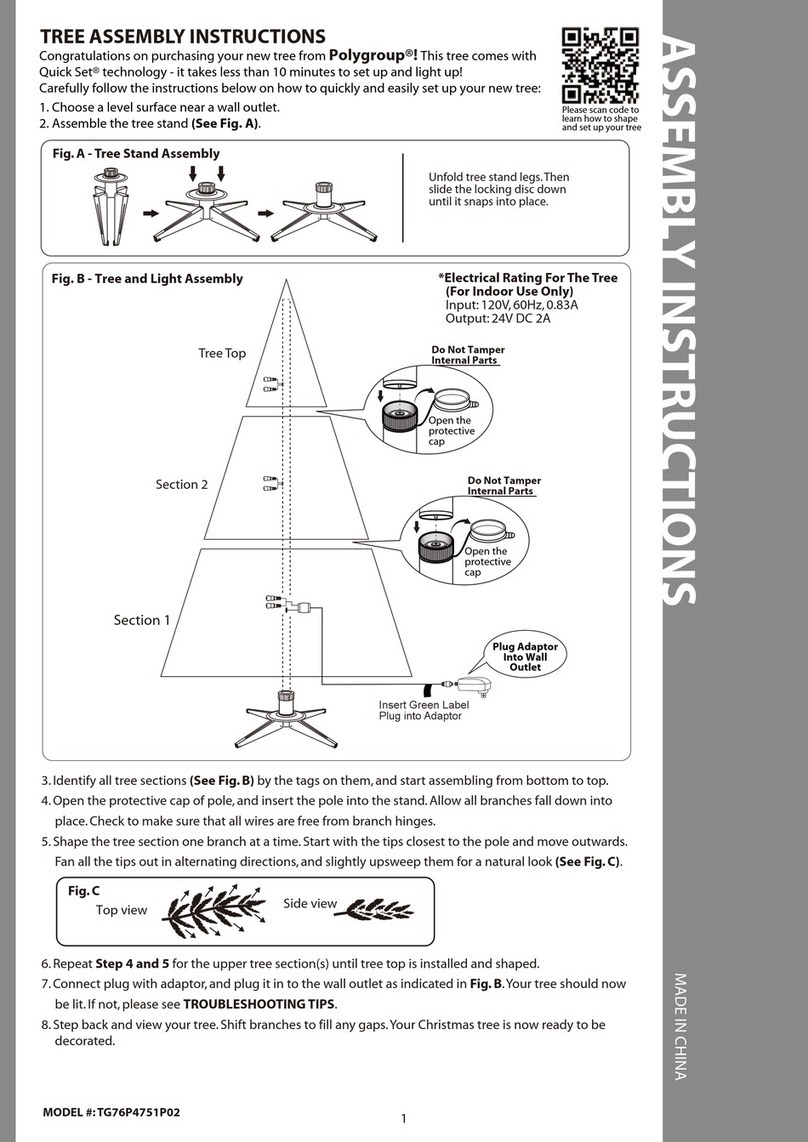
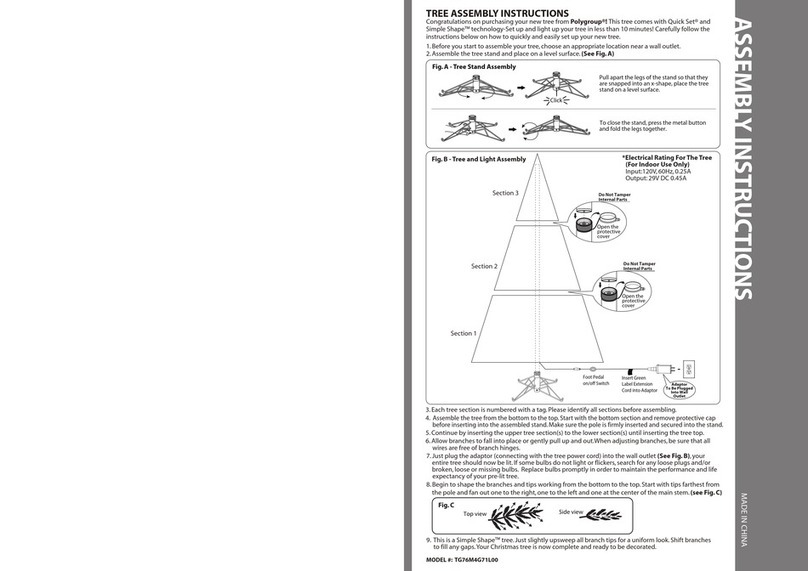
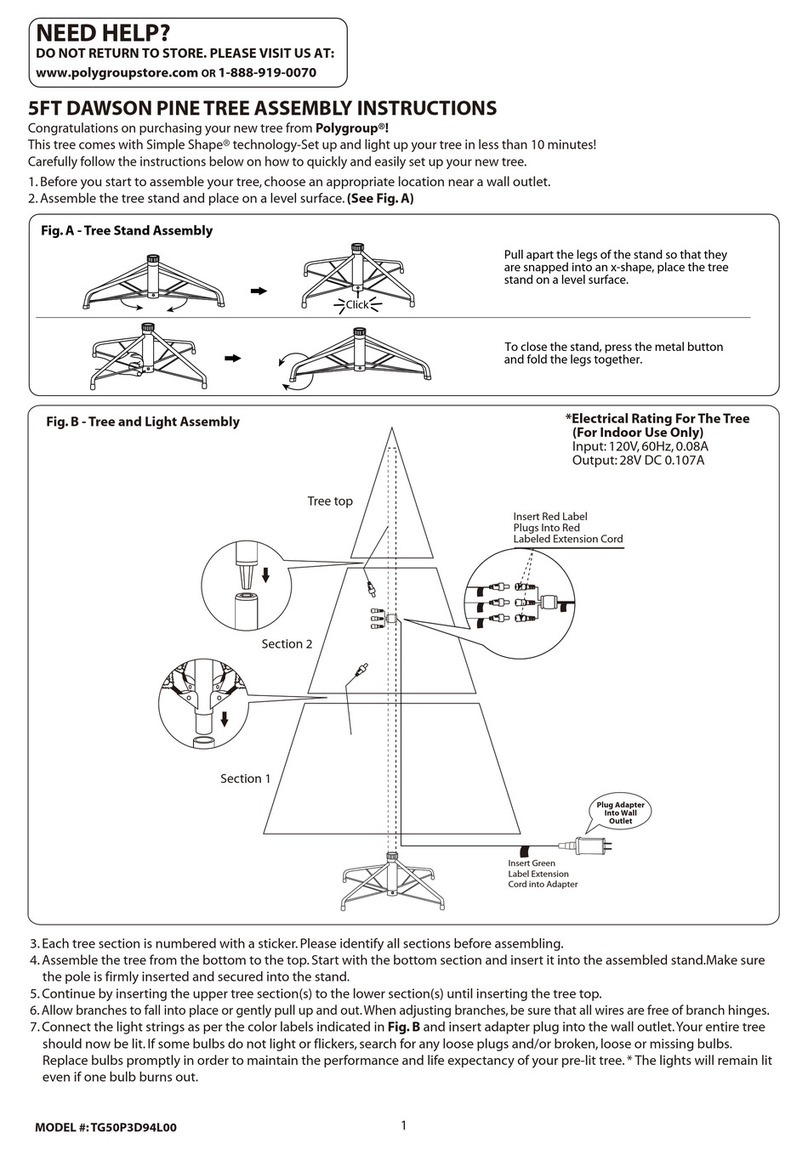
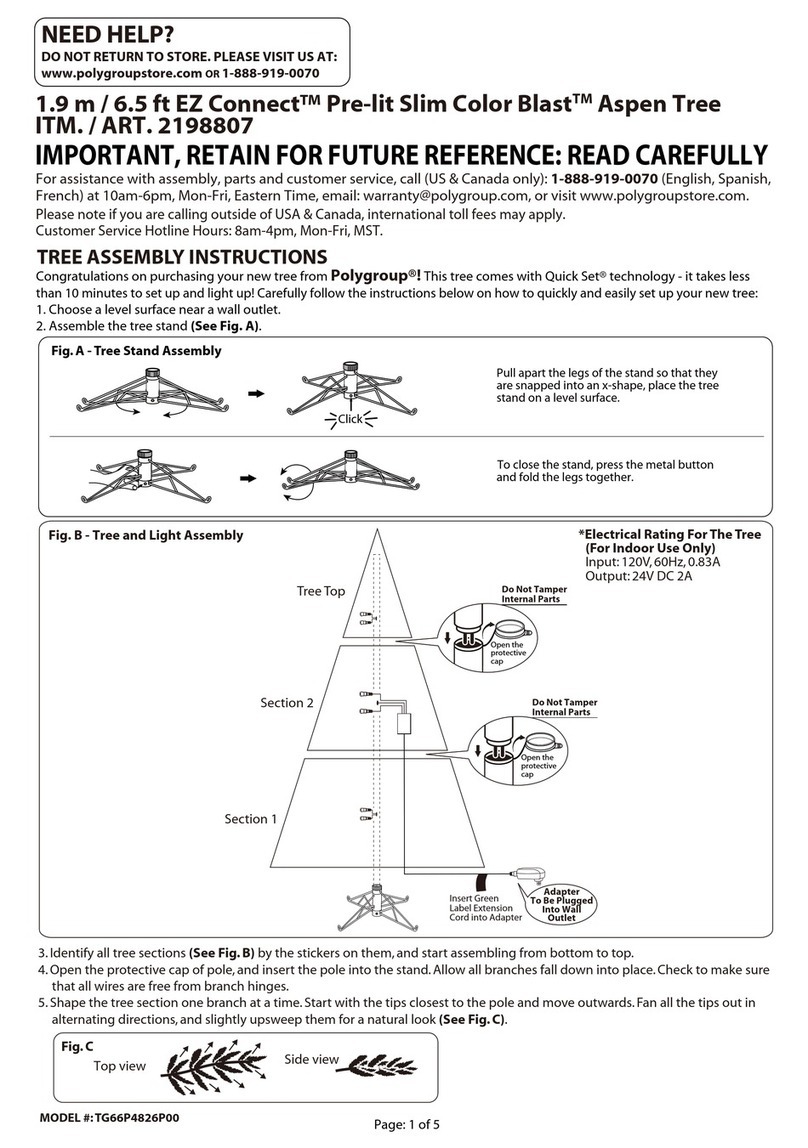
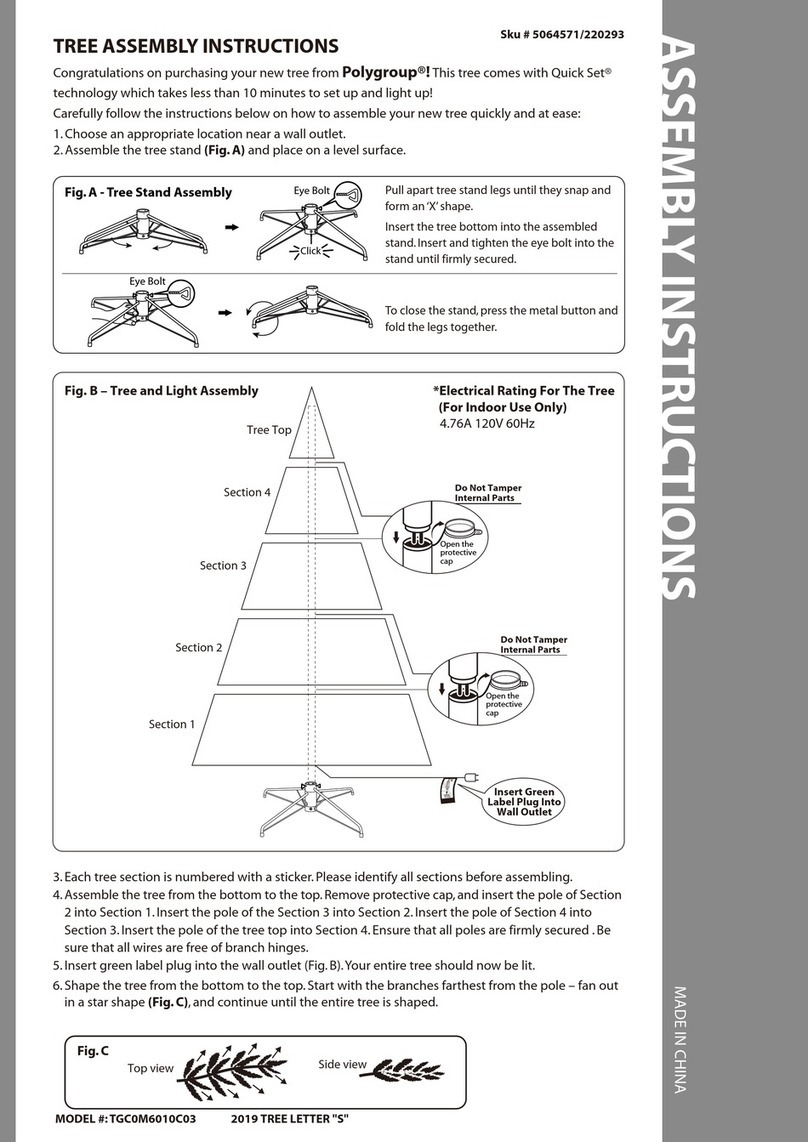
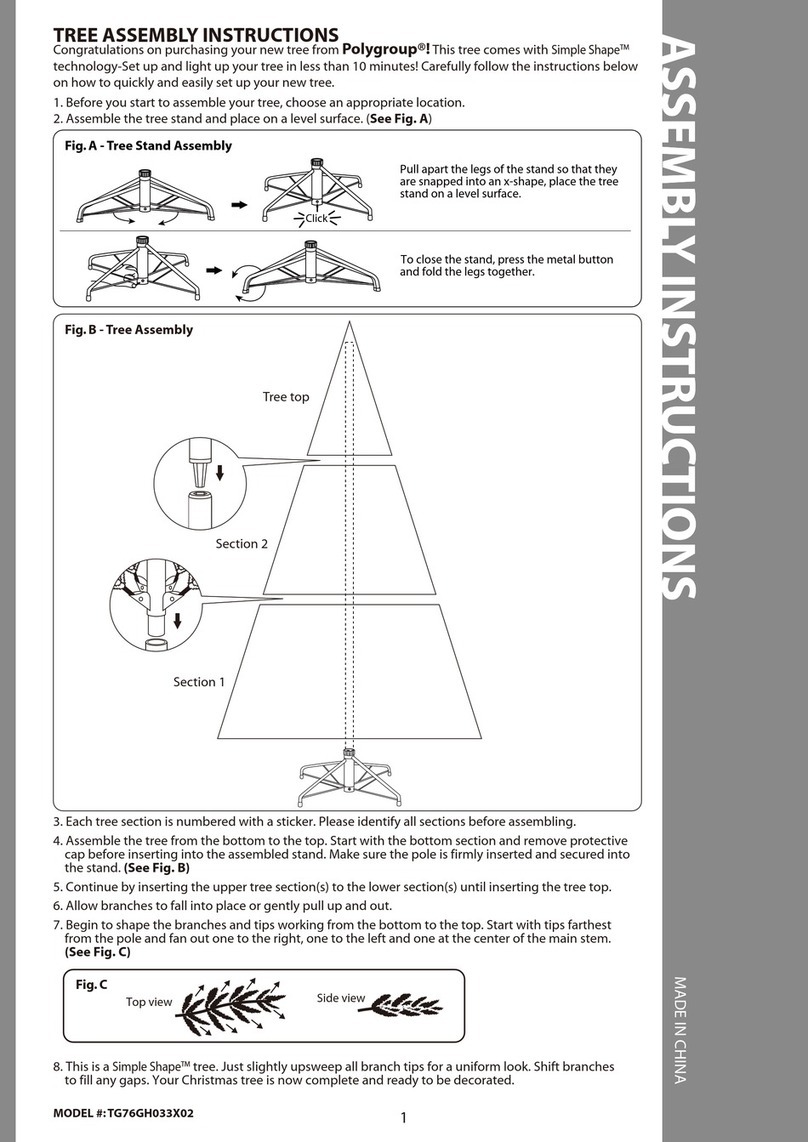
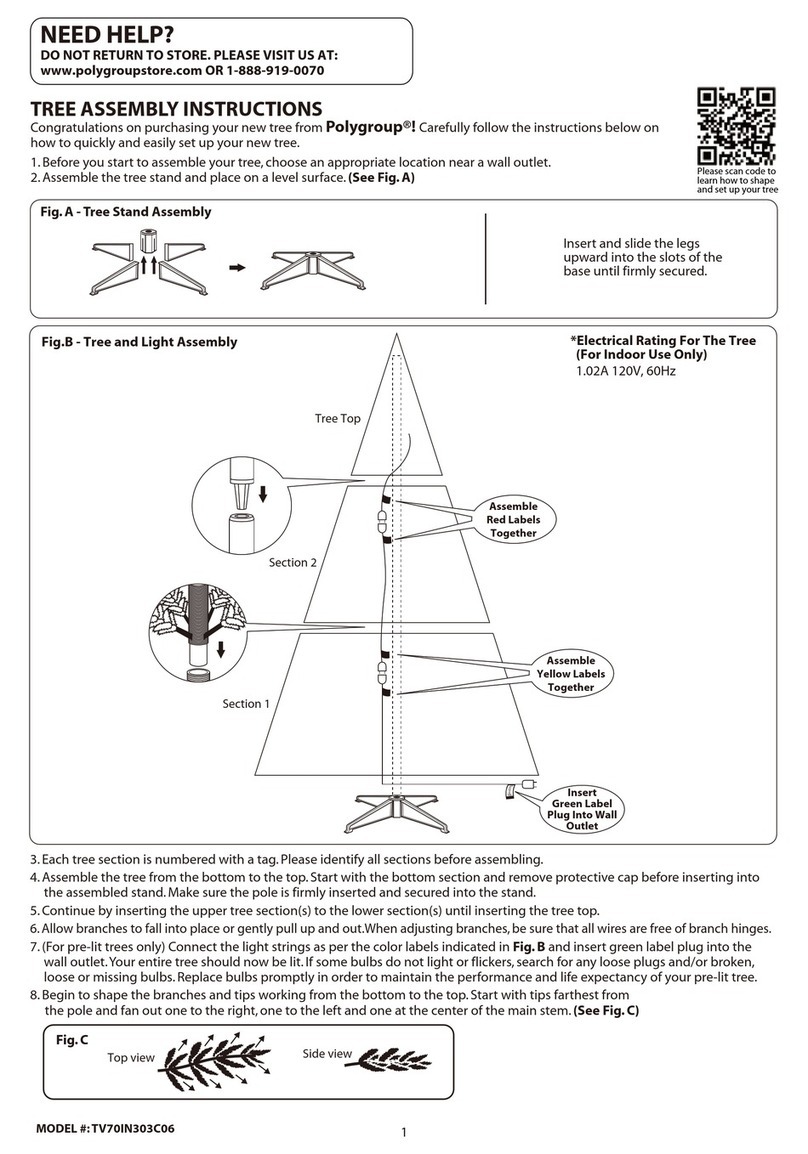
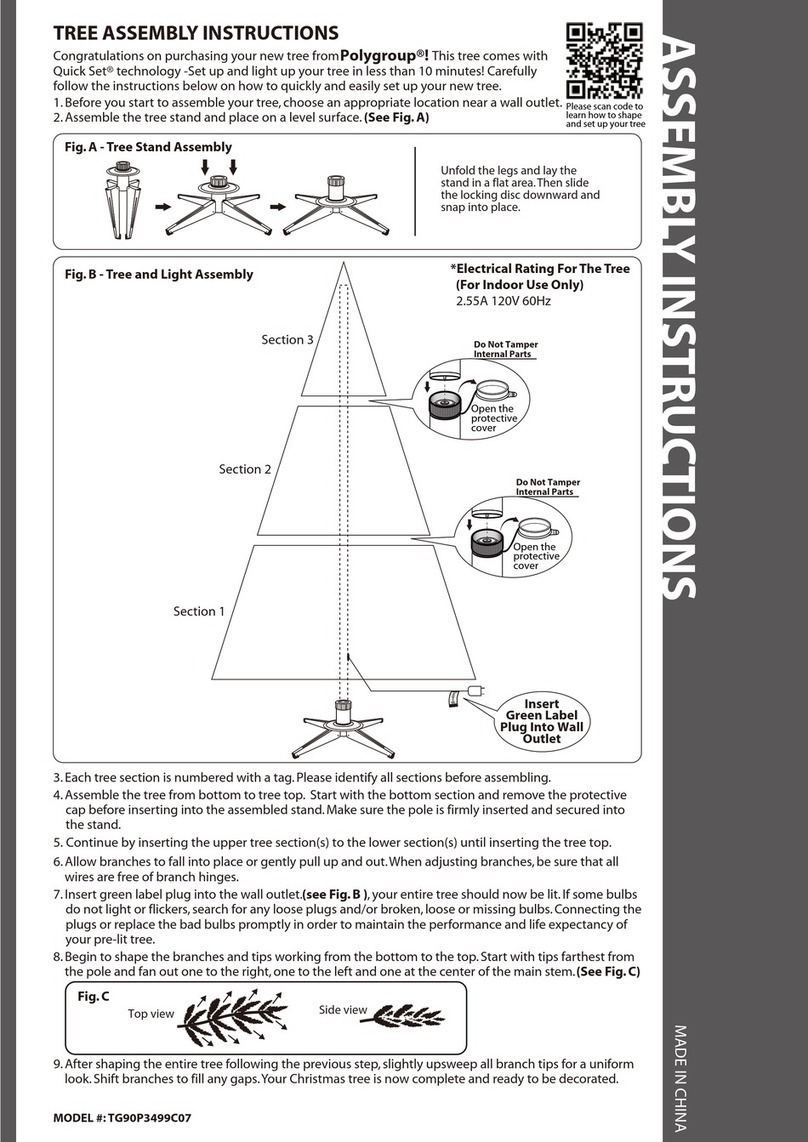
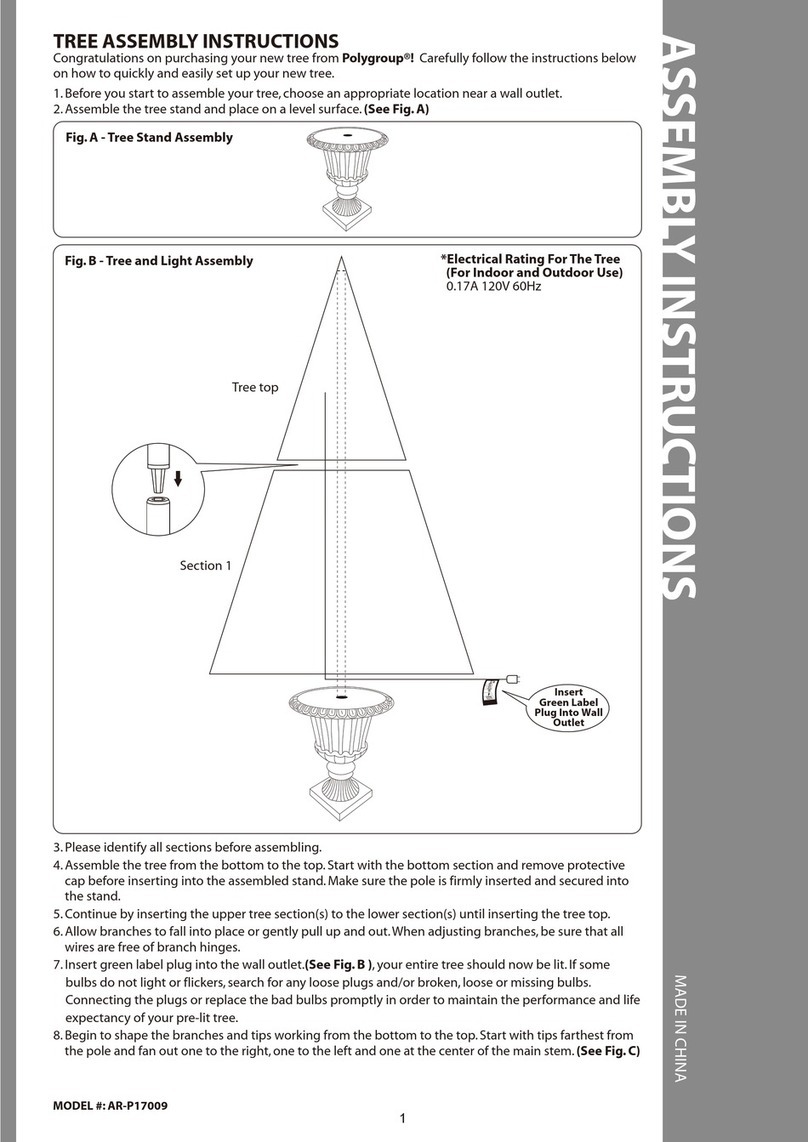
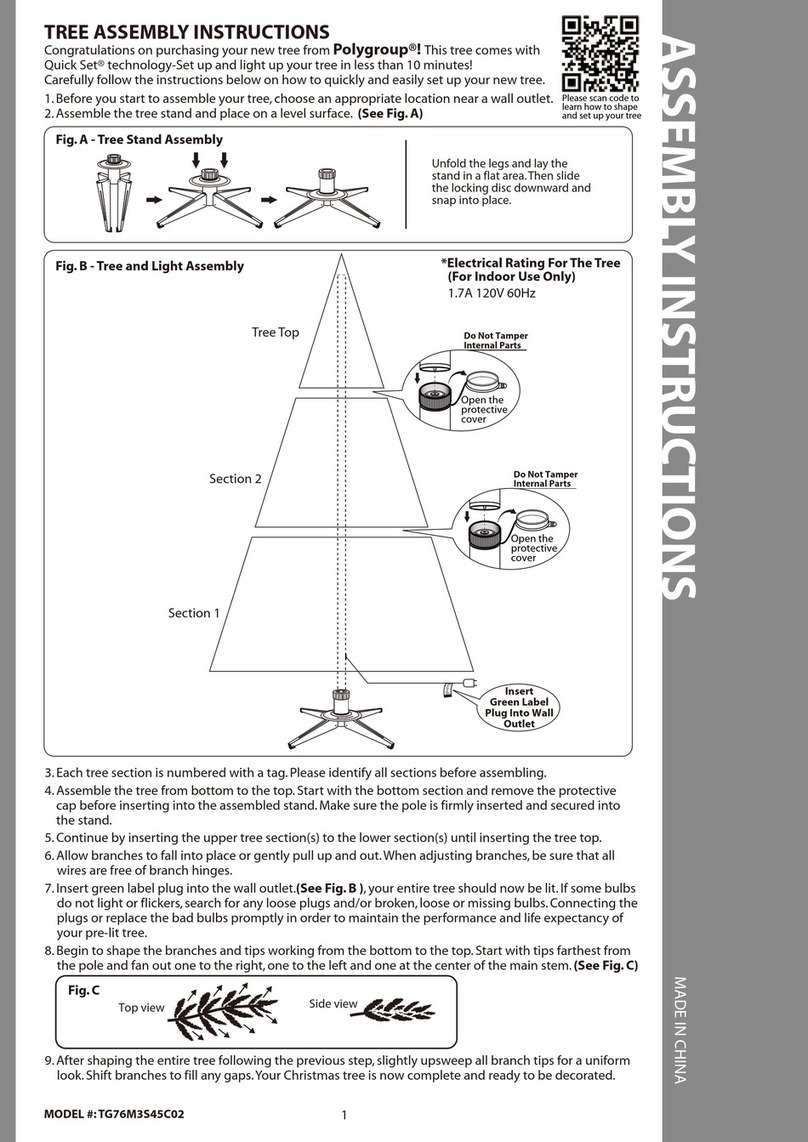
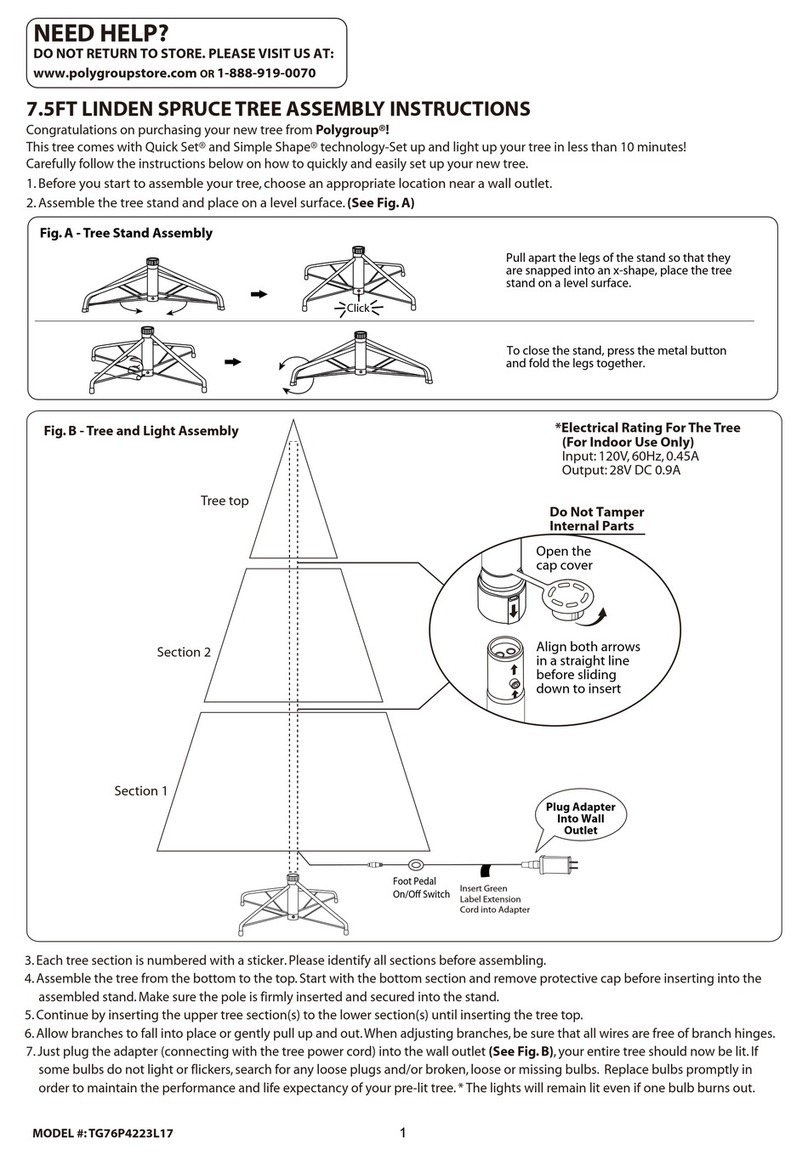
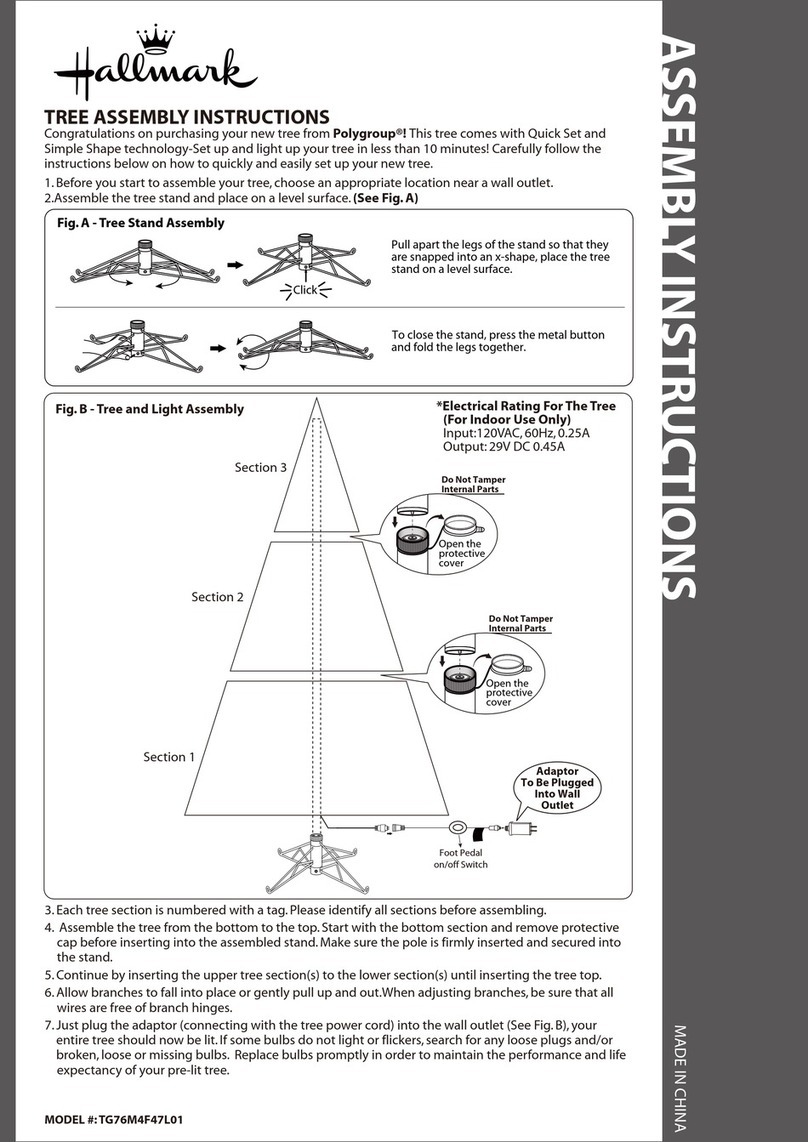
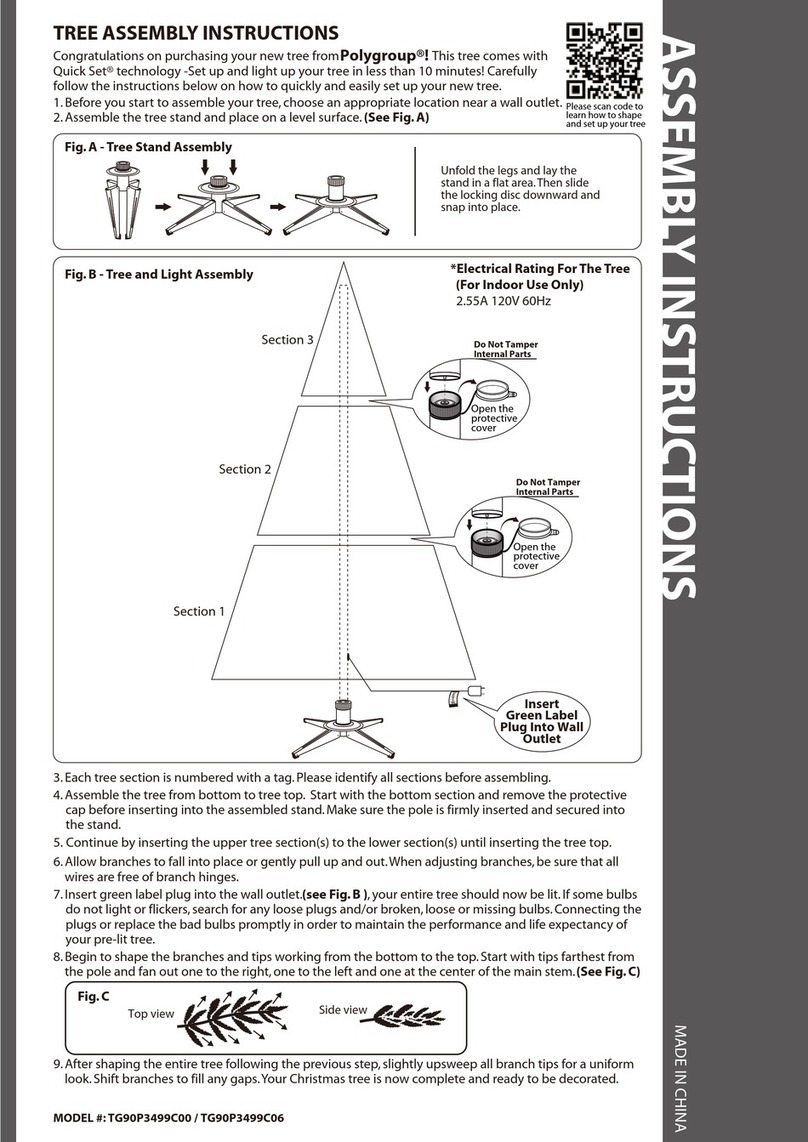
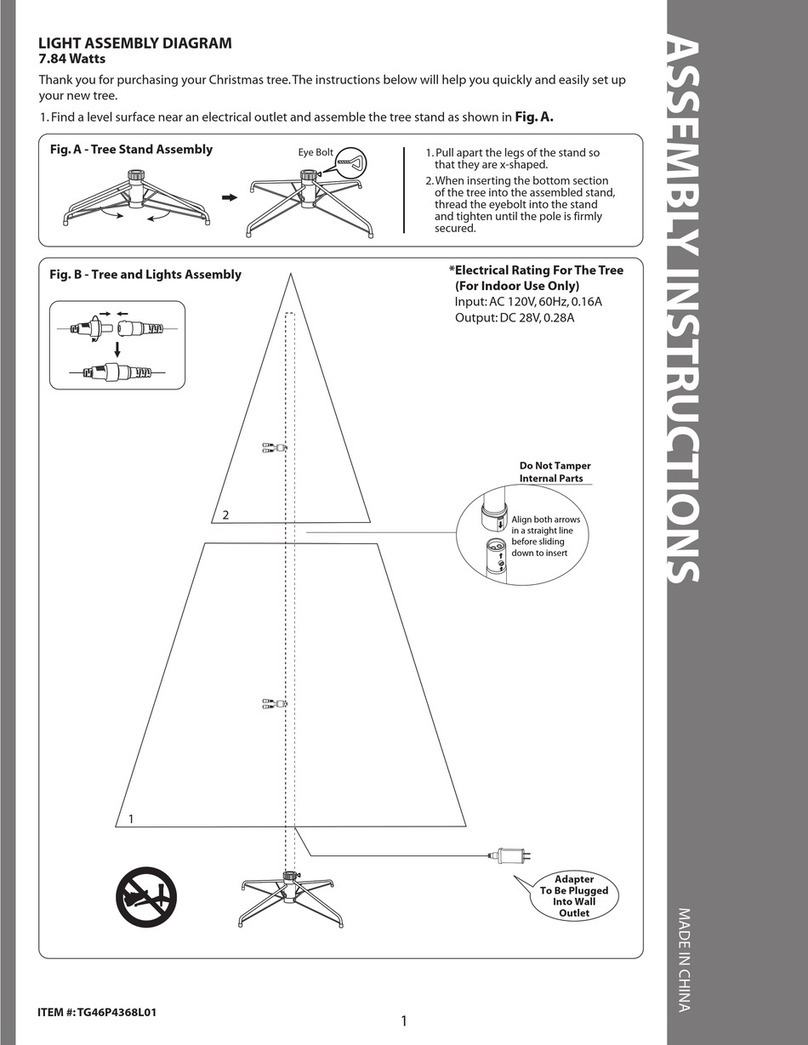
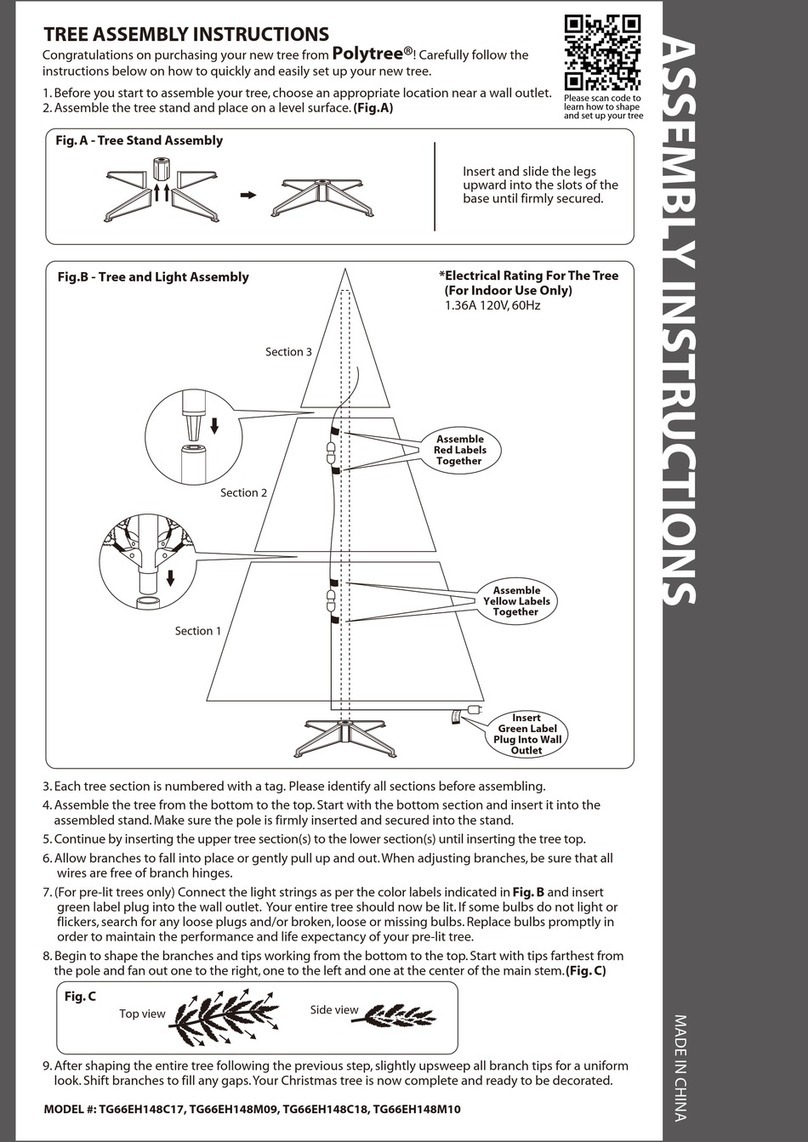
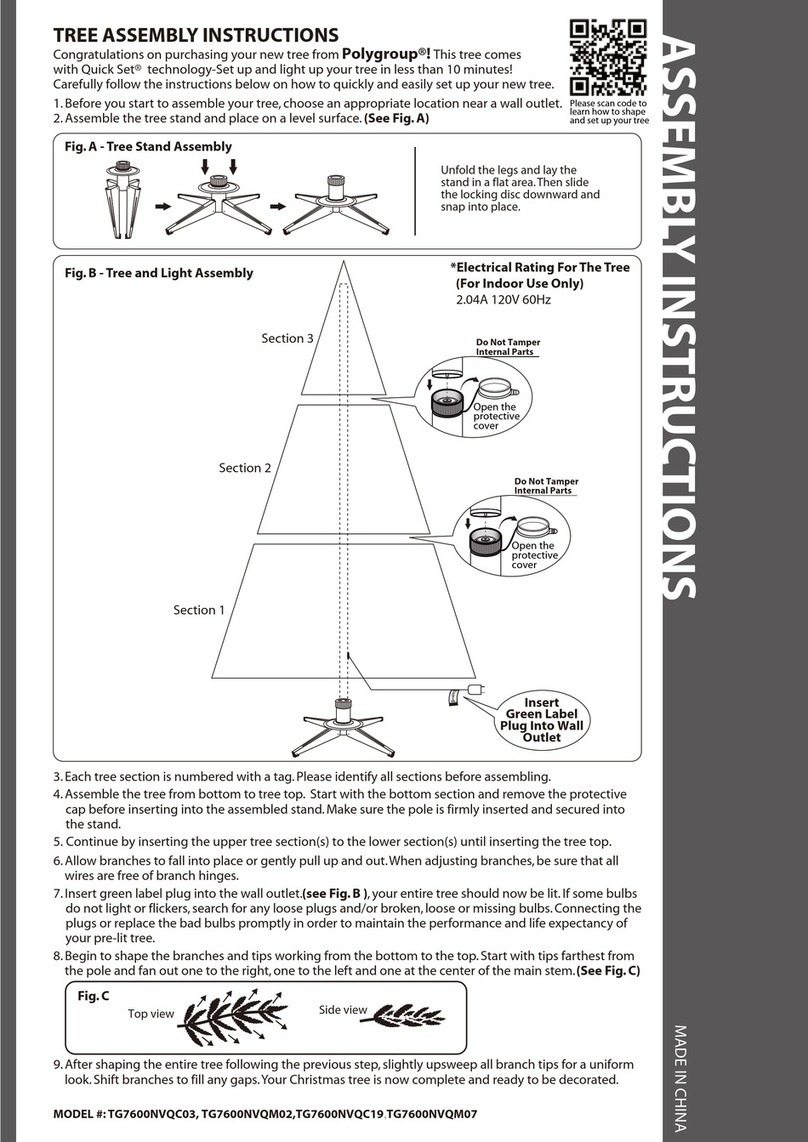
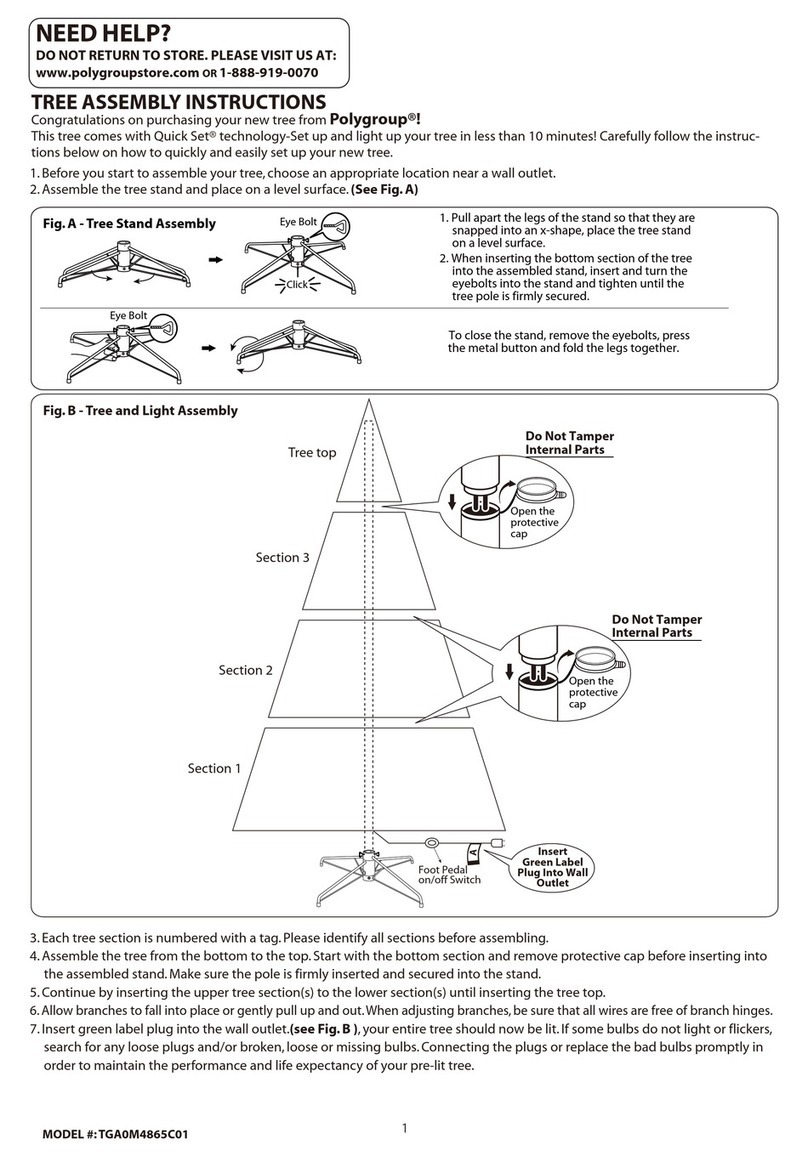
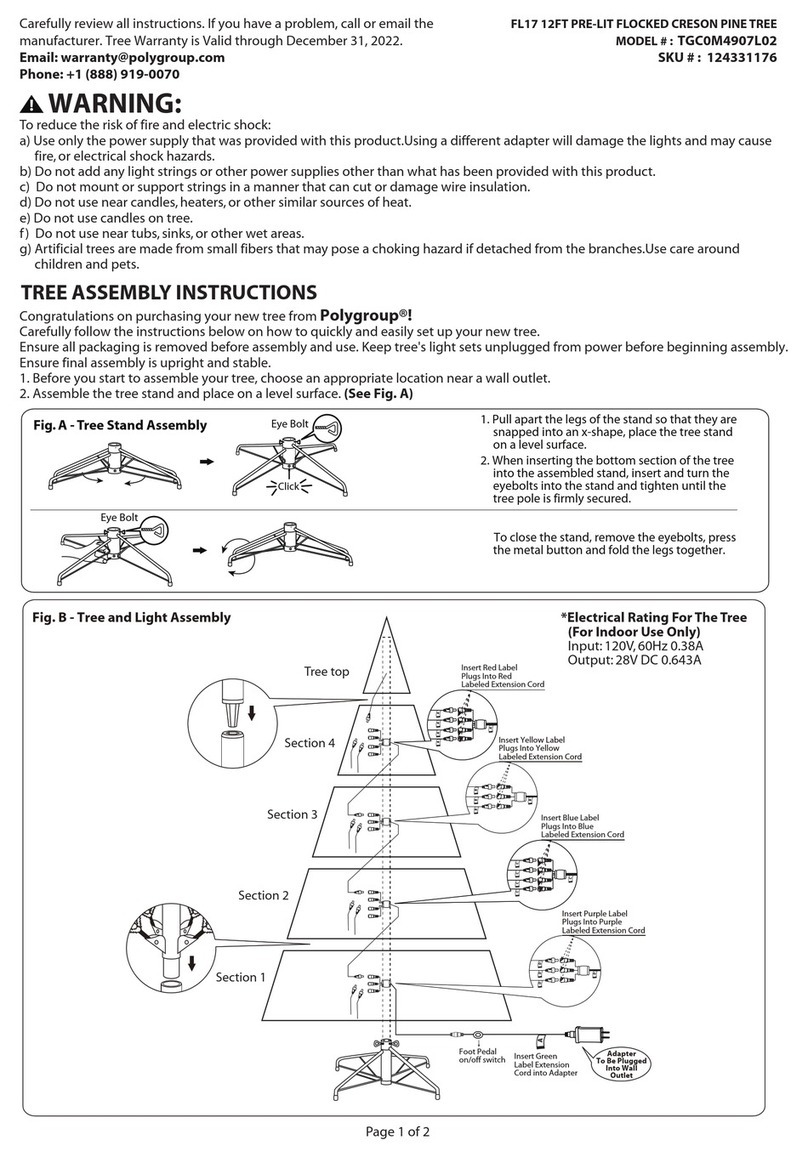
3. Each tree section is numbered with a sticker. Please identify all sections before assembling.
4. Assemble the tree from the bottom to the top. Start with the bottom section and remove protective cap before inserting into the
assembled stand. Make sure the pole is firmly inserted and secured into the stand.
Note: Do not step on the tree legs during the setup. This may deform the tree stand and may result in an unbalanced tree.
5. Continue by inserting the upper tree section(s) to the lower section(s) until inserting the tree top.
6. Allow branches to fall into place or gently pull up and out.When adjusting branches, be sure that all wires are free of branch hinges.
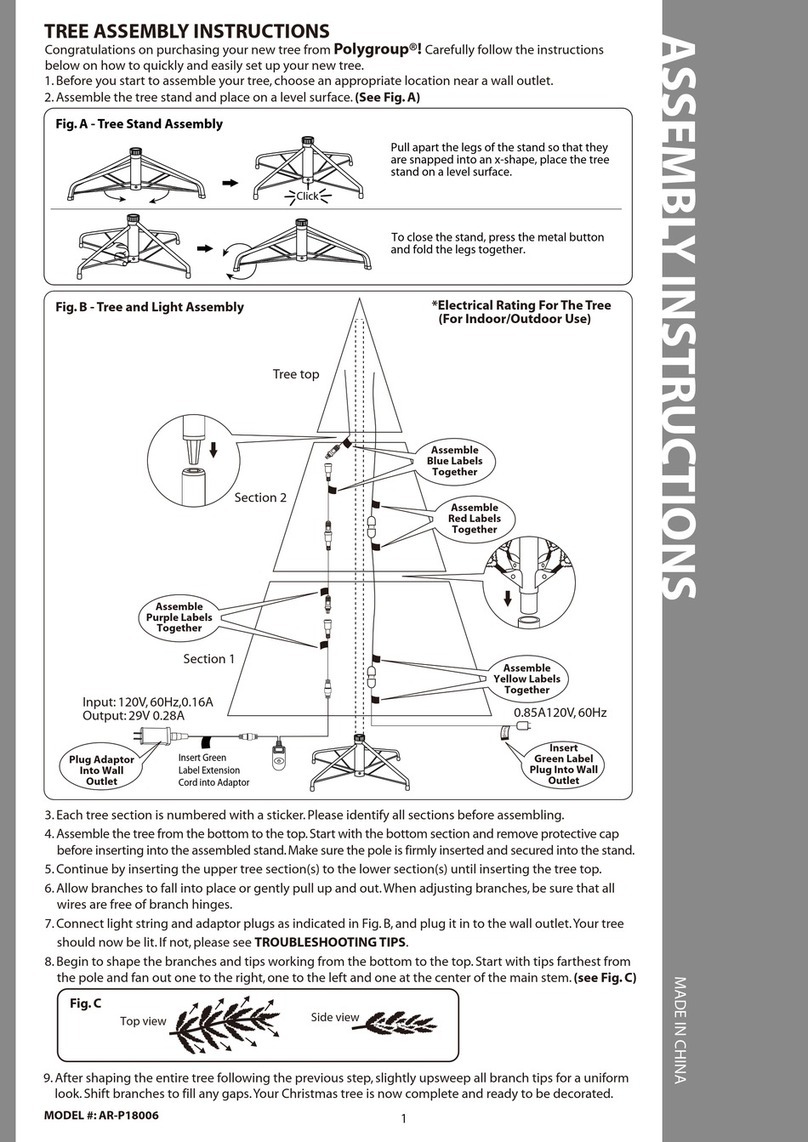
7. Connect the plug(s) securely to the extension cord(s) as per the color labels indicated in Fig. B and insert the green label extension
cord plug into the wall outlet.Your entire tree should now be lit.If some bulbs do not light or flickers, search for any loose plugs
and/or broken, loose or missing bulbs. Connecting the plugs or replace the bad bulbs promptly in order to maintain the
performance and life expectancy of your pre-lit tree.
8. Begin to shape the branches and tips working from the bottom to the top. Start with tips farthest from the pole and fan out
one to the right, one to the left and one at the center of the main stem. (See Fig. C)
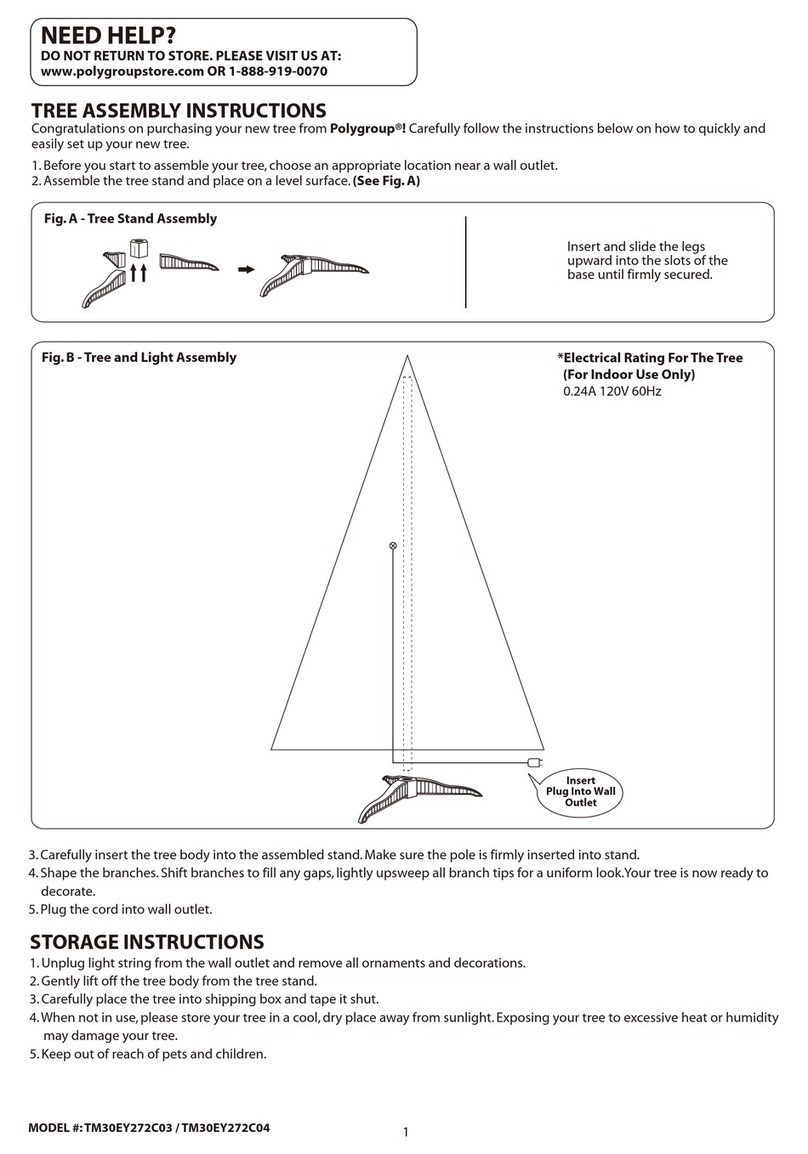
1. Before you start to assemble your tree, choose an appropriate location near a wall outlet.
2. Assemble the tree stand and place on a level surface. (See Fig. A)
Congratulations on purchasing your new tree from Polygroup®!
Carefully follow the instructions below on how to quickly and easily set up your new tree.
1
TREE ASSEMBLY INSTRUCTIONS
SKU#: 287-9001
NEED HELP?
DO NOT RETURN TO STORE. PLEASE VISIT US AT:
www.polygroupstore.com OR +1 (888) 919-0070
Tree top
Section 2
Section 1
Insert
Green Label
Plug Into Wall
Outlet
Insert Red Label
Plugs Into Red
Labeled Extension Cord
*Electrical Rating For The Tree
(For Indoor Use Only)
2.38A 120V 60Hz
Fig. B - Tree and Light Assembly
1.Unfold the legs and lay the stand in
a flat area.Then slide the locking
disc downward and snap into place.
2.When inserting the bottom section
of the tree into the assembled stand,
thread the eyebolt into the stand
and tighten until the pole is firmly
secured.
Fig. A - Tree Stand Assembly Eye Bolt
1. Remove all ornaments and decorations. For pre-lit trees, first unplug extension cord from the wall outlet and then disconnect
light extension cord between each section of the tree.
2. Disassemble the tree from the top to the bottom. Start with the tree top and gently lift straight up to remove from section
below and fold all branches toward the pole.
3. In case of difficulty separating the tree pole (trunk), apply a small amount of lubricant at the joint and rotate the upper pole in
both directions. Lift up the upper pole again.
4. Continue by gently lifting straight up each section(s) from the section below and fold all branches toward the pole until the
bottom section is removed from the tree stand.
5. Carefully place all tree sections into shipping box and tape it shut.
6.When not in use, please store your tree in a cool, dry place away from sunlight. Exposing your tree to excessive heat or
humidity may damage your tree.
STORAGE INSTRUCTIONS
For Pre-lit Trees, If The Tree Does Not Illuminate
1. Please check to make sure that all plugs are properly connected according to the color labels indicated in Fig.B and the
power cord is plugged into the wall outlet. Refer to assembly guide for instructions.
2. Please check for blown fuses at the light string plugs and power cord plug.Replace as needed.
Note: Please make sure to use appropriate replacement fuses as indicated on the light string plug and power cord plug.
3. Please check for loose, broken or missing light bulbs and replace as needed.
Loose Hinge Pin
1. Extra hinge pins are included for repairing the hinges.
Place the branch into the slot of the bracket.
2. Insert a new hinge pin through the hole and secure
using the retainer washer. (See Fig. D)
TROUBLESHOOTING TIPS
Each tree includes hinge pins/washers, and for pre-lit trees spare bulbs and fuses are also included.
If extra parts are needed, please contact our customer service center.
SPARE PARTS
2
Top view Side view
Fig. C
9. After shaping the entire tree following the previous step, slightly upsweep all branch tips for a uniform look. Shift branches
to fill any gaps.Your Christmas tree is now complete and ready to be decorated.
CUSTOMER SERVICE FOR CHRISTMAS TREES
For any questions, assistance, or missing parts, DO NOT RETURN TO PLACE OF PURCHASE. Contact us at +1 (888) 919-0070
or visit our website at www.polygroupstore.com. One of our customer service representatives will be happy to assist you.
TREE ID# IS LOCATED ON END PANEL OF BOX. TREE ID# IS REQUIRED WHEN REQUESTING REPLACEMENT PARTS.
Tree ID#:
Tree UPC#:
Store Purchased:
Specify Problem:
Customer Name:
Address: (No P.O. Boxes)
City & State:
Zip Code:
Day Phone:
Date Purchased:
CAUTION
1.To reduce the risk of fire and electric shock:
a) Do not install on trees having needles, leaves or branch covering of metal or materials which look like metal.
b) Do not mount or support strings in a manner that can cut or damage wire insulation.
2. Ensure the ladder is securely fixed and is not slippery.
Be cautious when climbing up and down the ladder.
Be cautious when
using ladder to
set up tall trees

This manual suits for next models

1

Other Polygroup Artificial Pine Tree manuals
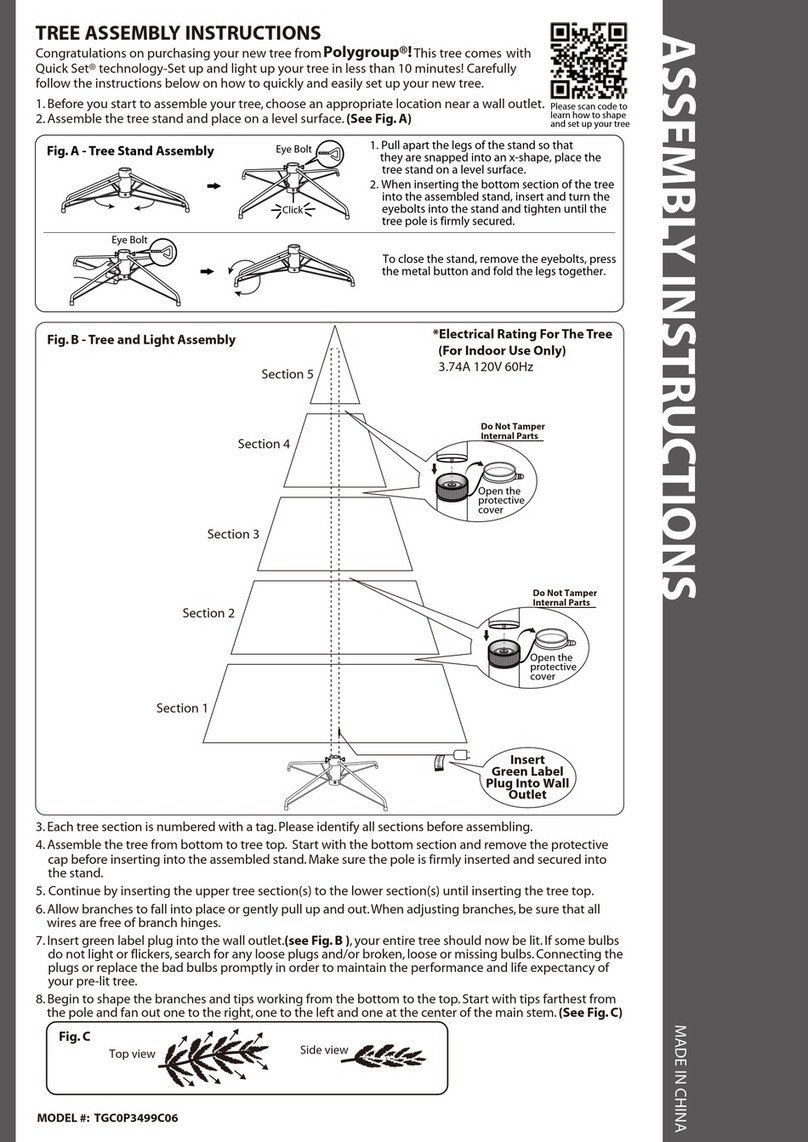
Polygroup TG90P6059D01 User manual

Polygroup

Polygroup TG90P6059D01 User manual

Polygroup TG66M3O27C00 User manual

Polygroup

Polygroup TG66M3O27C00 User manual

Polygroup TV40DY281C02 User manual

Polygroup

Polygroup TV40DY281C02 User manual

Polygroup Evergreen Classics AR-P20008A User manual

Polygroup

Polygroup Evergreen Classics AR-P20008A User manual

Polygroup AR-P17004A User manual

Polygroup

Polygroup AR-P17004A User manual

Polygroup ENCHANTED FOREST TG70M3ANYP01 User manual

Polygroup

Polygroup ENCHANTED FOREST TG70M3ANYP01 User manual

Polygroup TG66M3ABAD00 User manual

Polygroup

Polygroup TG66M3ABAD00 User manual

Polygroup Evergreen Classics TG70CH119P00 User manual

Polygroup

Polygroup Evergreen Classics TG70CH119P00 User manual

Polygroup TG76P2550C00 User manual

Polygroup

Polygroup TG76P2550C00 User manual

Polygroup TGC0M4907L02 User manual

Polygroup

Polygroup TGC0M4907L02 User manual

Polygroup TG76M3O06C00 User manual

Polygroup

Polygroup TG76M3O06C00 User manual

Polygroup TG70P4474C00 User manual

Polygroup

Polygroup TG70P4474C00 User manual

Polygroup TV70M3AMGC00 User manual

Polygroup

Polygroup TV70M3AMGC00 User manual

Polygroup TGA0M3ABSC01 User manual

Polygroup

Polygroup TGA0M3ABSC01 User manual

Polygroup TG70M3L21C03 User manual

Polygroup

Polygroup TG70M3L21C03 User manual

Polygroup Alexander User manual

Polygroup

Polygroup Alexander User manual

Polygroup TG66EH148C51 User manual

Polygroup

Polygroup TG66EH148C51 User manual

Polygroup TG60EH117X01 User manual

Polygroup

Polygroup TG60EH117X01 User manual

Polygroup Ashland TG76P4564D02 User manual

Polygroup

Polygroup Ashland TG76P4564D02 User manual

Polygroup TG76M4244C13 User manual

Polygroup

Polygroup TG76M4244C13 User manual

Polygroup TG76M3W48X02 User manual

Polygroup

Polygroup TG76M3W48X02 User manual

Polygroup TG76P4B15P00 User manual

Polygroup

Polygroup TG76P4B15P00 User manual

Polygroup Evergreen Classics TG76P4B26D00 User manual

Polygroup

Polygroup Evergreen Classics TG76P4B26D00 User manual

Polygroup H209504 User manual

Polygroup

Polygroup H209504 User manual

Popular Artificial Pine Tree manuals by other brands
LIVARNO home 380905 2101 Operation and safety notes

LIVARNO home

LIVARNO home 380905 2101 Operation and safety notes

Clas Ohlson MJG53094A-70L quick start guide

Clas Ohlson

Clas Ohlson MJG53094A-70L quick start guide

Mon Sapin Woody MSW1000 manual

Mon Sapin Woody

Mon Sapin Woody MSW1000 manual

Darice TG76P3E55D01 Assembly instructions

Darice

Darice TG76P3E55D01 Assembly instructions

Home Accents Holiday TG76P2621L06 manual

Home Accents Holiday

Home Accents Holiday TG76P2621L06 manual

Home Accents Holiday TG76M3P08D27 quick start guide

Home Accents Holiday

Home Accents Holiday TG76M3P08D27 quick start guide

Home Accents Holiday TG76M5311L08 manual

Home Accents Holiday

Home Accents Holiday TG76M5311L08 manual

Home Accents Holiday TG90M3C03L02 quick start guide

Home Accents Holiday

Home Accents Holiday TG90M3C03L02 quick start guide

SMUKEE OW-240191 manual

SMUKEE

SMUKEE OW-240191 manual

hayneedle EWB003 Assembly instructions

hayneedle

hayneedle EWB003 Assembly instructions

festilight SPLENDID 70215-9 manual

festilight

festilight SPLENDID 70215-9 manual

Polytree TG90M6010C08 Assembly instructions

Polytree

Polytree TG90M6010C08 Assembly instructions

Williams-Sonoma TG6600WN7D00 Assembly instructions

Williams-Sonoma

Williams-Sonoma TG6600WN7D00 Assembly instructions

Home Accents Holiday 301575510 quick start guide

Home Accents Holiday

Home Accents Holiday 301575510 quick start guide

Home Accents Holiday TG66M3W89D11 quick start guide

Home Accents Holiday

Home Accents Holiday TG66M3W89D11 quick start guide

Home Accents Holiday 1000047798 Assembly instructions

Home Accents Holiday

Home Accents Holiday 1000047798 Assembly instructions

Martha Stewart Living TG76P3945D01 quick start guide

Martha Stewart Living

Martha Stewart Living TG76P3945D01 quick start guide

NOMA 151-2737-6 instruction manual

NOMA

NOMA 151-2737-6 instruction manual

manuals.online logo
manuals.online logoBrands
  • About & Mission
  • Contact us
  • Privacy Policy
  • Terms and Conditions

Copyright 2025 Manuals.Online. All Rights Reserved.