54
II. INTRODUCTION TO THE
CARDIOCHEK PA TEST SYSTEM
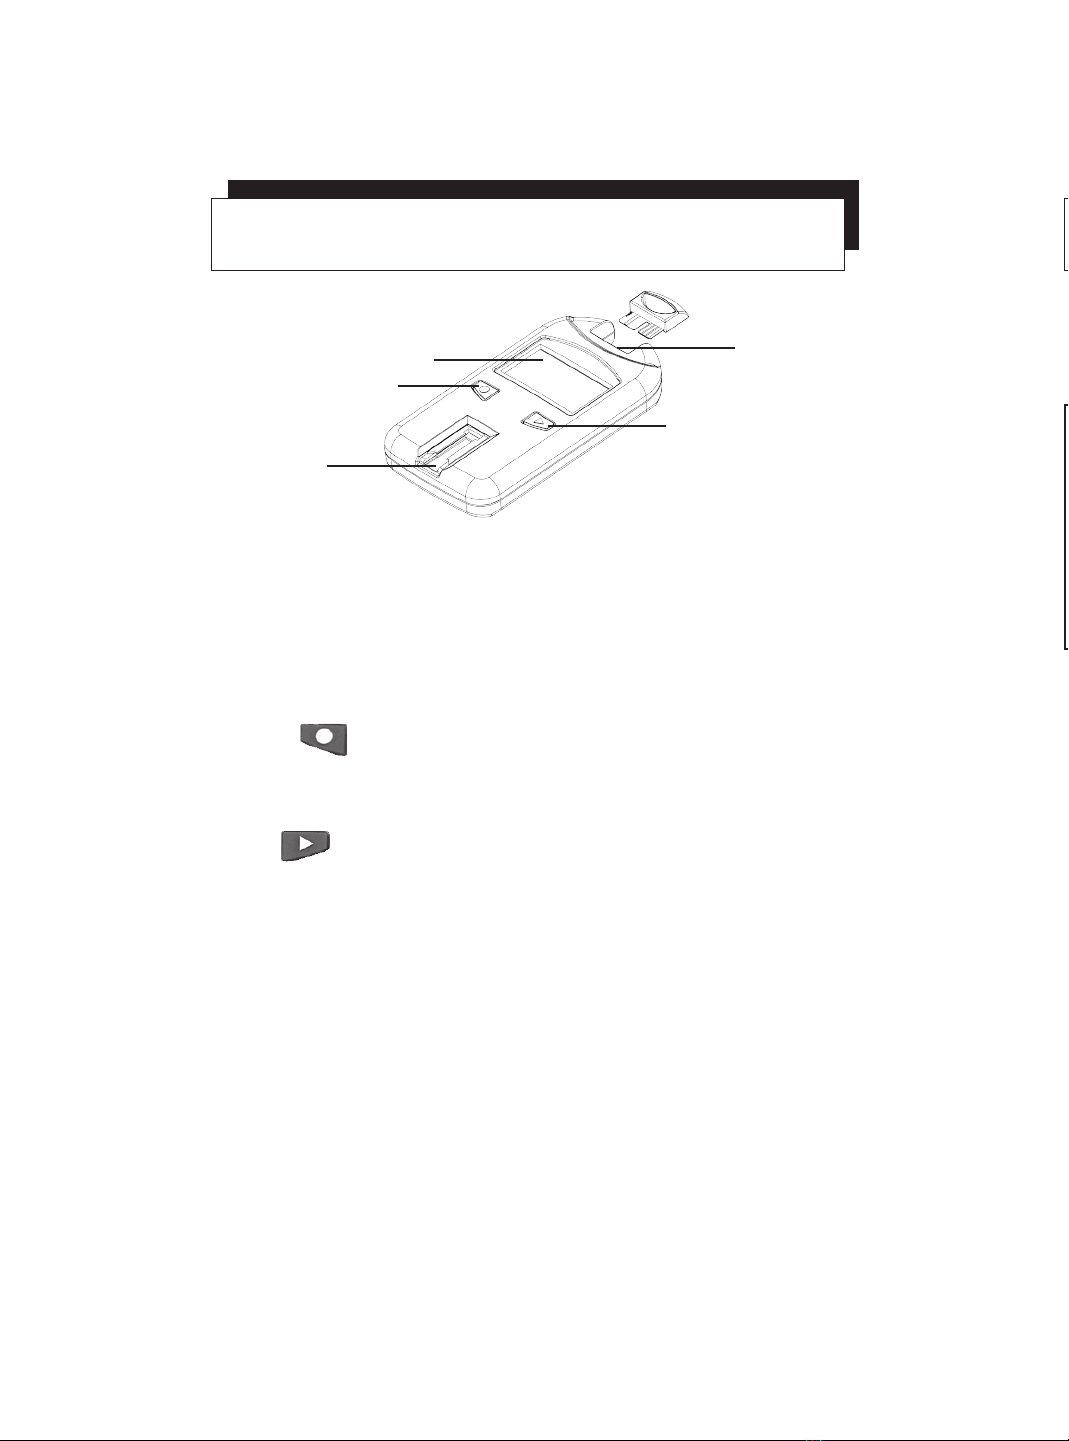
The CardioChek®PA Test System
The CardioChek PA test system consists of three main parts.
These include the device, PTS Panels®test strips, and a
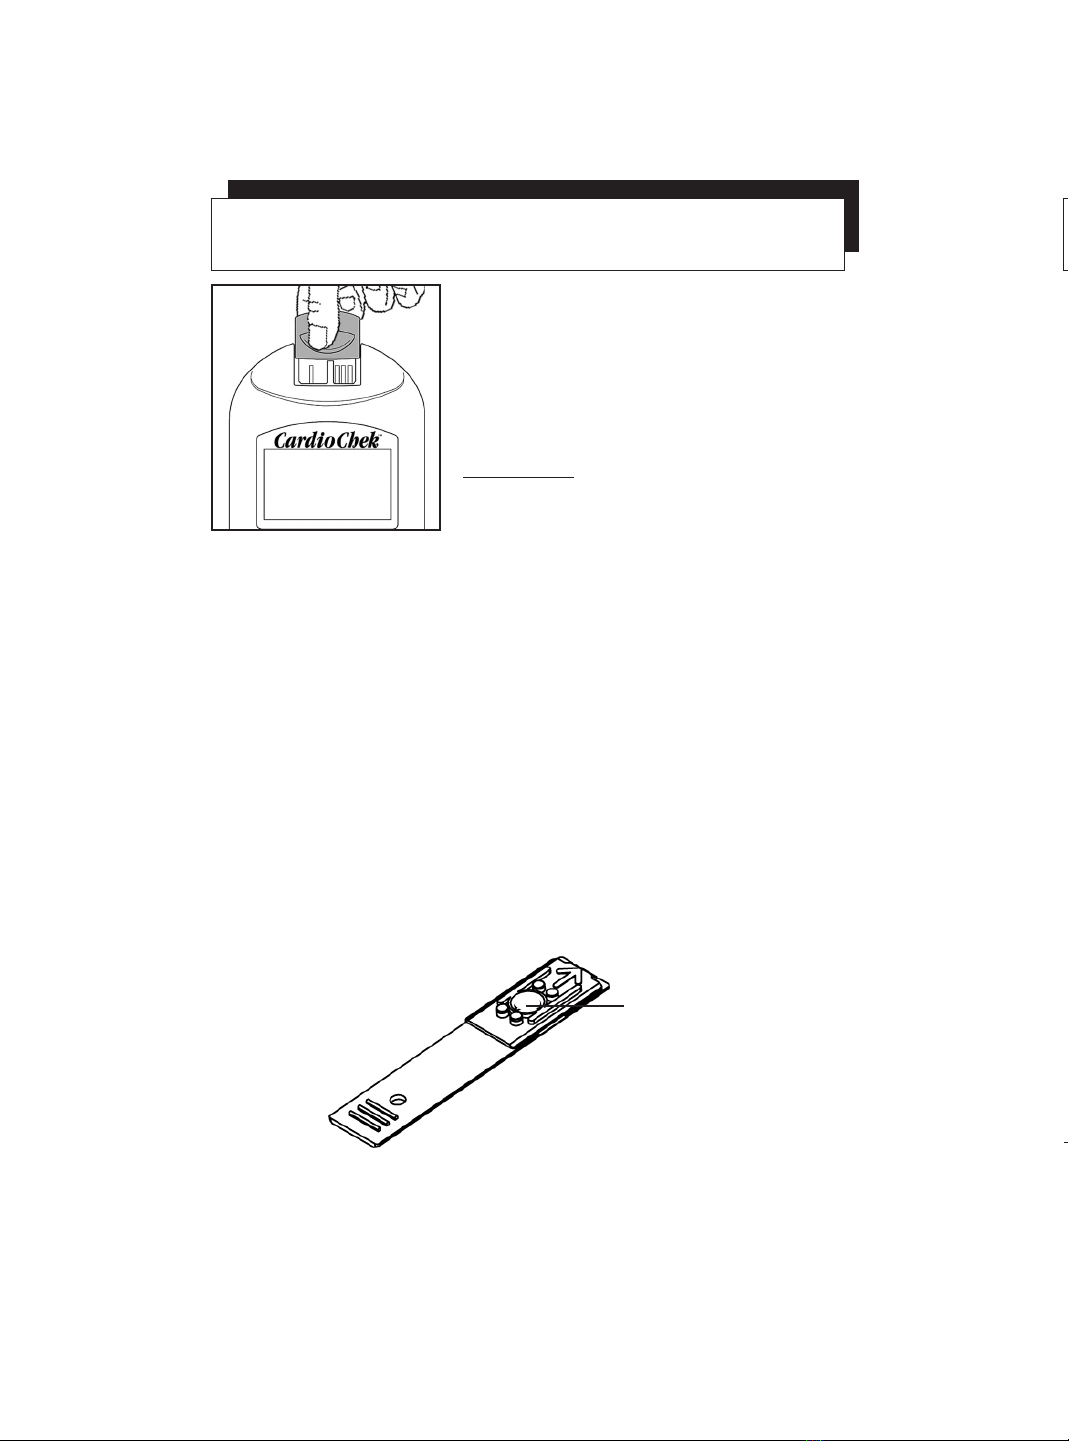
MEMo Chip®.
The CardioChek®PA Test System & Operating Principle
The device employs light reectance to measure an end-
point enzymatic chemical reaction. The test strips are
impregnated with enzymes which are specic for the analyte
to be measured. Refer to the individual PTS Panels test
strip package inserts for detailed information related to the
enzymatic reaction. When blood is applied to the test strip,
the ensuing sequence of chemical reactions results in a
color change on the test strip which is measured by light
reectance. The intensity of this colorimetric substance is
directly proportional to the amount of analyte in the blood.
Using a stored standard calibration curve, the device
calculates and displays the result on the screen.
I. INTRODUCTION
The CardioChek®PA device from Polymer Technology Systems,
Inc. (PTS, Inc.) is intended for in vitro diagnostic use, using
whole blood samples. This point-of-care (POC) test system is
designed for professional use. The CardioChek PA test system
has an optional printer and the CardioChek Link® software
solution to assist in data reporting.
The CardioChek PA device is fast, portable, and reliable. This
device is a component of a test system that includes PTS
Panels®test strips. The PTS Panels test strip box includes a
MEMo Chip® that contains the assay calibration curve and other
important information about the assay. PTS Panels test strips
are sold separately, and are available as single and multiple
analyte test strips.
This test system uses reectance photometry technology. An
enzymatic reaction on the test strip produces a color change
that is detected by the device after whole blood is applied.
This User Guide includes all the information that you need to
run POC assays using the CardioChek PA test system. Before
you begin testing, please read this entire User Guide and the
package inserts, which are included with the PTS Panels test
strips.
Please remember to return the enclosed warranty card to
PTS, Inc. to ensure that you receive product updates and other
important information.
For questions or additional assistance with your CardioChek PA
test system, please contact PTS, Inc. (Hours: 8:00 a.m. to 8:00
p.m. USA Eastern Time) using the following contact information:
Polymer Technology Systems, Inc.
7736 Zionsville Road
Indianapolis, IN 46268 USA
+1-317-870-5610 (Direct)
+1-877-870-5610 (Toll-free inside the US)
www.cardiochekpa.com